Personalize Journeys
Personalization is one of the main characteristics of FintechOS solutions, allowing companies to launch products and services aimed at each customer's specific needs. Using personalization tools, you can customize the user's experience at every step, create data-driven, personalized products and pricing that customers can easily subscribe in a journey adapted to their own needs and context. Furthermore, you can create effective and user-tailored ways of interacting with the customer through personalized content management to be used when setting up campaigns. Using personalization, you can launch differentiated products distributed through highly contextualized journeys.
Task at hand
For example, if your company wants to offer a personalized loan origination experience to their customers who also like to travel, you could begin by adapting one of the existing FintechOS data models to accommodate information related to a customer's option about traveling. Then, you could define the customer persona to whom the loan would be offered to contain such customers. You can also adapt your existing products to be available only to such globetrotter customers, and for a special price offer. Such customers might navigate through a customized flow within your digital journey, maybe even shortening their path. Finally, manage your campaigns to send these customers personalized content, improving your interaction with them.

Find below instructions on how to personalize your customer journeys. Keep in mind that these are explained for Innovation Studio v22.1.
Data is at the core of everything you build in FintechOS Studio. It's always faster to use an existing data model, so consider using one of the available common data models for retail banking and extend your data model on starting from that.
-
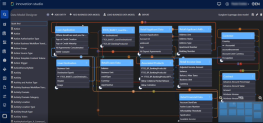
In FintechOS Studio, navigate to Evolutive Data Core -> Data Model Designer. Either open and view an existing model, or create a new one.
For example, you can use a data model already defined for a loan origination journey, extending the data model and customizing it to your needs.Read about the data model designer and how to use it in the FintechOS Studio user guide.
-
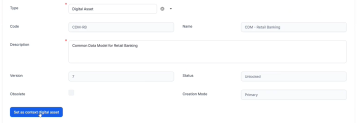
If you plan on modifying the data model, set your context to the digital asset which contains your data model, in our case
CDM - Retail Banking.Read about digital assets and setting them as context in the FintechOS Studio user guide.
-
Back in Data Model Explorer to our example data model, edit the
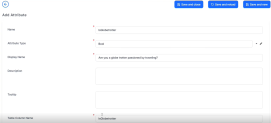
Retail Applicant Dataentity and extend it by adding a new attribute,IsGlobetrotter, to hold the information whether a customer likes or not to travel.Read about adding attributes in the FintechOS Studio user guide.
-
After saving it, the newly added attribute is available in the
Retail Applicant Dataentity, ready to be used.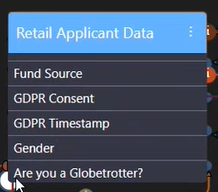
You could also extend the data model by creating new entities or more attributes.
Now you are ready to define who should be the target customers.
Set up your customer personas using the hyper-personalization feature available in FintechOS Studio. Using a visual designer, you can explore all available data sets and:
-
Define the contextualized data needed for segmentation, using the Persona Data Model Settings menu.
-
Set up segmentation rules and events to identify business meaningful customer personas, using the Customer Personas menu.
-
Set up tokens to be used dynamically in customer communication, as described in this dedicated topic.
-
Combine personas to set up target customer audiences, using the Audiences menu.
Later, you can use them in setting the product eligibility rules and data-driven pricing, dynamically orchestrate the journeys, and personalize your ongoing customer engagements.
Here's how to begin:
-
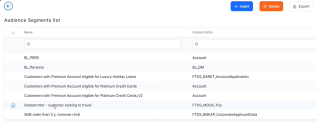
In FintechOS Studio, navigate to Hyper-Personalization -> Customer Persona. View the already defined audience segments records to see if there are records that you could further use.
-
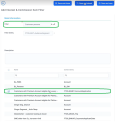
You can create an audience segment, using the below example of
Globetrotter - customer looking to travel. -
In the Segment Expression step, you can extend the already existing criteria that identifies the segment by adding new filters. For example, add the new
Are you a Globetrotterattribute and filter it to show customers who selectYes. -
After saving the record, the customer persona contains the customers who fulfill all the conditions of the filters defined within the record.
Now you are ready to define your personalized product and pricing offer.
Define differentiated, personalized products.
The examples listed below deal with banking products personalization, but you can use Proposal Configurator to personalize your insurance products. With Proposal Configurator, you can configure compliant special offers and segmented customer aligned product propositions, create individually priced products and benefit offerings to specific audiences.
You can define your personal loan product in Banking Product Factory. Set up personalized offers and pricing for each customer persona. Here are the key areas of personalization:
-
Use customer personas or data to set up the target customer audience for which this product should be available.
i.e. the product is available for customers with low risk profile and age between 30-45 yrs old.
-
Define tailored pricing for each by adding customer personas as criteria on different interests & commissions combinations. You can set up multiple pricing strategies for different personas.
i.e. for customers that are part of the globetrotter persona and their income is >5000 Eur, loan amount > 10.000 => interest rate is 5.3%, Zero commissions.
For customers part of the Globetrotter persona, with income <5000, and the loan amount is between 5000 – 10.000 => interest rate is 4.5%.
-
Set up when an insurance should be applied, or for which customers you could apply discounts.
i.e. Life Insurance applies for Globetrotter customer personas and loan amount >10.000.
Here's how to begin:
-
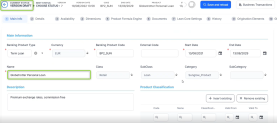
In FintechOS Studio, navigate to Product Factory -> Banking Products. Either open and view an existing product, or create a new one.
For example, you can use a product already defined and approved.To modify an existing approved product according to your needs, first you should create a new version for it. After creating the version, you can edit the information according to your needs.
 NOTE
NOTE
This page focuses on personalizing the products through customer personas, please read the Banking Product Factory user guide for detailed information about each available field. -
Within the opened product in
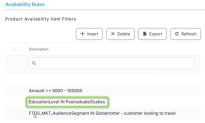
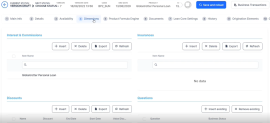
Version Draftstatus, you can edit the information in the Availability and Dimensions tab to use the data defined for the customer persona.For example, in the Availability tab, you can manage the availability rules, defining the customers for whom the product is going to be available.
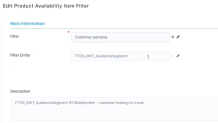
You can edit existing rules, or create new availability rules, either using existing filters or creating new ones.
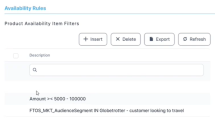
After saving the new availability rule, you can see it displayed in the product's Availability Rules section within the Availability tab.
-
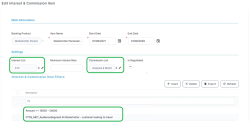
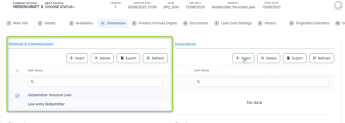
In the Dimensions tab, you can set up dynamic pricing conditions, for example through a mix of interests and commissions applicable to a customer segment and for a specified amount of the loan.
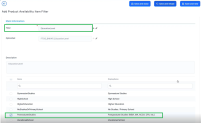
You can define different conditions that the customer must meet. For example, set up an interest & commission item with the following values, applicable if the customer meets the item filter conditions attached to the record:
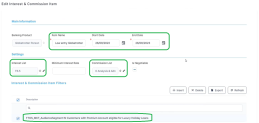
You can define a second interest & commission item for the same product, with the different values, applicable if the customer meets another set of conditions attached to the record, where you select another customer segment, for example
Customers with Premium Account eligible for Luxury holidays:In this case, your product has two interest & commission lists attached to it. During the loan origination process, the lists with their specific interest values are applied dynamically when the customer meets the conditions stipulated by the filters in any of the lists.
-
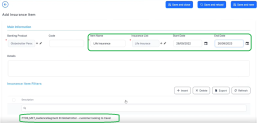
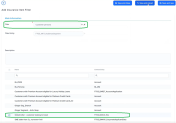
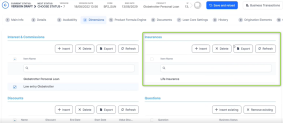
Still in the Dimensions tab, you can define insurance items and the conditions in which the insurance is applicable for the product, for example selecting the customer persona segment of
Globetrotter - customer looking to travel.After saving the insurance item, your product displays it in the Insurances section of the Dimensions tab. During the loan origination process, the insurance is applied dynamically when the customer meets the conditions stipulated by the filters.
-
You can also personalize the discounts applicable to different customer segments.
-
Save the changes and approve the product in order to use it in your digital journeys.
Thus, you can dynamically personalize the availability and the pricing applicable to the customer depending on the customer's profile, behavior, their needs, and context in the moment when they go through the loan origination process.
Now you are ready to customize the digital journeys within your loan origination process using personalized flow control rules.
Once you have defined your personalized products, make them available through highly contextualized digital journeys designed around customers needs and personas.
-
Use the Flow Control available in the Journey Designer to dynamically orchestrate customers experience and route them to relevant steps and processes given their own context.
-
In a visual designer similar to the one available for defining the personas, you can setup what are the steps customers would go through depending on their own needs and behavior. Orchestrate their experience dynamically given their persona or various data driven events.
Here's how to begin:
-
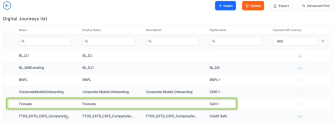
In FintechOS Studio, navigate to Digital Experience -> Digital Journey. Here you can use the same customer personas or data to personalize the way the customers go through the flow of the journeys depending on their behavior or context. Either open and view an existing journey, or create a new digital journey.
For example, you can use a journey already defined, used in loan origination processes.Double-click to open it for editing.
-
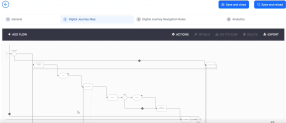
Go to the Digital Journey Map tab to view all the steps of the flow, along with their conditions and decision areas.
-
Select the step that you want to personalize, go to its UI tab and select the UI Designer. Insert the newly created
IsGlobetrotterattribute, as described in the FintechOS Studio user guide.NOTE
Make sure that the data model you are using, the one where you defined the new attribute, is part of the data that this journey can access. -
Once you've extended the flow with the new attribute, go to the Flow Control tab to dynamically orchestrate the flow. Here you can see the default steps, but you can also establish other flow control rules by clicking Insert within the Flow Control Rules section.
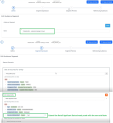
Thus, you can define rule expressions leveraging the available data or a specific customer persona or audience. When the conditions of the rules are met, the flow can be configured to redirect the customer to another step in the flow, or even to another flow entirely, as exemplified in the below picture:
Read detailed information about flow control and its rules in the FintechOS Studio user guide.
-
After saving, you finished defining the way in which the customers within the selected customer persona go through the journey from one end to the other.
You are now ready to define the campaigns with personalized content.
Continue your engagements and meaningful interactions with your customers by setting up ongoing campaigns mapped on your customer lifetime and main events.
-
Create operational and sales campaigns to drive better business outcomes and loyalty.
-
Tailor the messages sent to different customers by attaching personas and templates for each communication channel, using personalized content management.
-
Trigger events driven campaigns.
Follow step-by-step instructions about defining a campaign on the Define a Campaign End-to-End page.
After following the above stages, you should have a highly personalized journey for your customers, thus improving your customer relations and business outcomes.
Check out our available Academy courses on Evolutive Data Core, Banking Product Factory, Proposal Configurator, Digital Journeys, and Campaign Management.
