Set Tokens for Personalized Content
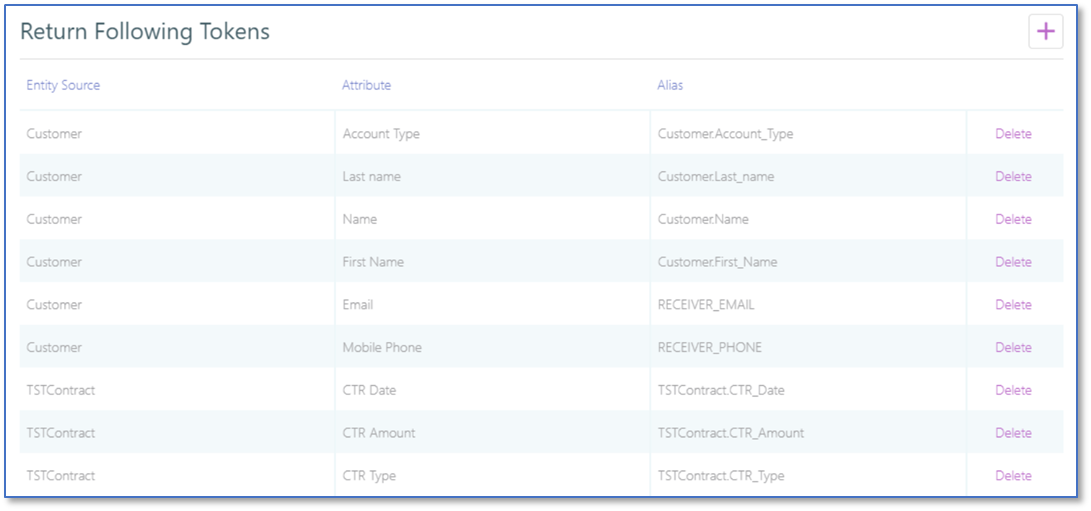
In the Return Following Tokens section, select all the tokens that will be used in personalized content. The section allows inline editing records.
NOTE
In order to set tokens for personalized content, you need to first create the content tokens. For information on how to add content tokens, see Content Settings.
In order to set tokens for personalized content, you need to first create the content tokens. For information on how to add content tokens, see Content Settings.
To set a token to be used in personalized content, follow these steps:
- Next to the Return Following Tokens section title, click the Add icon (+). An empty line is added to the list.
- In the empty line, click in the Source Name column and select the entity which contains the attribute whose value will be returned in personalized content.
- Click in the Attribute column and select the attribute whose value will be returned in the personalized content.
- Press ENTER. The alias of the attribute you selected at the previous step will be automatically displayed in the Alias column.
Follow the steps above to set all the token that you want to use.
 IMPORTANT!
If you add the customer persona to audiences which will be used in campaigns, you should provide two tokens, as follows: the email and phone information. You can do so by adding for the Email and Mobile Phone attributes the alias RECEIVER_EMAIL and RECEIVER_PHONE. - Click the Save and Close button at the top right corner to save the content type.