Term Loans
A term loan is a banking product which defines a loan for a specific amount that has a repayment schedule and either a fixed or floating interest rate.
Creating Term Loans
To create a new term loan from scratch, navigate to main menu > Banking Product Factory > Banking Products, and click the Insert button. A new page opens, with a series of tabs that assist you in configuring the banking product.
Alternatively, you can create a term loan by duplicating an existing one. Click the Duplicate button on the Banking Products List page. Make sure you change the Banking Product Code and Name according to your business needs.
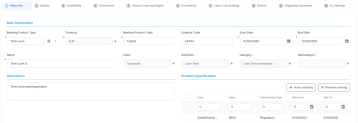
You can set the basic elements for creating the product, such as name, code, currency, validity, or product classification, in the Main Info tab.
Your product type selection influences the next steps. For term loans, select the Term Loan option in Banking Product Type.
-
In the Main Information section, select the Banking Product Type from the available list.
-
Choose the Currency for the banking product.
-
Enter the product code in the Banking Product Code field. It can have 10 characters, and it is used in the contract. It uses a sequencer and the code of the product type.
-
Set the product validity by selecting the date when the product becomes available (Start Date) and the last date from when the product is available (End Date).
-
Enter the product Name.
-
Optionally you can set the following fields:
-
External Code: Select the code of the product imported from an external system, if applicable. It can have 10 characters and it is not used in the contract.
-
Class: Select the class of the product. This field is used to place the product in a hierarchy. For more information, see Product Hierarchy
-
Subclass: Select the subclass of the product. This field is used to place the product in a hierarchy. For more information, see Product Hierarchy
-
Category: Select the category of the product. This field is used to place the product in a hierarchy. For more information, see Product Hierarchy
-
SubCategory: Select the subcategory of the product. This field is used to place the product in a hierarchy. For more information, see Product Hierarchy
-
Description: Enter any description or additional text related to your new product.
-
-
Click the Save and Reload button. The product is now saved and you can further edit it for your needs.
After saving the product, the Product Classification section is populated with more options for your term loan. You can insert or remove existing product classification items.
-
To add a product classification item, click Insert Existing and select an already existing item.
-
You can also create a new product classification item by clicking the Insert existing button and then the Insert button.
-
On the newly displayed Add Product Classification page, fill in the fields:
-
Name: Enter the name of the classification item.
-
Code: Enter the unique code of the classification item.
-
Valid From: Select the date from which the product classification item is valid.
-
Valid To: Select the date until when the product classification item is valid.
-
Classification Type: Choose the classification type of the item. Possible values: Regulatory, Restructuring.
-
Is Default: Select the checkbox if this classification item is default.
The Classified Banking Products section is displayed after you save the classification item record and allows you to insert existing banking products. The following information is displayed here: Code, Name, Class, SubClass, Category, SubCategory and Status.
For more information on how to create a new product classification, see Banking Product Classification.
-
-
Click the Save and Reload button.
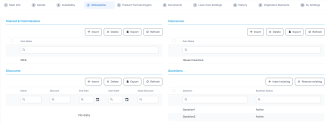
You can set elements such as general data, disbursement settings, payment schedule types and templates, product guarantees, tranches, and holiday settings in the Details tab.
-
In the General Data section, you can optionally set the following fields:
-
Is Revolving: If selected, allows a business to borrow money as needed for funding working capital needs and continuing operations such as meeting payroll and playable.
NOTE
If a term loan is revolving, its attached limit must also be revolving, meaning that the Available Amount of the limit is replenished either on each repayment of the principal or on loan contract closure.
-
Allow Refinancing: Select if the account can be refinanced for this product.
-
Allow Restructuring: Select if the loan can be restructured.
-
Allow CoDebtor: Select if another debtor exists for this product.
-
Max No. of CoDebtors: Set the maximum number of co-debtors possible for this product.
-
-
Click the Save and Reload button.
-
In the Disburse Settings section, check the Auto Disbursement box, and the disbursement is automatically performed when the contract is approved.
-
You can optionally set the following fields:
-
Max No Disbursements: Enter the maximum number of disbursements that can be configured for this product.
-
Active Tranche On Doc: If you select this checkbox, then the tranches are activated (disbursements are created and approved) after certain documents are submitted. It is the Financial Institution's responsibility to verify the content of the submitted documents.
-
-
Click the Save and Reload button.
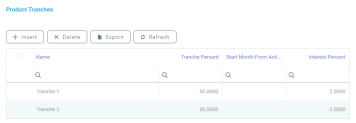
The Product Tranches section is displayed if you selected the Active Tranche On Doc checkbox. You can insert existing disbursement tranches or create new ones, configured to fit the product. Usually used for corporate loans, such dividend payments or cash outflows are not done in equal amounts and usually trigger a recalculation in terms of interest.
-
To add multiple such disbursements, Click the Insert button. The Add Product Disbursement section is displayed and you can set the following fields:
-
Name: Enter the name of the new disbursement.
-
Tranche Percent (%): Enter the percentage of the final amount that goes towards the disbursement.
-
Start Month From Activation: Enter the start month for the disbursement. It can be any month in the loan availability period.
-
Interest Percent (%): Enter the interest percent for that particular disbursement.
-
Unusage Commission Percent (%): Enter a commission paid for the loan amount unused.
-
-
Click the Save and Reload button.
-
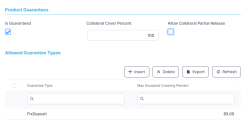
In the Product Guarantees section, set the following fields:
-
Is Guaranteed: If selected marks the product as secured.
NOTE
The Collateral Cover Percent, Allow Collateral Partial Release fields, and the Allowed Guarantee Types section appear when you select the Is Guaranteed checkbox. -
Collateral Cover Percent: Enter the percent that the collateral person on the contract pays. It usually is over 100%.
-
Allow Collateral Partial Release: A partial release is a mortgage provision that allows some of the collateral to be released from a mortgage after the borrower pays a certain amount of the loan.
-
The Allowed Guarantee Types section is displayed after you check the Is Guaranteed option. You can insert or delete allowed guarantee types:
-
Select the regularity of payments in the Periodicity Type. You can choose: Once (the whole amount is paid at maturity), Weekly, Monthly, Bimonthly, Trimestrial, 4 Weeks, Semestrial, Annual or 30Days.
NOTE
If the measurement unit of the selectedPeriodicity Type = Days,thenHoliday Shift For Repayment Installments = Falseand it cannot be changed. -
Optionally you can set the following fields:
-
Period Type: Select the period of availability for the product: Days, Weeks, Months, Years or Once.
NOTE
The period type must be the same as the measurement unit of thePeriodicity Type. -
Grace Type: Select whether the product grace should apply to the principal, the interest, or both. Select an option from the list: Both, Principal or Interest.
-
Product Grace: Select an option from the list. This is the amount of time that the bank can offer to a customer at the beginning of the contract without repayments of principal or principal + interest (however, most probably the bank capitalizes the interest for that period).
-
-
Click the Save and Reload button.
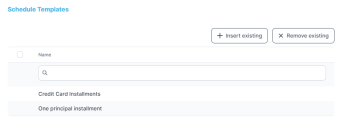
In the Schedule Templates section, you can associate/ delete payment schedule types to/ from the banking product.
-
To associate a payment schedule type to the banking product, click Insert Existing and select one of the already defined types. Go to Payment Schedule Types to read more about this.
IMPORTANT!
When creating a new Term Loan, Mortgage, or Overdraft banking product, you must select at least one payment schedule type, otherwise you can't approve the product. If the Schedule Templates section has no records, an error message is displayed upon transitioning the product into the Approved status.
-
Click the Save and Reload button.
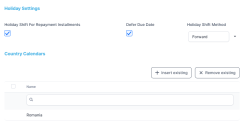
In the Holiday Settings section, the following fields are available:
-
Select the Holiday Shift For Repayment Installments checkbox for holidays to be taken into consideration when calculating the maturity program.
NOTE
The Country Calendars section and the Defer Due Date and Holiday Shift Method fields appear if you select the Holiday Shift For Repayment Installments checkbox.
The Defer Due Date option is selected by default. If selected, the payment schedule calculates the next payment amount as if the due date has not changed even when the due date falls on a holiday.
-
From the Holiday Shift Method, you can select the method to be used when calculating the due date if that date falls on a holiday. The due date can be shifted before or after the holiday. The possible values you can choose are:
- None - the due date is not shifted.
- Forward - the due date is shifted to the next working day after the initially calculated due date.
- Backward - the due date is shifted to the last working day before the initially calculated due date.
IMPORTANT!
TheHoliday Shift Methoddoesn't work if you selectedPeriodicity Type = Days.
In the Country calendars section, you can insert or delete calendars. You can work with multiple calendars as well. To insert a calendar:
-
Click the Insert Existing button and add the country's name. If the maturity date coincides with a holiday, it is allocated automatically on the next business day.
-
Click the Save and Reload button.
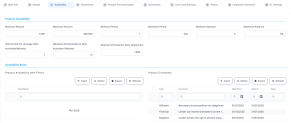
You can determine the monetary range and the time frame when the product is available for customers in the Availability tab.
-
Fill in the following fields:
-
Minimum Amount and Maximum Amount: Enter the minimum and the maximum amount of the product for which the bank opens a contract.
-
Minimum Period and Maximum Period: Enter the minimum and the maximum duration of the product mentioned in the contract.
-
Minimum Advance and Maximum Advance: Enter the minimum and maximum advance percentage from the contract's financed value applicable at the contract level.
-
Start Period For Unusage After Activation (Months): Enter the start period for unused amount after the activation, in months.
-
Maximum Period For Disbursement After Activation (Months): Enter the maximum period of disbursement after the this option is set, in months. The number of months during which the disbursement must be made.
-
Minimum Principal For Early Repayment: Enter the minimum principal for when early repayments are made.
-
-
Click the Save and Reload button.
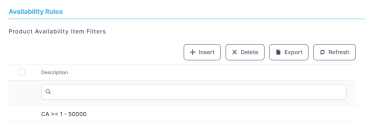
In the Availability Rules section you can select the item filters for your banking product.
-
Click the Insert button, the Add Product Availability Item Filter is displayed.
-
Select the desired filter from the Filter option.
-
Add the attributes of the selected filter.
-
Optionally, add a description for the added item filter.
-
Click the Save and Reload button.
For more details, see Product Filter.
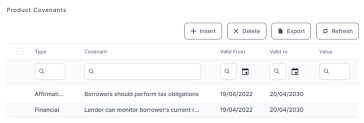
In the Product Covenants section you can set certain conventions that applicants must abide by after getting the loan. This is usually applicable for corporate clients that must meet certain requirements in order to continue to receive disbursements.
-
Click the Insert button to add a covenant to the product. Each covenant can be attributed a value, an availability period, and a review frequency in months. Read more about covenants in the Covenant page.
-
Click the Save and Reload button.
You can insert, delete or export interest, commissions, insurances, discounts or questions valid for your product in the Manage Dimensions tab.
To add a new one, click Insert and fill-in the fields detailed in the sections below.
To configure the interest and commissions separately, navigate to Main > Product Factory > Banking Product Dimensions menu which contains several other embedded menus.
-
To add an interest or a commission, click Insert in the Interest & Commissions section. The Add Interest & Commission Item page is displayed.
-
Select the banking product from the Banking Product list.
-
Enter the Item Name.
-
Enter the Start Date when the interest/ commission becomes effective and the End Date for the interest/ commission.
-
Fill in the following fields:
-
Code: Enter a code for this particular interest/ commission.
-
Interest List: Select from which list the interest is a part of.
-
Commissions List: Select from which list the commission is a part of.
-
Minimum Interest Rate (%): Enter the percent applicable as a minimum interest rate at the contract level.
-
Is Negotiable: Select the checkbox to specify that every interest, commission or margin field at the contract level is negotiable and can be edited.
-
-
Click the Save and Reload button.
-
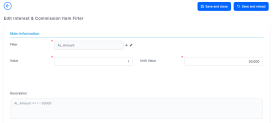
In the Interest & Commission Item Filters section, click Insert to insert an item filter.
-
Select a filter created earlier in the Product Filter.
-
Set the following fields:
- Value/ Date: Select the beginning value/ date for the filter.
-
Until Value/ Until Date: Select the maximum value/ date for the filter.
-
Description: This field is automatically filled in after clicking the Save and Reload button. The values/ dates inserted above are turned into an expression.
For Lookup attributes, the following fields are available:
-
Filter Entity: Entity on which the filter was defined.
-
Description: It is left blank. Add a description if needed.
-
Grid of Options: This field is automatically filled in after clicking the Save and Reload button. The values of the option set are displayed. Select the Boolean for the values you wish to include in the filter.
-
Click the Save and Reload button.
For any banking product, you can select a pre-existing insurance or create a new one.
-
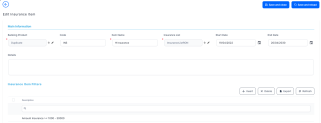
To add a new insurance, in the Insurances section, Click the Insert button and set the following fields:
-
Banking Product: Select the banking product.
-
Code: Insert a code for this particular insurance.
-
Item Name: Insert a name.
-
Start Date: Enter the start date when the insurance becomes effective.
-
End Date: Enter the end date for the insurance.
-
Details: It is left blank. Add a description if needed.
-
Insurance List: Select from which list the insurance is a part of.
-
-
Click the Save and Reload button.
-
In the Insurance Item Filters section, click Insert and fill in the following fields:
-
Filter: The name inserted earlier.
-
Value: The starting value for the attribute.
-
Until Value: The ending value of the interval.
-
Description: Insert the proper description for the availability filter.
-
-
Click the Save and Reload button.
For any banking product, you can add discounts of any nature. You can select a pre-existing discount or create a new one.
-
To add a new discount, Click the Insert button in the Discounts section.
-
In the Details Page, insert the appropriate Name for the discount.
-
Choose one of the pre-configured types of discounts available in the Discount field, or create a new one. According to the selected type, new fields appear on the page requiring to be filled in.
-
Insert the value of the discount to be applied, e.g. 15.
-
Set the start date when the discount becomes effective (Start date), and the end date for the discount (End date).
-
Optionally, you can fill in the following fields:
-
Applied to dimension: Specifies for which product dimension this discount is applicable (interest, commission or insurance). This is autocompleted by the selected discount's dimension.
-
Commission type: This field appears if the selected Discount = Commission discount or Management Fee Discount. Specifies for which commission type this discount is applicable. This is autocompleted by the selected discount's default commission type.
-
Commission: This field appears if the selected Discount = Commission discount or Management Fee Discount. Specifies for which commission this discount is applicable. This is autocompleted by the selected discount's default commission.
-
Insurance class: This field appears if the selected discount = Discount Life Insurance or Interest Discount. Specifies for which insurance class this discount is applicable (credit, home, life or other insurance class). This is autocompleted by the selected discount's insurance class.
-
Insurance: This field appears if the selected discount = Discount Life Insurance. Specifies for which insurance this discount is applicable. This is autocompleted by the selected discount's insurance.
-
Interest type: This field appears if the selected discount = Interest discount. Specifies for which interest type this discount is applicable.
-
Use Banking Formula: If you select this checkbox, the discount is calculated using the Banking Formula engine.
-
Is optional discount? : Selecting this checkbox results in the discount being applied only if the customer agrees to the discount.
-
Is percentage: If you select this checkbox, the discount is calculated as a percentage from the contract's amount.
-
Destination entity: Select the entity where to register the discount. This field opens when the Is optional discount? checkbox is selected.
-
Destination entity attribute: Select the attribute where to register the discount. This field opens when the Is optional discount? checkbox is selected.
-
-
Click the Save and Close button.
-
In the Product Discount Item Filter section, click Insert and fill in the fields as specified in the Product Filter page. The fields displayed depend on the selected filter.
-
Click the Save and Close button.
You can choose one or more questions to add to the banking product, or insert a new one.
-
To insert a new question, in the Questions section, Click the Insert existing button, then click Insert.
-
In the Add Banking Product Question page, fill in the following fields:
-
Question: Enter the appropriate name.
-
Answer Type: Select the type of answer the customer has to give: text, numeric or option set.
-
Answer Entity: Select the entity where the answer is stored.
-
Answer Field: Select the attribute where the answer is stored.
-
-
Click the Save and Reload button.
The Banking Products List shows where the question is used.
The question has to be activated in order for it to be added to the banking product.
-
Click the Save and Close button.
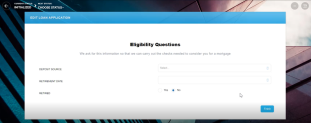
For example, this is how a question is displayed in a digital journey in the FintechOS Portal:
The Product Formula Engine tab keeps formulas built with Formula Engine for the banking product. Such formulas can be used to determine the eligibility of a customer.
In the Banking Product Formulas section, choose an already defined formula or click Insert to configure a new one, for example a formula for eligibility or scoring purposes. For information on how to build a formula, see Define Formula Inputs.
-
In the Add Banking Product Formula page, fill in the following fields:
-
Name: Enter an appropriate name.
-
Formula Type: Select the type of formula configured before, e.g. scoring /eligibility.
-
Formula: Select the previously configured formula.
IMPORTANT! The formula must be activated before attaching it to a product. -
Data Mapping: Select the previously configured data mapping.
The name of the banking product is inserted automatically in Banking Product.
-
-
After selecting the desired formula, click Save and reload, then click Map Data.
-
In the Formula Mapping page, click Input and configure the input data for the formula.
-
Click Output and configure the output for the formula.
-
Click the Save and Close button.
Such formulas can be used in digital journey steps, for example when the customer inserts their financial data.
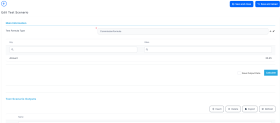
A good practice is to test the formula before displaying it in a digital journey. You can do that in the Test Scenarios section:
-
Click the Insert button to open the Add Test Scenario page.
-
Insert a Test Scenario Type from the option set. The keys and the values are shown.
-
Click the Save and Reload button.
-
Click the Calculate button. The outputs are displayed in the Test Scenario Outputs section.
-
You can save these outputs by selecting the Save Output Data checkbox next to Calculate.
You can manage all the attached documents available for a product and all the agreements that a customer needs to go through in the Documents tab.
Any previously associated documents are displayed in the Banking Product Documents section.
-
To attach a new document to the banking product, in the Banking Product Documents section, click Insert. The Add Banking Product Document page is displayed.
-
Set the following fields:
-
Operation Code: Enter a code for the document.
-
Banking Copies: Insert the number of copies made.
-
Report: Select a document from the list.
-
Document Type: Select a document type from the list.
-
Is Mandatory: Select if the document is mandatory.
-
Includes Debtor: Select if the document includes the debtor.
-
Includes Coborrower: Select if the document includes the co-borrower.
-
Requires Signature: Select if the document requires to be signed.
-
Is accord: Select if the document represents the accord.
-
-
Click the Save and Reload button.
The agreements that a customer needs to go through are displayed in the Banking Products Agreements section.
-
To attach a new agreement to the banking product, in the Banking Products Agreements section, click Insert. The Add Banking Products Agreements page is displayed.
-
Fill in the following fields:
-
Agreements: Select an agreement from the list.
-
Banking Product: It is automatically filled in.
-
Code: Insert the corresponding code.
-
Is Mandatory: Select if the agreement is mandatory for the product.
-
-
Click the Save and Reload button.
For more information on how to configure a contract or an agreement, see the Digital Document Processor.
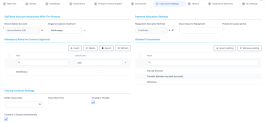
The Lean Core Settings tab is available only when Banking Product Factory is implemented along with Core Banking.
Transactions types that are performed to and from a banking product are displayed in the Lean Core Settings tab. The tab also holds information about the reconciliation account associated with the products, mandatory roles for contract approval, payment allocation settings, the treatment of returned goods for contracts based on this banking product (only for Term Loans and Mortgage banking products), and closing contract settings.
-
In the Self Bank Account Associated with the Product, for each banking product, you must select a reconciliation account, which is the bank account to be used for transactions, for money movements.
NOTE
This account must have the same currency as the product, because the conversions are performed from and into this account.
-
Select a value for the Negative Value Treatment drop-down to specify how Core Banking treats situations when the funds of the reconciliation account associated with the banking product used in the contract would go below zero if a disbursement event would be approved. The possible values are:
-
Error- there is an error message displayed if the disbursement event that is being approved would result in a negative balance of the associated reconciliation account. The event can't be approved and the balance can't go below zero. Select this value if you want to block any transactions that would result in a negative balance of the reconciliation account associated to the banking product. -
Warning- there is a warning message displayed if the disbursement event that is being approved would result in a negative balance of the associated reconciliation account. The event can be approved and the balance can go below zero. -
NoMessage- there is no error or warning message displayed if the disbursement event that is being approved would result in a negative balance of the associated reconciliation account. The event can be approved and the balance can go below zero.
NOTE
Core Banking also has a system parameter,ReconciliationAccountTreatment. That is a system-wide setting, applicable to events for contracts based on all banking products without a specifiedNegative balance treatmentvalue. Core Banking takes into consideration the settings used at the banking product level (theNegative balance treatmentfield's value). Thus, if the value is specified at the banking product level, then that value takes precedence over the system parameter's setting. -
If you associate the same reconciliation account to more than one banking product, then the setting selected in banking product A is applied for contract events based on banking product A, while for the banking product B, Core Banking would apply the setting selected at the level of banking product B.
In the Payment Allocation Settings section you can decide which allocation method should be used to determine the order in which credit items are prioritized when repaying loans, credit accounts, and so on. You can also define the grace period settings.
-
Fill in the following fields:
-
Payment Allocation Method: The payment allocation method represents the recovery order of amounts from payment notifications. Select a payment allocation method from the list.
-
Grace Days for Repayment: Insert the number of days for which the bank expects a payment without calculating penalty.
-
Penalty for grace period: If you select the checkbox, the penalty interest is applied on the loan contract without taking into consideration the grace period defined at contract level, being calculated for the difference between system date - due date, if the grace period passed and the customer didn't pay the due amounts. If you leave this checkbox unselected, the penalty interest is applied on the loan contract taking into consideration the grace period defined at contract level, being calculated for system date - due date + grace days for repayment.
-
Direct Debit Settlement Account: If you select the checkbox, the banking product has the automated settlement of repayment notification functionality (the payment allocation) turned on by default at the contract level. You can turn the automated settlement off either at the banking product level or at the contract level in Core Banking. Default value:
true.NOTE The automated settlement of repayment notification, or direct debit settlement account, is the functionality whereby, if funds are available on the settlement account and the contract has repayment notifications pending for recovery, Core Banking automatically uses the available balance up to full settlement of repayment notifications.
In Core Banking, the automated settlement ofInstallmenttype repayment notification functionality (the payment allocation) can be turned on or off, thus allowing the financial institution to manage the contracts in case of blocked accounts and control the allocation of funds to outstanding notifications in case of need to impose a block on the settlement account, or manage the settlement of multiple loans from the same settlement account when short on funds and exceptional rules might apply.
If the functionality is turned off, the contract is pending for manual allocation. You can turn it back on and leave Core Banking to allocate the funds according to its automated processes, using any funds that become available in the settlement account in order to cover pending notifications.
-
-
Click the Save and Reload button.
In the Mandatory Roles section you can add the roles of the participants that are mandatory to exist at the contract level for contracts based on this banking product. In other words, when creating contracts based on banking products with Merchant role in this section, you must add a customer with the same Merchant role as contract participant, otherwise, the contract cannot be approved. When Search Limit is selected for a role on a banking product, Core Banking checks if the contract participant with this role has an attached limit configured with a limit type associated to the same role, in this case Merchant Exposure.
-
In the Mandatory Roles section, click Insert and fill in the following fields:
-
Banking Product: The banking product for which you define mandatory roles. This is automatically completed with the current banking product.
-
Role: Select the role of the participants that are mandatory to exist at the contract level for contracts based on this banking product.
-
Search Limit: When
Search Limitis selected for a role on a banking product, Core Banking checks if the contract participant with this role has an attached limit configured with a limit type associated to the same role.
If you select a role not associated with a customer limit type in Core Banking, theSearch Limitfield becomes read-only and unselected.
-
-
Click the Save and Reload button.
In the Return Of Goods, you can define whether a contract based on the banking product can have Returned Amount or Goods transactions or not, and the specific conditions for these transactions. The Returned Amount or Goods transaction type can be used when a customer returns all or part of a loan or mortgage in a short while after contract creation, if the banking product was defined to allow such transactions. You can set up Return Fee type commissions, to return all or some of the claimed commission to the borrower.
-
Fill in the following fields:
-
Allow Return Of Goods: Select this checkbox if the contracts based on this banking product accept
Return of Goodstransactions. Default value: False. If selected, theAccepted Days For ReturnandReturn Messagefields are displayed, otherwise, these fields are not visible. -
Accepted Days For Return: Specify the number of days after contract creation during which the return of goods transaction can be created and approved.
-
Return Message: Select the behavior of messages generated by Core Banking for situations when the
Returned Amount or Goodstransaction's approval date + the number of accepted days for return >= the current date. Possible values are taken from the Warning Error Treatment option set. According to the desired behavior, choose:-
Error, if the transaction should not be approved and an error message should be displayed; -
Warning, if the transaction can be approved, but a warning message should be displayed; -
NoMessage, if the transaction can be approved without any messages.
-
-
-
Click the Save and Reload button.
Allow Return Of Goods = True, then the Returned Amount of Goods transaction is automatically added to the Transaction Types section. In the Closing Contract Settings section, you can configure the default closure settings for contracts based on this banking product.
-
Fill in the following fields:
-
Buffer Close Days: Enter the number of days used as buffer before automatically closing the contract when the contract reaches maturity and its balance reaches zero. If
Buffer Close Days > 0, then Contract Is Closed Automatically = False. -
Close Real Time: If you select this checkbox, the contract based on this banking product is closed in real-time, when the contract reaches maturity and its balance reaches zero, without waiting for the end of day processes. If
Close Real Time = True, then Buffer Close Days = 0 and Contract Is Closed Automatically = True. -
Closing Is Flexible: If you select this checkbox, the closure details of the contract based on this banking product can be modified at the contract creation.
-
Contract Is Closed Automatically: If you select this checkbox, the contract based on this banking product is closed automatically at maturity, if the balance reaches zero. If
Contract Is Closed Automatically = False, then Close Real Time = False.
-
-
Click the Save and Close button.
In the Allowed Transactions section, you can associate possible transaction types with the selected banking product:
-
Click Insert existing and select the desired transaction types to be associated.
-
Double-click a selected transaction type to edit it.
-
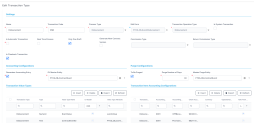
In the Edit Transaction Type > Settings section, fill in the following fields:
-
Name: Enter the name of the transaction type.
-
Transaction Code: Enter the code of the transaction type.
-
Process Type: This field associates the process type with the transaction operation type, which makes the connection with the transaction motor of bank accounts. Select one of the processes defined within the system.
NOTE There is no integration at this point with a payment gateway. -
Edit Form: Select the form used to edit this transaction type. You can choose only from the forms defined on the Contract Event entity.
-
Transaction Operation Type: The transaction operation type makes the connection with the transaction motor of bank accounts. Select one of the transaction operation types defined within the system.
-
Is System Transactions: If you select this checkbox the transaction is marked as being neither a credit of the account, nor an allocation of funds, but a transaction that does not influence other transactions within the account. System transactions are meant to be used only for accounting.
-
Is Automatic Transaction: If you select this checkbox here, then you cannot select it within the contract operations. The Is Automatic Transaction checkbox marks the transaction as automatic.
-
Real Time Process: This checkbox marks the transaction as to be processed in real-time. If selected, then the transaction is processed right away. If not selected, then the transaction is inserted as a bank account transaction queue record.
-
Only One Draft: If you select this checkbox, there can be only one record of this transaction type in
Draftstatus created at the contract level. -
Generate New Contract Version: This checkbox allows you to specify if a new contract version should be generated by this transaction type.
-
Commission Type: Select the commission type applicable for this transaction type. Return fee commissions are filtered out and can't be selected.
-
Return Commission Type: Select the return fee commission type applicable for this transaction type. Only return fee commissions can be selected.
-
Is Clawback Transaction: If selected, this checkbox marks the transaction as generating a clawback commission. The transaction type is to be used in third-party management invoicing activities. Default value:
False.
-
-
In the Edit Transaction Type > Accounting Configurations section, fill in the following fields:
-
Generates Accounting Entry: Select this checkbox to create an entry in the Operational Ledger. It generates records in the
Accounting Entryentity. -
OL Master Entity: Select the entity referenced by the accounting systems.
-
-
In the Edit Transaction Type > Purge Configurations section, fill in the following fields:
-
To Be Purged: This checkbox marks the transaction as purgeable. If you select it, you can purge or archive records in
Draftstatus. -
Purge Number of Days: Enter the default number of calendar days that a record can be kept in
Draftstatus before it is purged. For additional information, see the Core Banking System Parameters page. This field is displayed only whenTo Be Purged = True. -
Master Purge Entity: Select the master purge entity under which the draft records are. This field is displayed only when
To Be Purged = True.
-
-
You can also edit the information in the Transaction Value Types, Transaction Item Accounting Configurations and Transaction Accounting Models sections. Read more details about Transaction Types in the Operational Ledger User Guide.
-
Click the Save and Close button.
-
Accruals and Provisions- System transaction. If added at banking product level, the accruals and provisions for contracts can be calculated on a daily basis.
This transaction type is not added automatically. Make sure you insert it in the Associated Transactions tab. -
Disbursement- If added at banking product level, the requested funds are transferred into the customer's account.
This transaction type is not added automatically. Make sure you insert it in the Associated Transactions tab. -
Early repayment- If added at banking product level, the customer can make a payment earlier than the stated maturity date of the contract.
This transaction type is not added automatically. Make sure you insert it in the Associated Transactions tab. -
Payment Holiday- If added at banking product level, the official bank holidays are considered when calculating a payment schedule.
This transaction type is not added automatically. Make sure you insert it in the Associated Transactions tab. -
Repayment- If added at banking product level, the customer can make a payment to cover the scheduled repayment amount.
This transaction type is not added automatically. Make sure you insert it in the Associated Transactions tab. -
Repayment Notification- If added at banking product level, the system generates and displays in the contract a repayment notification after each disbursement, containing the total amount to be paid off.
This transaction type is not added automatically. Make sure you insert it in the Associated Transactions tab. -
Reschedule Overdues- If added at banking product level, the system extends or adds extra time to an existing contract.
This transaction type is not added automatically. Make sure you insert it in the Associated Transactions tab. -
Reschedule Debt- If added at banking product level, the system recalculates the entire payment schedule by extending the time period for loan repayment.
This transaction type is not added automatically. Make sure you insert it in the Associated Transactions tab. -
Returned Amount or Goods- If added at banking product level, theReturned Amount of Goodstransaction type can be used when a customer returns all or part of a loan in a short while after contract creation. You can set upReturn Feetype commissions, to return all or some of the claimed commission to the borrower.
This transaction type is not added automatically. Make sure you select theAllow Return Of Goodscheckbox in the Return of Goods section within the Associated Transactions tab. -
Revert Disbursement- If added at banking product level, disbursements performed at contract level can be reverted after being performed.
This transaction type is not added automatically. Make sure you insert it in the Associated Transactions tab. -
Revert Transfer between my bank accounts- System transaction. If added at banking product level, transfers between the same customer's bank account can be reverted after being performed.
This transaction type is not added automatically. Make sure you insert it in the Associated Transactions tab. -
Transfer between my bank accounts- If added at banking product level, the customer is allowed to move funds between their accounts at the contract level.
You can find the versions of the banking product, their workflow status and the user who modified the product in the History tab.
Here you can track the product's life cycle and review older versions that are no longer active (for details, see Banking Products' Life Cycle).
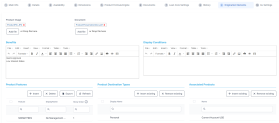
You can set the elements required in the origination journey, such as product benefits, display conditions, features, destination types, or associated products in the Origination Elements tab.
-
Fill in the following fields:
-
Product Image: Insert an image representative for the product.
-
Document: Insert the document representative for the product.
-
Benefits: Insert the advantages of owning the banking product. You can format the text in the text editor window.
-
Display Conditions: Insert the conditions for the applicant, e.g. age limit, annual turnover, education level, income, registration documents.
-
-
Click the Save and Reload button.
In the Product Features section, you can insert, delete or export features.
-
To add a feature, Click the Insert button and fill in the following fields:
-
Feature: Enter the name of the product feature.
-
Is Main Feature: Select the checkbox if it is the major feature.
-
Display Name: Enter the display name of the feature.
-
-
Click the Save and Reload button.
In the Product Destination Types section , you can insert or remove the existing product destination types:
-
Click Insert existing and select one of the existing destination types, or insert a new one.
-
To create a new destination type, insert a name and specify if it is default. For this case, the following have been configured: Loan Collateral, Loan disbursements, Personal, Repayments.
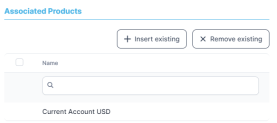
In the Associated Products section you can insert or remove an existing products. It is especially useful when you wish to create a link between two products.
To insert or remove a product from the list or create a new one:
-
Click Insert existing and select one of the existing destination types, or insert a new one.
-
Click the Save and Reload button.
The OL Settings tab is available only when Banking Product Factory is implemented along with Operational Ledger Add-On.
In the Banking Product GL Accounts section, you can set specific accounts to be used by the Operational Ledger system for transactions performed on contracts based on this banking product. Thus, you can overwrite the generic settings of the Operational Ledger, instructing it to use the accounts specified at banking product level.
-
To add specific accounts to be used by Operational Ledger, click Insert and fill in the following fields in the displayed Add Banking Product GL Account page::
-
Product: Select from the list the banking product. Automatically completed with the banking product you are currently editing.
-
Accounting System: Select from the list the desired accounting system. The list contains the records created in the
Accounting Systementity. -
Accounting Scope: Select from the list the corresponding accounting scope. The list contains the records created in the
Accounting Scopeentity. -
Item: Select from the list the corresponding transaction item. The list contains the records created in the
Transaction Item Accounting Configentity. -
GL Account: Select from the list the corresponding GL account. The list is filtered based on the previously selected accounting system. It contains the accounts defined in the
Accounting Chartentity that were added to the chosen accounting system record.
-
-
Click the Save and Reload button.
