Managing Interests
Interests are set up independently from the banking products. They are available in banking products in the form of interest lists, after they have been grouped together based on their use.
Interests
You can create and update interests and apply them to a product in the Interests menu available through the Product Factory. There are three main types of interests: fixed, base and variable. Banks can set up variable interests for loans and also calculate the amount each customer has to pay.
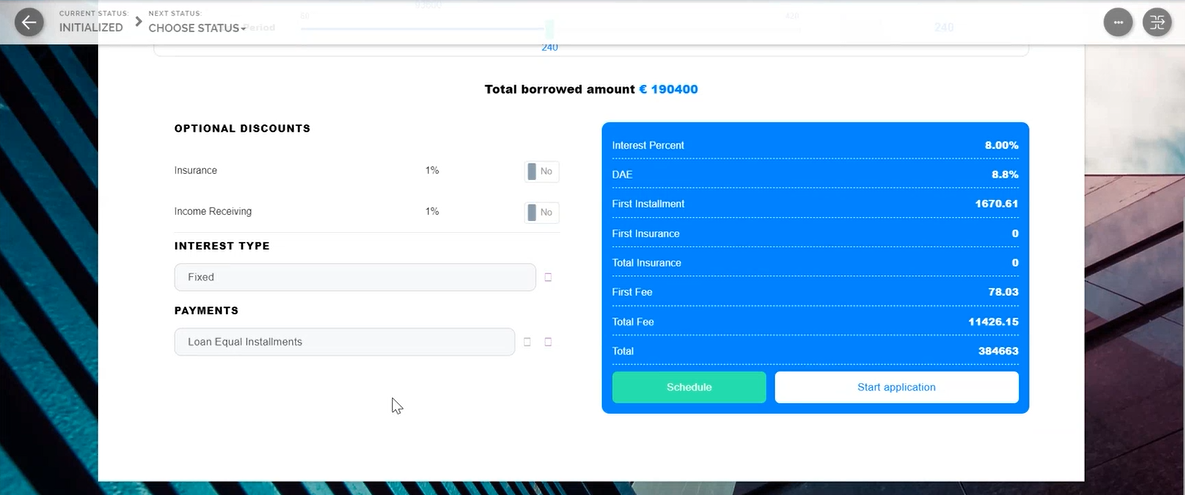
The following picture illustrates how the interests can be shown in a loan origination digital journey:
To manage interests, follow the steps below:
-
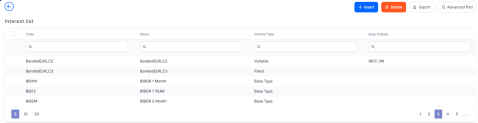
In the main menu, click Product Factory > Banking Product Dimensions > Interests, and the Interest list page opens.
-
On the Interest List page, you can add new interests or search, edit, and delete existing ones.

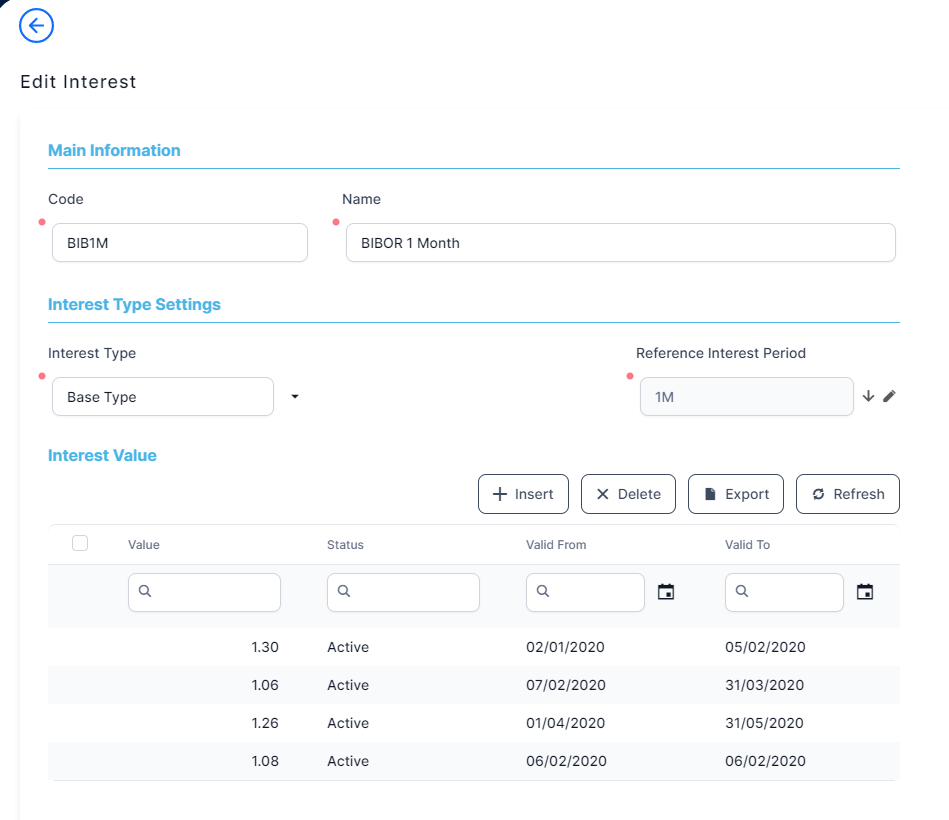
The Edit Interest page allows you to configure interest settings.
Read about how and when to use each interest type on the dedicated Interest Definition Best Practices page.
-
To create new interest, click the Insert button, and the Add Interest page opens.
-
In the newly opened Add Interest page, fill in the following fields:
-
Code: Insert a code for this particular interest.
-
Name: Insert a name for the interest.
-
Is Default: Select this checkbox if the interest is a default one.
-
Use Banking Formula: Select the checkbox if the interest is Banking Formula type.
-
Interest Type : Select the interest type :
- Fixed - the interest has one value during the validity period.
- Base Type - used for calculating the variable type, i.e. ROBOR.
- Variable - an interest rate formed from a Base Type interest plus a variable percent, e.g. EURIBOR + 4%.
- Collection - a combination of previously defined fixed and/or variable interest rates.
- Banking Formula - an interest rate that can be defined as a banking formula from the Formula Engine.
If you choose Variable, a new field Base Interest is displayed.
- Description: Insert a description for the interest.
-
Base Interest: Only displayed for variable interest types. Select (or insert) the base type interest used for calculating the variable interest.
-
Reference Interest Period: Only displayed for base type interest. Choose the interest reference period (where M = months, Y = years): 1M, 1Y, 2M, 3M or 6M.
-
For Sight Deposit: Used only for deposits when the interest is at sight. It is used when a customer wishes to end a deposit before the maturity date (end date). The customer does not receive the full interest, but a sight interest because the deposit has not reached its maturity.
-
Is For Overdraft: If this interest is an interest applicable to the overdraft amount of a contract based on a banking product that allows overdraft operations, select this checkbox. If the
Interest Type = Collection, then the Banded Interests section is displayed for you to enter the banded interests. -
Is Penalty: If this interest is a penalty interest, select this checkbox. Penalty interests are only possible for loans.
If you select this checkbox, two new fields, Is General and Apply to Loan Item (If Overdue) are displayed. -
Is General: Only displayed for interests applicable as penalties. If selected, this penalty interest is applied to all the loan contract's operation items that are overdue for payment, instead of having to define different penalty interests for each operation item that is subject to penalty interest calculation on a contract. This can be useful when you need to define one mass penalty interest to be applied to all the overdue amounts subject to penalty interest calculation resulting from repayment schedule processing.
If a banking product has in its attached interests list an interest with Is General = True, then at the contract level the penalty percent is applied to all operation items that are overdue and are marked with Include In Penalty Calculation = True.
NOTE
You can specify which operation items should be used by Core Banking for penalty interest calculation within the Add/ Edit Operation Item pages, selecting the Include In Penalty Calculation checkbox and then selecting an item from the Penalty Item (for Repayment Notification) list. Read more about operation items in the Core Banking user guide.
An interest list cannot contain a penalty interest with Is General = True and another penalty interest with Is General = False. -
Applied To Loan Item (If Overdue): Only displayed for interests applicable as penalties that have Is General = False. Select the operation item of the loan contract for which the penalty interest is applied.
-
Is Credit Line Interest: Interest that is applicable to the credit line.
-
Is Debit Order Interest: Interest that is applicable at each debit order.
-
Description: Insert a description for the interest.
-
-
Click the Save and Reload button.
-
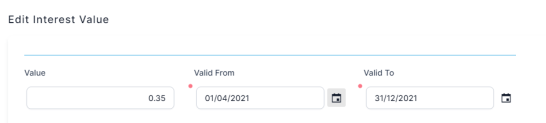
The Interest Value section is available only for Fixed, Base Type, and Variable interest rates . Insert the values (usually the interest rate index to your margin) by filling in the following fields:
-
Value: Enter the interest rate percentage.
-
Valid From: Select the day when the interest rate becomes applicable.
-
Valid To: Select the last day when the interest rate is applicable.
-
-
Click the Save and Reload button.
-
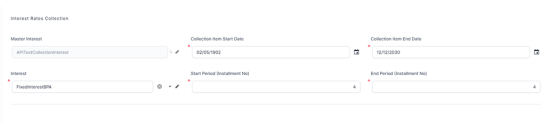
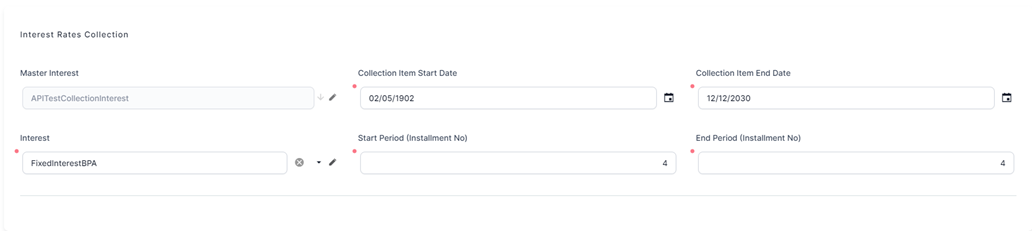
The Interest Rates Collections section is available only for Collection type interests. Such collections can hold more than one interest types, each with its own start period and installment. This is useful for example, when applying a fixed interest rate for the first 7 years of a mortgage loan, and applying a variable interest rate for the remaining period.

Insert the values in the section fields:
-
Master Interest: Enter the interest name.
-
Interest: Select a previously defined interest (fixed, variable or formula type).
-
Collection Item Start Date: Select the day when the interest rate becomes applicable. This date must be greater then current system date.
-
Collection Item End Date: Select the last day when the interest rate is applicable.
-
Start Period (Installment No): Select the first installment when the interest rate becomes applicable.
-
End Period (Installment No): Select the last installment when the interest rate is applicable.
-
-
Click the Save and Reload button. The system performs validations to ensure that the time intervals and the installment intervals do not overlap and no time or installment interval is left undefined. For more detail see the Validations Performed at Banking Product Approval section.
-
The Banded Interests section is available only for Collection type interests with
Is For Overdraft = True. Banded interests are interest rates that can be defined as collections of values that applied depending on the amount. For example, the bank wants to apply an interest rate of 5% for used amount between 1 and 10,000, an interest rate of 4.5 % for the used amounts between 10,001 and 20,000, and an interest rate of 4% for used amounts surpassing 20,001. Insert the values in the section fields:
-
Interest: Select a previously defined interest. Only Fixed and Variable type interests are displayed for selection.
-
Min Utilized Amount: Enter the minimum used amount to apply this interest.
-
Max Utilized Amount: Enter the maximum used amount to apply this interest.
-
Collection Valid From: Select the date when the interest rate becomes applicable.
-
Collection Valid To Yes Date: Select the last day when the interest rate is applicable.
-
-
Click the Save and Reload button.
-
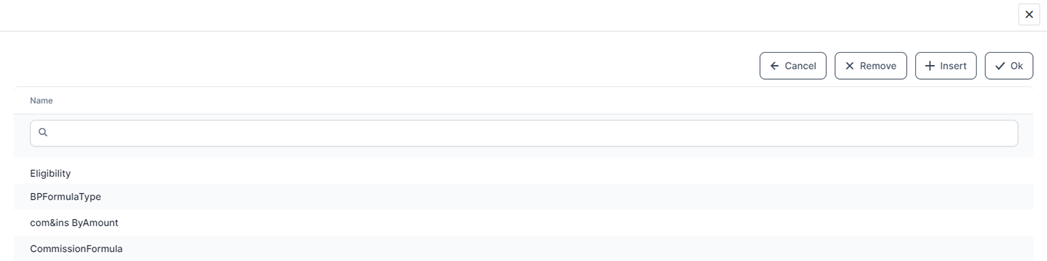
When creating an interest rate based on a banking formula, the Use Banking Formula checkbox is selected. In addition, the Banking Formula Type field allows you to pick from already defined banking formulas. Click the arrow next to the field and a list of available banking formulas opens.
-
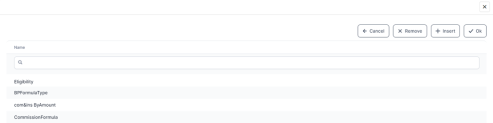
Click the Insert button to create a new banking formula.
-
Add a name for the banking formula. Insert or create an interest, banking product formulas, and test scenarios.
-
Click the Save and Reload button.


A series of additional validations are performed by the system when a banking product with a Collection type interest attached within its selected Interests List field goes through a status change from Draft or Version Draft to Approved:
-
The Start Period (Installment No) and End Period (Installment No) are validated to accommodate the maximum availability period of the banking product.
-
The period for interest is validated that there are no uncovered periods, the interests don't overlap over the same period, and there are no overlapping periods.
-
The Collection Item Start Date and Collection Item End Date dates don't overlap and there is no missing interval.
The interest rate collection can't be updated if an interest is attached to an approved banking product.
As an exception, the Collection Item End Date can be updated if Collection Item End Date
>= the current system date. Interest Lists
An interest list allows you to group multiple interests into a collection of interests that you can use in a banking product. You can group under the same umbrella the following types of interests created individually in the Interests: variable interest, base type and fixed interest.
To manage interest lists:
- In the main menu, click Product Factory > Banking Product Dimensions > Interest List, and the Interest List list page opens.
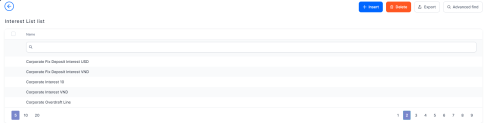
- On the Interest List list page, you can add new interest lists or search, edit, and delete existing ones.

- To create a new interest list, click the Insert button. The Add Interest List page is displayed.
- Enter a Name for the interest list.

- Click the Save and Reload button.
- Click the Insert existing button to add the applicable interests in the Interest section.
- Click the Save and Close button.

Filter Interest
You can define filtering criteria for your interests and commissions which you can later on call in your banking products.
To manage filtering criteria, follow the steps below:
- In the main menu, click Product Factory > Banking Product, and the Product List page opens.
-
Select the product where you want to add the filter.
- In the Dimensions tab, insert or edit an interest or a commission.
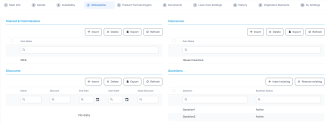
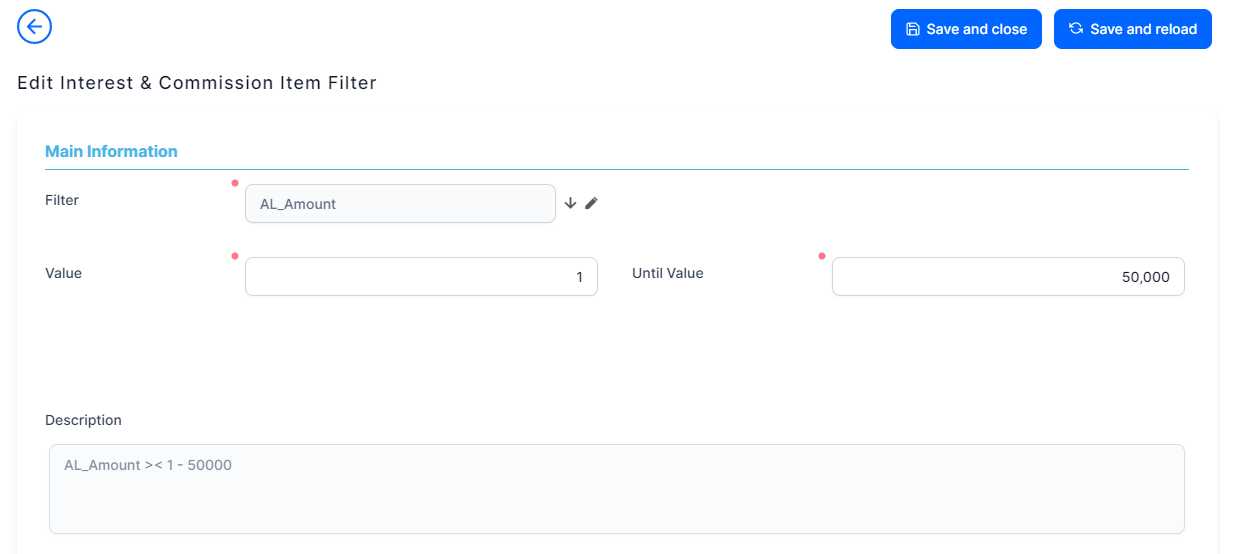
- In the Interest & Commission Item Filters section, click Insert, and fill in the following fields:

Filter: Select a filter created in the Product Filter.
Value/ Date: Select the beginning value/ date for the filter.
Until Value/ Until Date: Select the maximum value/ date for the filter.
Description: This field is automatically filled in after the Save and Reload button is clicked. The values/ dates inserted above are turned into an expression.
For Lookup attributes, the following fields are available:
Filter: Select a filter created in the Product Filter.
Option set: Automatically filled in with the option set name created for the attribute.
Description: Add a description if needed.
grid of options: This field is automatically filled in after the Save and Reload button is clicked. The values of the option set are displayed. Select the checkbox for the values you wish to include in the filter.
- Click the Save and Close button.