Create Customer Personas
Customer personas apply advanced filtering criteria on the information available in the Add Customer Persona Data Model to segment your customer base depending on your communication strategy.
To create a customer persona, follow these steps:
1 Insert a new customer persona record
- In FintechOS Studio, click the main menu icon at the top left corner.
- In the main menu, click Hyper-Personalization > Customer Personas. The Audience Segments List page opens.
- Click the Insert button at the top right corner of the page. The customer persona digital journey appears.
2 Define the customer persona
By default, the customer persona digital journey displays the Define step.
- Type the Name of the customer persona. Provide a descriptive name for the customer persona so that you can easily identify the target group at a first glance.
- Click the Save and reload button at the top right corner of the page to save the record.
3 Define audience segments
You can use an audience segment for various audiences. This way you will define a set of conditions once and you will be able to use it in different combinations when defining an audience. Repetitive conditions are easy to use in segmentation, once you created a segment you can simply re-use it anytime later.
A common use case is the audience segment covering the set of conditions for minimum eligibility criteria, that you have to add to all your campaigns. For example, customers with age between 24 – 73, that have Marketing Acceptance, that are not deceased, that have a mobile phone, etc.
Create simple segments that can be easily combined in various digital audiences later on.
To define an audience segment, follow these steps:
- Click the Segment Expression step.
- Set conditions to get specific records for specific entity (entities). For more information, see Get Records for Entity.
- Define aggregate data to use as token or to add new conditions to filter the data set. For more information, see Define Aggregate Data
- Set the tokens that will be used in communication templates. For more information, see Set Tokens for Personalized Content.
Preview your audience segment
Once you have defined and saved your segment expression, you can generate an Excel file that lists all the audience segment data. The preview is generated asynchronously by a job scheduler and you have the option to receive an email notification when the Excel file is ready. To create an audience segment preview:
- In the audience segment editor, select the Segment Preview tab.
- Click Insert to create a new segment preview.
- In the Add Generated Preview window, enter a Begin Date for when you wish to schedule the processing for the preview and select the Send Mail checkbox if you wish to send an email notification when the preview is ready.
- Click Save and Reload at the top right corner of the page.
- In the Edit Generated Preview page, you can modify the Begin Date and Send Mail options and customize the Email Address where you wish to receive the notification once the preview is ready.
- Click Save and Close at the top right corner of the page.
The Segment Preview tab lists all the audience segment previews tasks that have been finished, are in progress, or are scheduled to run in the future.
Once a preview generation is finished, if you select it from the list, you will be able to download the Excel file containing audience segment preview data.
Customer Personas Examples
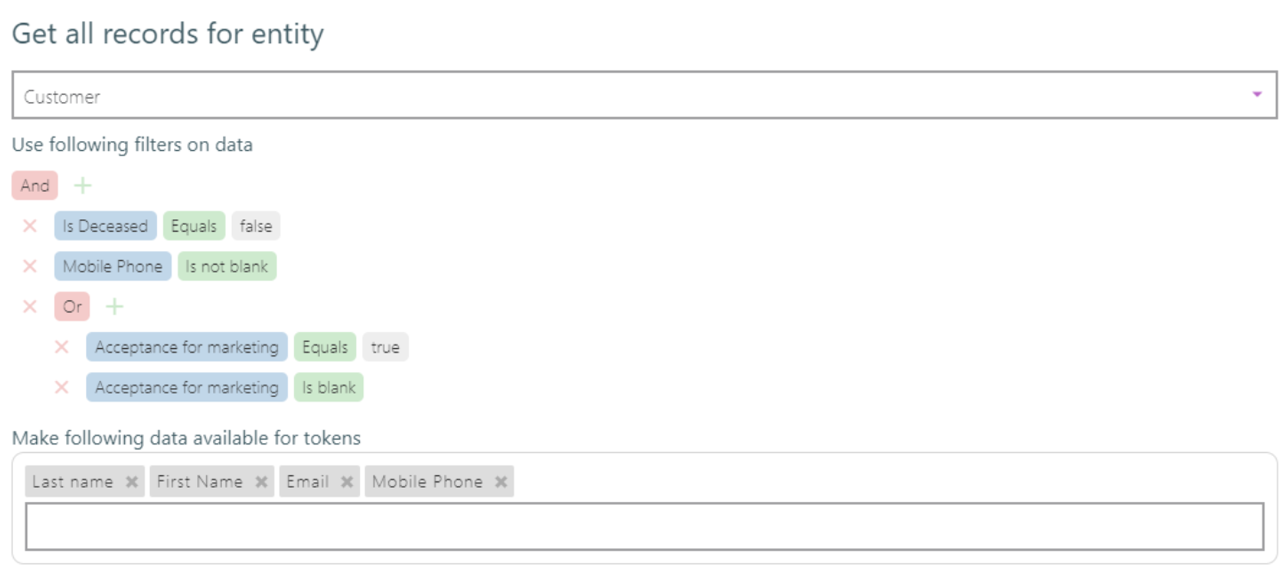
Customers not deceased, with valid mobile phone, who accepted marketing terms and conditions.
| Entity | Part | Expression |
|---|---|---|
| Customer | Filters | (isDeceased equal true AND MobilePhone is not blank AND (AcceptanceForMarketing equals true OR AcceptanceForMarketing is blank)) |
| Tokens | Phone, Email, First Name, Last Name | |
| Aggregates | Defined | - |
| Filters | - |
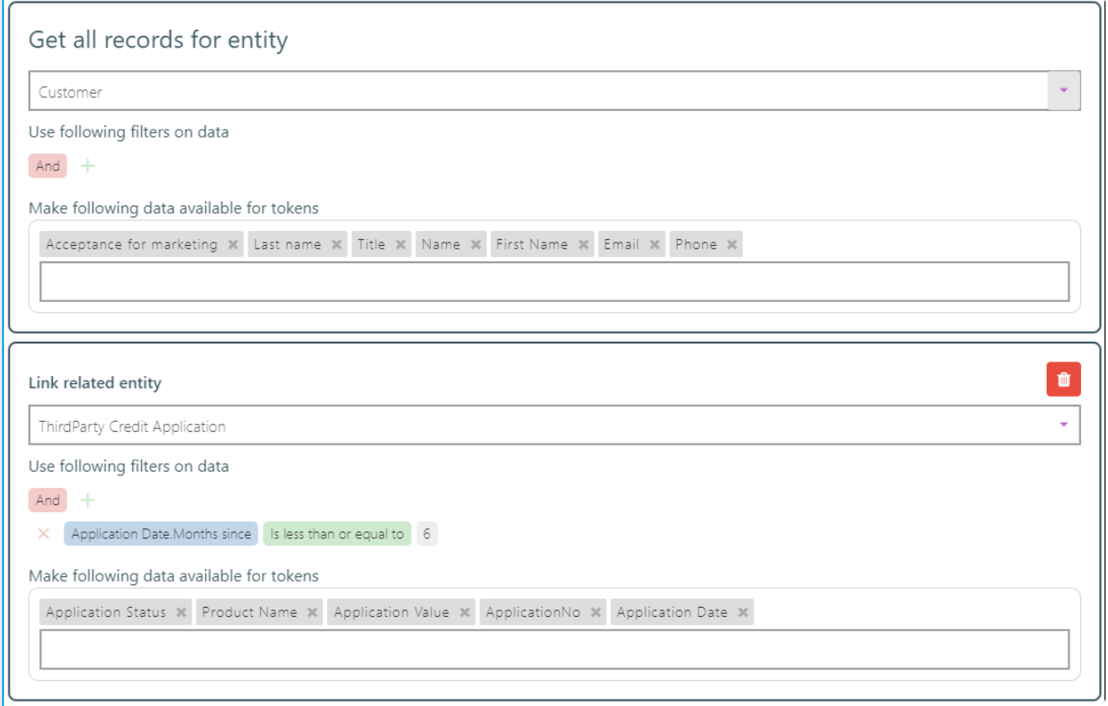
Customers with applications in the past 6 months.
| Entity | Part | Expression |
|---|---|---|
| Customer | Filters | - |
| Tokens | Phone, Email, First Name, Last Name | |
| Credit Application | Filters | ApplicationDate.MonthsSince is less than or equal to 6. |
| Tokens | Application Status, Product Name, Application Value, Application No, Application Date | |
| Aggregates | Defined | |
| Tokens |
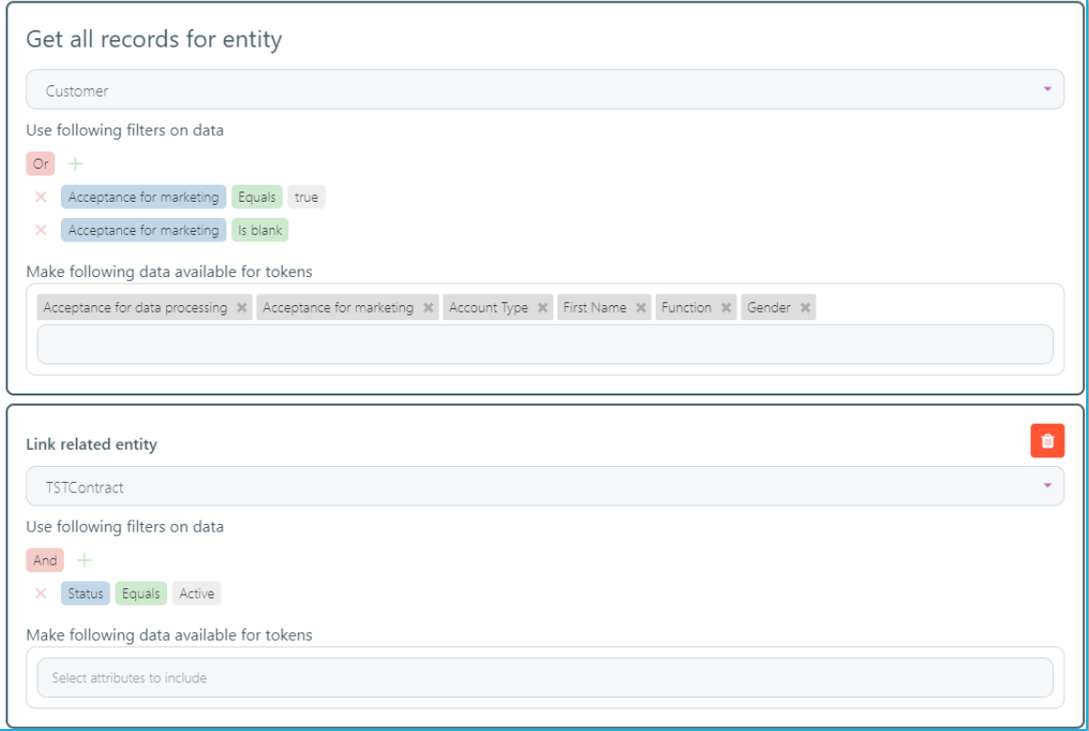
Customers with active contracts, which accepted marketing terms and conditions and which have more than five installments until the end of contract.
| Entity | Part | Expression |
|---|---|---|
| Customer | Filters | AcceptanceForMarketing equals true OR AcceptanceForMarketing is blank. |
| Tokens | Phone, Email, First Name, Last Name | |
| Contract | Filters | Status equals active |
| Tokens | - | |
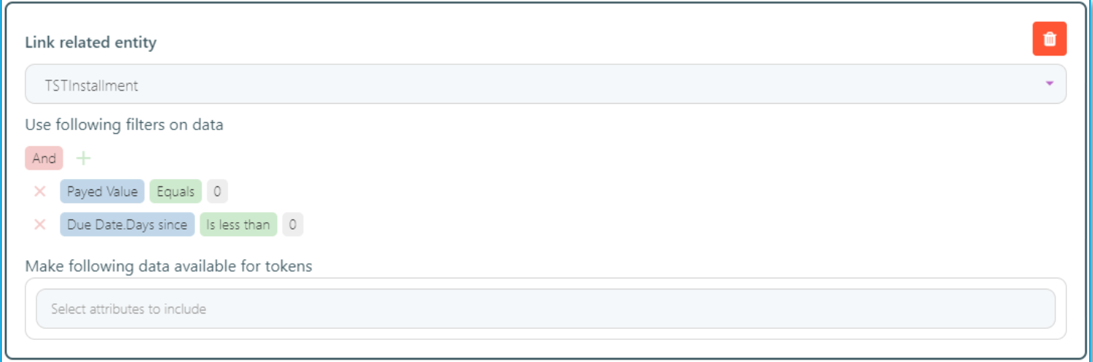
| Installment | Filters | PayedValue equals 0 AND DueDate.DaysSince is less than 0. |
| Tokens | - | |
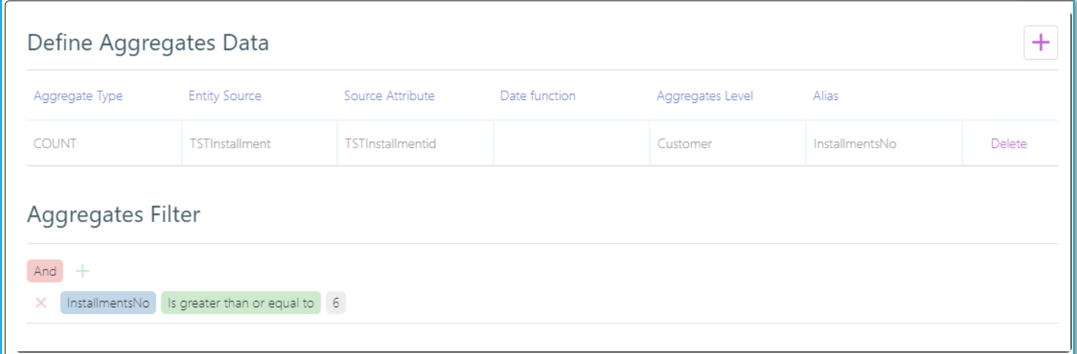
| Aggregates | Defined | Count(Installments) as InstallmentsNo. |
| Tokens | InstalmentsNo is greater than or equal to 6. |