Digital Journeys
Digital journeys are a visual representation of every experience (path) users might have when using an app. A digital journey comprises a set of steps and decision points which take the users throughout a process, carrying them from one step to another to achieve a goal such as an onboarding process, application for a home policy or a life insurance. FintechOS Digital Journey anatomy is composed of Evolutive Data Core, Form Driven Flows, User Interface and Fintech Automation Processors. FintechOS digital journeys are founded on the Evolutive Data Core which organizes, manages and displays various data collected in a business process.
Digital journeys also support API configuration, so you can load and access them in a custom application/ web application/ front-end, etc. This is enabled with the "Exposed API Journey" option in FintechOS Studio. Find out more in the Digital Journey API guide.
In FintechOS Studio, you can define how users interact with the apps based on their needs and expectations, improving the customer journey and providing a positive customer experience.
There are two types of flows a user is able to create and use to build a digital journey with multiple flows:
- Form driven flows enable you to group business-wise information in a logical and comprehensive manner. They are defined on entity. Another type of flow is the Mock-up Flow, which is a preliminary version of a Form Driven Flow, useful for prototyping and defining the information needed.
- Custom flows enable you to create custom URLs which redirect the user to a specific data form or view, generate custom filtered views based on security roles or add buttons which trigger specific actions.
A digital journey can combine several flows: a customer flow and an operator flow, depending on the business need. For example, it is possible to build a SME current account onboarding, by creating first a mock-up flow turning it into a form driven flow and attaching an operator flow. This way, a client will fill in their information and have a video call with an operator to confirm any further data.
For insurance, it is possible to build a journey for a client to apply for a motor policy by declaring information about this car and sign the contract in just a few minutes using Automation Blocks.
Prerequisites and Components
-
The first step when creating a digital journey is to define the underlying data model (business entity / entities and attributes) you will use in your Digital Journey. For more info, see Business Entities and Attributes.
-
With Form Driven Flows you define how the user gets from one place to another in a sequence of (process) steps.
-
The UI Designer is the tool you use to define what the user will see and how they will interact with the Digital Journey.
-
The Automation Processors are where you configure and use standard features like OCR, eSign, video calls, and/or product definitions.
General Settings
When creating a new digital journey in FintechOS Studio, you are presented with a few basic options in the General tab:
-
Name: The name of the digital journey used internally by the system. This field is mandatory.
-
Display Name: This is the name that will be shown in the user interface.
-
Description: Optional description of the digital journey.
-
Exposed API Journey: Setting that allows loading and accessing the digital journey in a custom application/ web application/ front-end, etc. Find out more in the Digital Journey API guide.
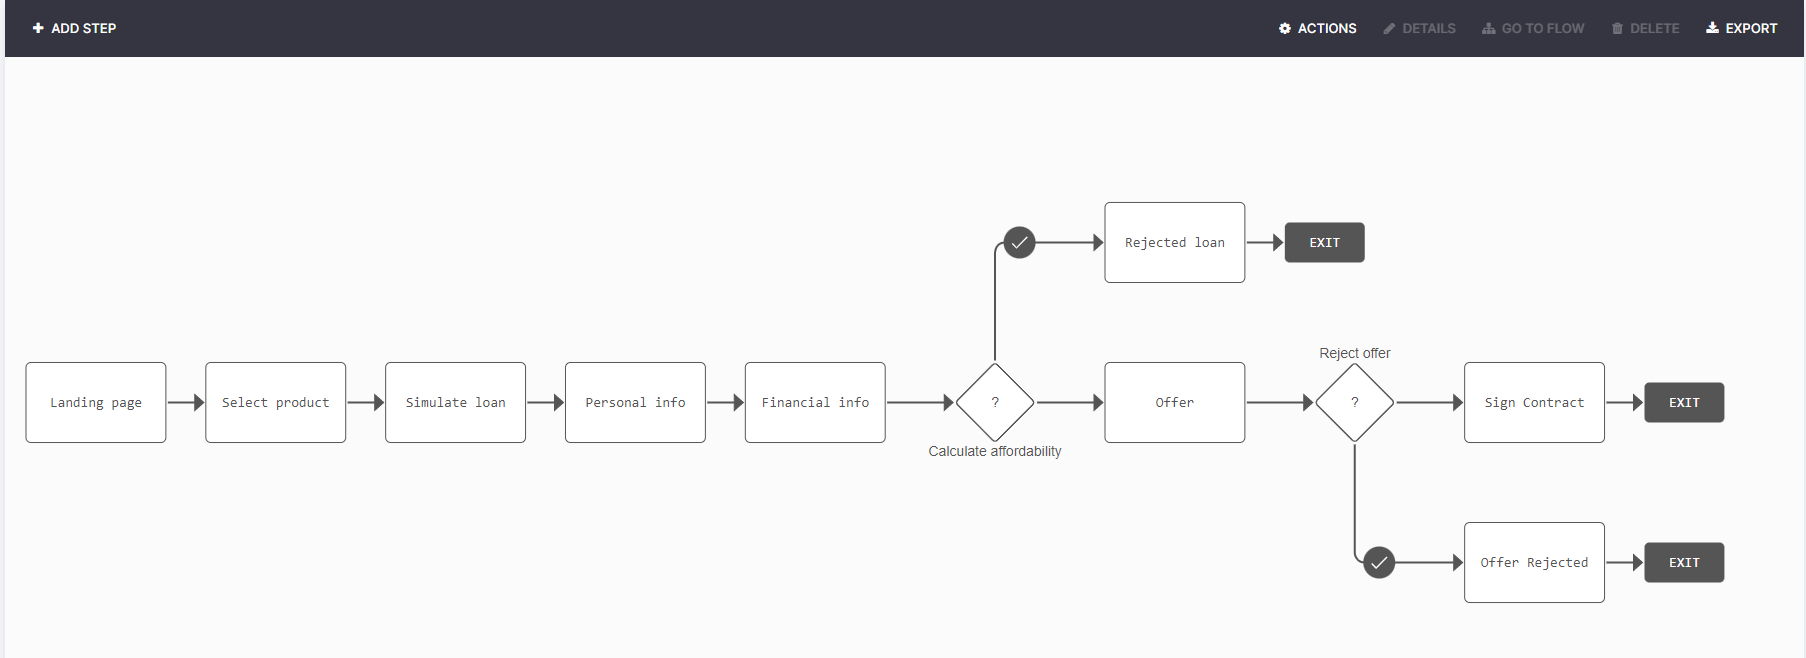
When building a digital journey, it is possible to have many form driven flows dedicated to the same digital journey, but each has a different set of steps that may be related to the other flows. In order to build visually aesthetic journeys with customer flows and operator flows, FintechOS Studio makes it possible to see all the flows on one journey in a map.
This helps the users see all the steps, rules and the flow of the journey.
To access the map:
- In the main menu, go to Digital Experience > Customer Journeys > Digital Journeys.
- From the list, select the digital journey you are interested in.
- Select the Digital Journey Map tab. From here, it is possible to perform an array of actions.
Add a flow to the map
-
Click Add flow. In the grid that appears, fill in the following fields:
-
Name and Description of the flow.
-
Type - can be Form Driven Flow or Custom Flow.
-
Form Driven Flow - select the desired flow from the list.
-
2. Click Save and reload. Add as many flows as needed.
Edit a step
Click a step to activate the Details and Delete buttons.
When you click Details or double-click a step, the configurations for the step are shown and it is possible to edit any needed element such as the UI, the flow and the security roles.
The Delete button erases the step from the digital journey map.
Double-clicking a rule on the map, opens the Edit Flow Control rule page, which allows you to edit the rule as needed. For more information, see Flow Control.
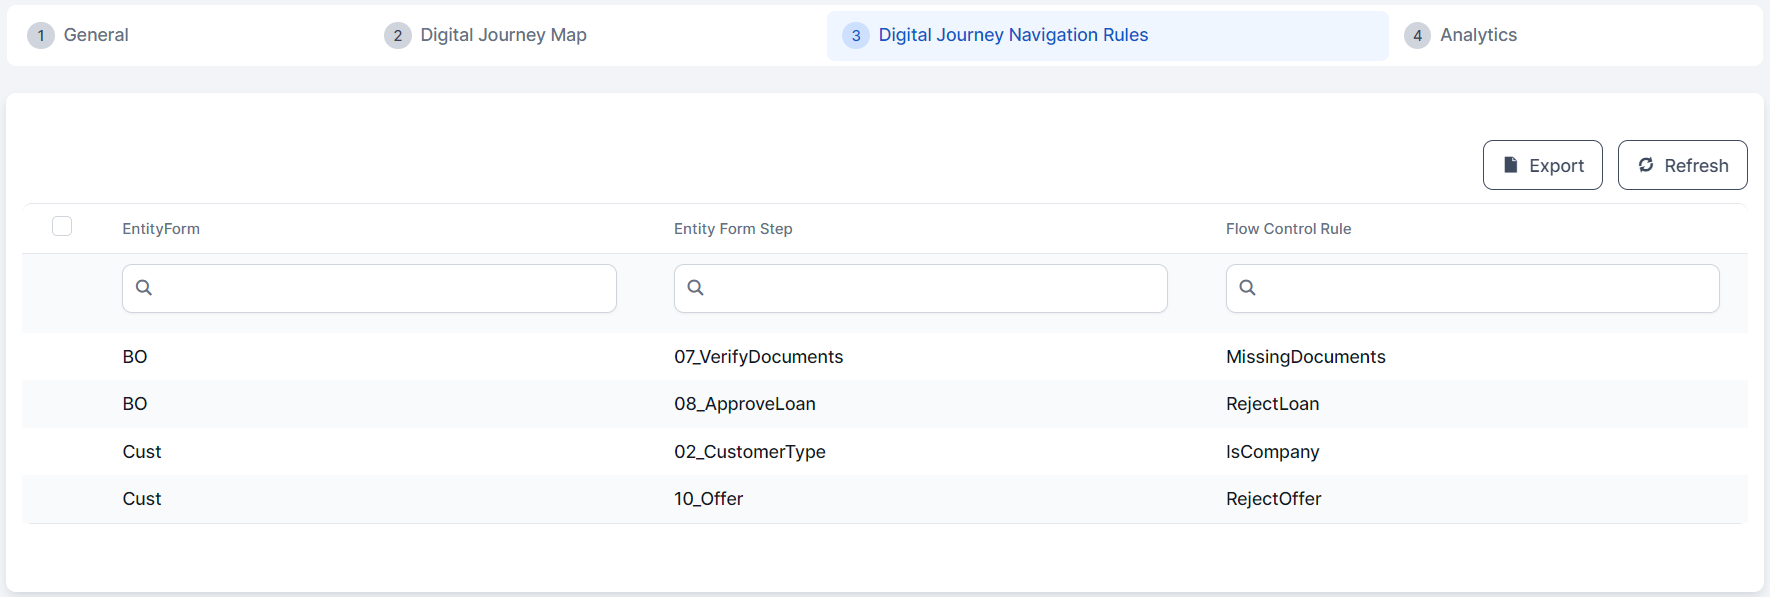
Based on the Digital Journey Map settings, the fields in the Digital Journey Navigation Rules tab will be populated with the step transitions.

