Digital Assets
Digital assets group together configuration items (entities, attributes, libraries, digital journeys, etc.) that belong to a common context, such as a data model, a digital journey, or an app data form.
You need to have the Developer security role to set a digital asset as context. Without this role, you can create a digital asset, but cannot use a digital asset as context. For details, see The Context Digital Asset.
Create Digital Assets
- To start creating a digital asset, you can either:
- Click Create new Digital Asset in the FintechOS Studio home page.
- Go to Main Menu > Configuration Management > Digital Assets click Insert.
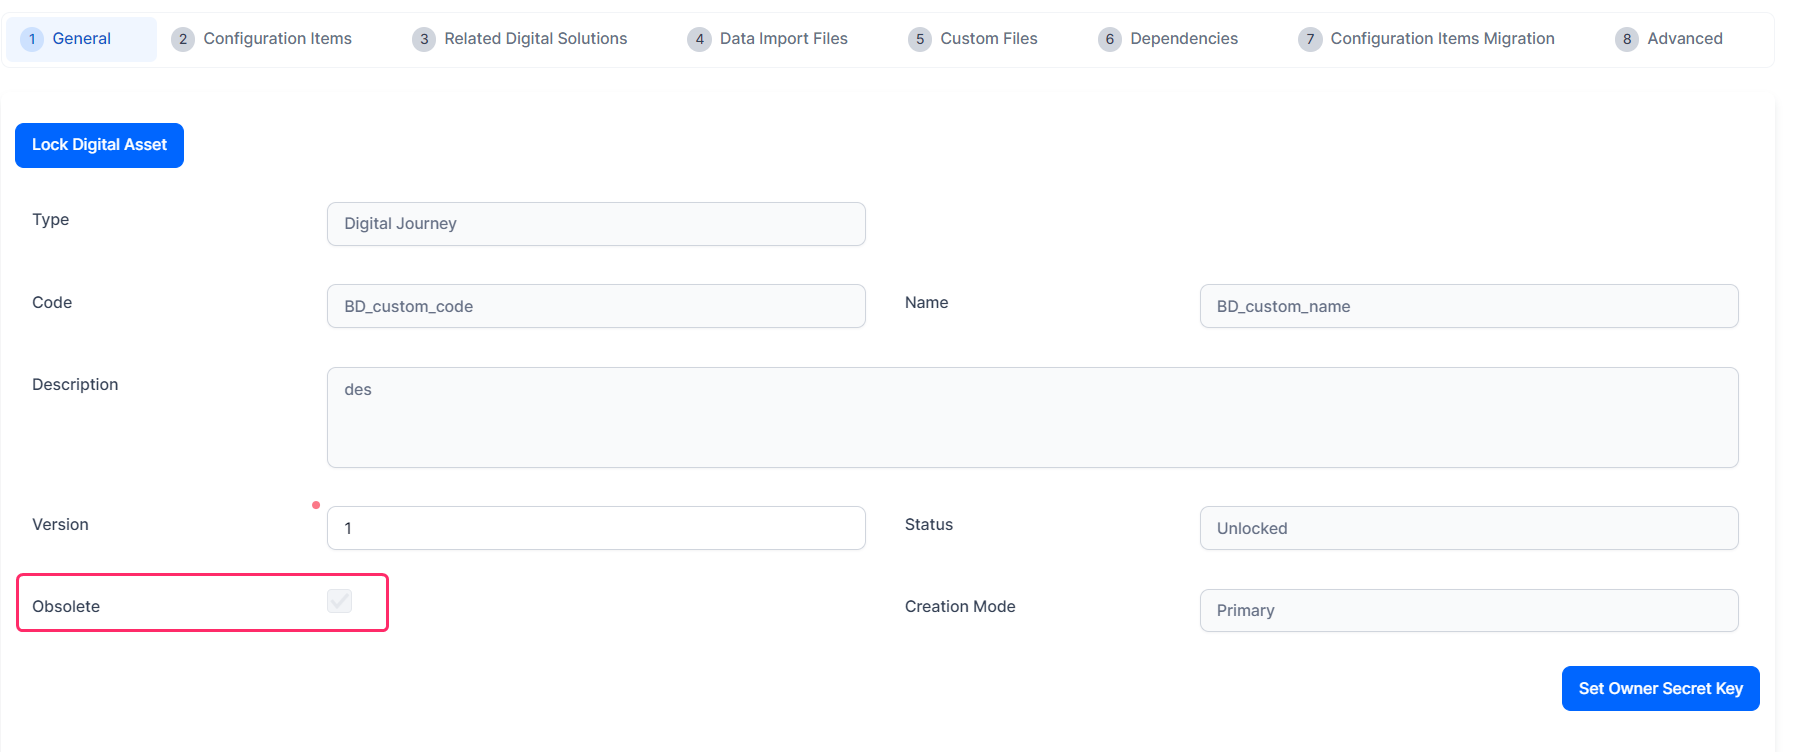
- In the General tab, fill in the following fields:
- Data Configuration - Used for defining metadata relationships and packaging business records which comply with a broad range of use cases, such as promoting banking or insurance products from one environment to another.
- Data Model - Used for creating and configuring generic data models that can be used by one or more Digital Assets.
- Digital App (App Data Form) - Used for building solutions published in employee portals for mid- and back-office applications.
- Digital Journey - Used for building customer facing journeys for a broad range of scenarios.
- Resources - Used for bundling generic resources such as endpoints, libraries, or style sheets. These can be referenced in more than one Digital Solution by one or more digital assets.
- none - The version number can be edited manually. You can enter integer values or numeric values in the x.y.z format.
- autoincrement - The field is readonly and incremented automatically on asset unlock.
- Click the Dependencies tab. From the drop-down list, select the Minimum Platform Version with which the digital asset is compatible with. Once selected, the digital asset cannot be imported in a prior version of the FintechOS platform.
- Click Save and reload.
The digital asset is created. The second dependency available could be a dependency on another digital asset. For details, see Edit Digital Assets.
|
Field |
Description |
|---|---|
| Type |
|
| Code | Identification code for the digital asset. |
| Name | Insert a suggestive name. |
| Description | Insert a text that describes the digital asset. |
| Version | Tracks the digital asset versions based on when you Lock and Unlock Digital Assets. To enable/disable automatic versioning, in the Configuration Manager, at the kv/<environment name>/<Studio instance>/app-settings path, set the feature-da-version-type key to:If the feature-da-version-type key doesn't exist, the setting defaults to autoincrement. |
| Status | This field is read-only. The status is automatically Unlocked. |
For each digital asset type, check the configuration item types compatibility in the Configuration items section.
Edit Digital Assets
When you open a digital asset, several configuration sections are available:
General
When editing a digital asset, the fields in the General tab that you used to create the asset (see Create Digital Assets) are visible in read-only mode, with the exception of the Description field which you can still edit.
Set the Context Digital Asset
If you click Set as context digital asset, the name of the digital asset will be displayed next to the FintechOS Studio logo.
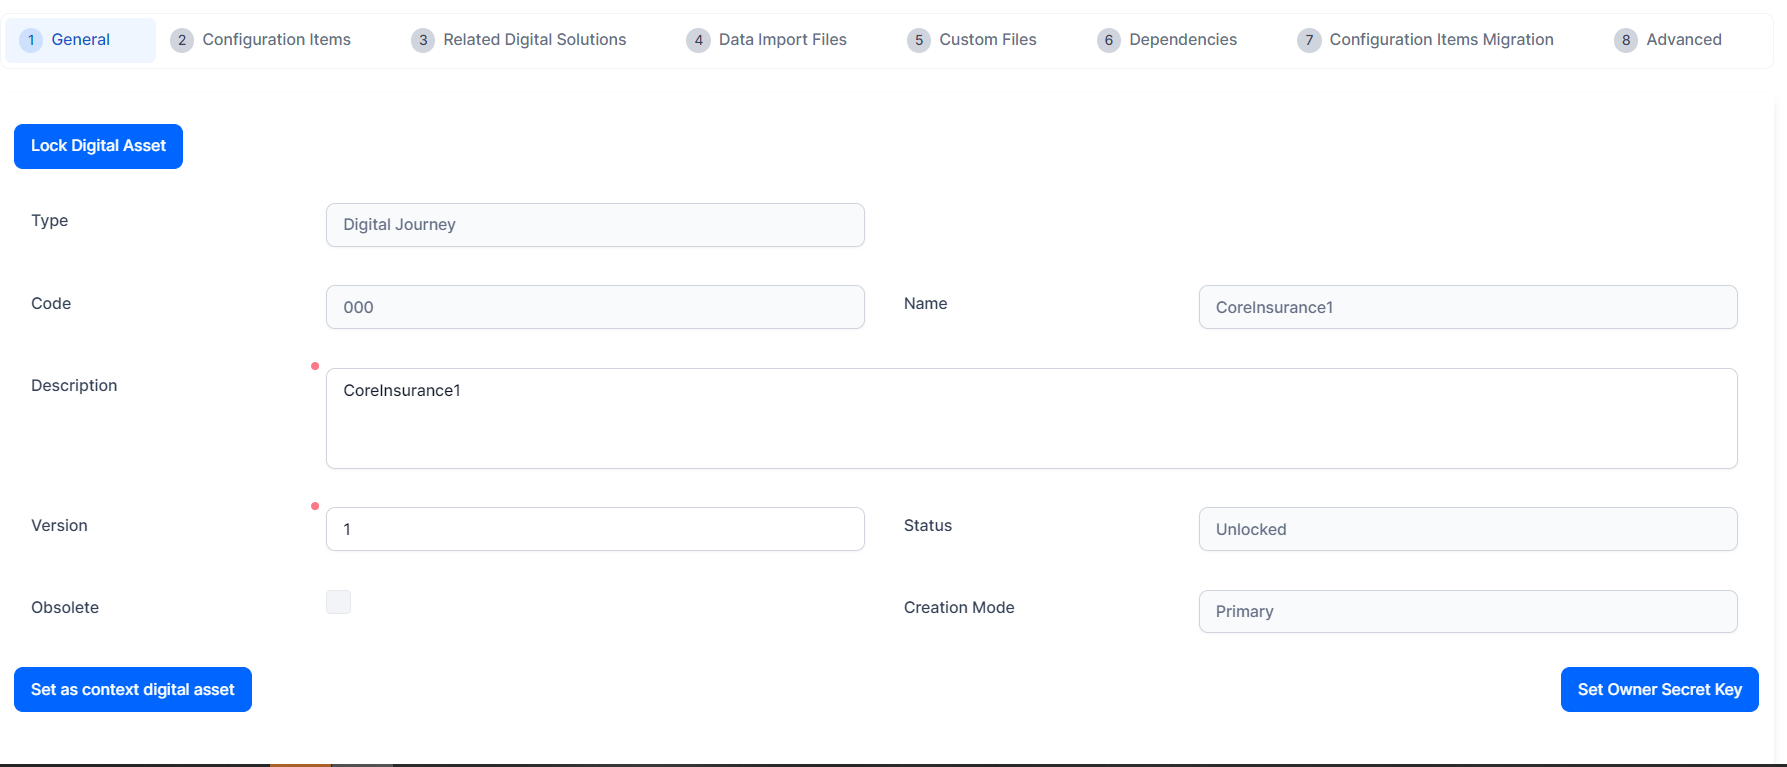
All the configuration items created while the context is active are assigned automatically to the digital asset.
To close the context digital asset, click Close Digital Asset.
Unlock Sealed Digital Assets
Some official FintechOS digital assets have controlled distribution and are locked by FintechOS to ensure their integrity. In this case, a Set Customization Key button is displayed in the interface. This button allows you to insert an unlock code provided by FintechOS to unlock the asset if you need to edit it.
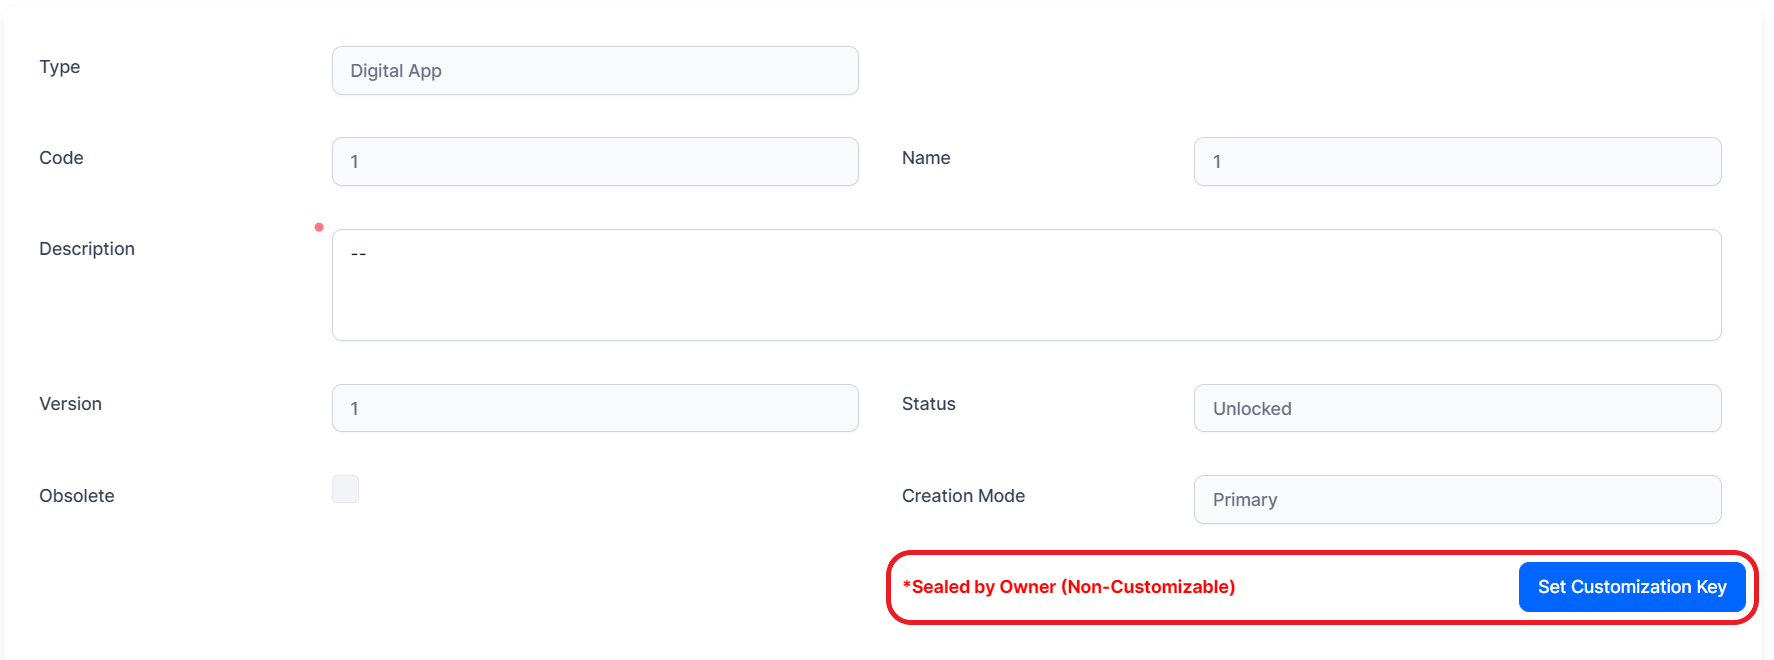
Sealed digital assets cannot be set as context digital assets and do not support the regular lock/unlock mechanism (see Set the Context Digital Asset and Lock and Unlock Digital Assets).
Configuration Items
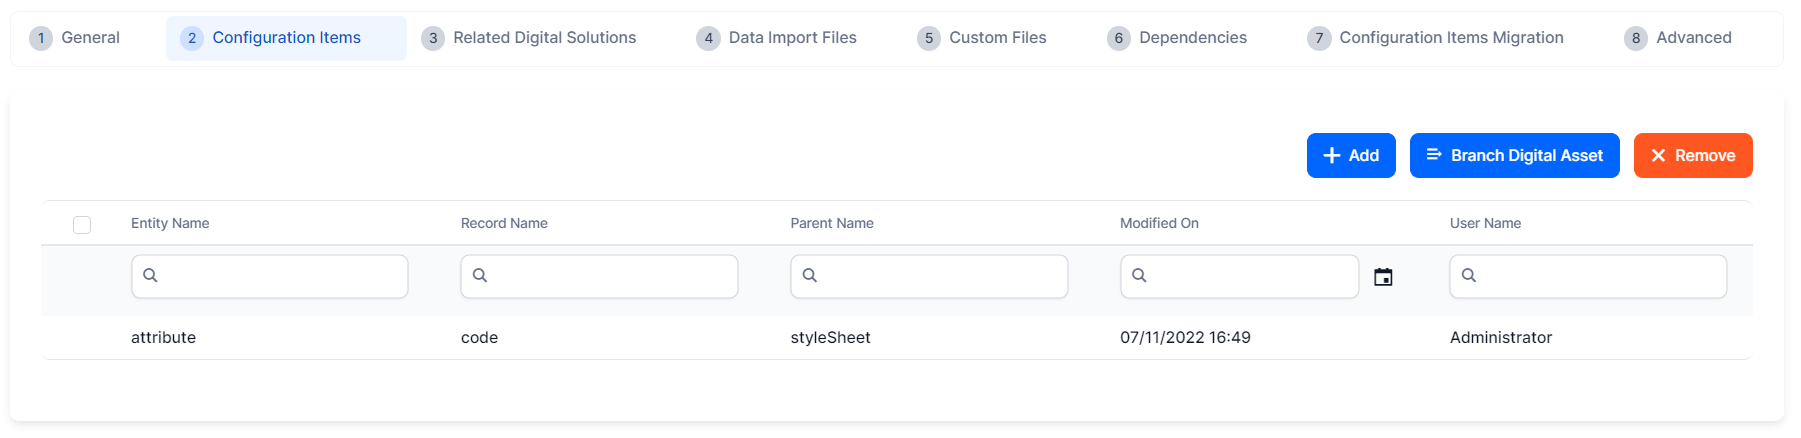
This tab typically includes all the components required for the digital asset to work, such as entities, form driven flows, entity views, scripts, configurations for the automation processors, and any other configurations made while the digital asset was set as context.
You can also use configuration items to distribute ownership over different areas of a business context. For instance, you can manage an entity form in a digital asset that is different from the one that owns the entity, or you can manage a form step in a digital asset that is different from the one that owns the entity form. This is useful when delivering modular business solutions for back office scenarios.
The Configuration Items tab also shows when an item was linked to the digital asset, and by whom. This is useful for keeping track of the modifications brought to the configuration items. They are shown in the last two columns of the Configuration Items grid: Modified On and User Name.
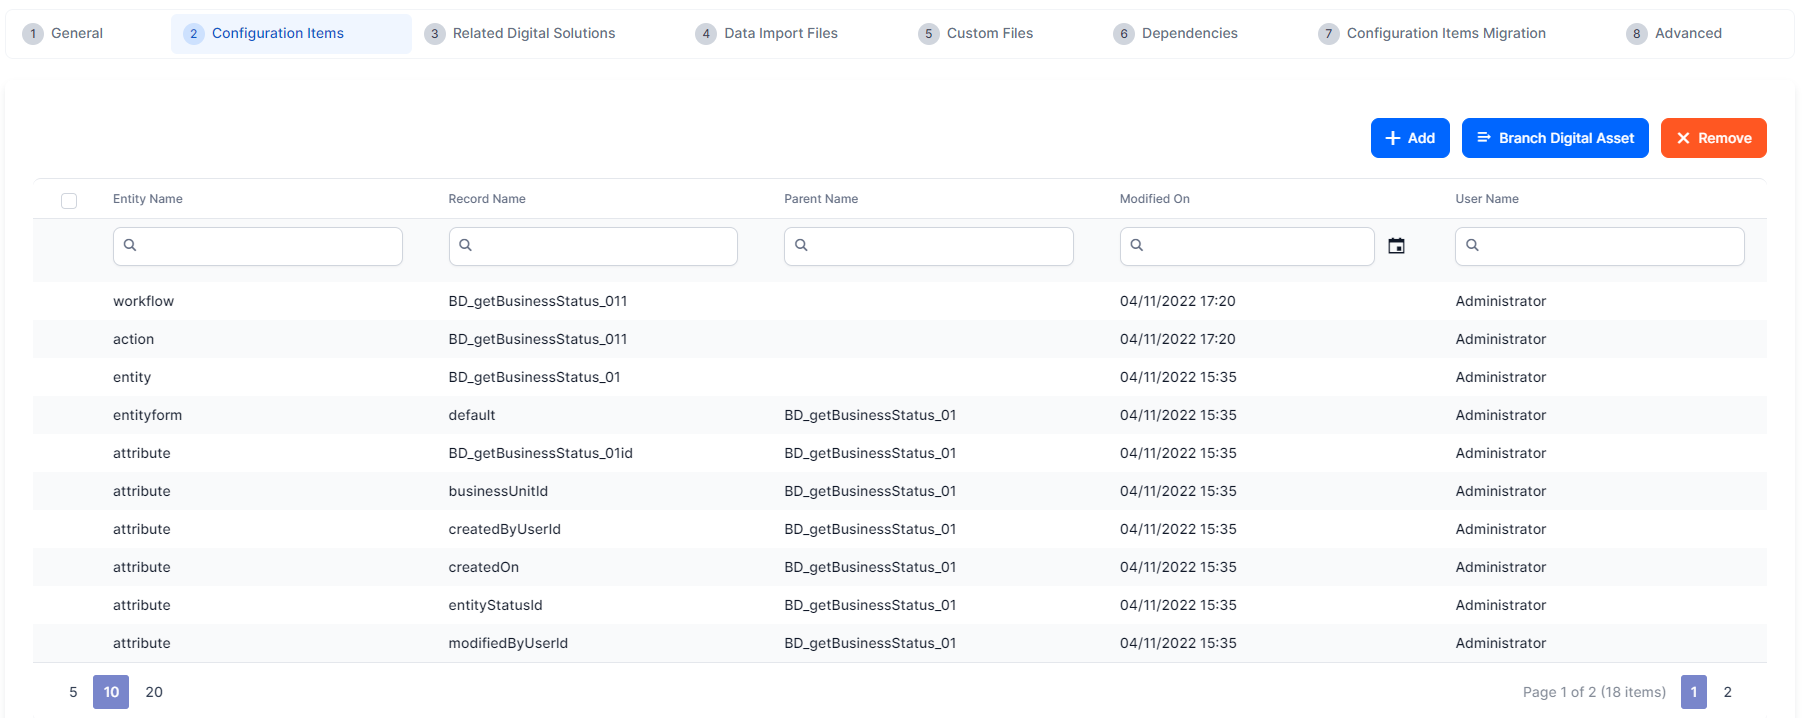
The section tab has three buttons above the grid. The Branch Digital Asset button merges two digital assets by transferring all the configuration items from one asset to the other. By clicking the button from the current asset, the configuration items will be moved to another asset and deleted from the currently displayed asset. For details, see Branch Digital Assets.
Manually Add Configuration Items to the Digital Asset
To add configuration items to the digital asset, click Add.

The Add Digital Asset Configuration Item page is displayed. The Type field allows you to select the type of configuration item.
The configuration item types compatibility depends on the Digital Asset type:
| Configuration item types | Digital asset types | ||||
|---|---|---|---|---|---|
| Data Model | Digital Journey | Digital App | Data Configuration | Resources | |
| Action Group | ✔ | ✔ | |||
| Action Authorization Type (v22.1.1 or later) | ✔ | ✔ | ✔ | ||
| Advanced Analytics | ✔ | ✔ | ✔ | ||
| Anonymous Frontends (v22.1.1 or later) | ✔ | ✔ | ✔ | ||
| Attribute | ✔ | ✔ | ✔ | ||
| Business Data Model | ✔ | ✔ | ✔ | ||
| Business Entity | ✔ | ✔ | ✔ | ||
| Business Entity extension | ✔ | ✔ | ✔ | ||
| Business Workflow | ✔ | ✔ | ✔ | ||
| Business Workflow Configuration | ✔ | ✔ | ✔ | ||
| Chart | ✔ | ✔ | |||
| Client Script Library | ✔ | ✔ | ✔ | ||
| Code Block | ✔ | ✔ | ✔ | ||
| Configuration Data Definition | ✔ | ✔ | ✔ | ✔ | |
| Custom Form | ✔ | ✔ | ✔ | ||
| Dashboard | ✔ | ✔ | |||
| Data Import Template | ✔ | ✔ | ✔ | ✔ | |
| Data Set | ✔ | ✔ | ✔ | ||
| DB Task | ✔ | ✔ | ✔ | ||
| Digital Document | ✔ | ✔ | ✔ | ||
| Digital Journey | ✔ | ||||
| Email Template | ✔ | ✔ | ✔ | ✔ | ✔ |
| Endpoint | ✔ | ✔ | ✔ | ||
| Entity Form Step | ✔ | ✔ | |||
| EntityForm | ✔ | ✔ | |||
| Entity Unique Constraint (v22.1.1 or later) | ✔ | ✔ | ✔ | ||
| EntityView | ✔ | ✔ | ✔ | ✔ | |
| Formula | ✔ | ✔ | ✔ | ||
| Formula parameter mapping | ✔ | ✔ | ✔ | ||
| Menu Item | ✔ | ✔ | |||
| Option Set | ✔ | ✔ | ✔ | ✔ | ✔ |
| Portal Profile | ✔ | ✔ | ✔ | ||
| Report | ✔ | ✔ | ✔ | ||
| Schedule Job (v22.1.1 or later) | ✔ | ✔ | ✔ | ||
| Schedule Service (v22.1.1 or later) | ✔ | ✔ | ✔ | ||
| Sequencer | ✔ | ✔ | ✔ | ||
| Server Automation Script | ✔ | ✔ | ✔ | ||
| Server Automation Script Library | ✔ | ✔ | ✔ | ||
| Style Sheet | ✔ | ✔ | ✔ | ||
| System Parameter | ✔ | ✔ | ✔ | ✔ | ✔ |
| User Competence | ✔ | ✔ | ✔ | ✔ | |
| Web Api Client Library | ✔ | ✔ | ✔ | ||
| Widget | ✔ | ✔ | |||
where ✔ = compatible
Business workflow configuration can be added as a configuration item to a digital asset of item data model starting with v22.1.11.
Once the configuration item type is selected, the system will automatically display the grid with the available configuration items.
Manually Remove Configuration Items from the Digital Asset
To remove configuration items from the digital asset, click Remove and confirm. This action also removes child dependencies, such as when removing an entity, it removes the entity default view, attributes, default form, or relations. Once removed, the configuration item becomes unallocated and can be used by other digital assets.
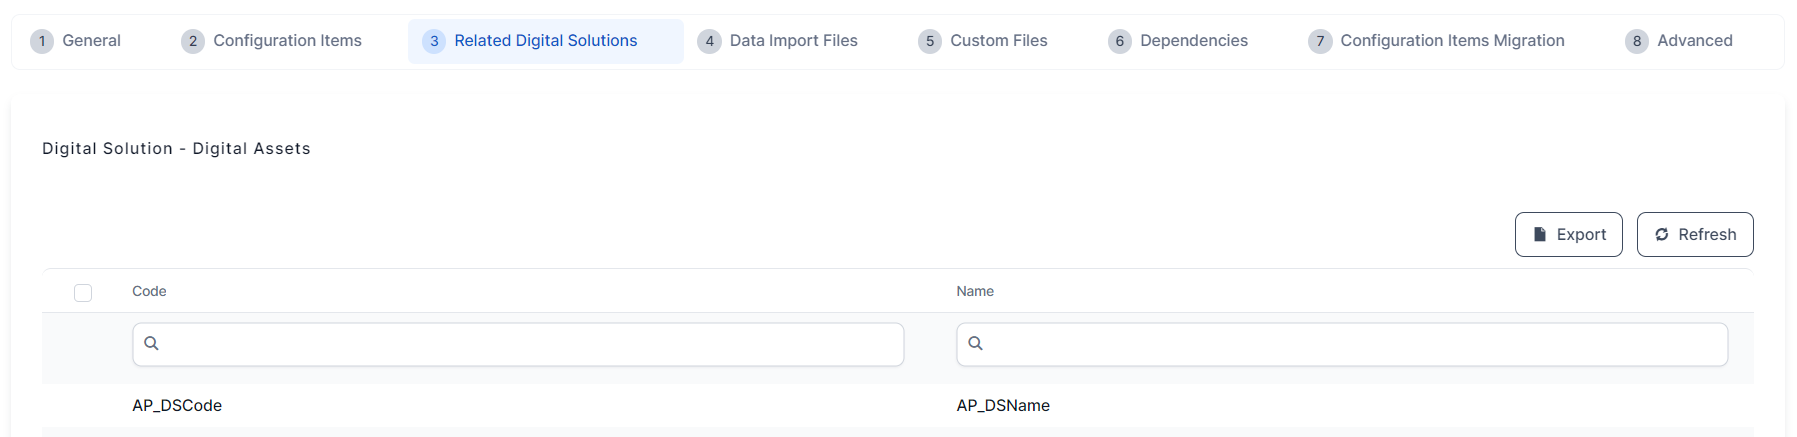
Related Digital Solutions
This section tab displays the Digital Solutions where the digital asset is included.
Data Import Files
This section tab displays the Data Import Templates and the Configuration Data Definitions which allow you to populate the digital asset’s metadata and data. From here, you can set the configuration items’ templates and the records’ data models that you will use for your imports, then you can perform the actual imports.

- To add a new package, click Insert. Select the Type:
- Based on Data Import Templates
- Based on Data Config Definitions
- Depending on what was selected for the type, two new fields are displayed, Data Import Templates/Data Config Definitions. Select the name of one of the templates/definitions.
- Click Select file. The local File Explorer opens. Select the desired file and add it to the template/definition.
- Click Save and reload.
From this section tab, you can download the templates which were previously displayed:
- Navigate to the Application Data Import Files grid.
- Select from the grid the template you wish to consult.
- Click the desired record in the grid. The Edit Application Data Import File page opens.
- To download a file already imported into the digital asset, click the file and it will download on the local drive.
Custom Files
Custom files are used to customize portal profiles, allowing you to change the appearance of theFintechOS Portal instances. Depending on your preferences, these folders can contain:
- style sheets (CSS) to style your application layout (change fonts, colors, margins, etc.)
- different types of images that you want displayed on your application,
- PDF files (Terms and Conditions, Loan Agreement, GDPR),
- Java script files.
In this section you can upload the custom and custom-on-demand files needed by your digital solution.

It is advisable to pack your custom files in a digital asset and use the import wizard for an automated publishing of custom files on the application server. Through this wizard, you can specify on which portal/application you want to apply the custom files.
Custom files are refreshed and published on portal level only through the deploy process. A simple upload on the digital asset level is not going to lead on the portal where the information is intended for.
The files should be in .zip archive format and it is advisable to archive them in a folder with the same name as your Digital Asset. In case your custom files contain a resource with the same name as an existing one, the existing resource file will be overwritten.
Custom and Custom-on-demand Folders Structure
- A custom folder contains the video custom components (css, images, and javaScripts:
dcs-sdk.jsandonfido.min.js) and has the below structure:Copy├── {Digital Asset Name}
│ └── css
│ └── img
│ └── js - A custom-on-demand folder contains the liveness component resources and has the below structure:Copy
├── {Digital Asset Name}
│   └── common
│   └── liveness
│   └── usermedia
│   └── video
│   └── zoom
To add custom or custom-on-demand files to click the Add file button to upload the Content For Custom Folder or the Content For Custom On Demand Folder.
Dependencies
Dependencies allow you to share resources between digital assets by providing the current digital asset with read-only access to configuration items that belong other digital assets.

To add more dependencies for the digital asset:
- In the grid labeled Digital Asset Dependencies, click Insert.
- The Add Digital Asset Dependency opens with the field labeled Referenced Digital Asset. Click the drop-down arrow and select from the list the digital assets.
- Click Save and close.
Repeat as many times as needed.
To delete a dependency, in the grid, select the digital asset by clicking once, then click Delete.
Configuration Items Migration
Migration is the process of importing a deployment package (including deployment packages from prior releases that don't support configuration management) into an existing digital asset. This allows you to easily upgrade your legacy applications to take advantage of the configuration management capabilities available starting with release 21.2 (digital assets, digital solutions, digital solutions packages, etc.).
To migrate a deployment package, follow the steps:
- Expand the Choose deployment package for migration field and select the deployment package to migrate to.IMPORTANT!
You cannot migrate an obsolete digital asset. If you attempt to migrate an obsolete digital asset, a toast message is displayed to inform the user. - Click Migrate. If the migration is successful, a grid will be displayed below the deployment package. From the grid, use the Export button to export records and see all deployment packages that were migrated.
Run server scripts in the Advanced tab
In order to re-initialize sequencers, troubleshoot data entry errors, or turn formulas from draft to actives, create an digital asset that contains automation scripts that can either call an endpoint, database tasks, or server side methods.
In theAdvancedtab, add the automation script:
In theBefore Importtab if the script should be executed before the import of the digital solution package on the destination environment.
In theAfter Importtab if the script should be executed after the import of the digital solution package on the destination environment.
For the scripts to import and run successfully, the resources used by it must be available on the destination environment.
Delete Digital Assets
To delete a digital asset, you must first unallocate all its configuration items:
- Go to Main Menu > Configuration Management > Digital Assets.
- In the digital assets list, double click the digital asset you wish to delete.
- Open the Configuration Items tab, select all the configuration items and click Remove.
- Once all the configuration items have been removed, click Save and close to return to the Digital Assets List.
- From the list, select the digital asset and click Delete.
- Confirm the deletion by clicking the Yes button when the pop-up question appears with the question Delete one record?
Import Digital Assets
Sometimes, you may need to import a digital asset on your environment. This is often the case when distributing applications that are based on a digital asset.
Imports based on deployment packages are deprecated and provided only for backward compatibility. The recommended method for importing digital assets is to use Digital Solutions Packages.
Prerequisites
- Check the minimum required version of the package and the version of the FintechOS Studio.
- Check the dependencies of other digital assets.
- Make sure the digital asset status is not obsolete.
- In FintechOS Studio, go to Main Menu > Configuration Management > Deployment Packages v1 (deprecated).
- Click Import deployment package icon. The local File explorer window opens. Select from the local drive the file you wish to import.
- A new form is launched where the xml summary is displayed and you can indicate the digital solution.
- Use the deployment package's embedded digital solution (display xml OPIS within brackets - digital solution name, apps included) or, to use an existing digital solution on that environment, select it from a drop-down list, or create a new digital solution.
- Confirm the digital solution selection and click Import to start the job.
The system checks the deployment package metadata and if no errors occur, the metadata is successfully added into the database.
If the are any errors, the system displays a toast message with the reason why the package could not be imported. To see the warnings, consult the log of the selected deployment package. For more information, see Deployment Package Logs.
On import, the system checks the package hash to see if the package content has been altered. If so, the import may still proceed with a warning (which is logged in Deployment Package Import Log), or it may be denied and the package will not be imported (an error is logged that the package content was altered).
The following messages may be displayed by the system on import:
| Field | Status |
|---|---|
| A newer application is already installed | Error |
| Application will be upgraded | Warning |
| New | Passed |
| You cannot upgrade an obsolete application | Error |
| Existing platform version is lower than minimum platform version required | Error |
Lock and Unlock Digital Assets
To lock or unlock digital assets, you need to have the Release Manager security role assigned to your user account. For more information, see Security.
Locking a digital asset prevents further modifications to its configuration items. The configuration items are still functional, i.e. you can still use the asset's digital journeys to create new records for instance, but you can no longer edit them in FintechOS Studio. This allows you to ensure compliance with your organization's application implementation workflow, for example when you wish to mark a stable version to be used for release.
When you lock a digital asset, its locked state is indicated in red in the FintechOS Studio header (when the digital asset is currently set as the context digital asset):

If you wish to resume development on a locked digital asset (for instance to start working on the next release of your application), you have to unlock it. This reopens the asset's configuration items for editing and increments the digital asset's version number. The changes in the asset's state and version number are indicated in the FintechOS Studio header when the asset is currently set as the context digital asset:

How to Lock a Digital Asset
- Log in to FintechOS Studio using a user account with the Release Manger security role.
- Go to Main Menu > Configuration Management > Digital Assets.
- From the Digital Assets List, open the digital asset you wish to lock.
- In the General tab, click Lock Digital Asset.
How to Unlock a Digital Asset
- Log in to FintechOS Studio using a user account with the Release Manger security role.
- Go to Main Menu > Configuration Management > Digital Assets.
- From the Digital Assets List, open the digital asset you wish to unlock.
- In the General tab, click Unlock Digital Asset.
Branch Digital Assets
Branching allows you to merge applications by transferring all the configuration items from one digital asset to another. This empties the source digital asset and tags it as Obsolete. You cannot reactivate a digital asset or use it in any other way once it is obsolete.
To branch a digital asset:
- In FintechOS Studio, go to Main Menu > Configuration Management > Digital Assets.
- From the Digital Assets List, open the source digital asset (the digital asset whose configuration items you wish to transfer).
- Open the Configuration Items tab, and click Branch Digital Asset.
- In the Branch the current Digital Asset window, select the destination digital asset from the dropdown box. Make sure that the target digital asset is not locked or obsolete.

- Click Save.
- The configuration items is transferred to the destination digital asset and the source asset is emptied and marked as obsolete.