Add and Configure Steps
Grouping entity information in steps based on specific criteria (business, operational or other relevant to you) is useful especially in complex financial activities when you have to display a lot of information on the entity forms and user journeys.
This sections walks you through the configurations that you need to follow to add steps and configure them.
1 Add step

- On the configuration page of the form driven flow whose information you want to group in steps, click the Steps tab.
- In the Entity Form Steps section, click Insert. The step configuration page appears, displaying only the general tab.
- Provide the following fields:
Name - The name of the step that will be used by system.
Display Name - We recommend you to use PascalCaseNames (upper camel). The Name starts with an uppercase letter, as do all additional words.
Step Type - Select either Default, Processor (for more info, see Custom Processor Steps), or Action (for more info, see Action Steps). - Click Save and reload. The step configuration page appears, containing more tabs, displayed by default on the General tab. You can configure the step, by clicking the tabs and making the desired settings.

2 Design the step layout
Click the UI tab . You can design a complex layout by providing the HMTL code, or you can create a classic data form layout by using the HTML elements available on the toolbar of the HTML editor.
The step UI template supports the following tokens:
| Token | Description |
|---|---|
| {AttributeName} | Displays the corresponding field on the step. NOTE The attribute name must be included between curly brackets; otherwise, a simple text will be displayed on the page instead of the actual field. |
| {#RelationshipName, view: viewName#} | Generates a view provided by relationship and by view. The viewName is optional and specifies which view to generate. If viewName is not provided, the default view will be displayed on the data form. |
| {#RelationshipName, view: viewName, editmode:cell#} | Generates a view provided by relationship and by view. This view allows inline editing meaning that you can edit cells one by one directly in the grid, without opening specific records. NOTE In order to activate inline editing for a specific cell, you must tick the Allow Editing checkbox displayed on the entity view column (View > View columns). |
| {#MKT_CampaignResponse_MKT_Campaign,nodelete,noinsert#} | Generates a view provided by relationship and by view, but the Delete and Insert buttons are not displayed on the view. You can apply the same logic (similar tokens) for the Export (noexport) or Refresh (norefresh) if you no longer need them on the view. |
| {$ChartName$} | Generates a chart based on the provided chart name. |
| {? entityName, view: viewName ?} | Allows you to display a view from another entity. For information on how to use it, see Display View from Another Entity. |
This is how a step might look like in the Portal UI:

In the HTML template, you can link HTML elements (labels) to attributes. For information on how to do it, see Link Labels to Attributes.
When designing the UI template of a step, you can also add custom buttons. For more information, see Work with Buttons.
3 Provide the code to be executed after the step is generated (optional)
Click the Advanced tab and, in the After Events field, provide the code to be executed after the step is generated (opened).
Click Save and Close . The new section will be displayed in the Entity Form Sections list.
Variables and functions declared in other steps or in the form driven flow's Advanced section are not visible in the current step. To access such variables and functions, use the formData.formScope object.
4 Define who has access to the step
If your business case requires that specific steps are available to designated roles within your organization, click the Security Roles tab and add the security roles who should have access to them. If no security roles are added here, all users will be able to view the section.
5 Actions
You can set specific Form Actions to trigger automatically when entering or saving a step, if specific conditions are met.
There are two grids displayed: On Step Enter and On Step Save.
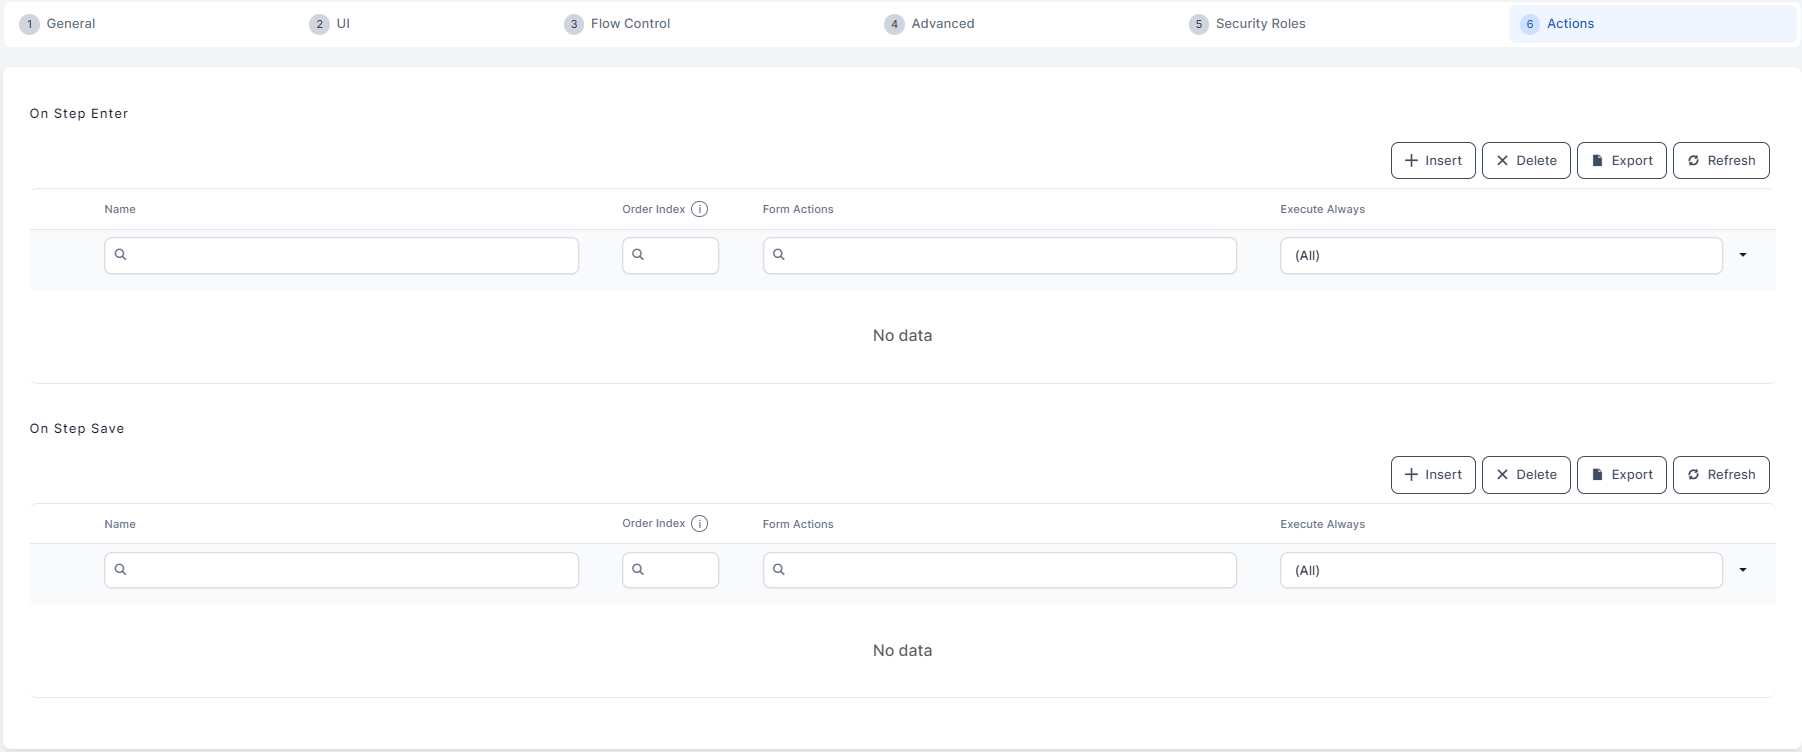
Depending on when you wish to trigger the actions (either on entering or saving the step), in the corresponding grid:
- Click Insert to add a new action.
- Fill in the following:
- Click Save and Close.
|
Field |
Description |
|---|---|
| Name | Insert a name for the action. |
| Action type | This is automatically filled based on the grid you are populating (On Step Enter or On Step Save). |
| Condition expression | Insert the condition(s) that must be met to trigger the action. For details, see Apply Conditional Navigation Rules for how to define a rule expression. |
| Form Action | Select the form actions(s) you wish to trigger from the configured Form Actions. |
| Execute Always | By default, the action is executed only when the condition expression is met. Checking the Execute Always option disregards the condition expression and always triggers the action. |
6 Save the step
Click Save and close. Add as many steps as you need, then either continue with the journey configuration or save the changes by clicking Save and close.
This feature makes it possible for a user to add an automation processor such as Computer Vision or eSign or Video Streaming Processor or Face Recognition to a step without writing code. This functionality aids the user to rapidly build a fully automated digital journey with multiple steps and to easily call processors to the flow. To do so:
- From the main menu, select Digital Experience > Customer Journeys > Form Driven Flows.
- Select the Form Driven Flow you wish to edit by adding a processor to one of its steps.
- After opening the form driven flow, click 4. Steps to add a new step.
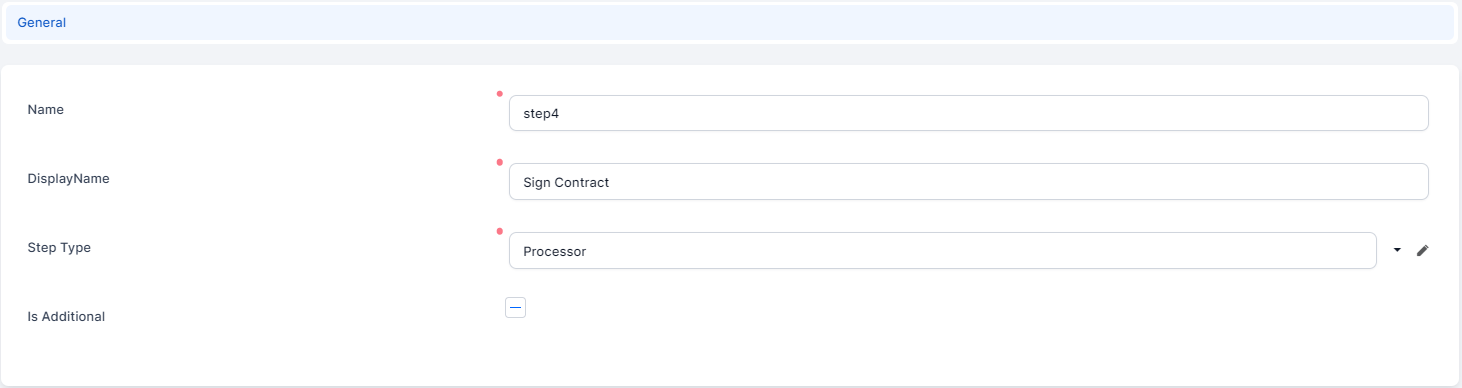
- Click Insert and fill in the name of the step, display name and for Type from the Option set select the Processor.
- Click Save and reload. The general page will open.
- Fill in the fields:
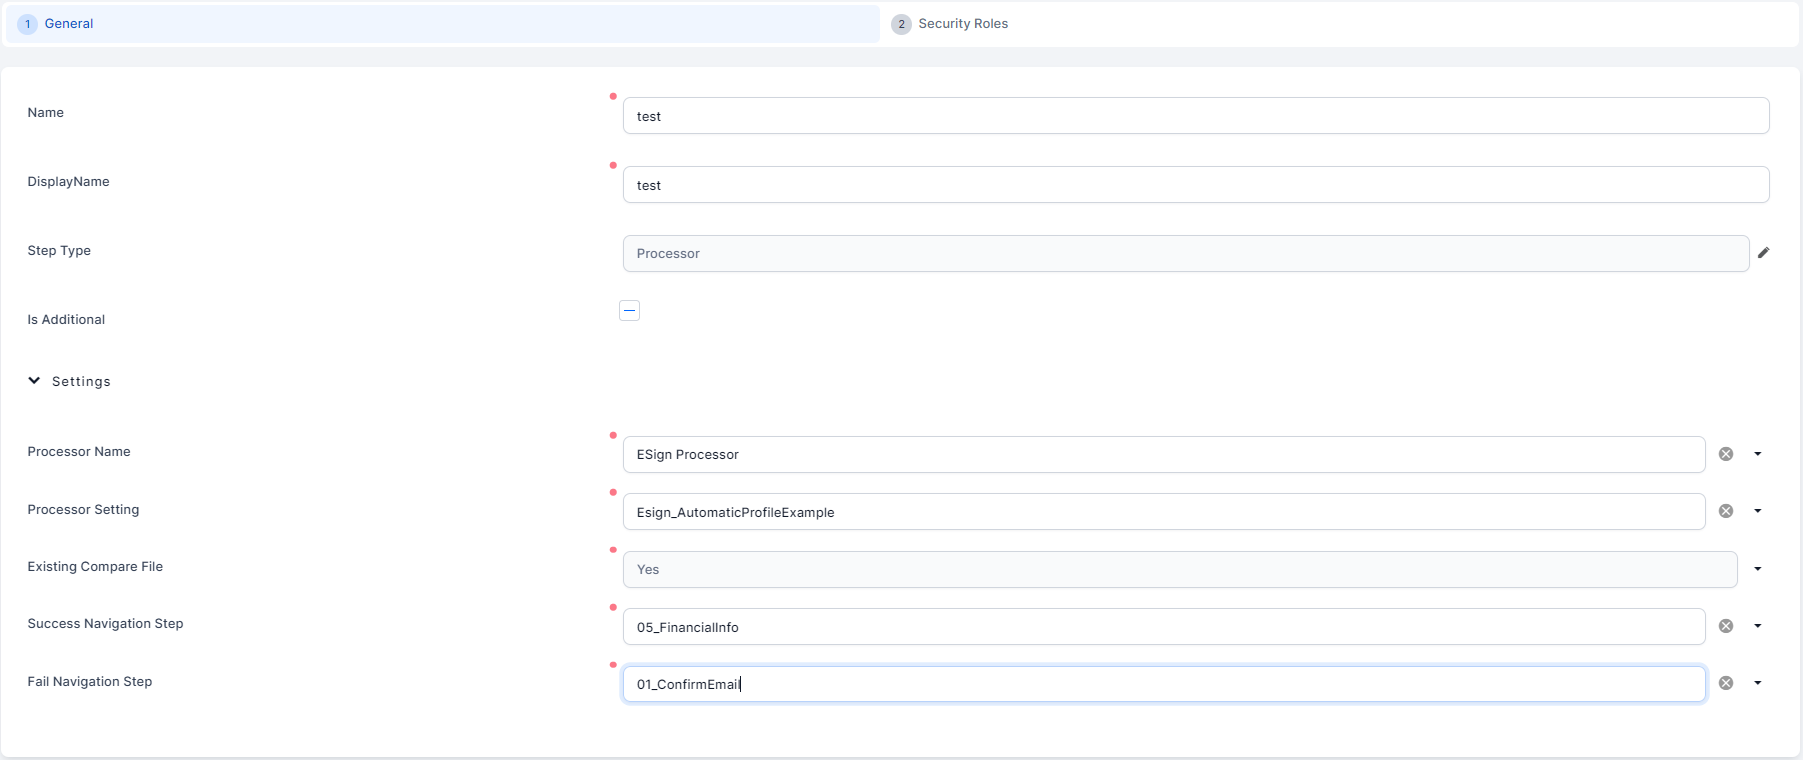
Fields Description Name It is automatically filled. It is the name of the step. Display name It is automatically filled. It is the name of the step. Step Type It is automatically filled. It is the name of the step. Processor name Select the name of the processor. Processor settings Select the settings you configured earlier for the processor. Existing Compare file When using the Face recognition or Face recognition with Liveness, this field enables the system to compare the selfie with the photo for an ID. Success navigation step Select the step you wish to be next if the processor step is a success. Fail navigation step Select the step you wish to be next if the processor step is a failure. - Click Save and reload.
- Add the proper security roles for this step by clicking Insert and choosing one of the security roles. For more details, see Security Roles. Click Save and close. Repeat for as many steps as needed.
This feature makes it possible to trigger an action created in Form Actions and add it to its own step. It looks like the default step without an UI.
- From the main menu, go to Digital Experience > Customer Journeys > Form Driven Flows.
- Select the Form Driven Flow you wish to edit by adding an action to one of its steps.
- After opening the form driven flow, click Steps to add a new step.
- Click Insert and fill in the name of the step, display name and for Type from the Option set select the Action.
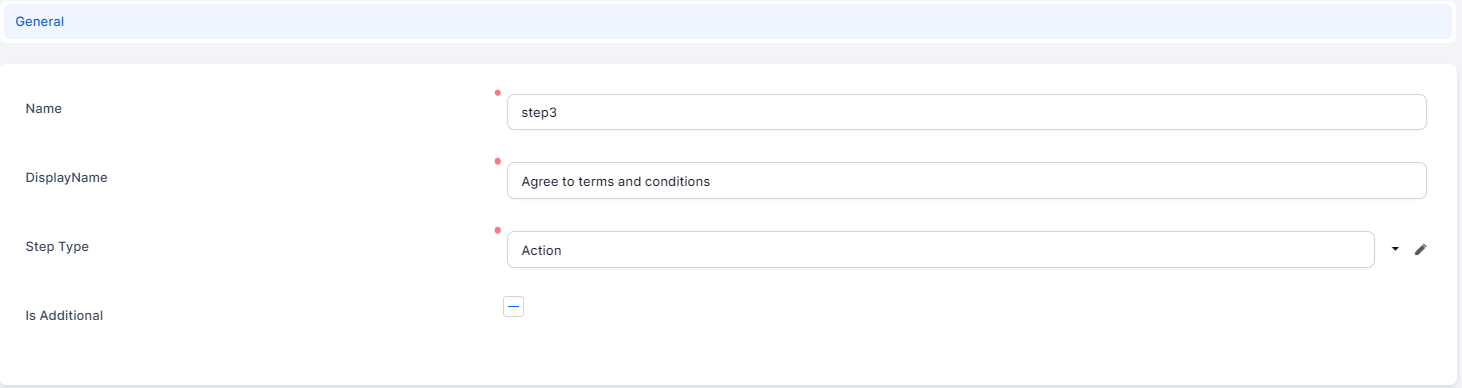
- Click Save and reload. The General page will open.
- Fill in the fields to configure the Flow Control, Advanced, Security Roles and Form Actions. They behave as for a default step.
- Click Save and reload.
- Add the proper security roles for this step by clicking Insert and choosing one of the security roles. For more details, see Security Roles. Click Save and close. Repeat for as many steps as needed.