Security Roles
A security role is a set of privileges and the level of access to various actions/functions within the platform. Security roles allow you to configure the security items, that is, the access privileges on CRUD operations for entities in the data model.
Users with elevated privileges (admin users) can control data access by setting up the organizational structure to protect sensitive data and configure various organization layers to allow communication, collaboration, or reporting.
You can grant even more granular access privileges in FintechOS, by associating security roles to digital journeys, workflows, analytics, Portal Profiles, etc. Such security roles are then associated to user accounts, hence those users are able to access those digital journeys, workflows, analytics, or Portal Profiles. Such an example is given in Access to Portal Profiles based on Security Roles. The data is automatically filtered based on the privileges and level of access defined within the security role via the security items.
The most granular level of access privileges you can grant to users in FintechOS is the attribute level.
Default Security Roles
-
Debugger - This is a development role. It is used by the implementation team to debug issues on the Portal using the Debugger in the kit.
-
Developer - Assigned to users who work with configuration items (such as entities and form driven flows) in order to develop digital solutions. Developers can create and configure configuration items, but they cannot lock/unlock them. They can also create Digital Solutions and import/export Digital Solutions Packages.
-
DjAnalytics - This role ensures read access rights for users who work with built-in analytics in digital journeys.
-
Guest - Inherited by the platform; it doesn’t have any special platform access meaning.
-
JobServer - This role is used by the JobServer service to execute scripts from the platform with a specific schedule (see Schedule Jobs).
-
Registered Users - Users with this security role have access rights to edit their account from My Account and to access a minimum list of entities in order to log in without errors in the application.
-
Release Manager - Users with this security role can lock/unlock Configuration Management and create Digital Solutions Packages.
-
User Management - Users with this role can manage the user accounts and user roles without having elevated privileges. System users who have been granted the User Management security role cannot manage existing Administrator users.
-
User Admin (22.1.6 or later) - Allows system users management, but no user roles management. User admins can manage system users and allocate user roles to them, but cannot create/delete user roles or modify existing user roles.
-
Security Role Management (22.1.6 or later) - Allows security roles management, but no system users management. Security role managers can manage security roles, but don't have access to system user accounts.
-
Integration Users - A role designed for integration with other systems. It is not an actual user, but rather a process that authenticates and calls various functions exposed inside the platform.
-
Widget - Inherited by the platform; it doesn’t have any special platform access meaning.
New security roles can be added to the list depending on your business needs. Once you configure the security roles, you can attach them to configuration items (such as form driven flows or reports) on which you wish to enforce access control.
1 Add the security role
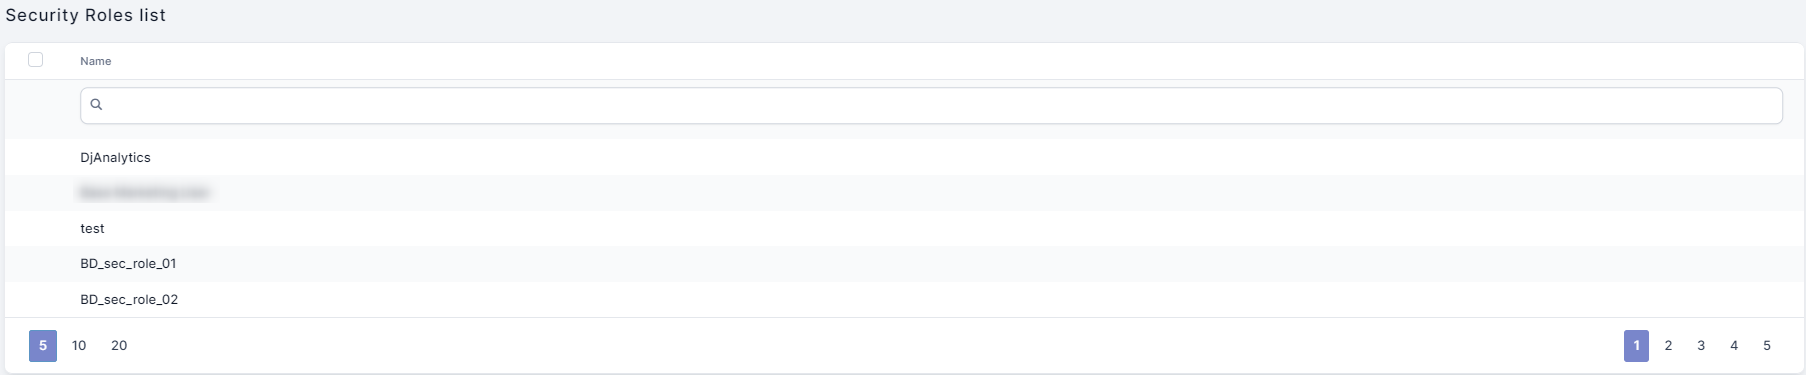
- From the menu, click Security > Security Roles. The Security Roles List page opens.
- Click Insert . The Add Security Role page opens.
- In the Name field, type a name for the new security role.
- Click Save and reload . The Edit Security Role page opens.
2 Assign security items to the security role
Security items specify the entities and the privileges (CRUD operations on those entities) that the security role grants access to.
Users assigned with a security role are able to perform only the CRUD operations on entity records assigned in the security items.
To add a security item, follow these steps:
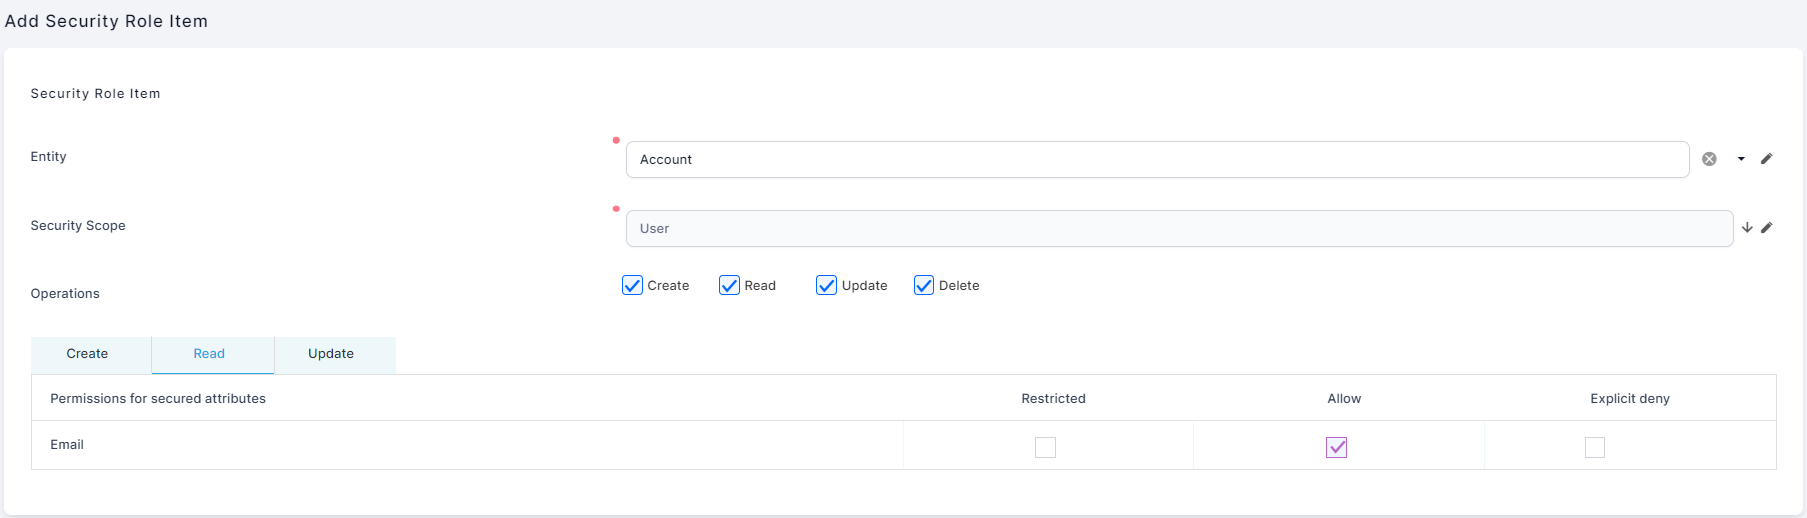
- From the Security Items section, click Insert. The Add Security Role Item page is displayed.
- In the Entity field, type the entity name or click the down-arrow and select it from the list.
- In the Security Scope field, type the level of access or click the down-arrow and select it from the list:
User Privileges to the records owned by the user or assigned to the user.
Parental Privileges to all records owned in the business unit to which the user belongs to, including privileges to the records owned in the child business units.
Business Unit Privileges to all records owned in the business unit to which the user belongs to.
Organization Privileges to all records in the organization regardless of their owner.
- In the Operations field, select the record-level privileges (CRUD operations) for which you want to assign permissions. You can choose one or more of the following:
Read
Update
Insert
Delete
- Click Save and reload.
- If your security role item is an entity with attributes tagged as isSecurable, you can use the Permissions for secured attributes table at the bottom of the page to set the Create, Read, and Update permissions for the entity's secured attributes:
Restricted (default) - Prevents access to the attribute.
Allow - Allows access to the attribute.
Explicit deny - Prevents access to the attribute even if another security role allows access.
- Click Save and close.
3 Edit Security Roles
To edit a security role, from the menu, click Security > Security Roles. The Security Roles List page appears. Double-click the security role that you want to edit. The Edit Security Role page appears. You can edit security roles by changing their name or by adding or removing security role items.
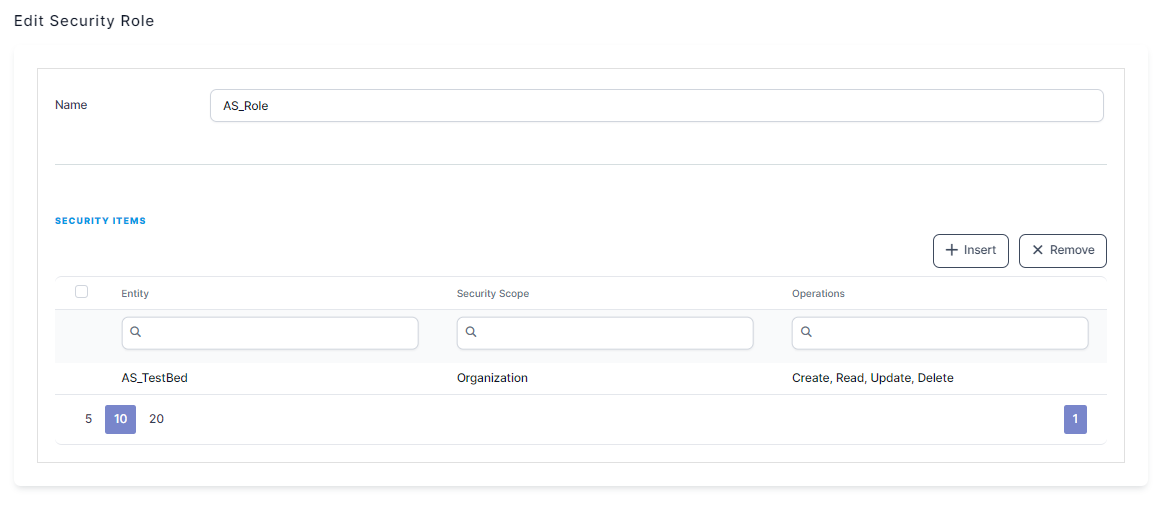
To remove a security item, scroll-down to the Security Items section, select the item that you want to remove and at the top of the Security Items section, click Delete . A confirmation dialog appears. Click Yes and the selected security item is removed from the system.

Make the desired security role changes and at the top-right corner of the page, click Save and close to save the changes.