Portal Profiles
Portal profiles allow you to customize the look and feel of FintechOS Portal instances by changing the: company logo, backgrounds, favicon, system parameters, menus, dashboards, etc. This helps you personalize the user experience you provide to different types of users. For instance, an internal portal that your employees use at work will look and behave differently from a customer facing portal that is used to expose your products and services.
To customize your portals, you define portal profiles and assign them to the desired FintechOS Portal instances. You can reuse your portal profiles by assigning the same portal profile to multiple portals.
Create a Portal Profile
- In FintechOS Studio, go to Main Menu > Digital Experience > Digital Frontends > Portal Profile.
- Click Insert to display the Add Portal Profile page.
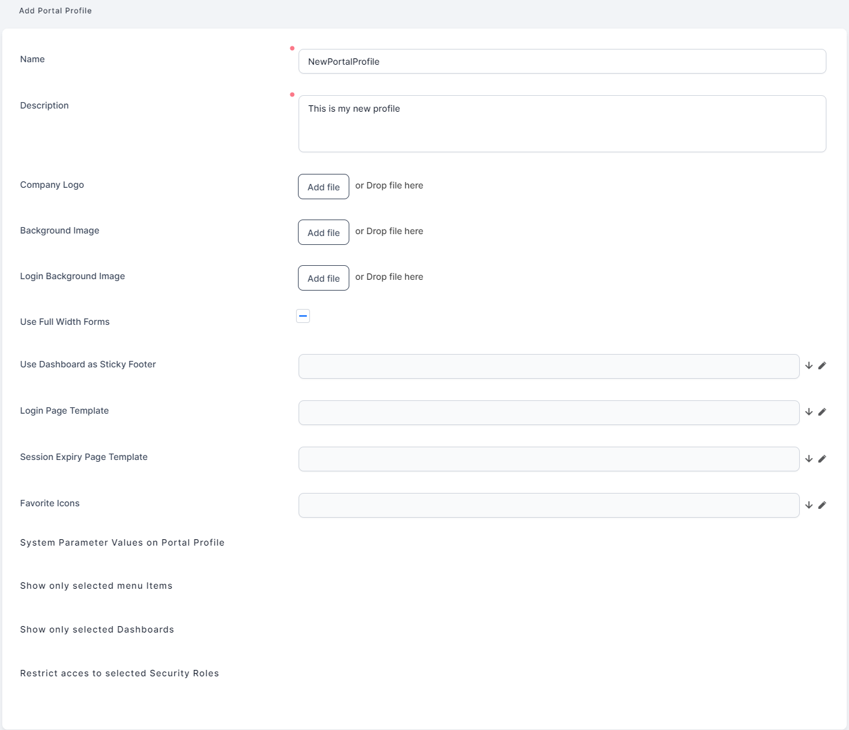
- Enter a Name and Description for your portal profile.
- You can change the Company Logo, Background Image, and Login Background Image by adding the desired image file(s).
- Check the Use Full Width Forms checkbox if you wish the forms displayed in the portal to cover the full width of the screen.
- If you want one of your Dashboards to always be visible at the bottom of the screen, select it in the Use Dashboard as Sticky Footer dropdown.
- If you wish to customize the Login Page Template or the Session Expiry Page Template, use these controls to insert new Custom Page Templates and/or to select one from the list. Otherwise, the default login and session expiration pages will be displayed.
- To customize the favicon, use the Favorite Icons control to insert a new one or select it from the list. When creating a new favicon, you have the option to provide links to different favicon variations depending on the resolution and type of device.

- Click Save and Reload.
- If you want to override specific System Parameters, use the System Parameter Values on Portal Profile grid to insert your changes. You can also disable such a system parameter if you want to temporarily revert it to the global system parameter value.HINT
Some of the system parameters you may use frequently to customize your portal instances are described below:- sys-hide-dashboard-tabs - Shows/hides the dashboard tabs.
- sys-hide-shortcuts-navbar-left - Shows/hides the navigation bar.
- sys-hide-footer - Shows/hides the pgage footer.
- sys-hide-menu - Shows/hides the menu.
- sys-hide-company-logo - Shows/hides the company logo.
- sys-minimal-css - Features a clean, minimalistic styling and design for all basic page elements.
- If you want to filter or disable specific Menu Items, use the Show only selected menu items grid to specify the available menu items and if they are temporarily disabled or not. If the grid is empty, all menu items will be displayed.
- If you want to filter or disable specific Dashboards, use the Show only selected dashboards grid to specify the available dashboards and if they are temporarily disabled or not. If the grid is empty, all dashboards will be displayed.
- Use the Restrict access to selected Security Roles grid to specify the Security Roles that allow access to the portal. If the grid is empty, all security roles will be able to access the portal instance.
- Click Save and Close.
Assign a Portal Profile to a FintechOS Portal Instance
To customize a FintechOS Portal to use a specific portal profile, go to theConfiguration Manager and add the following secret:
| Key Path | Key Name | Key Value |
|---|---|---|
| kv/<environmentName>/<portalName>/app-settings | core-setting-portal-profile | Portal profile name |
The value for the
core-setting-portal-profile secret must match a previously configured portal profile name.You can reuse your portal profiles by assigning the same portal profile to multiple portals.