Processing Loan Repayments
Based on defined product pricing and established parameters, financial institutions can manage the billing and collection process on a loan contract fully automatically. Once the disbursement is performed, Core Banking generates the repayment schedule and sends the payment notifications to the customer on the due date. Automated collection is triggered via integration with 3rd party payments engine or from the customer's settlement account. If funds are not available, overdue amounts and days are calculated and penalties applied.
Once a loan approved and disbursed, you can check the repayment schedule built based on contract details, on the Payments tab, in the designated section, as described in the Viewing a Contract's Repayment Schedule topic. If there are front-end fees, they are notified automatically by Core Banking and you can check them on the Payments tab, in the Repayment Notifications section (even without disbursing the funds). Read about repayment notifications in the Managing Repayment Notifications topic.
When the system reaches the dates that appear on schedule projections, the amounts resulting are made due, and Core Banking automatically triggers the notifications. Depending on the availability of funds in the settlement account and the direct debit setup, Core Banking settles those notifications, marking them with the Recovered status. Any amount that is not recovered on due date stays on the notification, and when funds become available, Core Banking automatically recovers and allocates them to the pending notifications based on the Payment Allocation Method setup at the product level, in the Lean Core tab. When the notifications are recovered, you can see the underlying debit transactions on the settlement account – there is always such traceability of the funds. You can also see the automatic payments performed by Core Banking either at contract level or in a dedicated menu, as described in the Viewing Customer Payments topic.
Payment Schedule Types, defined at the Banking Product Factory level, define how Core Banking handles the following:
-
How the interest is calculated (day basis: 30/360, actual/ 360, etc).
-
If the capital repayment is linear or annuity type (same principal for every installment or increasing principal and decreasing interest resulting in a constant amount being due for every installment).
-
Fees you want to include in the repayment schedule.
-
If you allow for manual installment amount to be provided and overwrite automatically calculated one.
-
Frequency of the installment (monthly, every 30 days, etc).
When amounts are not available to cover notified amounts and there is a penalty interest defined for the product, the missed amounts are subject to automatic penalty calculation. Core Banking calculates and notifies the penalty interest daily. All the penalties applied by automated processes at the contract level are visible on the Payments tab, in the Penalties section, as described in the Viewing a Contract's Penalties topic. When the penalty interest is defined, there are specific Operation Items linked to it so that the system knows what types of amounts are subject to penalty: overdue principal, interest, commissions. Alternatively, the penalty interest can be applied to all missed payments. Penalty interest is defaulted from the product level and, if allowed, it can also be amended at contract level.

You can find all the existing transactions, payments, penalties, bank account operations, repayment schedules, schedule versions, repayment notifications for a contract on the Payments tab. The tab has no information to display for contracts in Draft status. Approve the contract to perform any transactions on the contract. Meaningful payment information is displayed here only after performing a disbursement.
Contract transactions are events/ changes performed at the Approved contract's level. Such events are disbursements, reschedule overdues, early repayments, applying payment holidays, returning of amounts, and so on. Read more information about the available transaction types in the Transaction Types Used in Core Banking topic.
The Transactions section within the Payments tab holds all the transactions performed at the contract level, in any status. This section only has information if the contract is in Approved status and transactions were already created.
An event record has the following statuses, visible in the top left corner of any Event page:
-
Draft - the status of a newly created event record that was not yet sent for approval. The event value is not applied to the contract while the event is still in this status. While in this status, you can edit some fields. Approve after editing all the necessary details.
-
Approved - the status of an event record after being authorized. The event value is applied to the contract and you cannot edit any of the event's details. There is no further transition from this status.
-
Canceled - the status of an event record after being canceled. The event value is not applied to the contract and you cannot edit any of the event's details. There is no further transition from this status.
As a best practice, new records or new versions of existing records created on a specific day should be approved on the same day.
To view the events on a contract, follow these steps:
-
In FintechOS Portal, select a contract with Approved status and double-click to open it.
-
Navigate to the contract's Payments tab and view the list of events displayed in the Transactions section.

Here you can see only basic information about the transactions, such as event number, status, date, transaction type, value and the user who created it. -
To view detailed information about the transaction and the repayment schedule generated for the Approved event, double-click the event record to open the Event page:
-
View the following information displayed about each event, with some variations depending on the event type:
-
Transaction status, contract number, customer name, transaction number, type, and currency, all displayed in the header of the page.
The following details are displayed in the body of the page:
-
Event date and value. Contract events added through API integration also contain an external identifier.
-
Contract's financed and available amounts, and the installment method used for calculating the schedule.
-
The event's results, in this example, the results of a disbursement event: amount of the installments, repayment day and tenor of the contract in months.
-
-
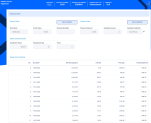
In the Contract Repayment Schedule section, view the information about each of the installments that are part of the repayment scheduled calculated as a result of performing the transaction:
-
Number of the repayment schedule version detail, date when the installment must be paid, value remaining to be repaid from the contract value at the moment of this installment, value of the interest and of the principal calculated for this installment, and total value of the installment to be paid.
-
You can add events to an approved contract via Core Banking's user interface or through API calls, using the Core Banking endpoints. Read more about these endpoints in the Core Banking Developer Guide.
In order to add events to a contract through the menus available in Core Banking, follow these steps:
-
In FintechOS Portal, select a contract with Approved status and double-click to open it.
-
Navigate to the contract's Payments tab and click the Insert button above the Transactions section. The Event page is displayed.
-
Fill in the following fields, common to every transaction type:
-
Event Date - This is pre-filled with current date.
-
Transaction Type - Select from the list the transaction type. Only the transaction types associated with the banking product which is at the base of the contract are displayed here.
Other values are automatically completed: contract, customer, and currency.
-
-
Click the Save and Reload button.
The event is saved in Draft status and a transaction number is automatically generated for it. The Edit Contract Event page corresponding to the selected transaction type is displayed. A series of value fields are automatically calculated and their values are displayed. -
Depending on the selected transaction type, follow the instructions for each event type as defined in the corresponding topics:
-
Disbursement - described in the Disbursing a Loan topic
-
Early repayment - described in the Refinancing a Loan By Performing an Early Repayment topic
-
Reschedule Overdues - described in the Rescheduling the Overdue Amounts for a Contract topic
-
Payment Holiday - described in the Applying Payment Holiday to a Loan topic
-
Returned Amount or Goods - described in the Working with Returns topic.
-
-
After defining the event as described in the corresponding page, save it.
If the event value meets the business requirements defined within Core Banking, the event is saved. Otherwise, an error message appears. Change the values as instructed in the message and try saving the event again.
While the event is in Draft status, you can modify all the event's fields except Transaction Type. The event value is not applied to the contract while the event is still in this status.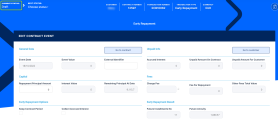
Depending on the selected transaction type, new sections are displayed at the bottom of the page, containing the contract repayment schedule for the event and any generated notifications. -
If it appears, click the Calculate/ Simulate Early repayment/ Simulate repayment schedule/ Simulate reschedule overdues buttons (the displayed button depends on the selected transaction type) to view the details of each installment.
For Reschedule Overdue transaction type, select from the list the overdue payment notifications that you wish to reschedule.
-
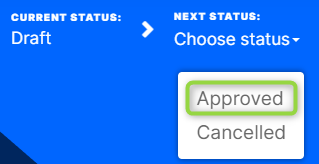
Approve the event by changing its status to Approved in the upper left corner of the Event page.
-
Confirm the change of status in the Confirmation window, clicking Yes. The event is now in Approved status.
The event value is now applied and visible in the contract's Payments tab -> Transactions section.
All existing versions of the contract in Contract Version Draft status are automatically changed to Contract Version Closed when a payment event is approved for that contract.
Core Banking automatically generates notifications for each installment that has to be paid for existing contracts that disbursed various amounts to customers. There can be various types of notifications generated for fees, commissions, payment holidays, and so on. Core Banking also assists you reconcile wrongly processed cases and other situations resulted from delayed processing/ wrong updates. Thus, depending on your user rights, you can manually add notifications for an active contract based on lending product types, term loans, and mortgages, or add notifications for amounts to be recovered even if there is no active contract. Core Banking includes all such manual notifications in the recovery processes.
All the repayment notifications that are not paid in full after their maturity dates are subject to automated penalty calculation processes performed by Core Banking. Thus, for repayment notifications linked to a contract, Core Banking uses the penalty interests defined within the interests list attached at the banking product level, and for repayment notifications not linked to a contract, it uses the penalty interest list specified in a system parameter.
All the
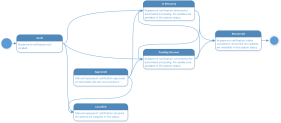
Front-End Fee commission types with Once periodicity type applied to a contract are notified and must be paid when the contract is approved. The Core Banking system parameter FrontEndFee defines the type of commission that is automatically notified at the contract approval.A repayment notification record has the following business workflow statuses:
-
Draft - the status of a newly created repayment notification record, either automatic or manual.
-
Approved - the status of a manual repayment notification record after being authorized by a user with notification approval competencies. While in this status, you cannot edit the record's details. From this status, the record is picked up by a scheduled job and its status is automatically changed, depending on the direct debit settlement settings. If the
Direct Debit Settlement Accountfield at the contract level =True, then the manual notification's status changes to In Recovery, otherwise it changes to Pending Recover. -
Canceled - the status of a manual repayment notification after canceling it straight from the Draft status. You can only cancel a manual notification if its
Total Amount=Remaining Value. -
Pending Recover - this is a system status applied to repayment notification when
Direct Debit Settlement Accountat the contract level is set toFalse. No updates are available in this system status. -
In Recovery - this is a system status applied to repayment notification when
Direct Debit Settlement Accountat the contract level is set toTrue. No updates are allowed on the record. -
Recovered - the last status of a repayment notification, after the complete recovery of the notification's debt. No updates are allowed on the record.
The repayment notification status transitions are illustrated below:
Core Banking enables you to access notifications in several places, for your convenience.
To view the notifications generated for a specific contract, follow these steps:
-
On the Contract page, navigate to the Payments tab > Repayment Notifications section.
-
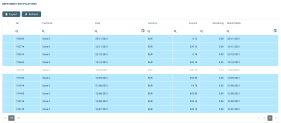
View all the repayment notifications generated for the contract. This section only has information if the contract is in Approved status and disbursements were already performed.
Repayment notifications highlighted in blue are already paid, allocated or closed to payment, while the ones not highlighted remain to be paid.
-
View the information is displayed about each notification:
-
Number, date, and status of the notification
-
Customer and currency of the contract
-
Amount of the installment for which the notification was generated
-
Remaining amount from the installment to be paid
-
Maturity date of the notification, automatically calculated adding the value of the
Grace period for repaymentfield at the banking product level to the notification date.
-
To access all the notifications created in Core Banking, follow these steps:
-
In the FintechOS Portal, click the main menu icon and expand the Core Banking Operational menu.
-
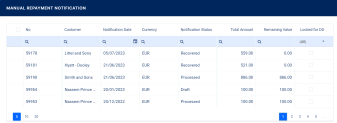
To access only manually captured notifications, click Manual Repayment Notification menu item to open the Manual Repayment Notifications page.
-
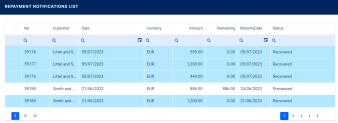
To access automatic and manual notifications, click Repayment Notification menu item to open the Repayment Notifications List page.
-
To view the details of a repayment notification, double-click the desired record. The Edit Repayment Notification page is displayed for automatically generated notifications, or the Edit Manual Repayment Notification page for manual notifications, both presenting the repayment notification details.
NOTE
Automatically generated notifications can't be edited! You can only edit the details of manual notifications inDraftstatus. -
View notification specific data in the Repayment Notification section:
-
Repayment Notification No. - The number of the repayment notification record.
-
Customer - The customer for whom the notification was generated.
-
Currency - The currency of the notification.
-
Contract - The number of the contract for which the notification was generated.
-
Notification Date - The date when the notification was generated.
-
Maturity Date - The maturity date of the notification. This is calculated by adding the value of the
Grace period for repaymentfield at the banking product level to the notification date. -
Source Bank Account - The bank account from where the notified amount should be allocated.
-
Total Amount - The total amount to be paid within the notification (the sum of all the details' values).
-
Repayment Description - A description of the manual notification.
-
-
View details (lines) of the notification in the Repayment Notification Details section:
-
Operation Item - The operation item for which the notification detail is generated.
-
Value - The value of the notification detail.
-
Remaining Value - The remaining value still to be paid from the notification value.
-
Is Paid - This checkbox is automatically marked as true when the full amount is allocated to the detail value. You cannot change this value.
NOTE
Notification details are automatically marked as paid when a repayment transaction performed and approved for the contract is allocated by the system to cover the value of the notification detail.
-
-
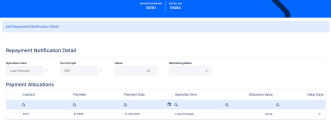
To view more information about a notification detail, double-click it to open the Repayment Notification Details page:
-
View information about the payments allocated for the notification details in the Payment Allocation section:
-
Payment No. - The number of the payment.
-
Payment Date - The date when the payment was performed.
-
Operation Item - The operation item from the notification for which the payment was allocated.
-
Allocated Amount - The amount allocated from the payment.
-
Due Date - The due date of the notification.
-
Delays (days) - The number of days passed since the notification's due date.
-
-
To view more information about a payment allocation, double-click it to open the Edit Payment Allocation page:

You cannot edit any of the fields from this page.NOTE
The operation item is used in the payment allocation process. If the repayment notification is not linked to contract, then Core Banking takes the operation item value from the allocation method configured within theManualAllocationMethodsystem parameter. If a repayment notification is created for a contract withClosedstatus, then Core Banking takes the operation item value from the allocation method selected at the banking product level. -
View information about the penalties calculated for the manual repayment notifications that were not paid in full until their maturity date in the Viewing Notification Penalties section:

All the repayment notifications that are not paid in full after their maturity dates are subject to automated penalty calculation processes performed by Core Banking. Thus, for repayment notifications linked to a contract, Core Banking uses the penalty interests defined within the interests list attached at the banking product level. For repayment notifications which are not linked to a contract, Core Banking uses the penalty interest list specified in the
ManualPenaltyInterestListsystem parameter.Each penalty displays information about the penalized item, the penalty date, the number of penalty notification, the number of overdue days after the repayment notification's maturity date, the penalty amount, a description, and whether the penalty was pad or not.
-
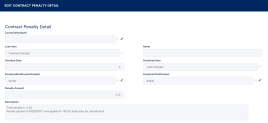
To view more information about a correction entry, double-click it to open the Edit Contract Penalty Detail page:
You can't edit any of the fields from this page.
-
View information about any correction entries created for the notification in the Viewing Corrections section. Contract correction entries are automatically generated, for notifications that are overdue, when creating a Reschedule Overdue transaction type contract event. Here you can see information about the customer of the contract, the date and currency of the correction entry, and the total amount of the correction (the sum of all the correction details' values).
-
To view more information about a correction entry, double-click it to open the Edit Contract Correction Entry page:
-
Repayment Notification - The repayment notification number.
-
Contract - The contract number associated with the notification.
-
Currency - The currency of the notification.
-
Customer - The customer associated with the notification.
-
Correction Date - The date when the correction was created.
-
Total Correction - The sum of all correction entry detail records associated with the current correction entry.
-
-
Additionally, you can view information about each detail within the correction:
-
Operation Item - The operation item of the transaction for which the correction entry detail was inserted.
-
Correction Value - The value of the correction entry detail, in the correction entry's currency.
-
The automated settlement of repayment notification, or direct debit settlement account, is the functionality whereby, if funds are available on the settlement account and the contract has repayment notifications pending for recovery, Core Banking automatically uses the available balance up to full settlement of repayment notifications.
When you have restrictions of any kind on the settlement account or the allocation simply needs to be done as per a legal authority instructions, you can turn off the automated settlement of Installment type repayment notifications functionality (the payment allocation) at the contract level using the Direct Debit Settlement Account checkbox. De-selecting the checkbox leads to the underlying amounts on notifications pending recovery not being retrieved automatically even if there are available funds in settlement account. Thus, financial institution can manage the contracts in case of blocked accounts and control the allocation of funds to outstanding Installment type notifications in case of need to impose a block on the settlement account, or manage the settlement of multiple loans from the same settlement account when short on funds and exceptional rules might apply.
This parametrization is available at product level, you can it amended at the contract level, and it is also available at customer level with a system parameter to instruct Core Banking if the customer level setup should impact underlying contracts or not. Thus, you can manage the Direct Debit Settlement Account setting at the customer level. The customer level setting takes precedence over the setting at the contract level when creating new contracts. For existing contracts, Core Banking applies the setting configured within the CustomerToContractDirectDebitSettlementAcc system parameter.
If the automated settlement of repayment notification functionality is turned off, the contract is pending for manual repayment. You can turn it back on as required, when required, and allow Core Banking to allocate the funds according to its automated processes, using any funds that become available in the settlement account in order to cover pending notifications. When the functionality is turned on or off, the notifications already processed remain unchanged. You can turn the automated settlement functionality on or off even after the maturity of a loan, as long as the contract is not closed.
The following validations are performed for the Direct Debit Settlement Account field at the contract level:
- If
Direct Debit Settlement Account=Trueand newInstallmenttype repayment notifications are generated, the system automatically tries to recover the values from Settlement Amount. When the repayment notification is fully paid, Core Banking automatically changes theInstallmenttype repayment notification's status toRecovered. - If
Direct Debit Settlement Account=Trueand old unpaidInstallmenttype repayment notifications already exist, the system tries to create recover debt records for the remaining amount for all unpaidInstallmenttype repayment notifications, and changes their status toIn recovery. - If
Direct Debit Settlement Account=Falseand newInstallmenttype repayment notifications are generated, the system doesn't register any debt to recover, and changes the notification's status toPending Recover. - if
Direct Debit Settlement Account=Falseand oldInstallmenttype repayment notifications are generated, the system removes debts to recover from the Settlement Account, and changes the status toPending Recover.
You can view the penalty interest already notified for the contract in the Penalties section of the Payments tab. These penalties are automatically calculated by Core Banking for an approved contract based on all the interests with selected Is Penalty checkbox that are applied to this contract.
To view the penalties applied to a contract, follow these steps:
-
On an approved contract's Payments tab, navigate to the Penalties section. If any penalty interest was calculated for the contract, they are displayed here:
-
View basic information about the penalties in the list, such as penalty date, amount, notification number and whether it was paid or not. Payed penalties are also highlighted in blue, for your convenience.
-
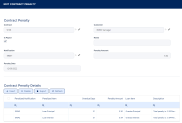
To see detailed information about one of the applied penalties, double-click on the desired penalty record. The Contract Penalty page is displayed with the selected penalty's details:
You can't edit the information displayed on this page.
-
View the information in the Contract Penalty section, as displayed:
-
Contract - The number of the contract for which the penalty is applied.
-
Customer - The customer for whom the contract was created.
-
Is Paid - A checkbox indicating whether the penalty was already paid through a payment allocation or not.
-
Name - The name of the penalty.
-
Notification - The number of the notification where the penalty is included.
-
Penalty Amount - The amount of the penalty expressed in the contract's currency.
-
Penalty Date - The date when the penalty was calculated.
-
-
View the information in the Contract Penalty Details section, as displayed:
-
Penalized Notification - The notification which was not paid in time and for which the penalty is calculated.
-
Penalized Item - The item to which the penalty interest was applied.
-
Overdue Days - The number of days since the notification was overdue for payment.
-
Penalty Amount - The calculated amount of the penalty.
-
Loan Item - The loan item which is used to calculate the penalty interest.
-
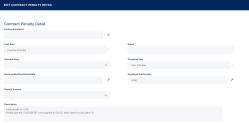
Description - The description of the contract penalty detail. It contains the total penalty value, the penalty percent or value applied to the number of overdue, and the delay days for calculation.
-
-
Double-click a detail record to view the details of the penalty on a separate page, Edit Contract Penalty Detail:
You can't edit the information displayed on this page.
Core Banking processes payments automatically, so you can't insert payment records manually. Payment information is displayed at the contract level, within the Payments tab. For convenience, you can also view each performed payment, along with its allocation details, on the Customer Payments page.
A payment record has the following statuses, visible next to the payment number on the Payment page:
-
Draft - the status of a newly created record that was not yet sent for allocation. The payment amount is not allocated yet as repayment for the contract's repayment notification. You can delete records with this status.
-
Unallocated - the status of a payment record before its amount gets allocated as payment for a repayment notification.
-
Partially Allocated - the status of a record after some of its amount gets allocated as payment for a repayment notification.
-
Allocated - the status of a record after its entire amount gets allocated as payment for a repayment notification. There is no further transition from this status.
Only payments with Allocated status operate changes at the contract repayment notification level.
To view a specific payment, follow these steps:
-
In FintechOS Portal, click the main menu icon and expand the Core Banking Operational menu.
-
Click Customer Payments menu item to open the Customer Payments page.
On the Customer Payments page, you can search for records, delete a payment in Draft status, or open a specific a payment for viewing.
-
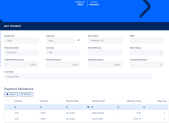
Double-click the desired payment on the Customer Payments page. The Edit Payment page is displayed.
You can only view a payment record, but you can't edit any of the fields of a payment.
-
View the following information about the selected payment:
-
Payment No - The number of the payment, as generated by Core Banking.
-
Customer - The name of the customer associated with the payment.
-
Payer Name - The bank account number from where the payment was performed.
-
IBAN - The IBAN of the account where the money is being paid.
-
Transaction Date - The date of the payment transaction.
-
Currency - The currency of the payment.
-
Bank Reference - The bank reference for the payment.
-
Bank Charge - The amount charged by the bank for performing this transaction.
-
Total Payment Amount - The sum of the payment amount and the bank charge value.
-
Payment Amount - The amount of the payment.
-
Allocated Amount - The amount that was already allocated as a contract's repayment for a notification for the selected customer.
-
Unallocated Amount - The amount that remains to be allocated as a contract's repayment for a notification for the selected customer.
-
Comments - Any comments referring to the payment.
-
-
View the payment allocation information, displayed in the Payment Allocation section.
This section is empty for payments in Draft or Unallocated status. The payment allocations for due repayment notifications are automatically calculated by Core Banking and they are displayed after the record reaches the Allocated or Partially Allocated status.
-
View more details about each allocation by double-clicking it. he payment allocation record opens in the Allocation Overview page, displaying the following information:
-
Contract Id - The contract for which the payment was allocated.
-
Payment - The number of the payment.
-
Payment Date - The date of the payment.
-
Currency Id - The currency of the payment.
-
Allocation Value - The value of the allocation.
-
Repayment Notification - The repayment notification for which the payment was allocated.
-
Operation Item - The operation item which was repaid with this allocation.
-
Delay Days - The days passed since the due date.
-
Contract Installment No - The number of the contract installment.
-
Installment Due Date - The due date of the installment.
-
Notification Maturity Date - The notification's maturity date.
-
Notification Remaining Value - The notification's remaining value to be paid.
NOTE
You can't edit any of the fields of a payment allocation record. -

