Creating Contracts
Contract records are created in FintechOS Portal, on the Contracts page. To create a new contract, click the Insert button on the top right side of the page. The Add Contract page is displayed.
Fill in the following fields:
| Field | Mandatory | Data Type | Details |
|---|---|---|---|
| Customer Type | No | Lookup | Select a value from the list:
|
| Customer | Yes | Lookup | Select from the list the customer for whom you are creating a contract. |
| Product Type | Yes | Lookup | Select from the list the product type. |
| Banking Product | Yes | Lookup | Select from the list the desired banking product. |
When creating a new contract, choose a product type to filter the list of banking products accordingly.
Be careful when choosing the values for the previously mentioned fields because they cannot be modified after saving the contract!
After saving the contract, all sections of the contract become visible and can be completed.
Click the Save and Reload button at the top right corner of the page. The contract is saved in Draft status, with minimum information, such as an auto-generated contract number, created by, version and version number, but the page displays now a series of tabs that assist you in configuring the contract:
-
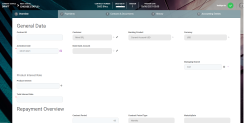
Overview tab - The first tab requires the basic elements for the creation of a contract such as customer, banking product, account, interest rate, participants, tranches, fees, and contract covenants.
-
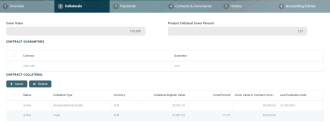
Collaterals tab - This tab, displayed only for contracts where the chosen banking product is secured, contains all the details about collaterals and contract guarantors.
-
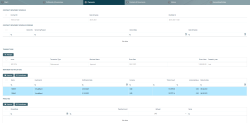
Payments tab - This tab contains all the transactions, payments, penalties, bank account operations, repayment schedules, schedule versions, repayment notifications for a contract. Depending on the contract's chosen banking product, only some of these may be displayed. The tab has no information to display while the contract is in the initial Draft status. Approve the contract to perform any contract event. Meaningful payments information is displayed in this tab only after performing transactions on the contract.
-
Contracts & Documents tab - This tab holds documents related to the contract. It is meant to be the electronic folder of the contract.
-
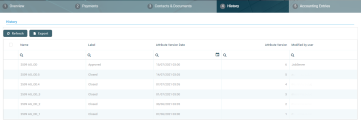
History tab - This tab displays the versions of the contract, along with workflow status and the user who modified the record.
-
Accounting Entries tab - This tab holds all the accounting entries, accounting totals, and accruals and provisions recorded for a contract. The accounting entries are generated after contract approval and performing transactions.
Depending on the chosen banking product, the contracts have different requirements regarding the fields that must be completed. The following pages exhibit the possible major contracts configurations:
The following configuration requirements generally apply for contracts:
The Overview tab requires the basic elements for the creation of a contract such as customer, banking product, account, interest rate, participants, tranches, fees, and contract covenants.
The following information in the Overview tab is common to all contract types:
| Field | Mandatory | Data Type | Details |
|---|---|---|---|
| Contract ID | No | Text | A contract ID can be filled in, other than the contract number generated automatically by Core Banking when you saved the contract. |
| Customer | Yes | Lookup | The customer who owns the contract, selected previously, in the initial contract creation page. You cannot modify this information. |
| Banking Product | Yes | Lookup | The banking product selected previously, in the initial contract creation page. You cannot modify this information. |
| Currency | Yes | Lookup | The currency of the banking product selected previously, in the initial contract creation page. For the moment the product is defined currency wise, thus each product has an underlying currency. You cannot modify this information. |
| Activation Date | Yes | Invariant Date | This is the date when the contract is activated. It is automatically completed with the system date. |
| Main Bank Account | Yes | Lookup | When the contract is approved, this account is created automatically for the bank defined as Main in Core Banking, within the Core Banking Operational > Bank menu. In order to generate an account number, a rule must be defined during the Core Banking implementation phase (example: branch code + incremental sequence number). |
| Managing Branch | Yes | Option Set | This represents the branch of the organization where the contract was created. It is automatically completed at contract saving time, but you can select another branch from the list. |
The following information should be filled in:
| Field | Mandatory | Data Type | Details |
|---|---|---|---|
| Product Interest Rate section | |||
| Product Interest | No | Lookup | Select from the list the interest to be applied for this contract. Only the interests associated to the selected banking product are displayed within the list. Depending on the selected interest, a series of other fields are displayed to be filled in: Margin, Reference Rate Date and Reference Rate. |
| Margin | No | Numeric | This field is automatically completed with the margin of the previously selected product interest. If the product interest was not selected, you can manually enter the margin. |
| Reference Rate Date | Yes | Date | The date for the reference rate that is part of the previously selected product interest. This field is automatically completed with the Activation Date value. You can edit this field. |
| Reference Rate | Yes | Numeric | This field is automatically completed with the reference rate valid at the previously selected date. |
| Total Interest Rate | Yes | Numeric | This field is automatically completed with the calculated total interest rate of the previously selected product interest and any values entered for margin and reference rate. If the product interest was not selected, you can manually enter the interest rate. |
| Date for Review Interest Rate | No | Date | Enter the date for reviewing the interest rate applicable for the remaining amount. This date must be between Activation Date and Maturity Date, otherwise, an error is displayed.For variable interest, this field is automatically completed with the Reference Rate Date + Reference Interest Period of the underlying interest definition, from the base type interest attached to variable interest. You can edit this field. For months where the date is overlapped, the last day of the month is used for the calculation. |
| Repayment Overview section | |||
| Contract Period | No | Whole Number | This field is automatically completed with the contract period as it was defined at banking product level. You can edit this value. |
| Contract Period Type | No | Option Set | This field is automatically completed with the contract period type as it was defined at banking product level. You cannot edit this value. |
| Maturity Date | No | Date | This field is automatically completed with the contract maturity date, calculated based on the values of the Contract Period and Contract Period Type. You cannot edit this value. |
| Repayment at end of month | No | Boolean | If you select this checkbox, then the due day of the contract is automatically set to the last day of the month, and the repayment schedule is calculated with an installment in the last day of month. |
| Closure Settings section Only displayed for Term Loan & Mortgage contracts based on banking products having the Closing Is Flexible = True setting |
|||
| Automatic Closure | No | Boolean | This field is automatically completed with the value defined at the banking product level, but you can modify it. Select this checkbox to instruct Core Banking to close the contract automatically when the available amount becomes zero and there are no further amounts to be recovered, and after the number of days set as buffer before closure pass and Closure Date = Current Date. If Automatic Closure = False, then
Real Time Closure = False and the contract remains open, regardless of the fulfillment of its maturity and balance criteria, waiting to be manually closed by changing its status to Closed. Default value: True. NOTE Revolving loans are closed only after maturity. In this case, the available loan amount is considered as balance. You can perform contracts events as specified in the Allowed Transactions section of the banking product, plus manual closure while the contract is pending closure. Performing any other transactions displays an error message. |
| Real Time Closure | No | Boolean | This field is automatically completed with the value defined at the banking product level, but you can modify it. Select this checkbox to instruct Core Banking to close the contract automatically, immediately after the available amount becomes zero and there are no further amounts to be recovered. For more details about the real-time closure, see Close Contracts RealTime(CB) Job. If Real Time Closure = True, then Buffer Close Days = 0 and Automatic Closure = True. |
| Buffer Close Days | No | Whole Number | This field is automatically completed with the value defined at the banking product level, but you can modify it. Enter the number of days used as buffer before automatically closing the contract. If Buffer Close Days > 0, then Real Time Closure = False. Core Banking waits the entered number of days after the contract's balances reach zero, and at the end of that day the contract is closed. For more detail about closing the contracts automatically when Real Time Closure = False, see Close Contracts (CB) Job. |
| Balance Off Date | No | Invariant Date | You can't modify this field. This date is calculated by Core Banking as follows:
|
| Closure Date | No | Invariant Date | You can't modify this field. The date when the contract is closed. For automatic closure, the date is calculated by Core Banking as Balance Off Date + Buffer Close Days. |
Click the Save and Reload button at the top right corner of the page.
Contract Participants Section
In the Contract Participants section, you can insert, delete or export customers who participate in this contract or who can be blocked from participation. After the first save operation, the customer is added as beneficiary of the contract. If the customer is a legal entity, all the company’s already entered legal representatives such as administrators, affiliates, owners, or other key contact persons are displayed in this list.
To add a participant, click Insert and fill in the following fields:
| Field | Required | Data Type | Details |
|---|---|---|---|
| Participant | No | Lookup | Select from the list the name of the customer who can access the contract. |
| Role | No | Option Set | Select from the list the role of the previously selected customer in the contract beneficiary's company. |
| Blocking Reason | No | Option Set | Select the reason for blocking this participant from accessing the contract, if needed. |
For legal entity customers, the participant with the
Company Administrator role must be added, otherwise, the loan contracts cannot be approved. This is not the case for current account contracts. For individual customers, the borrower and beneficiary of the contract are not mandatory to be added in order for the contract to be approved and disbursed.
Click the Save and Close button at the top right corner of the page.
Contract Tranches Section
In the Contract Tranches section, you can view the disbursement tranches configured at the product level. Usually used for corporate loans, such dividend payments or cash outflows are not done in equal amounts and usually trigger a recalculation in terms of interest. In this section, you can also insert, delete or export disbursement tranches for the contract.
To add a tranche in a contract based on a product that has a disbursement matrix set up, click Insert and fill in the following fields:
| Field | Required | Data Type | Details |
|---|---|---|---|
| Tranche Date | Yes | Date | Select the date of the disbursement tranche. |
| Tranche Percent | Yes | Numeric | Enter the percentage from the contract value that has to be disbursed with this tranche. |
| Amount | Yes | Numeric | Enter the amount from the contract value that has to be disbursed with this tranche. |
| Interest Percent | No | Numeric | Enter the interest percent applicable for this tranche if it must be different from the interest rate applicable for the entire contract. |
| Unusage Commission Percent | No | Numeric | Enter the commission percent applicable for the unused loan amount from this tranche. |
| Submitted Document | No | File | Upload the documents related to the tranche disbursement. |
Click the Save and Close button at the top right corner of the page.
Fees & Commissions Section
In the Fees & Commissions section, you can view all the fees and commissions configured at the product level that have the Automatic Load on Contract checkbox set to True. After the first saving operation, all fees that are defined as values are displayed. The fees that are defined as percentages are displayed after completing all the values of the contract. Read more about the commissions automatically inserted and calculated in the below section. You can also insert, delete or export fees and commissions for the contract.
To add a fee for this contract, click Insert and fill in the following fields:
| Field | Required | Data Type | Details |
|---|---|---|---|
| Contract | Yes | Lookup | This field displays the contract number generated automatically by Core Banking when you saved the contract. You cannot modify this information. |
| Currency | Yes | Lookup | The currency of the contract. You cannot modify this information. |
| Fee | Yes | Lookup | Select a commission from the list of commissions defined for the banking product used when creating the contract. |
| Periodicity Type | No | Option Set | This fields is automatically completed with the periodicity type of the selected fee. |
| Fee Date | Yes | Date | Specify which value of the commission is to be used by selecting the date of the commission. |
| Percent Fee | No | Numeric | This field displays the commission percentage applicable for the selected date if the commission was defined as a percentage. |
| Value Fee | No | Numeric | This field displays the commission value applicable for the selected date if the commission was defined as a value. |
Click the Save and Close button at the top right corner of the page.
Automatic Insertion and Calculation of Commissions
Commissions are automatically inserted/ updated in the Fees & Commissions section depending on the life cycle and status of the contract:
-
Creating a new contract: Core Banking automatically inserts active commissions associated to the banking product, within their defined validity period, with
Automatically load on contract = True, withIs For Unusage = False, andCommission value is percentage = False.
IfCommission value is percentage = True, then the commission is only inserted if the amount value was previously inserted. -
Updating a contract in
Draftstatus: Core Banking automatically inserts active commissions associated to the banking product, within their defined validity period, withAutomatically load on contract = True, withIs For Unusage = False. If a commission withCommission value is percentage = Truewas already inserted, then the commission's value is updated according to the contract's financed amount. If the value of a commission withCommission value is percentage = Truewas manually modified (for negotiable commissions), then the new value is calculated based on the modified percentage. -
Creating a new version for a contract: Core Banking automatically inserts all the commissions already present in the contract. Additionally, all commissions specifically created for contract version (
Is For Contract Version = True) are added as well.NOTE
If a version for a contract is created more than once on the same day, then all commissions withIs For Contract Version = Truethat were not notified yet for each previous version are deleted. At the end of the day, there is only one commission for the latest version. -
Updating a contract in
Contract Version Draftstatus: Core Banking only updates the percentage commissions that are not already notified.
For percentage commissions (with Commission value is percentage = True), the financed amount of the contract is used to calculate the commission value based on the percentage. The calculation method differs depending on the contract type:
-
For contracts based on Term Loan, Mortgage or Overdraft banking products:
-
If the commission is applied to amount, then the financed amount = amount due;
-
If the commission is applied to financed amount, then the financed amount = amount due - advance amount;
-
If the commission is applied to remaining value and the contract is in
Contract Version Draftstatus, then financed amount = (-1) * main bank account balance. If the result is a negative value, then financed amount = null. In all the other cases, financed amount = null, which is the default value.
-
-
For contracts based on Bank Account with Overdraft banking products:
-
If the commission is applied to overdraft limit amount, then the financed amount = overdraft limit amount;
-
If the commission is applied to used amount and the commission's period type is
Once, then the financed amount = overdraft limit amount - available amount for overdraft. In all the other cases, financed amount = null, which is the default value.
-
Contract Covenant Section
In the Contract Covenant section, you can view the covenants that applicants must abide by after getting the loan, configured at the product level. Such conventions are usually applicable for corporate clients that must meet certain requirements in order to continue to receive disbursements and not only: submit balance sheet every x months, have account turnover of at least x percent from average monthly turnover, provide other relevant documents from authorities. In this section, you can also insert, delete or export covenants for the contract.
To add a covenant to a contract, click Insert and fill in the following fields:
| Field | Required | Data Type | Details |
|---|---|---|---|
| Covenant | No | Option Set |
Select the desired covenant from the list of possible values:
|
| Value | No | Numeric | Enter the value of the covenant. |
| Covenant Type | No | Option Set | This field is automatically completed with the type of the selected covenant. |
| Review Frequency (Months) | No | Whole Number | Enter the number of months after which the covenant has to be reviewed. |
| Review Date | No | Date | Enter the date when the covenant has to be reviewed. |
Click the Save and Reload button at the top right corner of the page.
Activate the covenant record by changing its status to Active.
Click the Save and Close button at the top right corner of the page.
Contract Classifications Section
In the Contract Classifications section, you can insert, delete or export classifications for the contract. You can choose to add the classifications defined at banking product level.
To add a classification to a contract, click Insert and fill in the following fields:
| Field | Required | Data Type | Details |
|---|---|---|---|
| Classification | No | Lookup | Select the desired classification for the contract from the list of classifications associated with the banking product. |
| Contract | Yes | Lookup | This field is automatically completed with the number of the current contract. |
| Description | No | Text Area | Enter a description for the contract classification. |
Click the Save and Close button at the top right corner of the page.
The Collaterals tab appears on a contract only if the chosen product is secured. The tab is used to set collaterals as guarantees. Collaterals must be previously defined (see Collateral Management) and registered (see Registering Collaterals). Only after a collateral is registered, it can be used for covering a secured loan contract.
A registered collateral can be attached to multiple contracts if the contracts total amount does not exceed the collateral available amount.
The fields Cover Value and Product Collateral Cover Percent are automatically populated.
The
Product Collateral Coverage Percent field is read-only, and set with the value defined at banking product level.To add a collateral to a secured contract, go to the Collaterals tab at contract level. In this tab, you can insert one or more collaterals in order to have the contract covered, as well as contract guarantors.
Start by adding guarantors to your contract, if needed. The Contract Guarantors section can be used to add a collateral that is not owned by the customer. If a guarantor is added on the loan contract, you can use the collaterals owned by the guarantors in order to cover the contract risk.
- Click the Insert button within the Contract Guarantor section.
- In the newly displayed Add Contract Guarantors page, fill in the following fields:

- Click the Save and Close button at the top right corner of the page.
- Click the Insert button from the Contract Collateral section.
- In the newly displayed Add Contract Collateral page, fill in the following fields:
Field Mandatory Data Type Details Customer / Guarantor Yes Lookup Select the customer who acts as guarantor for the contract. The field is automatically completed with the customer selected in the contract, but you can select any of the customers already added as guarantors for this contract. Collateral Register Yes Lookup Select a collateral registered to the current customer. When selecting a collateral, the
Cover Register Value,Cover Register Value UsageandCover Value in Contract Currencyfields are automatically calculated.NOTE
A registered collateral can be attached to multiple contracts if the contracts total amount does not exceed the collateral available amount.IMPORTANT!
When selecting a Fixed deposit collateral, the status of the associated bank account becomesBlocked.
If the contract's status changes fromOwnedorActiveintoReleased, the status of the bank account becomesOpened.If the status is changed from Active to Released – the status for Bank account changes to Opened (Only for fixed deposit collateral).
Collateral Register Value Usage (%) Yes
Numeric
The percentage to be used from the registered collateral's total value. The percentage is set at banking product level, in the Collateral Cover Percentfield. You can modify this percentage. As a result, theCollateral Register Valueand theCover Value in Contract Currencyvalues are automatically recalculated by Core Banking.Cover Register Value Yes
Numeric
The value that is taken from collateral, expressed in the collateral's currency.
If the collateral is in a different currency than the contract currency, the exchange rate is automatically applied in order to have the available amount correctly calculated. Further, theDaily recalculation of Collateralsjob runs daily in order to recalculate the available amount for each collateral.Cover Value in Contract Currency Yes
Numeric
The cover value converted in the contract's currency at the exchange rate defined in Core Banking. Mortgage File No
File
Attach a file relevant for the mortgage. - Click the Save and close button.
| Field | Mandatory | Data Type | Details |
|---|---|---|---|
| Contract | Yes | Lookup | Read-only field, automatically completed with the current contract. |
| Guarantor | Yes | Lookup | Select the customer who acts as a guarantor for the contract. |
You can send a contract for approval only if Cover Value = Financed Amount * Product Collateral Cover Percent / 100.
The Payments tab contains all the transactions, payments, penalties, bank account operations, repayment schedules, schedule versions, repayment notifications for a contract. Depending on the contact's chosen banking product, only some of these may be displayed. The tab has no information to display in Draft status. Approve the contract to perform any contract event. Meaningful payment information is displayed in this tab only after performing transactions on the contract.
Contract Repayment Schedule Section
The Contract Repayment Schedule section displays the repayment schedule automatically generated by Core Banking for the approved contract, after performing a disbursement.
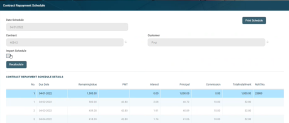
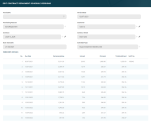
The section displays only basic information about the generated schedule, such as contract number, schedule date and last modification date and time. For detailed information and the actual list of the installments, double-click on the schedule. The Contract Repayment Schedule page is displayed with the selected schedule and a list with every schedule detail:
You cannot edit the information displayed on this page, but for contracts in Version Draft status, you can import a custom repayment plan, if you don't want the contract to use the repayment plan automatically generated by Core Banking.
Following an early repayment event, for contracts based on banking products with the Is Revolving field set to
False, when the installments number recalculated after such an event is lower than the previous installments number, the maturity date and the contract period are updated along with the number of installments.The following information is displayed about each schedule detail (installment):
| Column | Details |
| No. | The number of the repayment schedule detail. |
| Due Date | The date when the installment must be paid. |
| Interest | The value of the interest calculated for this installment. |
| Principal | The value of the principal calculated for this installment. |
| Commission For Undrawn Amount/ or other commissions, depending on the selected contract type | The value of the commission with the specified type calculated for this installment. |
| Total Repayment | The number of the repayment notification generated for this schedule detail. |
| Notification No. | The number of the notification where the installment is included, if it was already generated. |
Within the list, the schedule details are color coded as follows:
-
Schedule details highlighted in blue are already paid, allocated or closed to payment.
-
Schedule details not highlighted (displayed on a white background) remain to be paid.
To export the schedule in a .pdf file, click the Print Schedule button. Your browser automatically downloads the PaymentScheduleFile file, with all the information displayed within the Contract Repayment Schedule page.
Importing a Repayment Plan Using the Contract Repayment Schedule Page
For cases when the contract needs a schedule that cannot be automatically generated by Core Banking, you can import your custom repayment plan. You can either perform the import at a contract event level (when adding a Disbursement, Early Repayment, Payment Holiday, or Reschedule Overdues transaction), or within the Contract Repayment Schedule page, for contracts in Version Draft status.
To import a custom repayment plan within the Contract Repayment Schedule page, perform the following steps:
-
Select the Import Schedule checkbox. The Schedule File field is displayed, with the Select file button. The Export Schedule Template button is also displayed. A warning message informs you that "The previous repayment schedule was generated by the system".
-
Click the Export Schedule Template button to download a
.xslxfile with the schedule template for this specific contract. -
Open the downloaded schedule template
.xlsxfile exported from Core Banking and make it editable. -
Format the Due Date column as
Text -
Fill in the lines of the template file with the data needed in the contract's custom repayment plan.
Fill in each installment's type according to your needs.NOTE
Make sure you don't change the data formats within the columns, except for the Due Date column which needs to beText. Do not change the headings. Validations are performed for the file after uploading it to Core Banking, when the record is saved, and incorrect formats or data are not accepted, then error messages are shown for such files.IMPORTANT!
For contracts with existing repayment notifications, these notifications are already present in the downloaded template file. Do not modify the existing notifications' data. Compose your custom schedule taking into account the already existing repayment notifications.Read more about the repayment plan template file and how to fill it in its dedicated section.
-
Save the file. If the file needs to be labeled according to your company's information protection policy, label it as
Public, otherwise, Core Banking can't import it. -
Back in Core Banking's Contract Repayment Schedule page, click Select File.
-
In the newly displayed Explorer window, browse for the
.xlsxfile that contains the custom schedule you've filled in with the contract's repayment plan, then click Open.
The selected file's name is displayed under the Schedule File field. -
Click the Save and Reload button at the top right corner of the page. Core Banking performs the validations, making sure that the uploaded file meets all the criteria for a correct, functional schedule.
-
Click the Run Import Schedule button to perform the import of the new custom schedule to the contract. This button can be clicked only if a file was selected in the Schedule File field. The Contract Repayment Schedule Details section now displays data contained in your custom schedule.
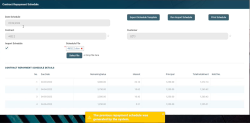
If you click the Run Import Schedule button one more time, the values within the Contract Repayment Schedule Details section are deleted and reinserted.
Read more about importing a custom schedule file in the Import Repayment Plan section of the user guide.
Contract Repayment Schedule Versions Section
The Contract Repayment Schedule Versions section displays the versions of the repayment schedules automatically generated by Core Banking each time when a contract event that changed either the maturity date or the amount of a repayment was performed on the contract. The section is displayed only if such versions exist for the contract.
The section displays only basic information about the generated versions, such as version number, versioning reason, version creation date and the date of the previously active schedule.
The most recent repayment schedule version is considered active by Core Banking, while the previous schedule records are kept for historical purposes.
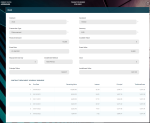
For detailed information about the repayment schedule version, double-click on the desired record. The Edit Contract Repayment Schedule Version page is displayed with the selected schedule and a list with every schedule detail:
You cannot edit the information displayed on this page.
The following information is displayed about each schedule version:
| Column | Details |
| Version No. | The number of the repayment schedule version. |
| Version Date | The date when the version was created. |
| Versioning Reason | The type of contract event that triggered the generation of the version. |
| Customer | The customer for whom the contract was created. |
| Contract | The number of the contract for which the repayment schedule version was generated. |
| Contract Event | The id of the contract event that triggered the generation of the version. |
| Date Schedule | The date of the previous repayment schedule. |
| Schedule Type | The type of schedule selected in the contract and used to generate the repayment schedule. |
| Version's Details List | |
| No. | The number of the repayment schedule version detail. |
| Due Date | The date when the installment must be paid. |
| Remaining Value | The value remaining to be repaid from the contract value at the moment of this installment. |
| Interest | The value of the interest calculated for this installment. |
| Principal | The value of the principal calculated for this installment. |
| Total Installment | The total value of the installment to be paid. |
| Notification No. | The number of the notification where the installment is included, if it was already generated. |
Transactions Section
The Transactions section displays all the transactions performed at the contract level, in any status. This section only has information if the contract is in Approved status and transactions were already created. Read detailed information about contract events and how to add an event on the dedicated Contract Events page.
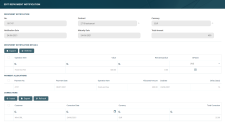
The section displays only basic information about the transaction, such as event number, status, date, transaction type, value and the user who created it. For detailed information about the transaction and the repayment schedule generated for the approved event, double-click on the schedule. The Event page is displayed with the selected event and the generated repayment schedule for the event:
You cannot edit the information displayed on this page.
The following information is displayed about each event, with some variations depending on the event type:
| Column | Details |
| Contract | The number of the contract for which the transaction is performed. |
| Customer | The customer for whom the contract was created. |
| Transaction Type | The type of the transaction that is performed on the contract. |
| Currency | The currency of the contract. |
| Financed Amount | The amount financed by the contract. |
| Available Value | The amount still available in the contract. |
| Event Date | The date when the event was created. |
| Event Value | The amount of the transaction. |
| Repayment Due Day | The day of the month when the repayment is due. |
| Installment Method | The method of calculating the installment value. |
| Tenor | The tenor of the contract in months. |
| Principal Value | The amount of the principal of the contract. |
| Installment Value | The amount of the installment. |
| Contract Repayment Schedule section | |
| No. | The number of the repayment schedule version detail. |
| Due Date | The date when the installment must be paid. |
| Remaining Value | The value remaining to be repaid from the contract value at the moment of this installment. |
| Interest | The value of the interest calculated for this installment. |
| Principal | The value of the principal calculated for this installment. |
| Total Installment | The total value of the installment to be paid. |
In order to add transactions to an approved contract, the transactions must be previously defined and associated with the banking product in the Banking Product page > Associated Transactions tab.
All existing versions of the contract in Contract Version Draft status are automatically changed to Contract Version Closed when a payment event is approved for that contract.
Repayment Notifications Section
The Repayment Notifications section displays all the repayment notifications generated for the contract. This section only has information if the contract is in Approved status and disbursements were already performed.
Within the list, the repayment notifications are color coded as follows:
-
Repayment notifications highlighted in blue are already paid, allocated or closed to payment.
-
Repayment notifications not highlighted (displayed on a white background) remain to be paid.
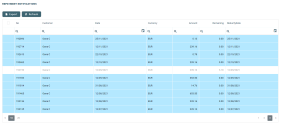
The following information is displayed about each notification:
| Field | Description |
|---|---|
| No. | The number of the repayment notification record. |
| Customer | The customer for whom the contract was created. |
| Date | The date when the notification was generated. |
| Currency | The currency of the contract. |
| Amount | The amount of the installment for which the notification was generated. |
| Remaining | The amount from the installment that remains to be paid. |
| Maturity Date | The maturity date of the notification. This is calculated adding the value of the Grace period for repayment field at the banking product level to the notification date. |
For detailed information about a repayment notification, double-click on the desired record. The Repayment Notification page is displayed with the selected notification:
You cannot edit the information displayed on this page. Read detailed information about repayment notifications on the dedicated Repayment Notifications page.
All the
Front-End Fee commission types with Once periodicity type applied to a contract are notified and must be paid when the contract is approved. The Core Banking system parameter FrontEndFee defines the type of commission that is automatically notified at the contract approval.Penalties Section
The Penalties section displays the penalty interest applicable to the contract, automatically calculated by Core Banking for an approved contract, based on all the interests with selected Is Penalty checkbox that are applied to this contract, configured in the Overview tab.
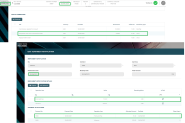
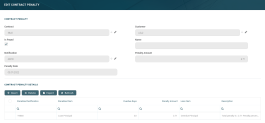
The section displays only basic information about the penalties, such as penalty date, amount, notification number and whether it was paid or not. For detailed information, double-click on the desired penalty record. The Contract Penalty page is displayed with the selected penalty's details:
You cannot edit the information displayed on this page.
The following information is displayed about each penalty record:
| Column | Details |
| Contract | The number of the contract for which the transaction is performed. |
| Customer | The customer for whom the contract was created. |
| Is Paid | A checkbox indicating whether the penalty was already paid through a payment allocation or not. |
| Name | The name of the penalty. |
| Notification | The number of the notification where the penalty is included. |
| Penalty Amount | The amount of the penalty expressed in the contract's currency. |
| Penalty Date | The date when the penalty was calculated. |
| Contract Penalty Details section | |
| Penalized Notification | The notification which was not paid in time and for which the penalty is calculated. |
| Penalized Item | The item to which the penalty interest was applied. |
| Overdue Days | The number of days since the notification was overdue for payment. |
| Penalty Amount | The calculated amount of the penalty. |
| Loan Item | The loan item which is used to calculate the penalty interest. |
| Description | The description of the contract penalty detail. It contains the total penalty value, the penalty percent or value applied to the number of overdue, and the delay days for calculation. |
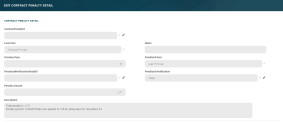
You can view the details of the penalty on a separate page, named Edit Contract Penalty Detail, if you double-click the detail record:
You cannot edit the information displayed on this page.
Depending on the banking product used for the selected contract, other sections may be displayed. Please check the pages corresponding to the desired contract.
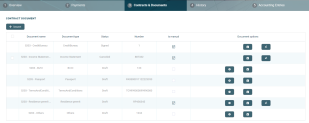
This section holds documents related to the contract. It is meant to be the electronic folder of the contract. The section displays a list of the document records for the current contract, with details such as document name, type, status, number, whether the record was added through the user interface (Is manual = True) or through API integration (Is manual = False), and download options for the attached files.
Contract documents have a dedicated business workflow, thus you can transition them through a series of statuses.
On the Contracts & Documents page, you can:
-
Add a new contract document record by clicking the Insert button on the top left, under the Contract Document section.
-
Edit a contract document from the list by double-clicking it. You can only edit the fields of a contract document in Draft status. For contract document records in Signed or Canceled status, you can view the record's details.
-
Delete a contract document by clicking the Delete record button next to the record. Only contract documents in Draft status can be deleted. Once Signed, a contract document should be canceled if the document is not to be used within the contract.
-
Download the initial document by clicking the Initial document button next to the record. Open the downloaded file to view its content.
-
Download the signed document by clicking the Signed document button next to the record, if a signed document was uploaded for that contract document record. Open the downloaded file to view its content.
Users with the associated predefined security roles of Corporate Credit Officer and Retail Credit Officer can perform contract document-related operations such as adding, updating, and deleting records or changing their statuses.
Adding Contract Documents
To insert a document to the contract, click the Insert button in the Contract Document section. The Add Contract Document page is displayed.
You can't insert documents for contracts in Contract Closed or Contract Version Closed statuses.
Fill in the following fields:
| Field | Mandatory | Data Type | Details |
|---|---|---|---|
| Document name | No | Text | Automatically completed with the name of the document. Core Banking names the document record using the contract name + '-' + the selected document type + '-' + a unique document increment. For example, 5203 - Income Statement - 60. |
| Document type | Yes | Option set | Select the type of the document. |
| Description | No | Text Area | Enter the description of the document. |
| Number | No | Text | Enter the number of the document, if the document has an external identifier number. |
| Initial document | No | File | Select the file containing the initial, unsigned document. Click the Select file button under this field, navigate to the desired file, select it and click Open. The selected file's name is displayed here. You can delete it by clicking the x next to the file name. |
| Signed Document | No | File | Select the file containing the final, signed document, if available. Click the Select file button under this field, navigate to the desired file, select it and click Open. The selected file's name is displayed here. You can delete it by clicking the x next to the file name. NOTE To change the status of the contract document record to Signed, a signed document file must exist within the record. |
Click the Save and Close button at the top right corner of the page.
You can also add, update, and approve contract document records through API integration, using the
FTOS_CB_AddUpdateContractDocument and FTOS_CB_ApproveContractDocument endpoints. Read more details in the Core Banking Developer Guide.Contract document files added through integration cannot be deleted and those records can't be canceled!
Contract Document Statuses
A contract document record has the following statuses, visible in the top left corner of the Add Contract Document page, after saving the record:
-
Draft - the status of a newly created contract document record that was not yet authorized (marked as Signed). While in this status, you can edit some fields and you can delete the uploaded documents. Change its status to Signed after editing all the necessary details and uploading the
Signed Documentfile. Change its status to Canceled if the document is not to be used within the contract. -
Signed - the status of a contract document record after being authorized. You cannot edit any of the record's details. You can change the status of the record to Canceled, if needed.
-
Canceled - the status of a contract document after being canceled. You cannot edit any of the record's details. There is no further transition from this status. Contract document records created through integration (having their
Is manualfield =False) can't be canceled.
Contract Document Validations
Core Banking performs the following validations for contract document records:
-
The uploaded files' specifications follow High Productivity Fintech Infrastructure's settings and restrictions regarding size and format, allowing .pdf,.doc,.docx,.els,.jpg,.jpeg,.xlsx,.dll,.ppt,.pptx,.txt,.png,.ttf,.xml file formats.
-
If the contract document record is in Signed status, the record can't be deleted or updated, nor can its files be deleted.
-
The name of the contract document record is unique, automatically generated by Core Banking.
The naming convention is "the contract name + '-' + the selected document type + '-' + a unique document increment". For example,5203 - Income Statement - 60. -
The names of the selected files are not validated for uniqueness.
The History tab displays the versions of the contract, along with workflow status and the user who modified the record. A contract can have only one Draft version, one Current version, but it may have multiple History versions, which are displayed in this section. In this tab, you can track the contract's life cycle and review older versions that are no longer active (for details, see Contract Versioning).
The Accounting Entries tab holds all the accounting entries, accounting totals, and accruals and provisions recorded for a contract. These records are automatically generated by the system, after performing transactions for an approved contract.
Accruals and Provisions Section
The records containing daily accrual and provisions are displayed in the Accruals and Provisions section. Generated automatically by the system respecting the definition of the contract, product dimensions, system parameters and jobs.
The following information is displayed for each accrual and provision entry:
| Column | Details |
| Classification | The classification of the accrual and provision entry. The classification is determined based on the records created in the Loan Classification menu. These records classify transactions based on the number of days since a repayment notification is overdue. |
| Contract | The number of the current contract. |
| Calculation Date | The date when the accrual and provision calculation was performed. |
| Daily Accrual Interest | The amount of interest accrued on that day. |
| Accumulated Interest Accrual | The total amount of interest accrued until that day. |
| Daily Interest Provision | The amount of interest provisioned on that day. |
| Accumulated Interest Provision | The total amount of interest provisioned until that day. |
| Daily Fee Accrual | The amount of fees and commissions accrued on that day. |
| Accumulated Fee Accrual | The total amount of fees and commissions accrued until that day. |
| Principal Provision | The amount of principal provisioned. |
| Previous Principal Provision | The previous amount of principal provisioned. |
| Process Days | The number of days processed. |
Accounting Totals on Contract Section
The Accounting Totals on Contract section provides an overview of the total amounts specified in accounting records. The accounting entries are generated by the Generate Accounting Entries service in the Core Banking END OF DAY (CB) daily job . The job runs automatically at the end of day.
The following information is displayed for each total amount:
| Column | Details |
| Account | The account where the operation was performed. |
| Total Debit | The amount which was debited from the account. |
| Total Credit | The amount which was credited to the account. |
Accounting Entries Section
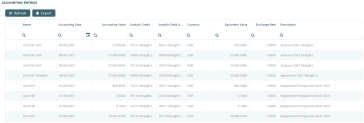
The Accounting Entries section reflects the accounting for the transactions related to the loan contract. The accounting entries are generated by the Generate Accounting Entries service in the Core Banking END OF DAY (CB) daily job . The job runs automatically at the end of day.
The following information is displayed for each accounting entry:
| Column | Details |
| Name | The id of the accounting entry. |
| Accounting Date | The date when the entry was generated. |
| Accounting Value | The value of the accounting entry. |
| Analytic Credit Account Code | The code of the analytic credit account. |
| Analytic Debit Account Code | The code of the analytic debit account. |
| Currency | The currency of the accounting entry. |
| Equivalent Value | The equivalent value of the accounting entry expressed in the contract's currency. |
| Exchange Rate | The exchange rate between the accounting entry currency and the contract currency. |
| Description | The description of the accounting operation. |

