Importing Repayment Plans
To accommodate cases when a contract's repayment plan cannot be built using any of the existing Core Banking automated logic, you can import a custom-built schedule on a contract. After importing a custom repayment plan on a contract through a .xlsx file whose template must be first exported, the system validates that the total outstanding amount is matched by the principal on schedule. On due dates, the due amounts are processed properly and the notifications are generated as per the imported repayment plan.
For cases when the contract needs a schedule that cannot be automatically generated by Core Banking, you can import your customized repayment plan. You can either perform the import at a contract event level (when adding a Disbursement, Early Repayment, Payment Holiday, or Reschedule Overdues transaction), or at a contract level within the Contract Repayment Schedule page, for contracts in Version Draft status.
For example, you could use such imported schedules for contracts that require seasonal repayment plans. For seasonal credits in agriculture, you could have due dates only in April or September. You could build a schedule to have installments only in these months, to accommodate such situations.
Another example is that you could use the import functionality for contracts with atypical schedules that have to be migrated into Core Banking. First, you could import the schedules as they are, then you could decide to adopt the Core Banking logic for schedule calculation, maybe change the interest rate, so you version the contract to have a repayment plan automatically calculated by the system.
Importing Repayment Plans at Contract Event Level
To import a custom repayment plan at a contract event level (when performing a transaction), for contract events in Approved status, perform the following steps:
-
On the Contracts page or in the Contracts Dashboard, select a contract with Approved status.
-
Double-click the contract to open it for editing.
-
Navigate to the contract's Payments tab.
-
Double-click a Disbursement, Early Repayment, Payment Holiday, Returned Amount Or Goods, or Reschedule Overdues transaction in Draft status.
OR
Create a new Disbursement, Early Repayment, Payment Holiday, Returned Amount Or Goods, or Reschedule Overdues transaction as described in the Contract Events topic, up until saving the event in Draft status.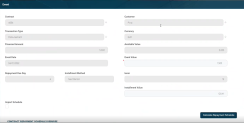
-
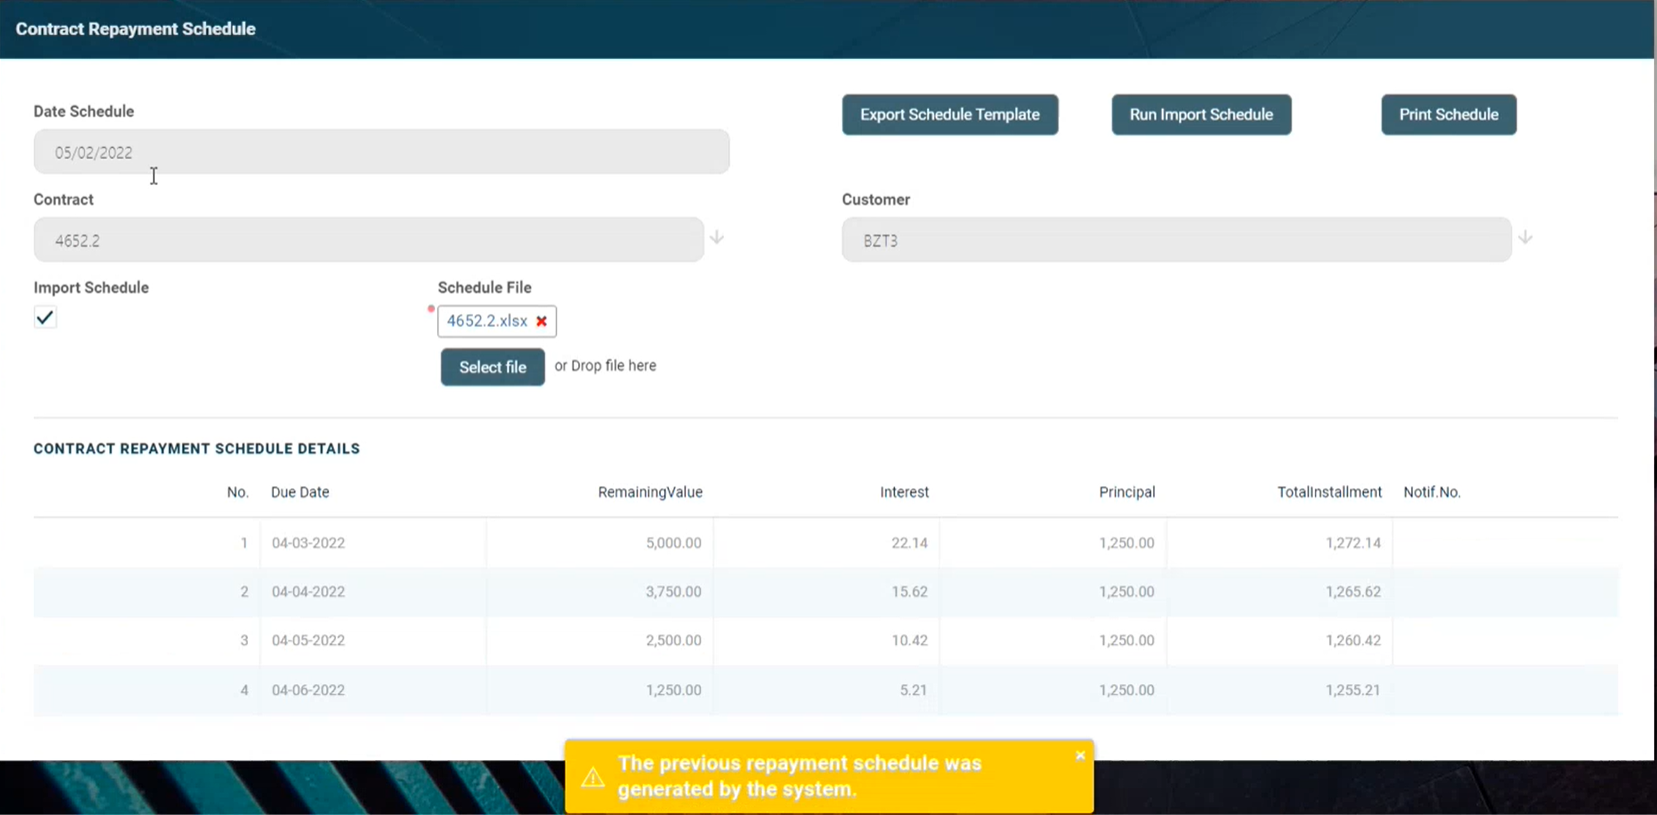
Select the Import Schedule checkbox. The Schedule File field is displayed, with the Select file button. The Export Schedule Template button is also displayed. A warning message informs you that "The previous repayment schedule was generated by the system".

-
Click the Export Schedule Template button to download a
.xslxfile with the schedule template for this specific contract. -
Open the downloaded schedule template
.xlsxfile exported from Core Banking and make it editable. -
Format the Due Date column as
Text -
Fill in the lines of the template file with the data needed in the contract's custom repayment plan.
Fill in each installment's type according to the event type.NOTE
Make sure you don't change the data formats within the columns, except for the Due Date column which needs to beText. Do not change the headings. Validations are performed for the file after uploading it to Core Banking, when the record is saved, and incorrect formats or data are not accepted, then error messages are shown for such files.IMPORTANT!
For contracts with existing repayment notifications, these notifications are already present in the downloaded template file. Do not modify the existing notifications' data. Compose your custom schedule taking into account the already existing repayment notifications.Read more about the repayment plan template file and how to fill it in its dedicated section.
-
Save the file. If the file needs to be labeled according to your company's information protection policy, label it as
Public, otherwise, Core Banking can't import it. -
Back in Core Banking's Contract Repayment Schedule page, click Select File.
-
In the newly displayed Explorer window, browse for the
.xlsxfile that contains the custom schedule you've filled in with the contract's repayment plan, then click Open.
The selected file's name is displayed under the Schedule File field.
-
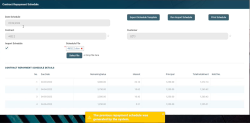
Click the Save and Reload button at the top right corner of the page. Core Banking performs the validations, making sure that the uploaded file meets all the criteria for a correct, functional schedule.
-
Click the Run Import Schedule button to perform the import of the new custom schedule to the contract. This button can be clicked only if a file was selected in the Schedule File field. The Contract Repayment Schedule Details section now displays data contained in your custom schedule.
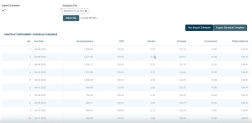
If you click the Run Import Schedule button one more time, the values within the Contract Repayment Schedule Details section are deleted and reinserted. -
Approve the event by changing its status to Approved in the upper left corner of the Event page.
The contract's repayment schedule, accessible through the Contract Repayment Schedule page, now displays the custom repayment plan uploaded through the approved event.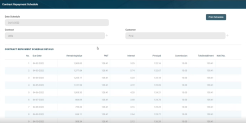


When versioning a contract that has an imported repayment plan, the schedule recalculation is not mandatory. You can choose between recalculating and importing an updated repayment plan.
Importing Repayment Plans at Contract Level
To import a custom repayment plan directly at a contract level, for contracts in Version Draft status, perform the following steps:
-
On the Contracts page or in the Contracts Dashboard, select the contract for which you wish to change its schedule with a custom repayment plan. Make sure that the contract is in Version Draft status.
-
On the displayed contract's page, navigate to the Payments tab and double-click the contract displayed in the Contract Repayment Schedule section. The Contract Repayment Schedule page is displayed.

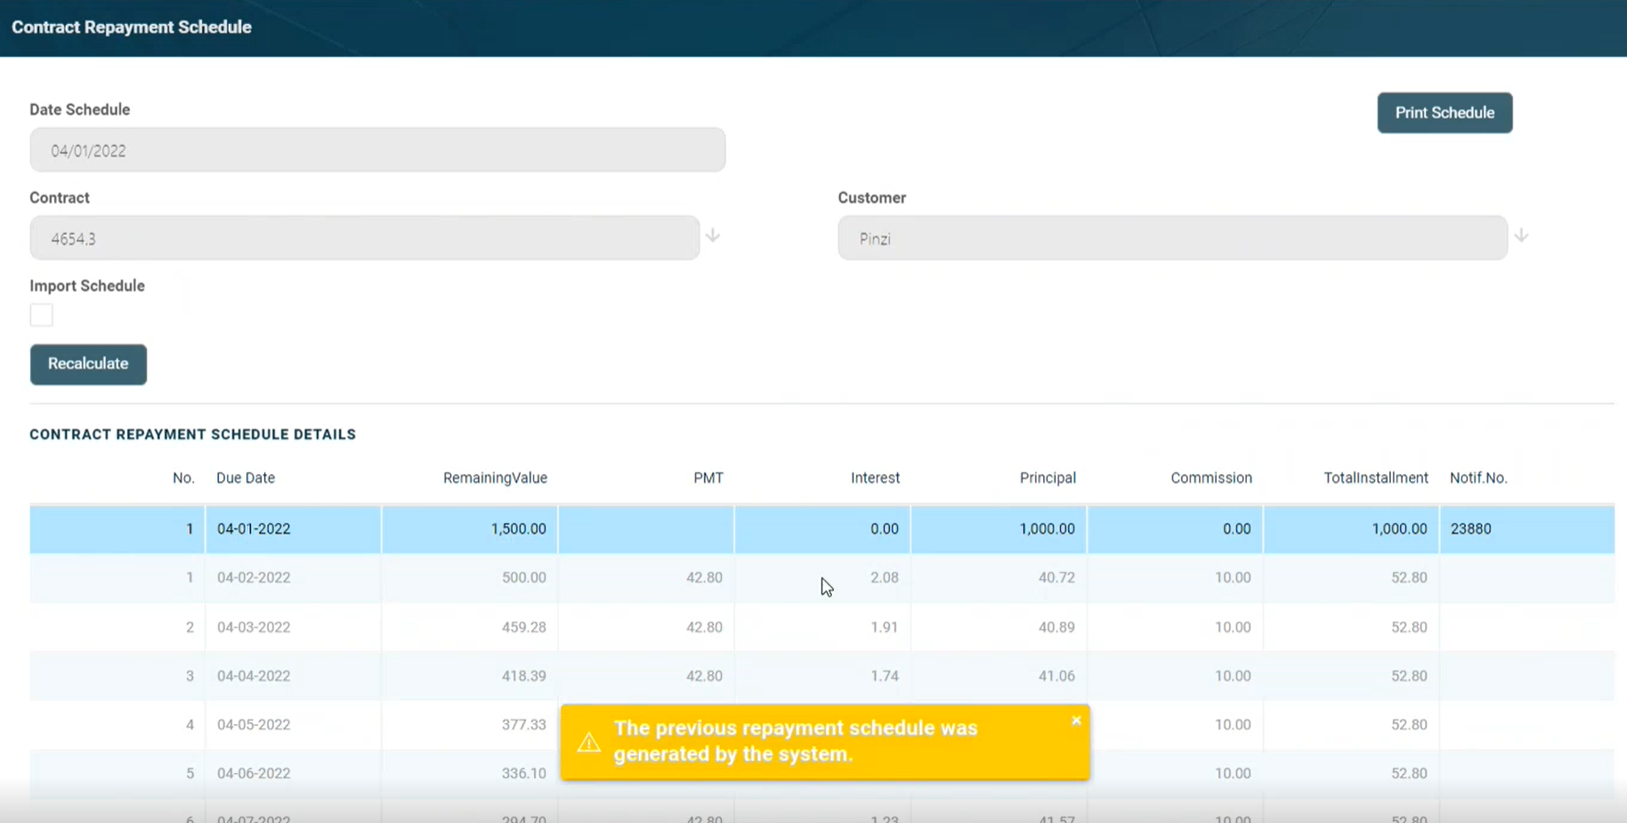
A warning message lets you know that "The previous repayment schedule was generated by the system". You can either recalculate the schedule using the Core Banking logic, or you can import a custom repayment plan which you build for this contract version. -
On the newly opened Contract Repayment Schedule page, select the Import Schedule checkbox. The Schedule File field is displayed, with the Select file button. The Export Schedule Template button is also displayed. A warning message informs you that "The previous repayment schedule was generated by the system".
-
Click the Export Schedule Template button to download a
.xslxfile with the schedule template for this specific contract. -
Open the downloaded schedule template
.xlsxfile exported from Core Banking and make it editable. -
Format the Due Date column as
Text -
Fill in the lines of the template file with the data needed in the contract's custom repayment plan.
Fill in each installment's type according to the event type.NOTE
Make sure you don't change the data formats within the columns, except for the Due Date column which needs to beText. Do not change the headings. Validations are performed for the file after uploading it to Core Banking, when the record is saved, and incorrect formats or data are not accepted, then error messages are shown for such files.IMPORTANT!
For contracts with existing repayment notifications, these notifications are already present in the downloaded template file. Do not modify the existing notifications' data. Compose your custom schedule taking into account the already existing repayment notifications.Read more about the repayment plan template file and how to fill it in its dedicated section.
-
Save the file. If the file needs to be labeled according to your company's information protection policy, label it as
Public, otherwise, Core Banking can't import it. -
Back in Core Banking's Contract Repayment Schedule page, click Select File.
-
In the newly displayed Explorer window, browse for the
.xlsxfile that contains the custom schedule you've filled in with the contract's repayment plan, then click Open.
The selected file's name is displayed under the Schedule File field. -
Click the Save and Reload button at the top right corner of the page. Core Banking performs the validations, making sure that the uploaded file meets all the criteria for a correct, functional schedule.
-
Click the Run Import Schedule button to perform the import of the new custom schedule to the contract. This button can be clicked only if a file was selected in the Schedule File field. The Contract Repayment Schedule Details section now displays data contained in your custom schedule.
If you click the Run Import Schedule button one more time, the values within the Contract Repayment Schedule Details section are deleted and reinserted.
When versioning a contract that has an imported repayment plan, the schedule recalculation is not mandatory. You can choose between recalculating and importing an updated repayment plan.
Repayment Plan Template File
Each time you need to import a custom schedule to a contract, you must export its template file first. You can do this by clicking the Export Schedule Template button. A file with .xlsx format is downloaded to your computer. The file contains the columns that must be filled in based on the contract's schedule type definition.
Each contract type may have a different schedule type definition, so make sure you download the template!
This is an example of an exported repayment plan template file:

After opening the downloaded schedule template .xlsx file, make it editable so that you can perform changes within its cells.
Format the Due Date column as Text.
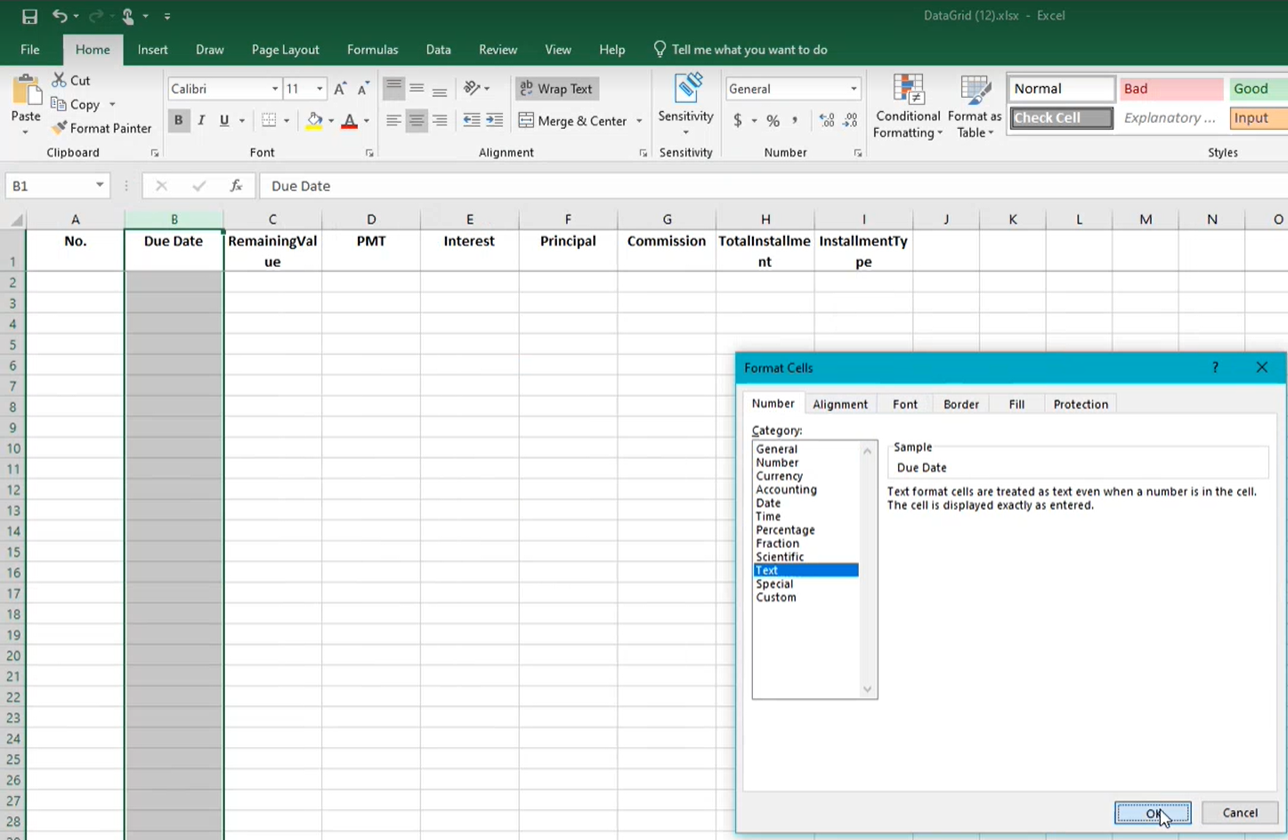
Fill in the lines of the template file with the data needed in the contract's custom repayment plan. Fill in each installment's type according to the event type. The possible values are Installment, EarlyRepayment, DownPayment, PaymentHoliday, ReturnAmount, or RescheduleOverdue.

Make sure you don't change the data formats within the columns, except for the Due Date column which needs to be
Text. Do not change the headings. Validations are performed for the file after uploading it to Core Banking, when the record is saved, and incorrect formats or data are not accepted, then error messages are shown for such files.For contracts with existing repayment notifications, these notifications are already present in the downloaded template file. Do not modify the existing notifications' data. Compose your custom schedule taking into account the already existing repayment notifications.
Save the file after filling in the template file with the desired schedule information. If the file needs to be labeled according to your company's information protection policy, label it as Public, otherwise, Core Banking can't import it.
Validations
A series of checks and validations are performed for the file after uploading it to Core Banking, when the record is saved, before being imported:
-
Due Date must be of the correct
Textformat:dd-mm-yyyy; -
Remaining Value = previous Remaining Value - previous Principal;
-
Sum(Principal) = eventValue for
Disbursementevent type; -
Sum(Principal) = outstanding amount (sum of principal for installments not notified yet) in all other cases;
-
Values are not negative;
-
Due Date >= Activation Date if installment type =
DownPayment; -
Due Date >= First Due Date if installment type =
Installment; -
Due Date <= Maturity Date;
-
Total Installment respects the formula from the contract's schedule type;
-
Max(InstallmentNo) <= Installment Number from the contract Overview tab;
-
Due Date and InstallmentNo values must be different and consecutive, except for
Early Repaymentevent type, where you can have 2 installments of the same number on the same day; -
If the installment is of
Early Repaymentevent type, it can only be the first installment in the imported schedule; -
If the import is performed on a contract in Version Draft status and there are installments notified, those should not be modified and the checks should be done over installments that were not notified yet, so sum(principal) for installments to be imported = outstanding amount. In this case, Due Date should be >= than the last notified installment and Installment Number > the last notified installment.
If any of these checks fail, then you are presented with error messages and cannot continue with the import process.
Warning messages notify you if "The previous repayment schedule was generated by the system" or if "The previous repayment schedule was imported". These warnings are for your information and do not affect the import process.
Whenever you opt for using the automatically generated repayment plan on a contract that already had an imported schedule, a warning message informs you that the standard system method overwrites the schedule that was imported in a previous version/ event.
The following error appears when you try to change an installment's Due Date (within the contract's Overview section) starting with the second disbursement: "You are not able to change Due Date that is already saved in the consolidated repayment schedule!".
For contracts with imported schedules where the second disbursement with repayment contract was automatically generated by Core Banking, the workaround is to:
1. Create a new version of the contract.
2. Recalculate the repayment plan.
3. Approve the contract version.
4. Create a new disbursement.