Insurance Products
The Insurance Product Factory enables you to create a great variety of products aimed to help potential customers get insurance, as effortlessly as possible.
For example, an insurer who wants to seize the opportunity, following a market boom, such as lots of owners selling their houses in a particular area, can create a new Home Insurance Product promptly. The premium amount can be calculated separately for each product item - such as the contents of the house, allowing a better understanding concerning pricing the whole product. If needed, the insurer can also set a time limit for the product availability. Once activated, the product is digital journey-ready and the insurer can expose it to potential customers through different digital channels, relevant to that area.
Insurance Products View
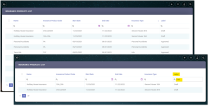
In Innovation Studio, in the Insurance Products section, you have an overview of all the insurance products created in your system. This is an all-inclusive view; yet, you can also search and sort your products for easier processing. For example, if you want to view all the products in Draft status, you can use the Search by Label option and sort all your invoices accordingly.
Below, you can see an example of a list view for products and a product search example.
Follow these steps to view your Insurance Products:
-
Go to Innovation Studio.
-
At the top left corner of your screen, click the main menu icon to open the main dropdown list.
-
From this main list, click Insurance Product Factory. A second dropdown opens.
-
Next, click Insurance Products to go to the Insurance Products List.
On the Insurance Products List page:
-
To inspect a record from the grid, double-click it.
-
To add a new record, click Insert, at the top right corner of the page.
-
To edit a Draft record from the grid, double-click it and press Edit.
-
To delete a record from the grid, select it and click Delete, at the top right corner of the page.
Creating an Insurance Product
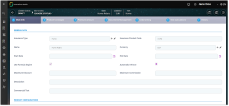
At the top right corner of the Insurance Products List page, click Insert to add a new insurance product. The Insurance Product dynamic form opens. This form allows you to create your desired product and configure the product settings. To complete the creation journey for your product, go through all the tabs listed below. Filling in information in the first tab activates the next tabs and lets you move forward through the product creation journey. However, if you need to interrupt your journey, you can use the Save and close button to save your product as Draft, and complete the journey at a later time. While the product is in Draft business status, the form is still editable. For more details, see the Creating a Draft Insurance Product section.
Use the tabs described below to create your insurance product:
The Main Info tab has two sections:
-
The General Data section - holds details about the product's main characteristics, those which are most visible to the final customer.
-
The Product Configurations section - lets you configure the details for the policy coverage, policy administration, the scheduling of payments and billing, and the management of claims.
In this section, generally describe your new product. The following fields are available:
| Field | Description |
|---|---|
| Insurance Type | Click the dropdown to select a Type of insurance for your insurance product - ex. Auto, Health, Home, Travel. See Insurance Types for details. |
| Insurance Product Code | Use this text area to fill in the code of the insurance product. |
| Name | Insert the name of your insurance product. |
| Currency | From the dropdown list, select a currency for your insurance product. |
| Start Date | Pick the date when your product becomes available. |
| End Date | Pick the date when the availability of your product ends. |
| Use Formula Engine | Mandatory check for calculating different insurance formulas for your product. It allows the connection with FintechOS Business Formulas. |
| Automatic InForce | Set to true if you allow automatic transitioning from Issued to InForce business status for policies including this insurance product, when the date they are issued is the same as their begin date. See Policy Admin for more details. |
| Maximum Discount | Set the maximum percentage of the commercial discount which can be offered in the sales process for your product. This field allows numeric values. |
| Maximum Commission | Set the maximum percentage of the commission which can be offered to intermediary sellers. This field allows numeric values. |
| Description | Give some details (500 characters) about the insurance product. |
| Commercial Text |
Give some details (300 characters) about the prescribing terms for a policy - the prescribing date of the claim, calculated as the start date of an event added to the number of days defined for each covered risk. This text is going to be used in different user journeys and document templates. |
After inserting the required information, move to the next section of the tab.
In this section, describe your product configurations concerning policy coverage, policy administration, the scheduling of payments and billing, and the management of claims.
The following fields are available for configuring Policy Coverage:
| Field | Description |
|---|---|
| Grace Period | The grace period for a policy. Input the number of time units for the grace period. |
| Grace Period Type | From the option set, choose Days or Months to indicate the type of grace period. |
| Total Indemnity Limit | Insert the maximum coverage amount provided per insurance policy. |
The following fields are available for configuring Policy Administration:
| Field | Description |
|---|---|
| Free Withdrawal Period Limit | Set the Free Withdrawal Period Limit - necessary for Cancellation processes. |
| Allow Renewal | Check the box if you allow renewal for policies including this insurance product. |
| Renew Type | Choose the type of the insurance policy renewal. The option set values are: No (default), Automatic renewal, and Renewal offers. |
| Suspension | Choose if you allow suspension settings on your insurance product. The option set values are: No (default) and Yes. |
| Type of Suspension | If you set Yes for Suspension, this is the field that allows you to select what type of suspension you allow for policies incorporating your product. The option set values are: Generic and Specific. Choose Specific if you want your particular settings to be included into any suspension flow for that product. Choose Generic if you allow general suspension settings for your product, managed through the Policy Admin module. |
| Days Before Suspended | Set the number of days before a policy enters the suspension flow. |
| Premium Update due to Suspension | Choose if you allow premium updates on the suspended policies. The option set values are: No and Monthly. |
| Max. no of consecutive suspended months before lapsing | Set the maximum number of consecutive suspended months before a policy is moved to the lapsing flow. |
The following fields are available for configuring Payments Schedule & Billing:
| Field | Description |
|---|---|
| Payment Period Grace (days) | Insert the number of days for the payment grace period. |
| Write off | Set the tolerance threshold for writing off payments that fall shorter than the expected agreed installment amount (for example 74.5$ instead of 75$). The option set values are: No write-off, Generic, and Specific Write Off. Choose: NoWriteOff if no rule for writing off is applied for your product. GenericWriteOff if you allow the generic write-off settings to be used. SpecificWriteOff if you want to set the value for this parameter yourself. When you choose the Specific Write-Off option, a Json pop-up appears and you can add your own key-value pairs, per different currencies. Set the desired values for this parameter. Your inserts are automatically saved. |
| Statement Generation |
Configure the values to be used for automatic invoice generation. The option set values are: Generic, Specific SGDAY and Specific Day. |
* SGDAY translates to Statement Generation Day - This parameter stores the number of days in advance (before the payment due date), for automatically generating an invoice for a scheduled payment (installment) on a policy.
The following fields are available for configuring the Claims Management:
| Field | Description |
|---|---|
| Claim Prescribing Period (months) | The period of prescription of a claim, expressed in months. |
| Claim Notification Period Limit (hours) | The period during which the claimant can notify the damage produced - in order to open a claim on a policy that contains this insurance product, expressed in hours. |
Click Save and reload. The other tabs become available and you can see them at the top of the screen.
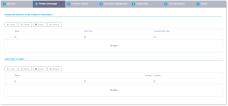
The Product Coverages tab allows you to configure the coverage for each product item. For example, for property insurance, a customer might buy coverage for two types of product items: first, the house and second, the contents of the house - which can be covered individually, also.
This tab has two sections:
-
Insurance Product Items - This section is reserved for items of type Base. For example, for a Property Insurance policy, the Base insurance product item could be the coverage for the actual building, only. And the coverage for the contents of the house could be included as a Rider, see below.
-
Additional Clauses - In this section, you can include Riders - additional risks that the customer wants to cover. For example, for a Life Insurance policy, additional coverage may potentially refer to losing working capacity.
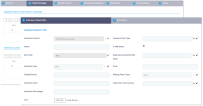
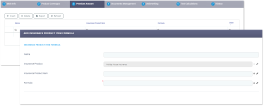
Proceed to insert a Base product item. In the header section of the form, under Insurance Product Items, click Insert. The Insurance Product Item window opens. This form allows you to add any number of base items attached to your insurance product and any relevant documents describing each added item.
The following fields are available for configuring each Product Item that you create:
| Field | Description |
|---|---|
| Insurance Product | The Insurance Product to which the current Product Item is assigned to. This information is automatically filled in by the system. |
| Insurance Item Type | From the dropdown, select the Type of the insurance product item (ex. House/ Car). If you need to add a new Item Type, see Insurance Types. |
| Name | Add the name of the insured product item. |
| Is Mandatory | Check the box if the item is mandatory. For example, a mandatory house insurance as part of a mortgage. |
| Item Type | Base - It is automatically filled in by the system. |
| Operation Type | Choose Sum to have this product item included into the calculation of the final premium, for the current product. |
| Supervisory Authority Risk Class | This is a dropdown with a list of risk classes, as reported by insurers to their local, regional or national supervisory authority. Choose a risk class that covers your insurance product item. |
| Code | The code of the product. |
| Waiting Period | The amount of time a policyholder must wait before the coverage for the current item comes into effect. Insert the number of time units for the waiting period (until the current coverage becomes available on a policy). |
| Waiting Period Type | From the option set, choose Days, Weeks or Months to indicate the type of waiting period. |
| Indemnity Limit | The monetary amount of the coverage provided under the insurance policy. |
| Indemnity Limit Currency | From the dropdown list, select a currency for the indemnity limit of your insurance product item. |
| Indemnity Percentage | The percentage of indemnity limit, set-up as percentage from the total indemnity limit of the current product. |
| Icon | Upload an icon for the product item, if the case. |
| Commercial description | Text area for describing the product item. |
Click Save and reload. Next, the Modules grid becomes available, at the bottom of the form. This grid allows you to correlate groups of risks coverage (eg. natural disasters) with your current Insurance Product Item.
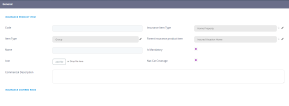
In the Modules grid, click Insert to open the General window.
For each Risk Group that you add, the following information must be provided:
| Field | Description |
|---|---|
| Code | The Code for your document. |
| Insurance Item Type | It is automatically filled in by the system with the current item type. |
| Item Type | It is automatically filled in by the system with the type Group. |
| Parent Insurance Product Item | It is automatically filled in by the system with the Parent Insurance Product Item. |
| Name | Add the name for the Risk Group. |
| Is Mandatory | Check the box if the feature is a mandatory one. |
| Nat-Cat coverage | Check the box if the risk item belongs to the Natural Catastrophes group. |
| Icon | Upload an icon for the risk item, if necessary. |
| Commercial description | Text area for describing the product item. |
Adding these details about the groups of risks coverage for your current item unlocks a view, at the bottom of the form, in which you can see all the types of risks covered by the Insurance Product that you are currently configuring. You can explore the list of risks and if necessary, you can edit the risk types from the Insurance Risks menu.
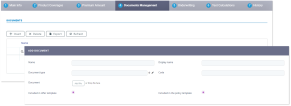
Click Save and reload and then click Documents. This window allows you to add any relevant documents related to the product item. For each Document that you upload, the following information must be provided:
| Field | Description |
|---|---|
| Name | The name of your document. |
| Display name | The display name of your document. |
| Document type | From the option set, choose between Policy, Terms & Conditions orIPID - Insurance Product Information Document - which is a type of document presented during the Quote&Apply flow. |
| Code | The code for your document. |
| Included in offer template | Check the box if your document must be included in the product offer template. |
| Included in the policy template | Check the box if your document must be included in the policy template. |
Click Add File to upload your document.
Add as many base Product Items as you need for the current Insurance Product. Use the Modules grid on every Product Item to set group risks, the same way you did for the first base Product Item, if the case.
Once finished, click Save and close and navigate back to the Insurance Product Items window. Here, you can use the Additional Clauses grid to add Rider items for your insurance product.
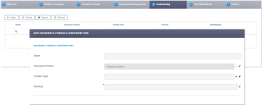
Under Additional Clauses, click Insert. The Insurance Product Item Rider window opens. This form is similar to the form for the Base insurance product items, the exception being the Item Type field - which is automatically filled in by the system with the Rider option.
The following fields are available for configuring each Product Item Rider that you create:
| Field | Description |
|---|---|
| Insurance Product | The Insurance Product to which the current Product Item is assigned to. This information is automatically filled in by the system. |
| Insurance Item Type | From the dropdown, select the Type of the insurance product item (ex. House/ Car). If you need to add a new Item Type, see Insurance Types. |
| Name | Add the name of the insured product item. |
| Is Mandatory | Check the box if the item is mandatory. For example, a mandatory house insurance as part of a mortgage. |
| Item Type | Rider - It is automatically filled in by the system. |
| Operation Type | Choose Sum to have this product item included into the calculation of the final premium, for the current product. |
| Supervisory Authority Risk Class | This is a dropdown with a list of risk classes, as reported by insurers to their local, regional or national supervisory authority. Choose a risk class that covers your insurance product item. |
| Code | The code of the product. |
| Waiting Period | The amount of time a policyholder must wait before the coverage for the current item comes into effect. Insert the number of time units for the waiting period (until the current coverage becomes available on a policy). |
| Waiting Period Type | From the option set, choose Days, Weeks or Months to indicate the type of waiting period. |
| Indemnity Limit | The monetary amount of the coverage provided under the insurance policy. |
| Indemnity Limit Currency | From the dropdown list, select a currency for the indemnity limit of your insurance product item. |
| Indemnity Percentage | The percentage of indemnity limit, set-up as percentage from the total indemnity limit of the current product. |
| Icon | Upload an icon for the product item, if the case. |
| Commercial description | Text area for describing the product item. |
Click Save and Reload. Add as many Product Item Riders you need for your Insurance Product. Use the Modules grid on every Product Item Riders to set group risks, the same way you did for the Product Items, if the case.
This section allows you to use different formulas in order to calculate the Premium Amount for each Item attached to your current Product. For more information about creating your own formulas and examples of the logic used for calculating premium amounts for insurance products, start from the Business Formulas Integration page.
This section allows you to manage the documents that are associated with your product. For example:
-
terms and conditions for the current insurance product,
-
the mandatory general presentation of the product as requested by the authorities,
-
mandatory clauses to be included in contracts based on different criteria,
-
sample presentations that are to be used in the quote & apply journey or for different customer personas, and more.
For each Document that you upload, the following information must be provided:
| Field | Description |
|---|---|
| Name | The name of your document. |
| Display name | The display name of your document. |
| Document type | From the dropdown, choose between Policy, Terms & Conditions orIPID - Insurance Product Information Document - which is a type of document necessary for the Quote&Apply journeys. |
| Code | The Code for your document. |
| Included in offer template | Check the box if the document must be included in offer template. |
| Included in the policy template | Check the box if the document must be included in the policy template. |
Click Add File to upload your document and then click Save and reload to continue your journey.
This section allows you to use different formulas for analyzing different risks related to property insurance and produce a status or decision regarding the policy - for example, establishing whether the proposed risks are insurable for that particular property. You can also configure formulas for determining whether the policy proceeds further with an automatic flow or if it needs to go on a manual approval flow. For more information about creating your own formulas and examples of the logic used for risk scoring and underwriting for insurance products, start from the Business Formulas Integration page.
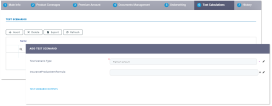
A history of the product allows you to understand how your product evolved over time and decide on updating its course, eventually. You go to the History tab when you need to have an overview over the product's life cycle, inform yourself about previous product versions (approved or unapproved) and also about any currently opened version in Draft status.
Creating a Draft Insurance Product
There are times when you need to create a draft product, rapidly. While the product is in Draft business status, the form is still editable and you can complete the product creation journey at a later time.
To create a draft product, please follow the next steps:
- Open Innovation Studio.
- At the top left corner, click the main menu icon to open the dropdown list.
- From the list, click Insurance Product Factory. A second dropdown opens.
- Click Insurance Products to open the Insurance Products List page.
- To add a new record, click Insert, at the top right corner of the page.
- The Insurance Product form opens. Start filling in the mandatory fields, in order to be able to save the record as a Draft.
Mandatory fields:
| Field | Description |
|---|---|
| Insurance Type | From the dropdown, select an Insurance Type for your insurance product - for example, Auto, Health, Home, or Travel. See Insurance Types for details. |
| Insurance Product Code | Fill in the code of your insurance product. |
| Name | Insert the name of your insurance product. |
| Currency | From the dropdown, select the currency for your insurance product. |
| Write off | Set the tolerance threshold for writing off payments. More details about Write off in the description of the Payments Schedule & Billing configurations section. |
| Statement Generation | Configure the values to be used for automatic invoice generation. More details about Statement Generation in the description of the Payments Schedule & Billing configurations section. |
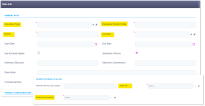
Below is an example of an Insurance Product form, with the mandatory fields highlighted.
Modifying an Insurance Product
Here are the details for modifying an Insurance Product that is in Draft status:
- Open Innovation Studio.
- At the top left corner, click the main menu icon to open the dropdown list.
- From the list, click Insurance Product Factory. A second dropdown opens.
- Click Insurance Products to open the Insurance Products List page.
- From the list, select the Insurance Product that you want to edit and double-click it. Once opened, use the form to edit your Product.
Deleting an Insurance Product
To delete an Insurance Product from the grid, please follow the next steps:
- Open Innovation Studio.
- At the top left corner, click the main menu icon to open the dropdown list.
- From the list, click Insurance Product Factory. A second dropdown opens.
- Click Insurance Products to open the Insurance Products List page.
- From the list, select the Insurance Product that you want to delete and then click Delete, at the top right corner of the page.
