Custom UI
(v.22.1.4 or later)
Custom UIs are generic containers that enclose forms/flows/steps and that run in the context of the enclosed component. Since custom UIs are reusable (you can associate a custom UI with multiple forms for instance), you can use them to segregate form layout and styling from the forms' content.
For instance, you can create a custom UI that contains a company header, followed by the enclosed component, followed by a company footer. Thus, all form driven flows associated with that custom UI will be displayed preceded by the company header and followed by the company footer.
With custom UIs, you can customize the user interface without having to modify the layout/styling-related code in your client-side forms and steps each time a package is updated. All form driven flow and app data form UI customizations can be fully decoupled from the client-side functional logic.
Configuration
There are two main tasks for setting up a Custom UI: creating the Custom UI and associating it with a Form/Flow/Step.
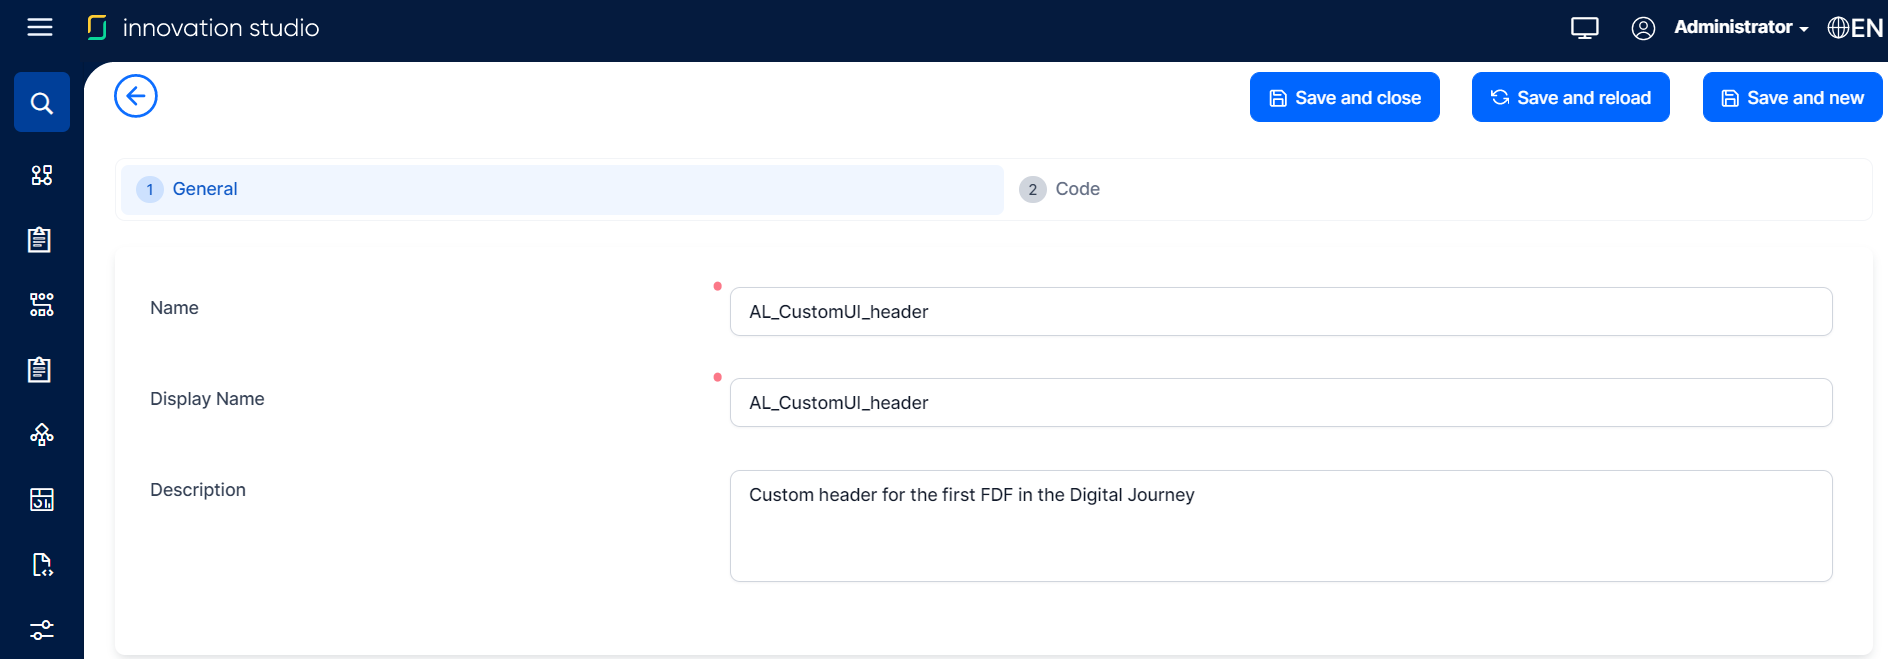
Create a Custom UI
-
Navigate to Digital Experience > Digital Frontends > Custom UI.
- Select +Create.
-
Fill in the Name and Display Name fields (the Description field is optional).
-
Select one of the Save options.
In the Code tab, enter the custom UI HTML and JavaScript code. The code must return an object with 2 properties (methods) that the platform will know to execute in a Form Driven Flow code execution flow (
beforeRenderingandafterRendering):Copyreturn = {
beforeRendering: function(formName),
afterRendering: function(formName, stepName)
}Example:
Copyvar customControl = ebs.importClientScript("myControls")
return {
beforeRendering: function(formName){
console.log("before render: ", formName, formData, formScope);
ebs.rendering.registerInterceptor("name", new customControl.textEditor());
},
afterRendering: function(formName, stepName){
console.log("after render", formName, stepName, formData, formScope);
},
}The
beforeRenderingandafterRenderingfunctions can also return Promises, for example:Copyreturn {
beforeRendering: function(formName){
return ebs.getByIdAsync("cuitest", "al1d2f5f-4ff9-4904-8efd-0790470e6850")
.then(function(){
console.log("setting marker from form custom after");
formScope.marker = "set from testCA(form after custom)";
});
}
}Use a
{standardUI}token to inject the content of the associated form/flow/step in the Document Object Model (DOM) of the custom UI.
Clone a Custom UI
If you wish to create a variation based on an existing Custom UI, you can clone the desired Custom UI and use it as a starting point for further modifications.
To clone a custom UI:
- Open your Custom UI and in the General tab, select Clone Custom UI.

- In the pop-up window that opens, provide a name for the clone.
- Select Clone to create your new Custom UI.
Associate a Custom UI with a Form/Flow/Step
- Navigate to Digital Experience > Form Driven Flows.
- Select the flow (or step) you want to apply your Custom UI to.
- Go to the Advanced tab > Set Custom UI > select the Custom UI from the drop-down list.
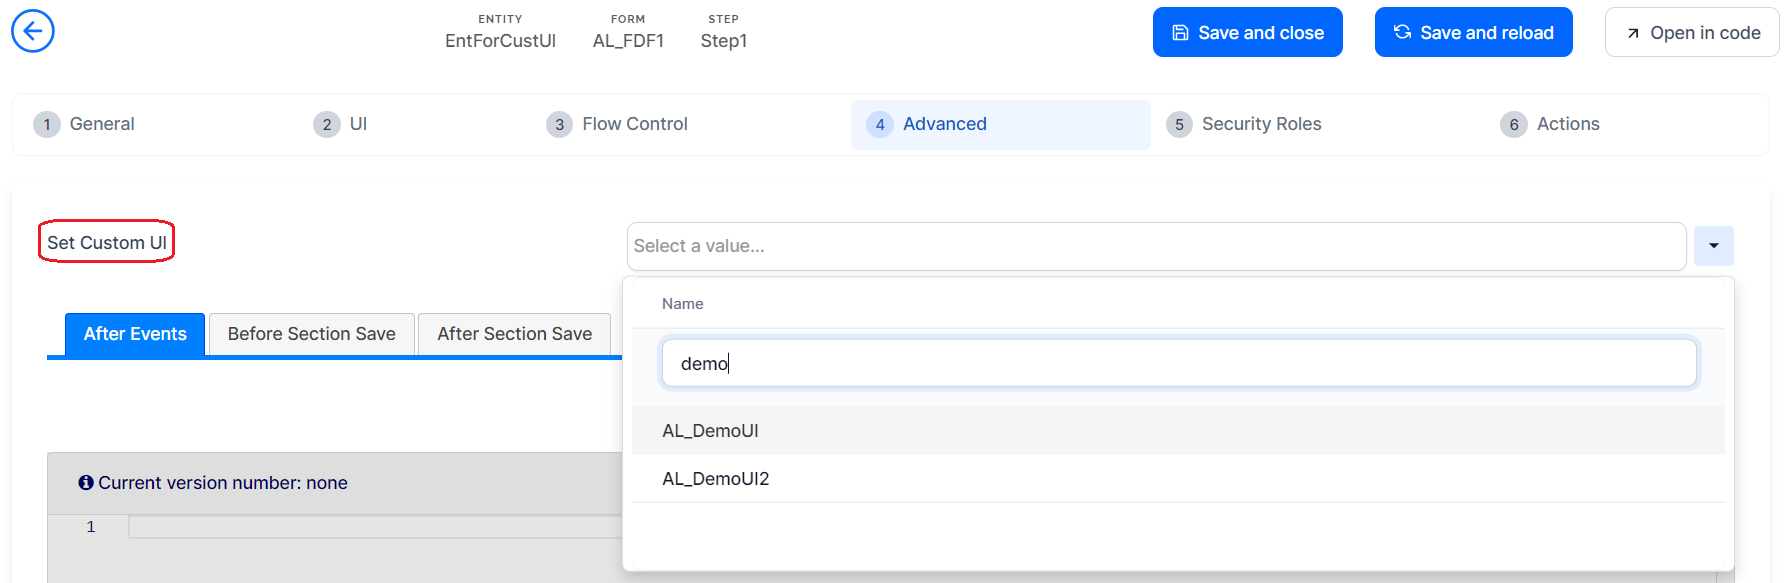
- Select Yes in the pop-up confirmation window.
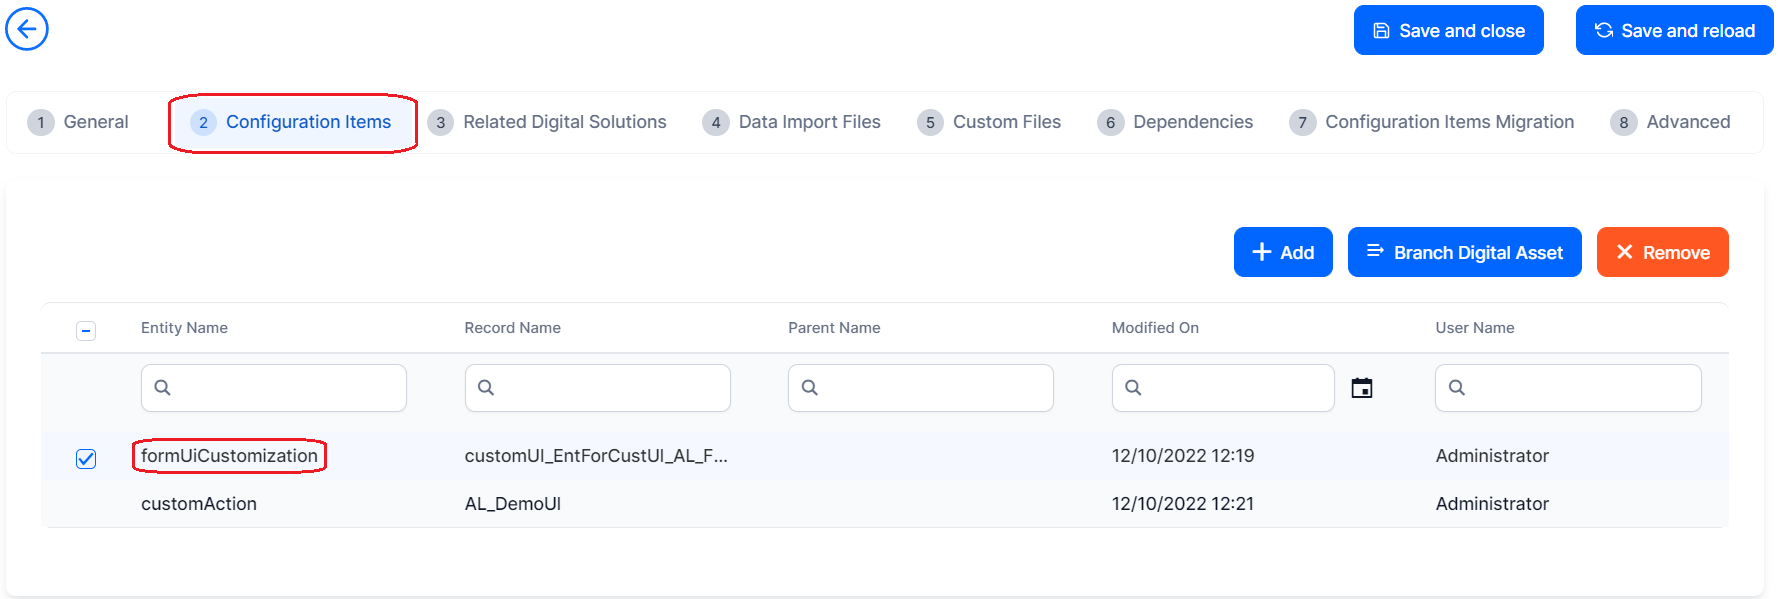
This action does not alter in any way the Form Driven Flow or App Data Form metadata. It is a means of linking them to use the Custom UI. The link is created in a new configuration item of type formUICustomization and is automatically added to your context Digital Asset, which can be different from the Digital Asset containing the Form Driven Flow.
formUICustomizations are treated as root configuration items and you can move them from one Digital Asset to another.
We recommend you to keep the UI customization configuration items in a separate Digital Asset - in case you need to deploy patches or fixes, this will speed up the process.
Events flow execution
1. If there is a configuration made on Form level:
The HTML template used will be the one of the configured customForm.
While rendering:
- The
beforeRenderingfunction will be called after the BeforeEvents of the Form - The
afterRenderingfunction will be called after the AfterEvents of the Form
AfterEvens(Form) -> AfterEvens(Step) -> afterRendering(customUI)
2. If there is a configuration made on Step level too:
- The HTML template used on the Step will be the one of the configured customForm
- If the configured HTML Template is null and there is a Custom UI configured on the Form, then the HTML template used will be the one from the configured customForm of the Form
- The
afterRenderingfunction will be called after theAfterEventsof the Step (if the configuration exists on Form level too, theafterRenderingconfigured on Form level will also be executed)
The
beforeRendering function from a Step Custom UI is not executed, as beforeRedering is linked in execution with theForm beforeEvent.You can also register your custom event to be triggered on step navigation (when the step changes, before the AfterEvents from Form and Step), including forward / backward navigation. E.g.:
formScope.myChangeSection = formData.on("stepNavigation", function(formName, stepName){
    console.log("changeSection", formName, stepName, formData, formScope);
});
And when needed, you can unregister your event:
formScope.myChangeSection.dispose()Your code is executed in form context, so besides having access to
formName and stepName, you will have direct access to formScope and formData.For UI manipulation, you need to write your code in
afterRendering. Having in mind the execution flow and that this event will be called any time the step after event is executed, if you want to avoid multiple executions for each step, you need to use flags in formScope.The execution sequence follows the pattern below:
AfterEvens(Form) -> AfterEvens(Step) -> afterRendering(customUI configured on Form) -> afterRendering(customUI configured on Step)
For more details about events flow execution, see Code Execution Sequence.
Custom UI on Custom Flows (B2C)
This feature exposes a function that can be called from the After Generate Js of a custom action that will load a customUI by name. It is exposed as a member of a context object available in the After Generate Js of the customAction entity: context.setCustomUI("customUIName"). The context.setCustomUI(customUIName) function called from the After Genereate Js of the customFlow will:
- Fetch the data for the specified customUI
- Check if the template contains the
FTOS_B2C_UI_Wrappermarker and then check if the same customUI already wraps the UI (and if not, use it to wrap the UI) - Execute the
afterRenderingof the customUI - Execute the
stepNavigationevent handler with the parameters: formName: null, stepName: null, customFlowName: the name of the custom flow
To ensure that the loader is disposed of after the customUI is fully rendered, the After Generate Js of the Custom Flow must return a Promise. As context.setCustomUI is a Promise, we recommend using it like this:
  return context.setCustomUI("customUIName").then(function(){
    //any other logic
  });
Custom UI on B2C journeys
B2C journeys exposed in B2C portals are built to provideanonymous customer interactions, not requiring a standard user authentication. Usually, these journeys are subject to a full UI Customization.
To view more details about unauthenticated user access, see Anonymous Frontends.
When the Digital Experience Portal runs in B2C User Journey mode, the standard portal layout components are removed by default. This means no menu, no header, no footer, etc. Only the exposed journeys flows are rendered. However, with the Custom UI functionality, you can customize the look and feel of your journeys in B2C mode as well.
Custom UI on Automation Blocks
You can further enhance your digital journeys by applying the Custom UI functionality to automation blocks. To associate a Custom UI to an automation block, go to the Processor Settings section of your desired automation block and select your Custom UI. For more information, see Automation Blocks.
Custom UI on the entire UI (B2C)
You can wrap the entire digital journey UI (layout, header, footer, logo, etc.) to match your business needs, with the CustomUI functionality. If there is a custom UI set on the form and the HTML template of the associated Custom Action contains an element with the id “FTOS_B2C_UI_Wrapper“, you can use that template to replace the {standardUI} token and wrap the whole UI with the customUI.
Scenarios
- Assuming you have a Digital Journey with 2 form driven flows, both having the
FTOS_B2C_UI_Wrapperin their respective configured customUI:- If the user starts the Digital Journey on the first form driven flow, then the journey UI is wrapped with the first customUI template.
- If the user progresses to the second form driven flow, then the journey UI is wrapped with the second customUI template.
- In case of a Digital Journey with 2 form driven flows, with only the first flow having the
FTOS_B2C_UI_Wrapperin the configured customUI (the second flow does not have one):- If the user starts the Digital Journey on the first form driven flow, then the journey UI is wrapped with the first customUI template.
- If the user progresses to the second form driven flow, then the first customUI template still wraps the UI.
- In a Digital Journey with 2 form driven flows, where only the second flow has the
FTOS_B2C_UI_Wrapperin the configured customUI:- If the user starts the Digital Journey on the first form driven flow, nothing happens.
- If the user progresses to the second form driven flow, then the journey UI is wrapped with the second customUI template.