Create a Complex Formula
A business process involves calculating the sum of money to pay and to be paid for a service. Formulas process different inputs from your digital journeys in order to generate desired outputs. It is mainly used to define mathematical and logical calculations that support various business needs.
Task at hand
The use-case is to create a formula with several arguments. The arguments are the following:
- Construction Type;
-
Appendages: warehouse, garage, shed, stable, swimming pool, sauna or storage room;
- Construction Year;
- Seismic Zone;
- Risks.
The steps is to return the result. The formula is the following:
result = Risks * Construction Year * Seismic Zone * Construction Type * Appendages;The risks included in the insurance are:
- Hail, storm, storm, avalanche or snow
- Earthquake, floods, landslides
- Fire, lightning, explosion, floods caused by installations
- Theft, vandalism, disposable property
- Falling bodies from outside, floods caused by neighbours
- Accommodation and rent costs in a temporary home
- Reconstruction project costs
- Costs for expertise and damage assessments.
Before you begin
- Create an entity with the attributes that match the list of arguments above.
- Create a home insurance data model and journey.
- Expose the journey in the FintechOS Portal.
1 Import the data sets
Follow the path: FintechOS Studio > Fintech Automation> Business Formula > Data sets.
For each of the arguments create a data set.
Construction type
| Construction type | Material | Dimensions | Coefficient |
|---|---|---|---|
| house | wood | under 150 square meters | 1 |
| over 150 square meters | 2 | ||
| brick | under 150 square meters | 3 | |
| over 150 square meters | 4 | ||
| cement | under 150 square meters | 5 | |
| over 150 square meters | 6 | ||
| apartment | wood | under 100 square meters | 7 |
| over 100 square meters | 8 | ||
| brick | under 100 square meters | 9 | |
| over 100 square meters | 10 | ||
| cement | under 100 square meters | 11 | |
| over 100 square meters | 12 | ||
| villa | wood | under 180 square meters | 13 |
| over 180 square meters | 14 | ||
| brick | under 180 square meters | 15 | |
| over 180 square meters | 16 | ||
| cement | under 180 square meters | 17 | |
| over 180 square meters | 18 | |
| holiday home | wood | under 100 square meters | 19 |
| over 100 square meters | 20 | |
| brick | under 100 square meters | 21 | |
| over 100 square meters | 22 | |
| cement | under 100 square meters | 23 | |
| over 100 square meters | 24 |
Appendages
| Appendages | Coefficient |
|---|---|
| warehouse | 25 |
| garage | 26 |
shed | 27 |
stable | 28 |
swimming pool | 29 |
sauna | 30 |
storage room | 31 |
Construction Year
| Construction year | Coefficient |
|---|---|
| 1970-1980 | 32 |
| 1980-1990 | 33 |
| 1990-2000 | 34 |
| 2000-2010 | 35 |
| 2010-2025 | 36 |
Seismic Zone
| Seismic Zone | Coefficient |
|---|---|
| Class I | 37 |
| Class II | 38 |
| Class III | 39 |
| No risk | 40 |
To import the .xml files, click the Insert files.
| Data set | Details |
|---|---|
Name | Insert the name for each data set, e.g. Data_Set1. |
Display Name | Insert a display name. |
| Description | Insert a description. |
| Value types | Select numeric. |
| Single value | The boolean is true. |
| Return Default Value | The boolean is true. |
Ignore Empty Values | The boolean is true. |
Start Date | The present date is the start date. |
End Date | The end date is 25/02/2050. |
Has Column Description | The boolean is true. |
Has Row Description | The boolean is false. |
Version | It is automatically true. |
Click the Insert button at the top right-hand corner of the page.
Enter a Name for the data set, e.g. Insurance_Home. Enter a Description for the data set, e.g. demo_trail.
In the Value Types field, select if the data set returns Numeric.
Check the Single Value box because the data set includes a mapping between a single discriminant key and a single metric value.
Select the Start Date, e.g. 10th of March 2021, time 10 a.m. The End Date and Version fields are populated automatically based on the data set's versioning.
Tick the Has Column Description and Has Row Description checkboxes because there is field descriptions in the second row and/or second column.
Click the Save and Reload button.
For details, see Data Sets.
2 Add the arguments
Follow the path: FintechOS Studio > Fintech Automation> Business Formula > Formula Input.
Insert a name and description, e.g. Home_Insurance.
Click the Insert button to add an argument.
| Argument | Details |
|---|---|
| Name | Insert the name for each argument:
|
| Display Name | Insert a display name. |
| Formula Input | This field is automatically filled in, in this case, Home_Insurance. |
| Master Type | Select Single type. |
| Formula Argument Sub-Type | Select whole number. |
Click the Save and reload button. Repeat six times.
For details, see Define Formula Inputs.
3 Create the formula itself
Follow the path: FintechOS Studio > Fintech Automation> Business Formula > Formula.
Click the Insert button on the right-hand corner of the screen to add a new formula. Fill in the following:
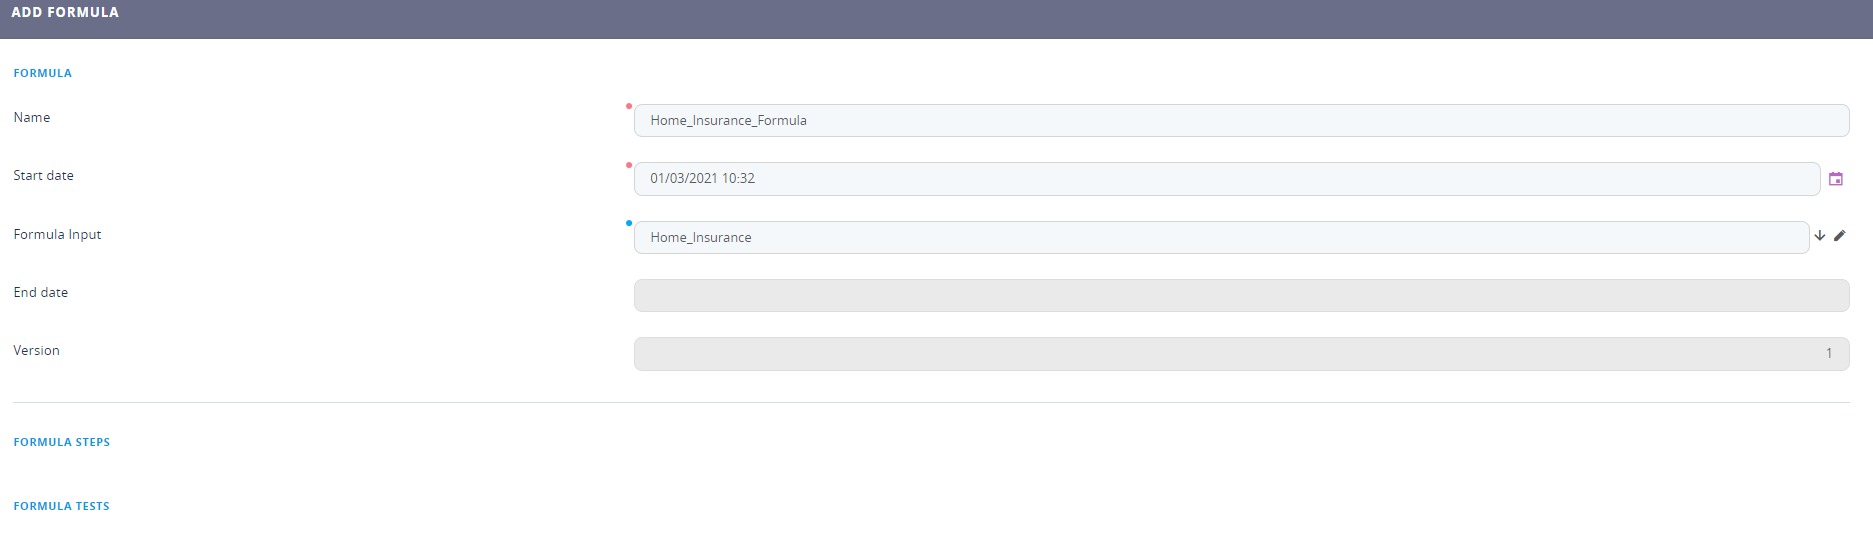
| Field | Details |
|---|---|
| Name | Insert the name, e.g. Home_Insurance_Formula. |
| Start date | Automatically the current date and hour are registered, but can be changed. |
| Formula Input | Select from the drop-down list the input (arguments' list) created earlier. |
| End date | It is read-only, automatically filled in by the system after save. |
| Version | It is read-only, automatically filled in by the system. |
Click the Save and reload button. For details, see Define Formula.
4 Create the formula step
Insert a name for the formula step.
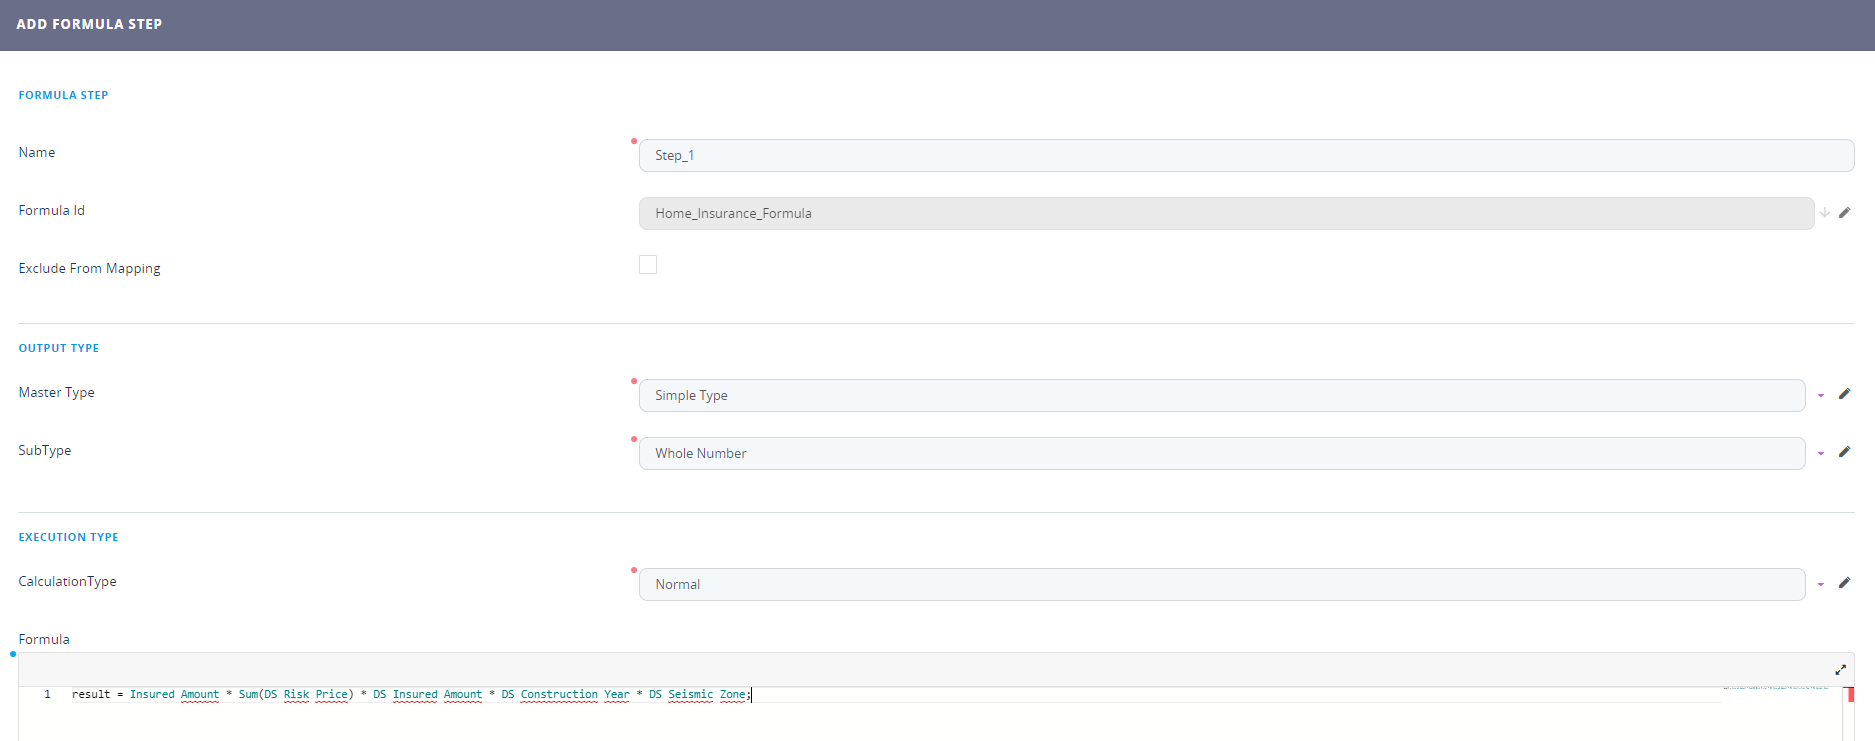
In this case, we only have one step to create. Insert the following formula:
result = Risks * Construction Year * Seismic Zone * Construction Type * Appendages;Click the Save and close button.
Activate the formula to use it in a digital journey!
5 Test the formula
Insert a suggestive name for the test, e.g. HomeInsuranceTest.
Select a reference date, e.g. 25 of March 2021.
Click the Save and reload button.
Insert the input.
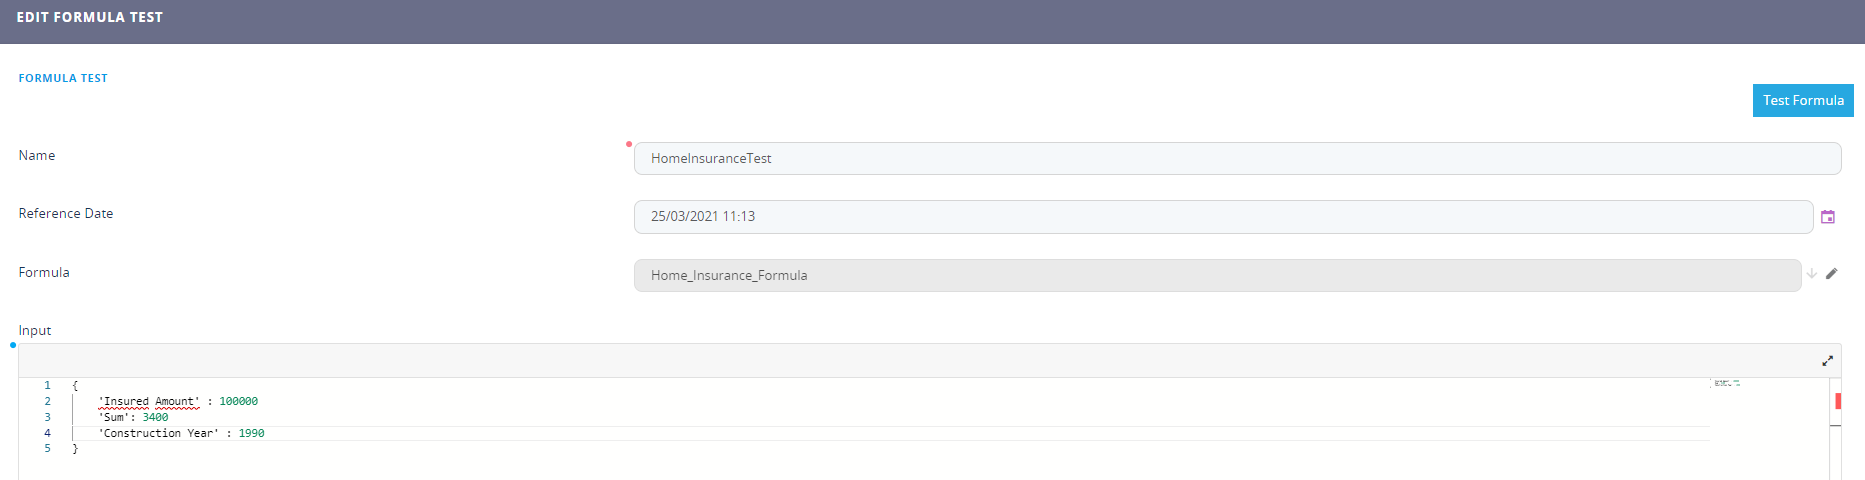
Click the button Test formula.
5 Map the formula
Follow the path: FintechOS Studio > Fintech Automation> Business Formula > Formula Parameter mapping.
Click the Insert button and fill in the following:
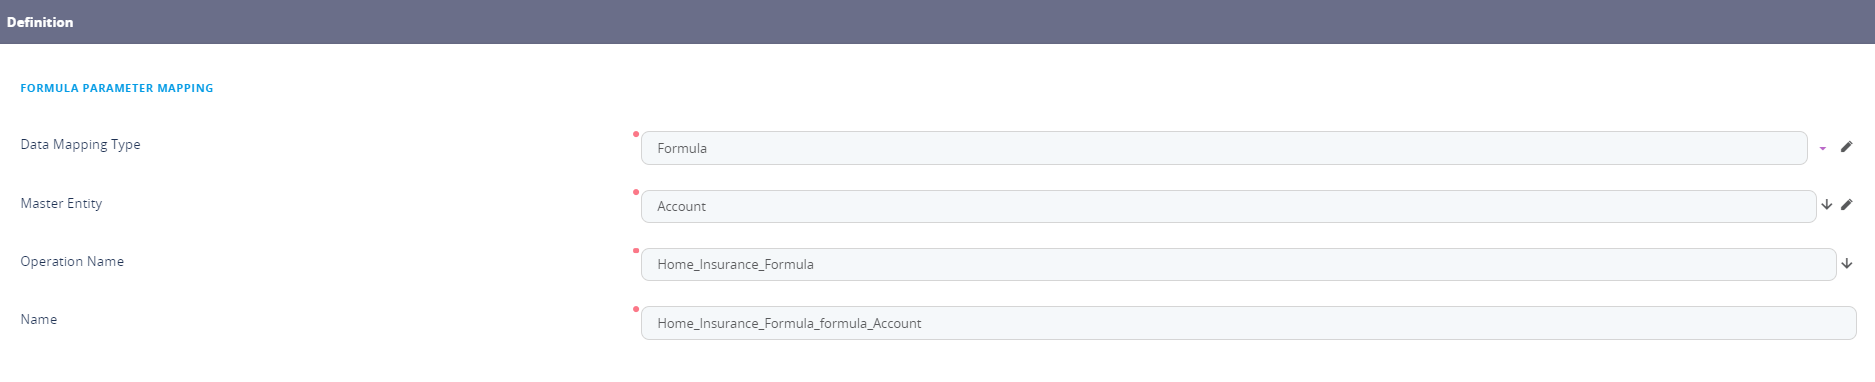
| Field | Details |
|---|---|
| Data mapping type | Select formula from the list. |
| Master entity | Select the entity used in the form driven flow. |
| Operation name | Select the active formula created earlier. |
| Name | The name is automatically generated. |
Click the Save and reload button.
Input

Output
The attributes shown here must be whole number.

For details, see Formula Parameter Mapping.
6 Call the formula no-code in a journey
Follow the path: FintechOS Studio > Digital Journey > Form Driven Flows.
Access from the list the form driven flow for the Home Insurance. Navigate to the Actions tab.
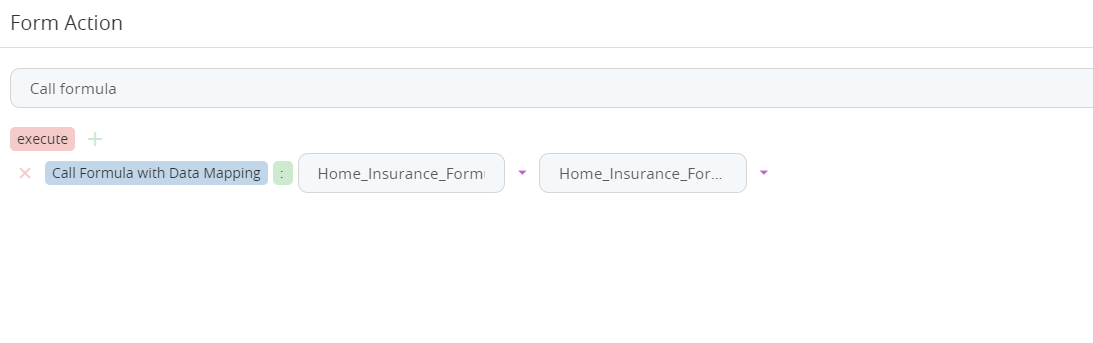
In the Form Actions grid, click the Insert button.
Insert a name for the action, e.g. Call formula. Add the Call formula mapping and map the data.
Add the action to any step you wish. For details, see Calling Formula Engine No-Code.
Congratulations! You have created a calculation to use in your digital journey!