
Define Formula Inputs
Formula Input is a grouping of parameters that can be used on more than one formula. Each input has a set of arguments used in several formulae at a time.
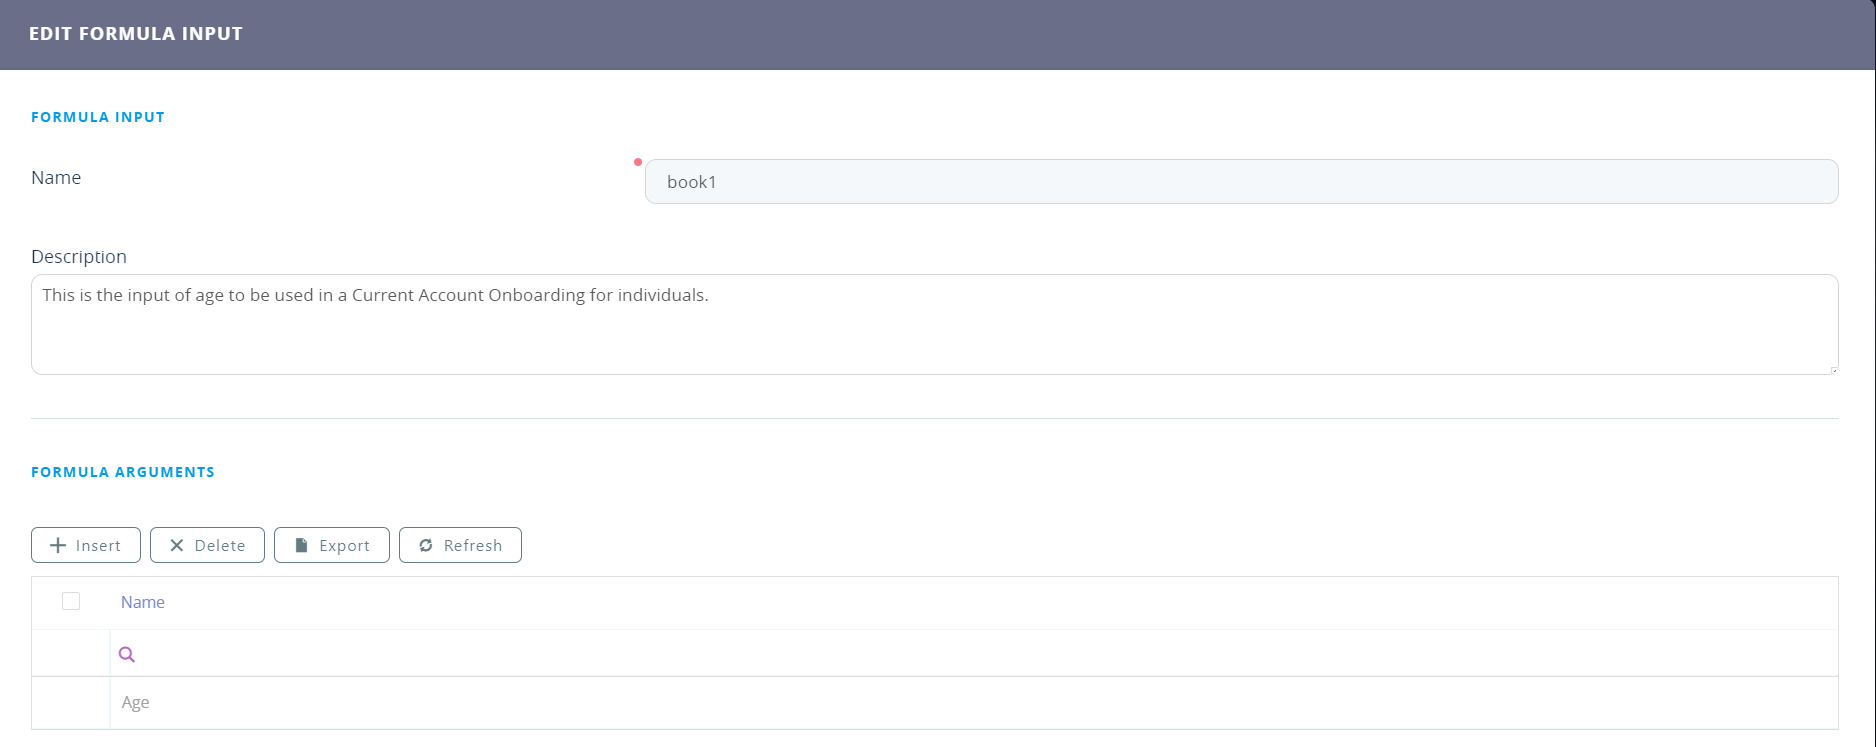
To define the set of arguments that go into a formula:
- Open the Main Menu (
 ) in FintechOS Studio.
 - Select Business Formulas.
- Select Formula Input.
- Click the Insert button (
 ) at the top right corner of the page.
 - Enter a Name for the formula input. This name must be unique. This name will be referenced by formulas that process this specific set of arguments.
- Optionally enter a Description for the formula input.
- Click the Save and Reload (
 ) button at the top right corner of the page.
Alternatively, from stage 4, it is possible to delete an input by clicking the ''X'' sign on the right corner of the screen. Updating or deleting a Formula Input that is used in a Formula which is not in status Draft is not allowed. This will also apply to all Formula Arguments declared in the Formula Input.
Add arguments to a formula input
Formula argument is the entity which holds a single value (be it simple or collection) which will be used as input for the Business Formulas. They are practically the parameters for the formula.
For example, for an insurance product it is possible to have as arguments the construction year of the house, the construction type, the seismic zone, the risks and the insured amount. For a banking product such as a loan, the arguments can be education, age, income, expenses, FICO score etc.
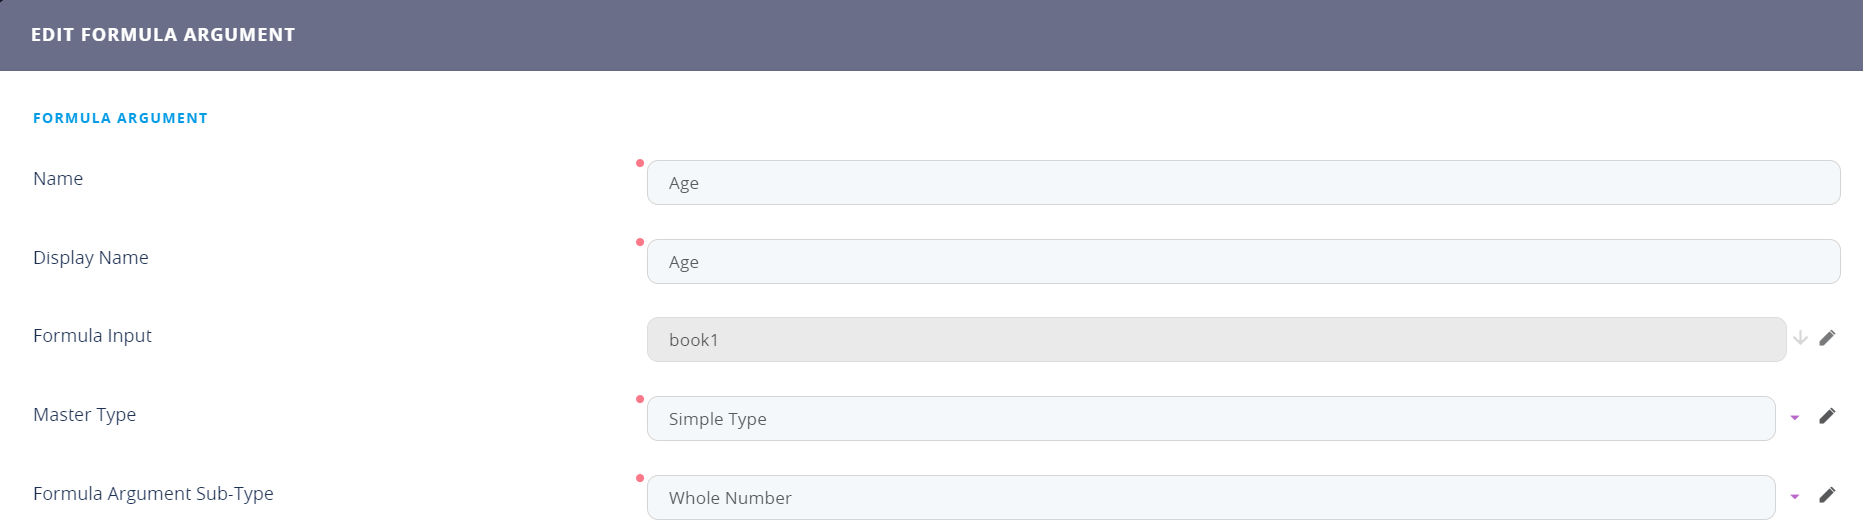
- In the Formula input page, in the Formula Arguments section, click the Insert button to add an argument.
- Enter a Name for the argument. This is a unique name that identifies the argument in the formula input e.g. Formula Arguments must have a unique name per each Formula Input (you can reuse argument names for different formula inputs).
- Enter a Display Name for the argument. This is how the argument will be displayed in the end-user interface.
- The Formula Input field is automatically populated with your formula input name.
- Select the Master Type of your argument as either Simple Type (a single value) or Collection (a set of multiple values; decimal and whole number collections only). For example, a Simple Type - Decimal can be the amount that the client must pay in a month for a credit he has taken, while a Collection – Decimal represents a list containing all the monthly payments installments that the client must pay in order to fully repay the credit he has taken.
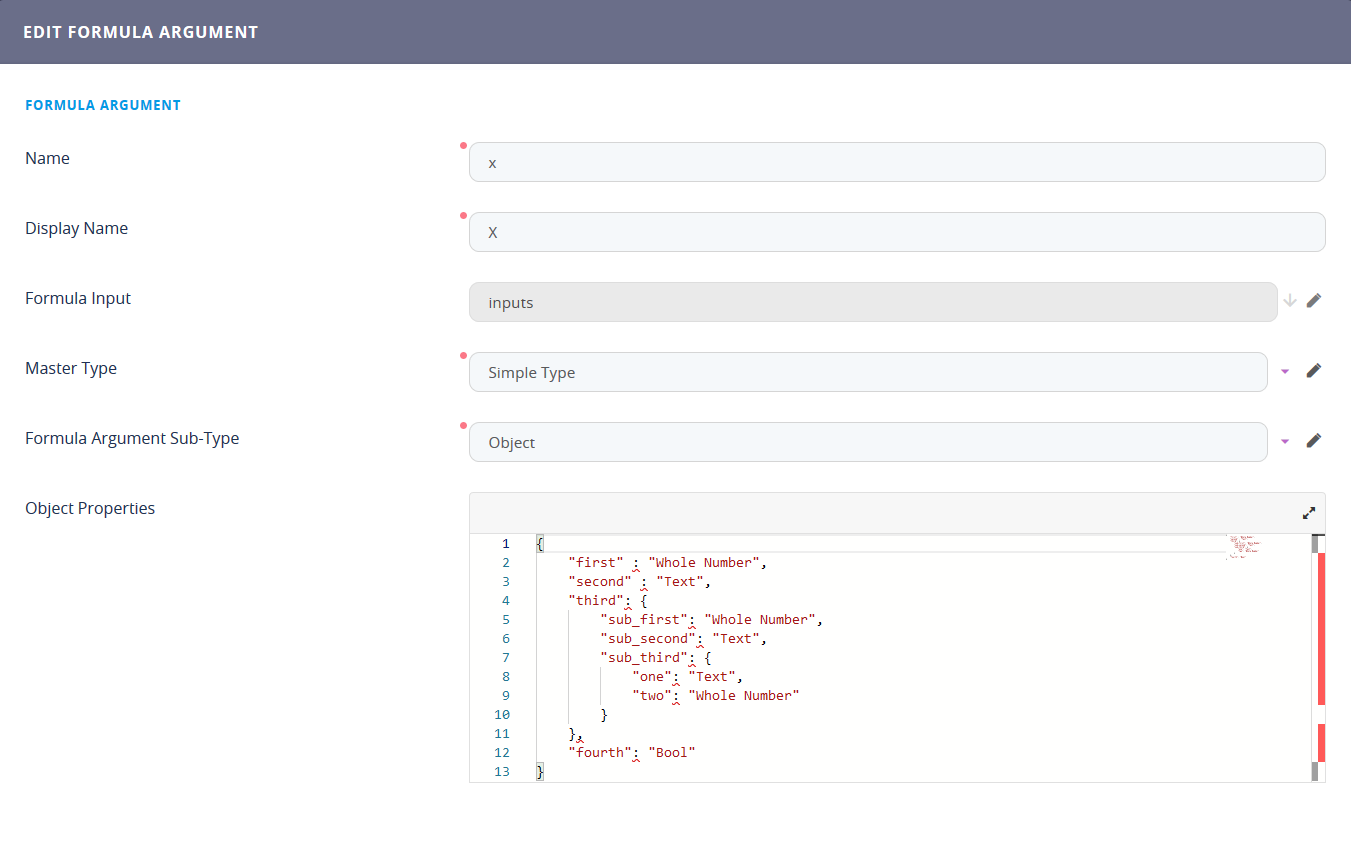
- In the Formula Argument Sub-Type field, enter the data type for your argument:
- Whole Number
- Decimal
- Boolean - only for Simple Type master types
- Text - only for Simple Type master types
- Object - only for Simple Type master types. When this data type is selected, an Object Properties field will open where you must enter the JSON code containing the object's keys and data types. This will be presented in intellisense to the user in the Formula Step where he can use the argument. The object should look similar to:
{
"first" : "WholeNumber",
"second" : "Text",
"third": "Decimal",
"fourth": "Bool"
}
For example, you can have a collection master type with a whole number sub-type for the argument moto risks e.g. for each risk, fire, vandalism, hurricane. Each risk there is a number e.g. 1, 2, 3, 4.
- Click the Save and Close button (
 ) at the top right corner of the page.
 - Repeat for any additional arguments you wish to include in your formula. The order for adding the arguments is not relevant.
After you've added all the arguments, click the Save and Close button (
) at the top right corner of the page.
To change or delete a Formula Argument, you must make sure that the parent Formula Input is not used in an active formula.
After having set the parameters for the formula, it is time to set the steps for the calculation of each formula.