Data Sets
Data sets are mappings that associate values for a set of discriminants (such as age, sex, driving experience, etc) to values for a specific metric (such as a risk coefficient). You can call data sets from your functions, allowing you to reference the predefined metric value that matches a set of arguments (for details, see Data Set Calls).
Data set values are populated by importing mapping values from Excel files and/or by manual entries.
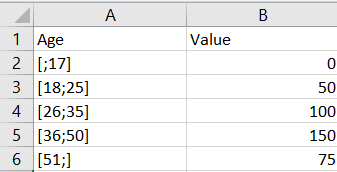
For example, you can import a file with coefficients for the age of a client.
Create a Data Set
Data set discriminants is the grid where a user can teach the system the two dimensional data in rows and columns.
The value of an argument is dependent to a discriminant contained in the Excel file imported. For example, a column or row could be the age of the client, his income, his status, the item insured, the type of car, risk zones etc. For each of this text items you can set coefficients in Excel.
If the Excel file has more than one sheet, those other sheets will not be imported. Please, import one sheet at a time.
- Open the Main Menu (
 ) in FintechOS Studio.
 - Select Business Formulas.
- Select Data Set.
- Click the Insert button (
 ) at the top right corner of the page.
 - Enter a Name for the data set. This is a unique name used to identify the data set in the system.
- Optionally enter a Description for the data set.
- In the Value Types field, select if the data set returns Numeric or Text values.
- Check the Single Value box if the data set includes a mapping between a single discriminant key and a single metric value.
- Select the Start Date at which the data set becomes active. Select the time as well. This makes it possible to activate and later on deactivate the formula for minute to minute.
- The End Date and Version fields are populated automatically based on the data set's versioning (see Data Set Versioning for details).
- The Has Column Description and Has Row Description checkboxes indicate that the Excel files used to import value mappings include field descriptions in the second row and/or second column (key values are set in the first row and first column).
- Click the Save and Reload (
 ) button at the top right corner of the page.
Define Data Set Discriminants (non Single Value data sets)
- In the data set screen, in the Data Set Discriminants section, click the Insert button to add a discriminant.
- Enter a Name for the discriminant.
- The Data Set field is automatically populated with your data set name.
- Optionally enter a Description for the discriminant.
- In the Values Type field, select the data type for the discriminant. This can be either Text, Numeric, or Option Set. In the case of option sets, an Option Set field will be displayed, allowing you to select the option set that the discriminant values must belong to (see Adding Option Set Attributes for details).
- Select Is Interval if the discriminant values are in the form of a value range.
- Intervals must be entered using the following syntax: [; <maximum value>], [<minimum value>; <maximum value>], or [<minimum value>; ].
- If the minimum value is not specified, the interval covers all values smaller than or equal to the maximum value. If the maximum value is not specified, the interval covers all values greater than or equal to the minimum value.
- You can use closed intervals […], open intervals (…), or half-open intervals […) (…].
- Select Is Row Key if discriminant values are represented in the first column of the imported Excel file used to add data set values (see Add Data Set Values (non Single Value data sets)). You can have a only one row key discriminant per data set.
- Select Is Column Key if discriminant values are represented in the first row of the imported Excel file used to add data set values (see Add Data Set Values (non Single Value data sets)). You can have only one column key discriminant per data set.
- Click the Save and Close button (
 ) at the top right corner of the page.
 - Repeat for any additional discriminants you wish to include in your formula.
Add Data Set Values (single value data sets)
For this kind of data set, no Excel file is needed. The values are inserted in the form and the ''Start Import'' button is missing.
- In the data set screen, in the Data Set Values section, click the Insert button.
- The Data Set field is automatically populated with your data set name.
- Enter a Name for the value mapping.
- Optionally enter a Description for the value mapping.
- Click the Save and Reload () button at the top right corner of the page.
-
6. At the bottom of the page:
i. Enter the discriminant value in the left column.
ii. Enter the metric value in the right column.
- Click the Save and Close button () at the top right corner of the page.
Add Data Set Values (non Single Value data sets)
Data set value mappings are imported via Excel files for discriminants that are column/row keys and entered manually for discriminants that are not.
If you your data set includes more than two discriminants, set the discriminants with the top two highest cardinalities as row key and column key. This way, you will need fewer sets of values.
For instance, if you have 3 discriminants, such as age (4 age brackets), education (5 education levels), and sex (2 sexes), you can set age and education as row and column key values. This will allow you to populate the data set with only two value sets: one Excel file with age/education mappings for males and another with age/education mappings for females.
- In the data set screen, in the Data Set Values section, click the Insert button to add a set of values.
- The Data Set field is automatically populated with your data set name.
- Enter a Name for the set of values.
- Optionally enter a Description for the set of values.
- Insert in the Import file the Excel file you wish to use.
- Click the ''Start Import'' button on the right side of the corner.
- Click the Save and Reload () button at the top right corner of the page.
- Enter keys for any non-row/column key discriminants:
- Click the Insert button in the Data Set Discriminant Values section.
- Enter a Name for the discriminant.
- The Data Set Value is populated automatically.
- Select the corresponding Data Set Discriminant from the list.
- Enter the discriminant key value in the Discriminant Value Text field.
- Click the Save and Close button () at the top right corner of the page.
- Repeat for any remaining non-row/column key discriminants.
- Click the Add file button to select the Excel import file for the row/column key discriminants. The Excel file must match the discriminants' data type settings and formatting (description row/description column).
- Click the Start Import button at the top right corner of the page. After the import finishes, the imported data will be displayed at the bottom of the page.
- Click the Save and Close button () at the top right corner of the page.
- Repeat for any additional value sets you wish to include in your data set.
Data Set Versioning
When you first create a data set, it will be in a Draft state, meaning that it can be edited, but not used by the system.
Activate a Data Set
To activate a data set draft, in the data set page, click the Next Status: Active field in the top left corner of the screen.

Once activated, a data set can be used in formulas (see Data Set Calls for details).
Create a New Data Set Version Draft
An active data set cannot be modified. Instead, a Create New Version button will appear in the top right corner of your data set page.
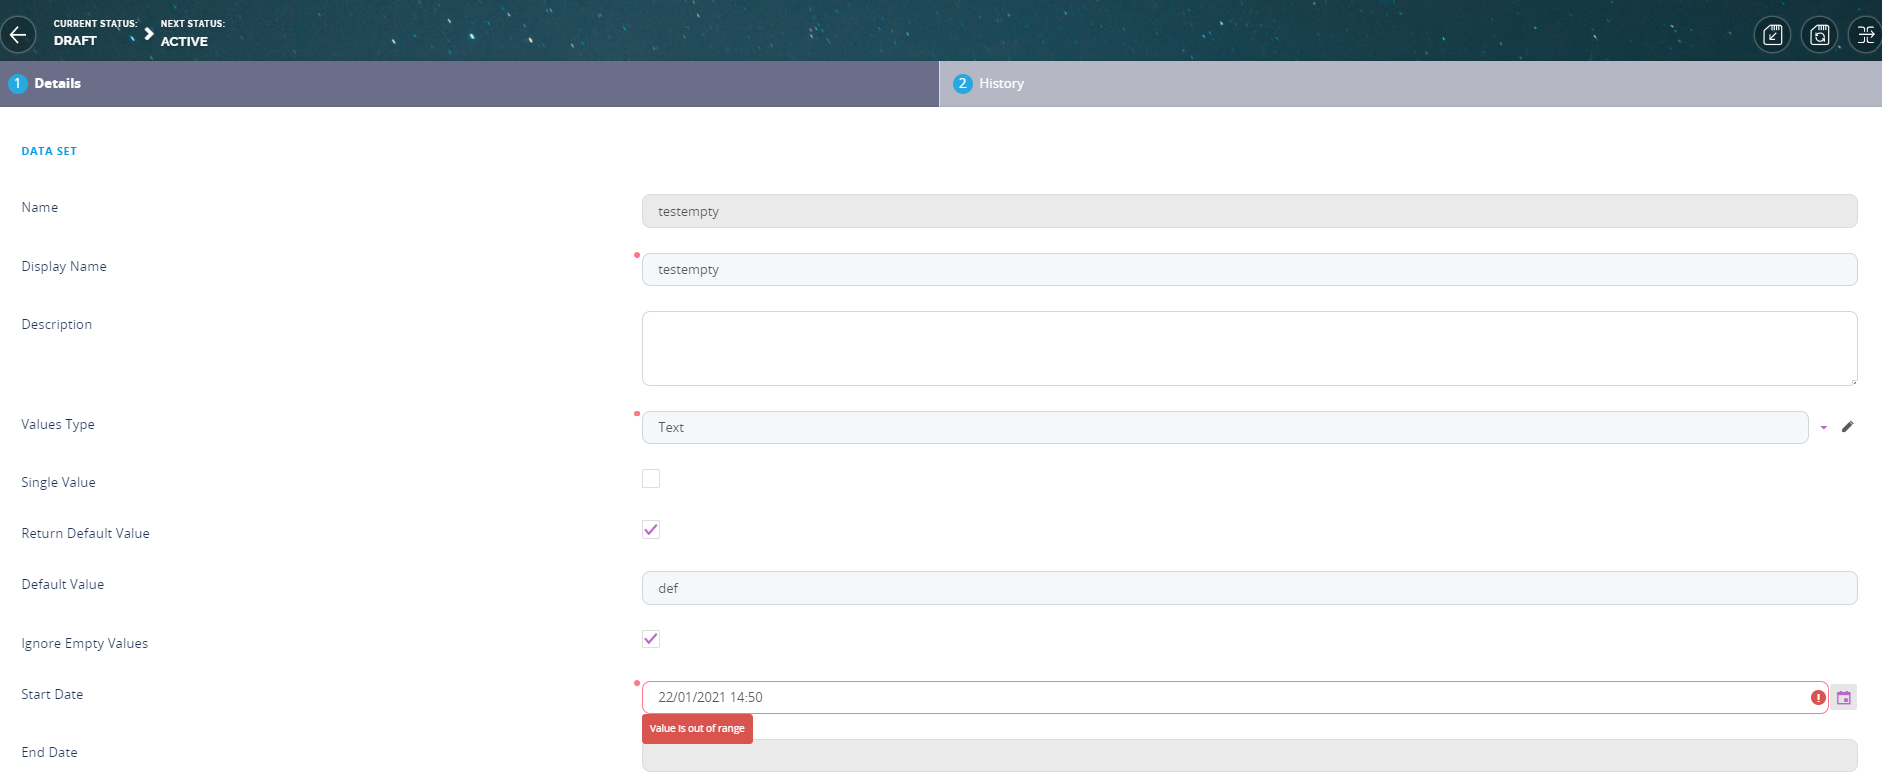
Click the Create New Version button to create a new draft version based on the active data set. You can edit the draft version while the active data set is still enabled. It will create a new version with start date today or the start date of the data set it is in the future. If the new version created takes the current date as start date (the date and time when it was created e.g. 10:45) then the start date will become out of range when displayed and it will have to be changed.
Activate a Data Set Version Draft
Once you finish updating the draft version, change its status from Draft to Active as shown above. The previously active version will be set to a Closed state, and the draft version will become the currently active version.
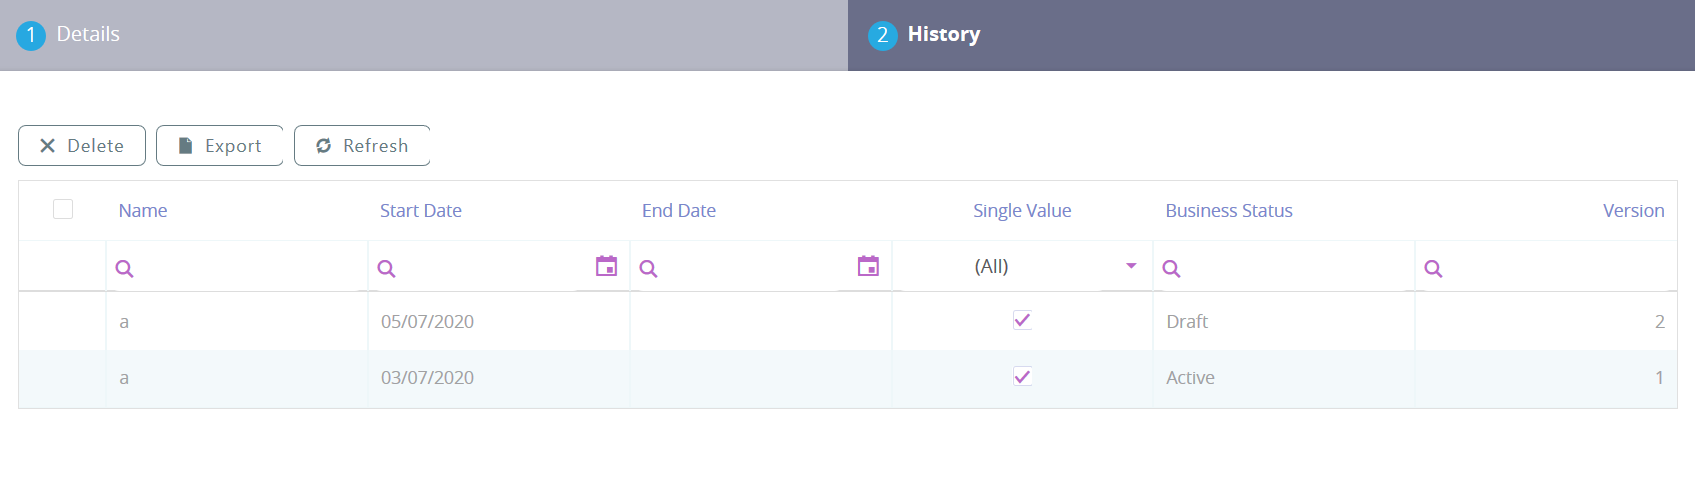
You can track the data set versions in the History tab of the data set page.