Digital Journeys
Digital journeys provide a visual representation of the user’s path to completing a specific process, such as onboarding or applying for a loan. Digital journeys guide users through a series of steps and decision points, incorporating all necessary customization elements (such as data models, form-driven flows, user interfaces, and automation processors) to ensure the successful completion of the process.
Digital journeys enable you to combine multiple flows into a cohesive experience. You can combine Form Driven Mock-up Flows, Form Driven Flows, and Custom Flows within the same journey. For example, you might create a co-browsing onboarding journey by first developing a mock-up flow for the user, converting it into a form-driven flow, and then adding a secondary flow for the operator. This setup allows the client to input their information while an operator assists and verifies additional data via video call.
In addition to the graphical user interface, digital journeys also support API configurations, making it possible to load and access them in custom applications, web applications, front-end interfaces, and more. This capability is enabled through the "Exposed API Journey" option. For more information, see the Digital Journey API documentation.
Create a Digital Journey
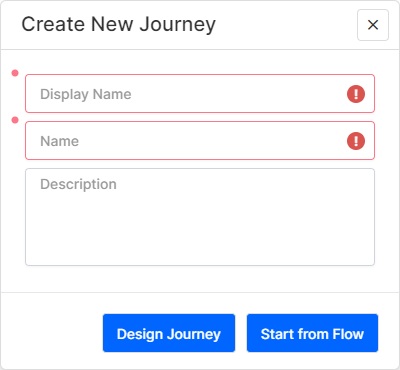
To create a digital journey, in FintechOS Studio, go to Main Menu > Digital Experience > Digital Journeys and click Insert.

A pop-up window appears, offering two methods to create a digital journey:
- Design Journey - Allows business users to draft a high-level overview of the digital journey, enabling previewing, testing, and stakeholder approval before development begins. This method supports a single underlying mock-up form, which you can later customize for the final product:
- Use the Journey Designer to draft the entire user experience.
- Once you are happy with the outcome, publish the journey to automatically generate an associated mock-up flow, complete with steps, navigation rules, and actions.
- Begin development by attaching a data model to the mock-up form (converting it into a regular form-driven flow) and implementing further customizations.
- Start from Flow - Design the journey on top of existing or newly created form driven flows. This method allows you to leverage existing form driven flows and to build complex journeys that integrate multiple flows.