Data Forms
Forms are user interface elements that allow you to interact with individual entity records. You can access the entity forms from the Data Forms section of the entity.
You can create up to 2 forms for the same entity, depending on the different contexts in which users interact with the entity. Some forms may allow users to add records to the entity, some only to edit existing records, some may be read-only, some may have multiple pages and advanced controls and validations, etc.
If you wish to work with more than 2 forms for the same entity, you can use Servicing (App Data Forms) instead.
When you create an entity, a default form is created automatically which allows you to do basic record inserts and edits. The default form will be used to insert or edit records when an entity is exposed in the Digital Experience Portal or other front-ends without designating a custom form for inserts or edits. The automatically created default form uses the Auto Generate Template option (see below), but can be customized at any time. An entity can have only one default form for record inserts and one default form for record edits at a time.
System entities do not have default forms created automatically.
Create an Entity Form
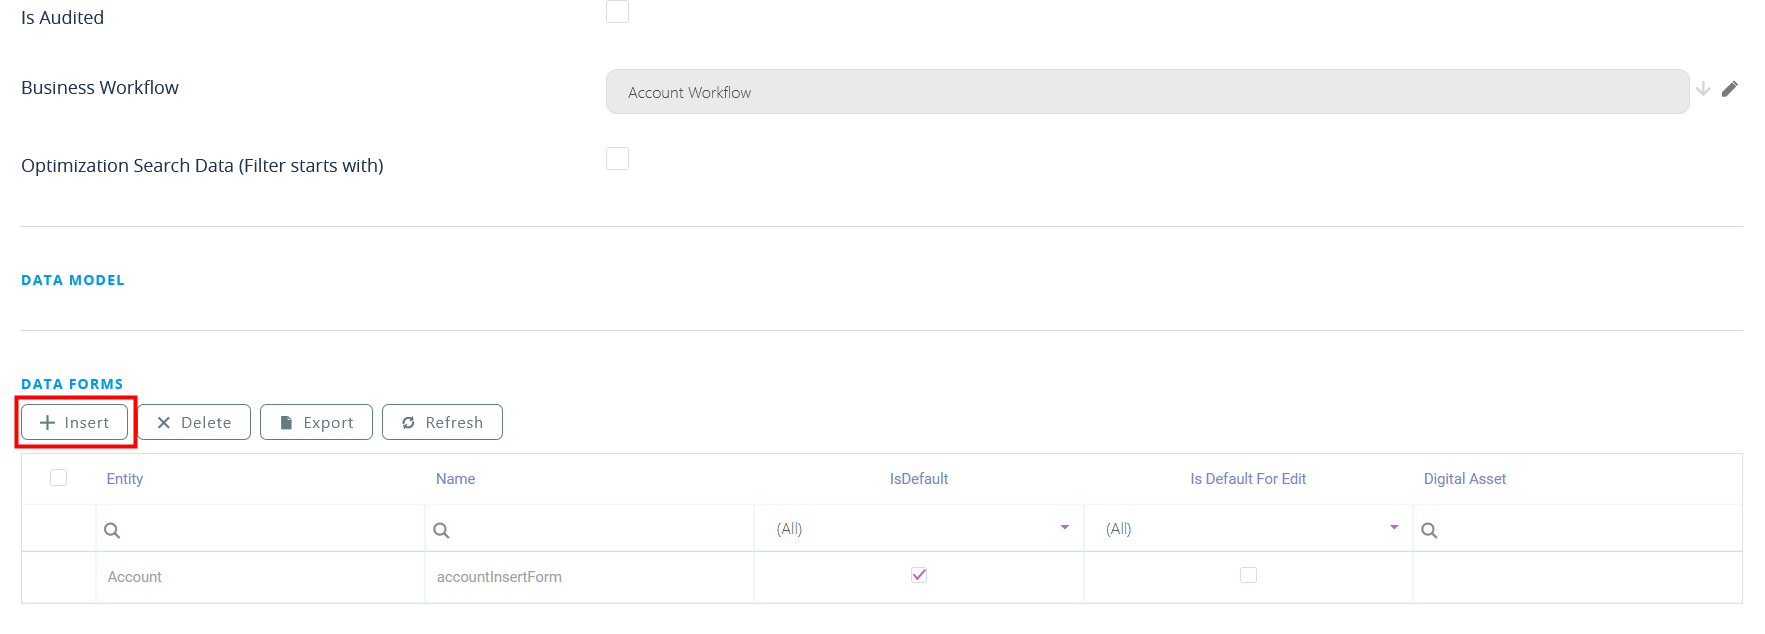
- Expand the Data Forms section of an entity and click Insert.

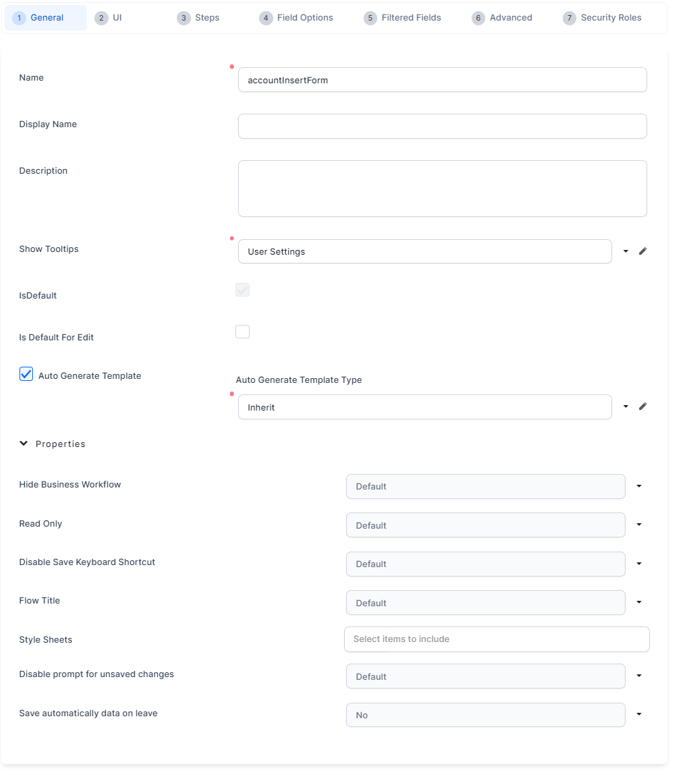
- Fill in the form's general information.
- Name - Name used to identify the entity's form. If the entity has another form defined (each entity can have up to two forms), this name has to be different from the other form's name.
- Description - Optional description of the form's function to simplify development.
- Show Tooltips - Select if form fields display tooltips on mouse hover. The default is to inherit the user setting.
- Is Default - Check to make this the default form for inserting and editing entity records when displaying entity views in the user interface. You can have only one default form for an entity at a time.
- Is Default for Edit - Check to make this the default form for editing entity records when displaying entity views in the user interface. You can have only one default edit form for an entity at a time.
- Auto Generate Template - Check to automatically generate the form fields based on the entity's attributes using a 1, 2, 3, or 4 column layout. The template will include all entity attributes, except the primary key and system attributes. If inherit is selected, the data form layout will inherit the value from the entity which is parent for the current entity.
- Hide Business Workflow - Hides the entity record's state and state transition options in the end-user interface. For more information about business workflows, see Business Workflows.
- Read Only - Prevents end-users from making any changes to the displayed form fields.
- Disable Save Keyboard Shortcut - Prevents end-users from saving and reloading the form by pressing the Ctrl+S keyboard shortcut.
- Flow Title - Selects the title displayed on each step (see Steps):
- use display name (displays both the flow name and the step name)
- show only step display name (displays only the step's name)
- Style Sheets - Select the style sheet you wish to use. Multiple style sheets can be added. The order in which you select them is also the order in which they are applied. For details, see Style Sheets.
- Disable prompt for unsaved changes - When navigating away from the form or step, for instance by clicking the Back button, if the form contains unsaved data, the user will not be prompted to save the changes.
- Save automatically data on leave - When navigating away from the form or step, for instance by clicking the Back button, any unsaved data in the flow will be automatically saved.
- Click Save and Reload.
Edit an Entity Form
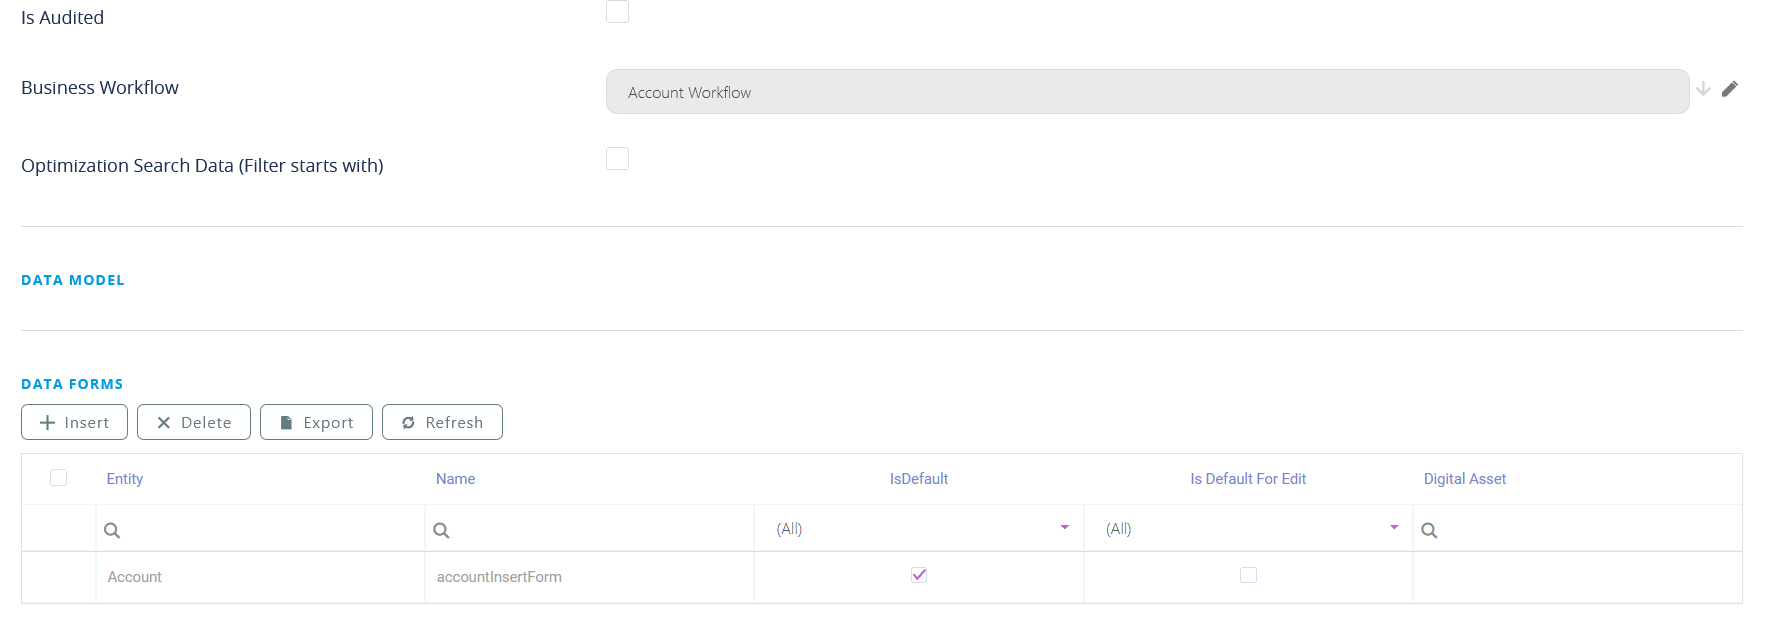
To edit an entity form, expand the Data Forms section of an entity and double click the form. The form's settings are displayed.
General
In the General section you can edit any of the general information fields filled in at form creation.
UI
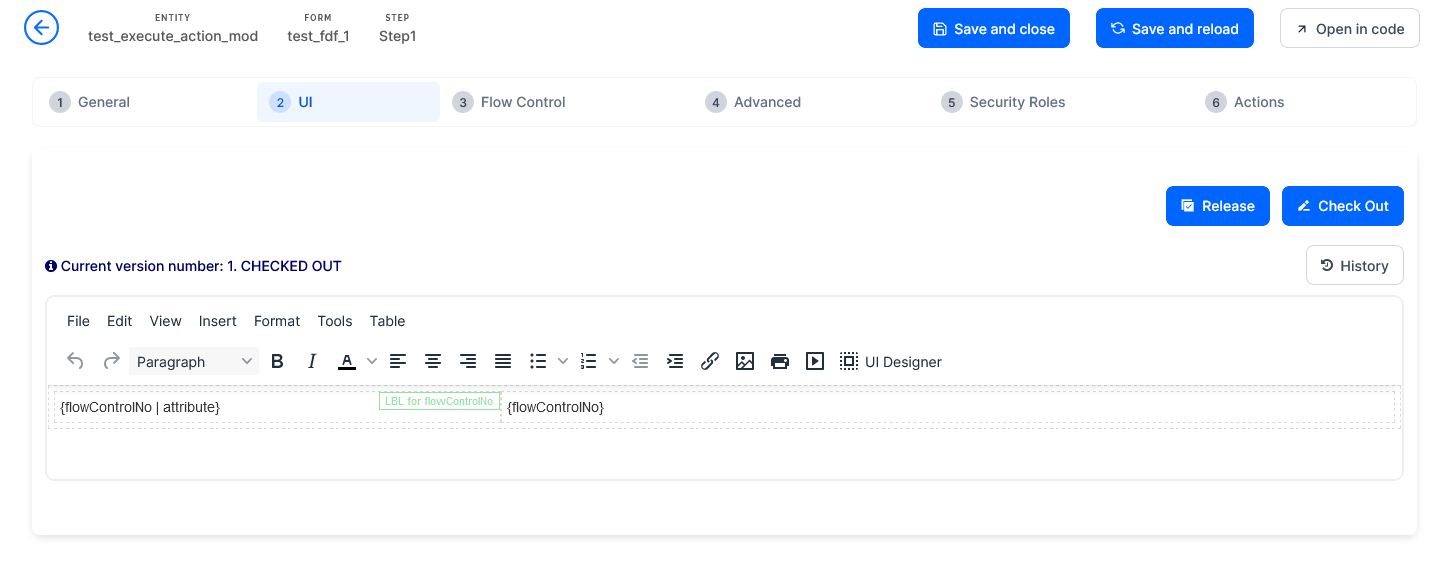
Use the UI designer to define the form's layout. For details on how to use the UI designer, see UI Designer.
For forms created in FintechOS Platform versions prior to v.24, the UI tab displays the legacy template designer which, in addition to the UI designer, provides an HTML editor that allows you to configure the form's HTML elements.
Legacy forms also allow you to use the Advanced Code Editor (deprecated) or the Code Editor respectively to edit their HTML code directly.
The form's UI template supports the following tokens:
| Token | Description |
|---|---|
| {AttributeName} | Displays the corresponding field in the UI. NOTE The attribute name must be included between curly brackets; otherwise, a simple text will be displayed on the page instead of the actual field. |
| {#RelationshipName, view: viewName#} | Generates a view provided by relationship and by view. The viewName is optional and specifies which view to generate. If viewName is not provided, the default view will be displayed on the data form. |
| {#RelationshipName, view: viewName, editmode:cell#} | Generates a view provided by relationship and by view. This view allows inline editing, meaning that you can edit cells one by one directly in the grid, without opening specific records. NOTE In order to activate inline editing for a specific cell, you must tick the Allow Editing checkbox displayed on the entity view column (View > View columns). |
| {#MKT_CampaignResponse_MKT_Campaign,nodelete,noinsert#} | Generates a view provided by relationship and by view, without the Delete and Insert buttons. You can apply the same logic (similar tokens) for the Export (noexport) or Refresh (norefresh) if you no longer need them on the view. |
| {$ChartName$} | Generates a chart based on the provided chart name. |
| {? entityName, view: viewName ?} | Allows you to display a view from another entity. For information on how to use it, see Display View from Another Entity. |
In the HTML template, you can link HTML elements (labels) to attributes. For information on how to do it, see Link Labels to Attributes (deprecated).
Steps
Use the Steps section if you want to set up forms with multiple pages. For details on how to work with steps, see Add and Configure Steps.
Field Options
The Field Options section allows you to customize form fields based on how users have filled out other fields in the form: show field values, show or hide specific fields, etc. For details on how to work with field options, see Configure Field Options.
Filtered Fields
A filtered field restricts the values available in a form field based on entries in other fields. For details, see Defining Filtered Fields.
Advanced
The Advanced section allows you to write custom client-side JavaScript code that is executed before or after the form is rendered. For details on the execution sequence of the various form-level and step-level scripts, see Code Execution Sequence.
Security Roles
Use the Security Roles section to select the Security Roles required for users that can access the form.
To learn more, check our Academy Evolutive Data Core course - Entity Views module.


