Create a First Notification of Loss
When registering a new claim, you need to start with creating a First Notification of Loss (FNOL). A new FNOL record can be automatically inserted by a client in a FNOL customer journey, or you can use the FNOL menu in FintechOS Portal to insert information about the policy, the notifier, the people involved, and upload the requested documents.
Follow the steps below to register a new FNOL record:
-
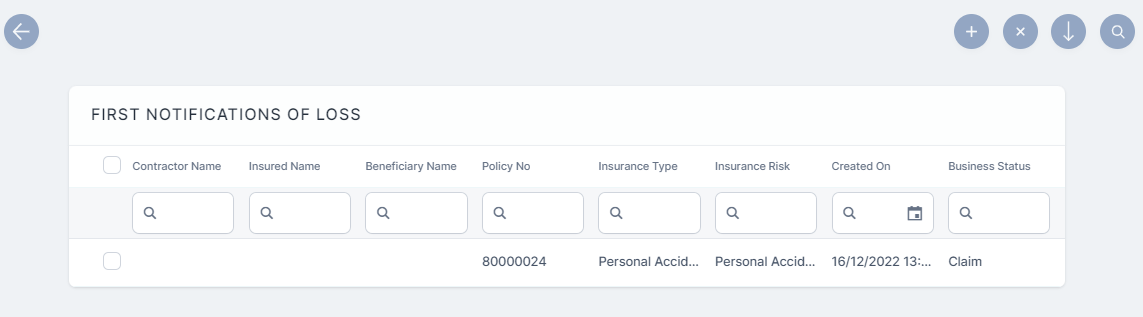
In FintechOS Portal, go to Main Menu > Claim > First Notification of Loss. The list of all existing FNOL records is displayed.

-
Click Insert to add a new record.
-
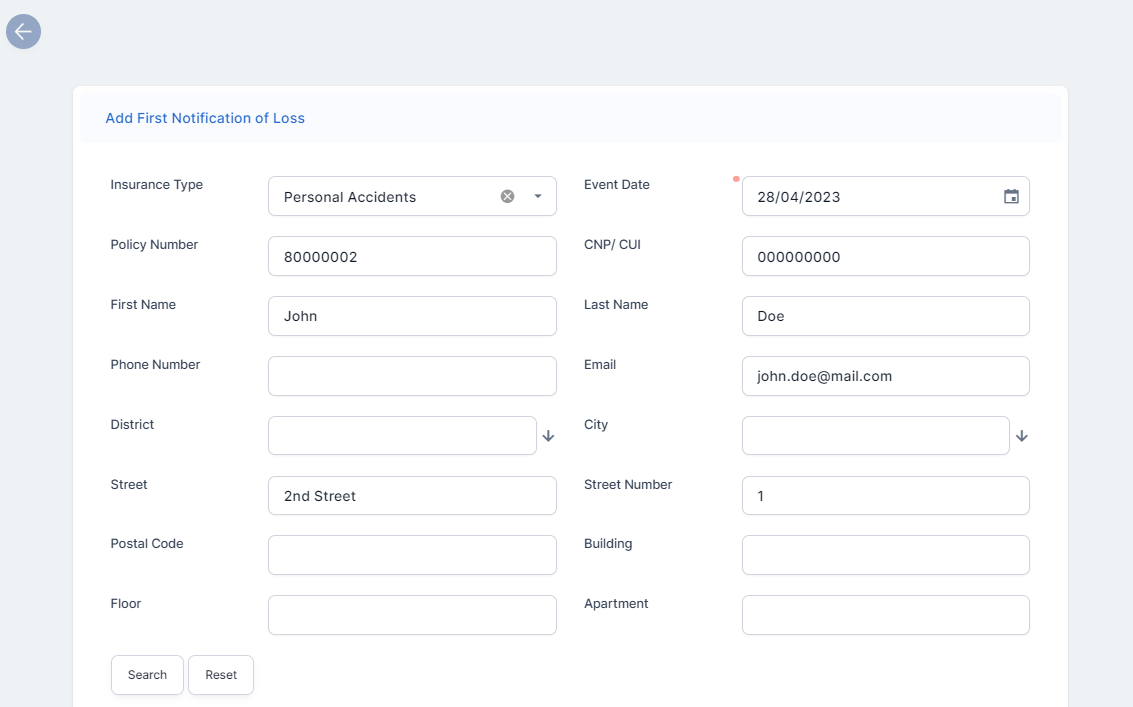
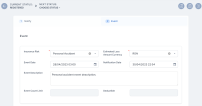
Input the general information and the details about the policy in the following fields:
-
Insurance Type: The type of insurance for which the FNOL is opened;
-
Policy Number: The number of the policy on which the claim is made;
-
First Name: The first name of the policy owner;
-
Phone Number: The contact number;
-
District: The district where the asset is located;
-
Street: The street where the asset is located;
-
Postal Code: The postal code where the asset is located;
-
Floor: The floor where the asset is located;
-
Event Date: The date when the event happened;
-
CNP/ CUI: The personal number (CNP)/fiscal enrollment number (CUI);
-
Last Name: The last name of the policy owner;
-
Email: The email of the owner;
-
City: The city where the asset is located;
-
Street Number: The street number where the asset is located;
-
Building: The building where the asset is located;
-
Apartment: The apartment where the asset is located.

-
-
Click Search to display the existing policies based on the parameters from fields that you previously filled in.

-
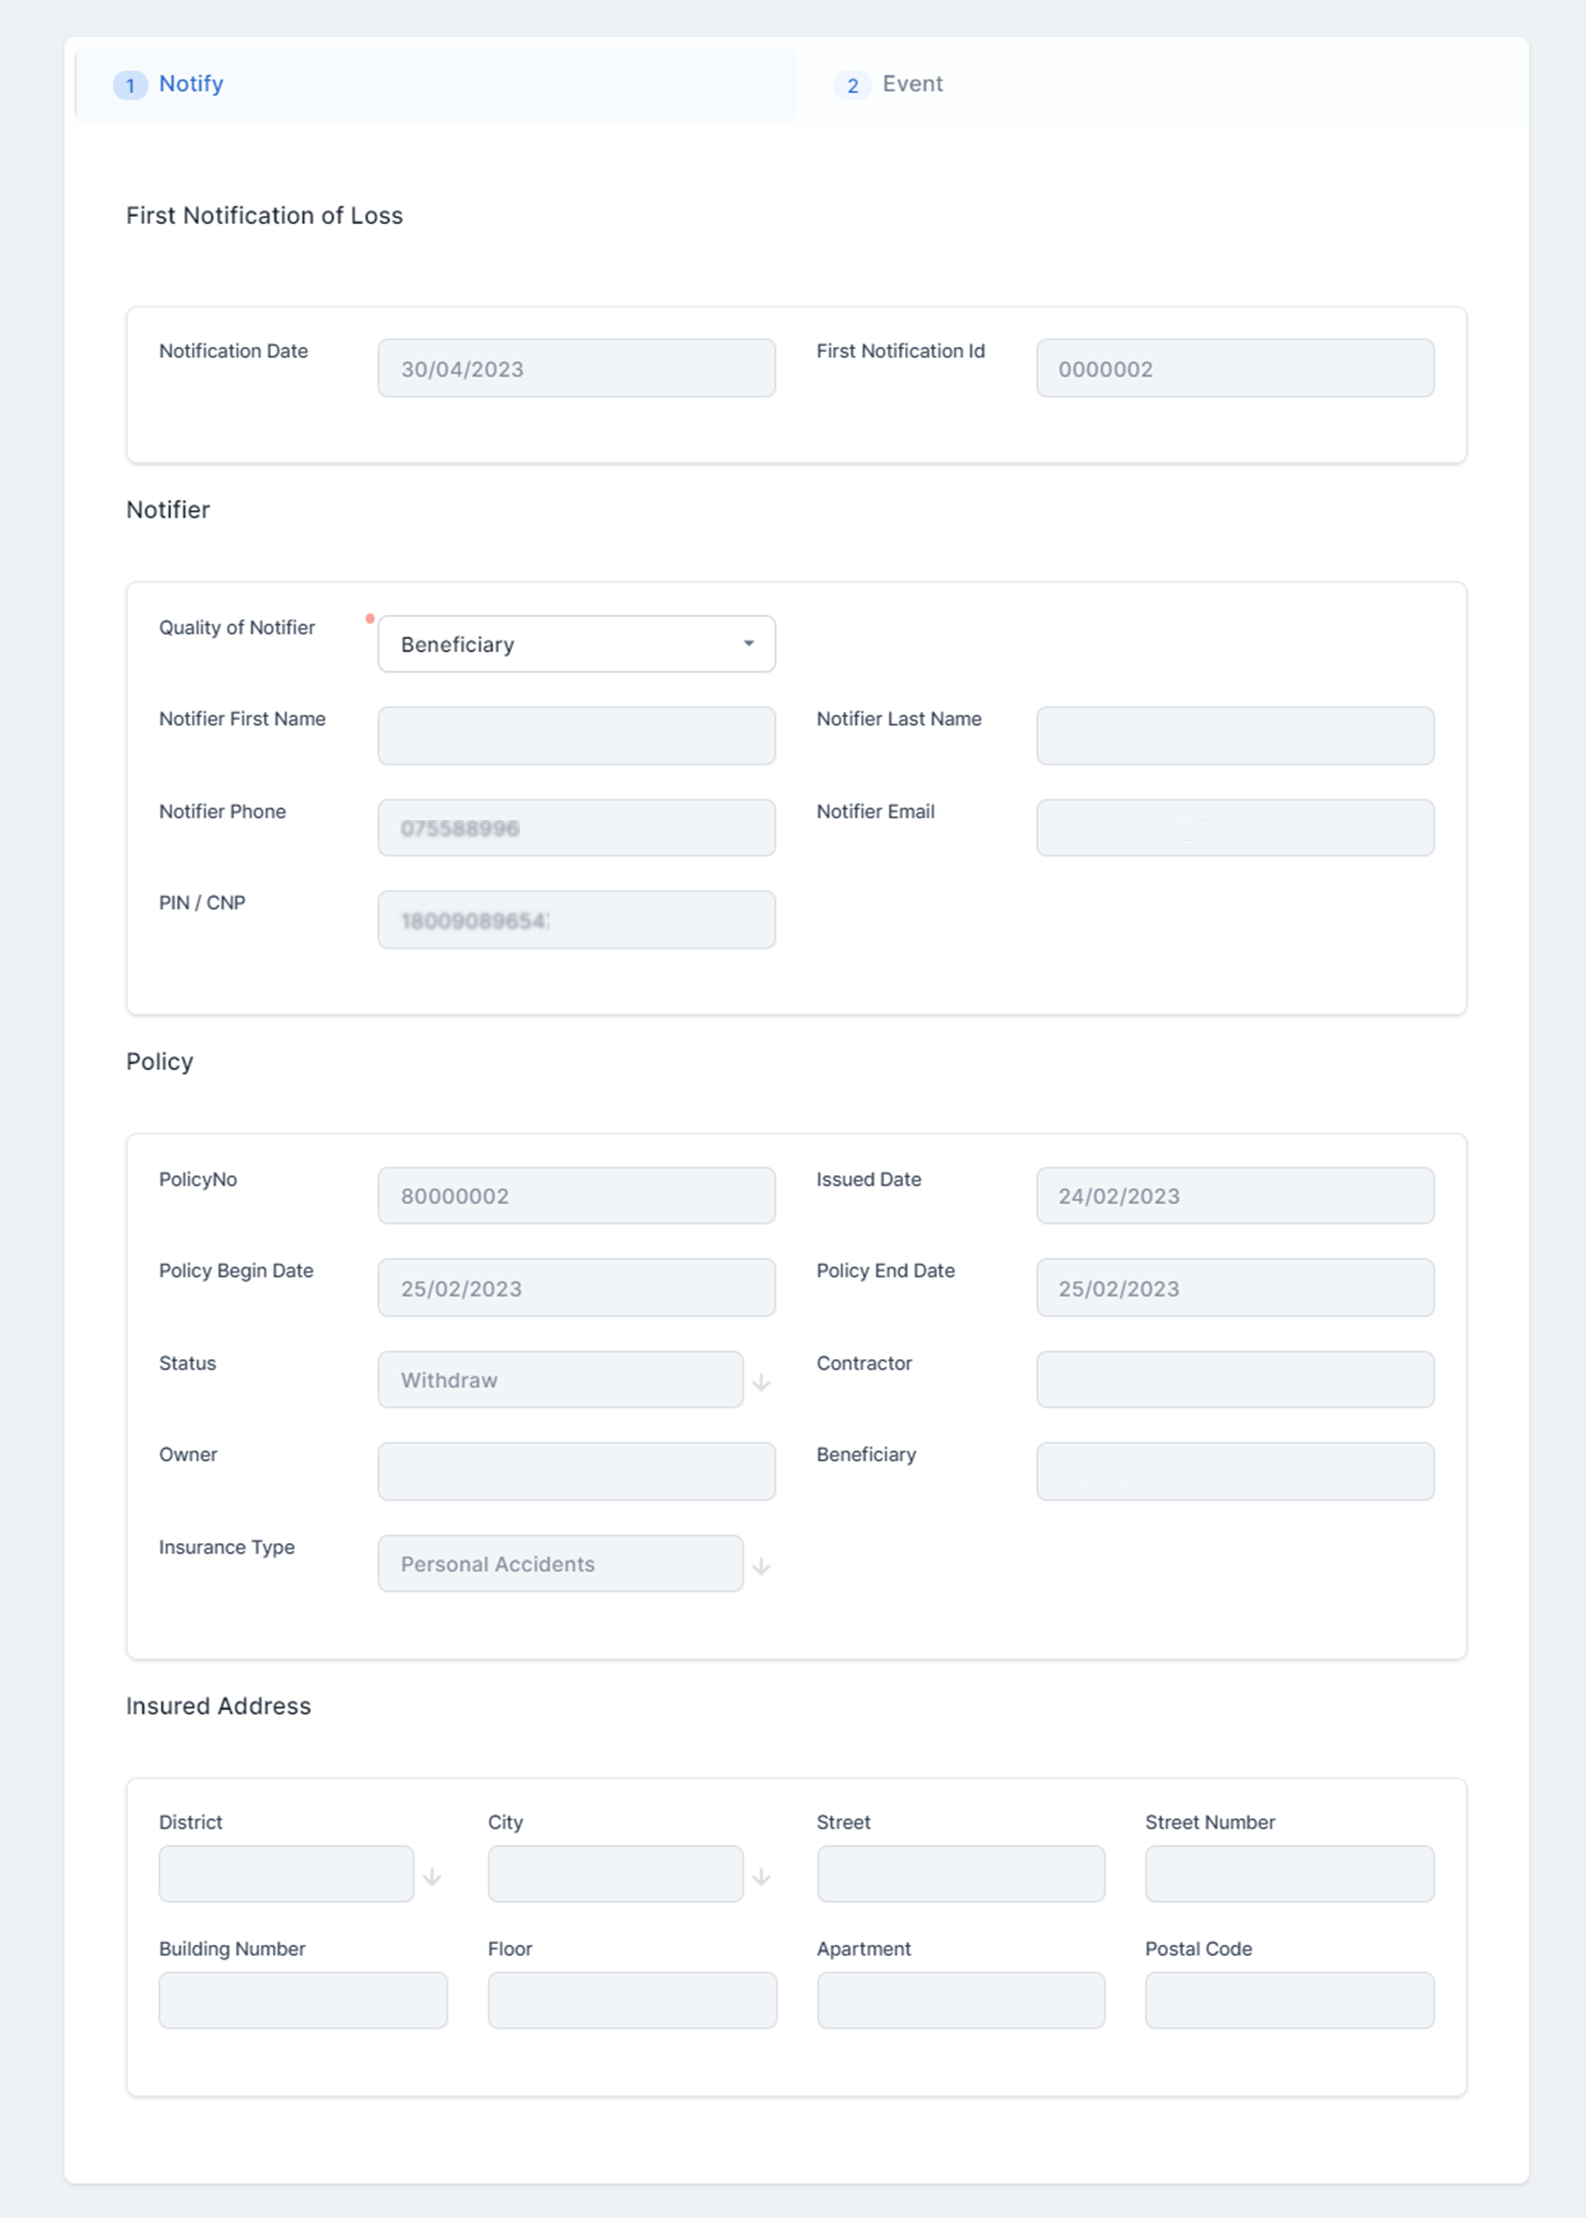
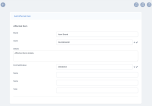
From the list, select the policy that you want to process and click Choose option. The Notify and Event tabs are displayed.
-
In the Notify tab, write down the details of the notifier, or choose the Quality of Notifier from the drop-down, and the details are automatically filled in from the policy data.
-
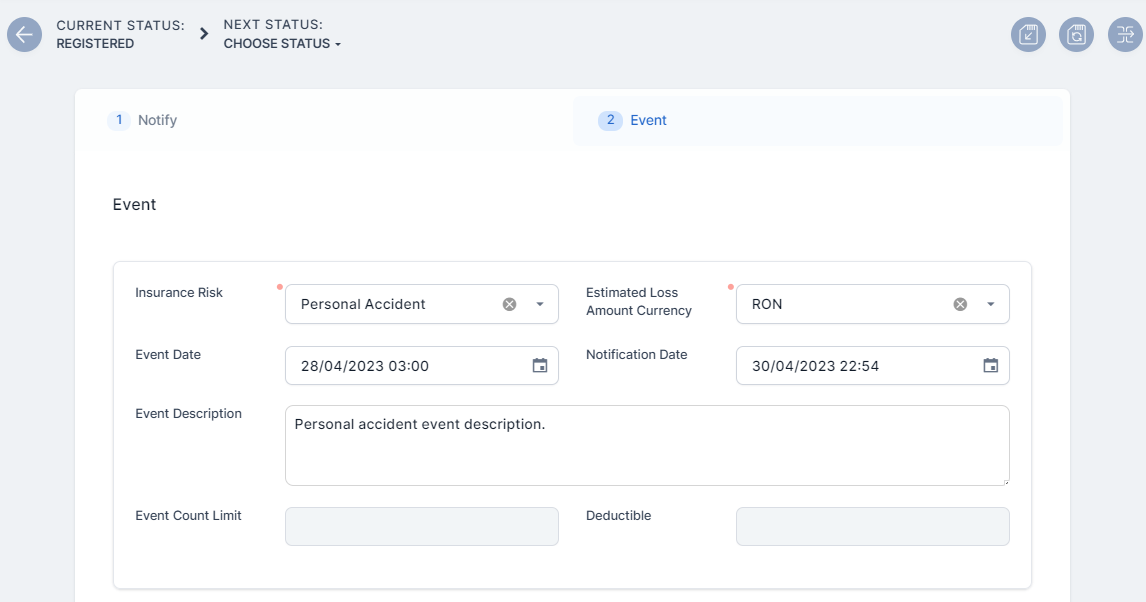
Go to the Event tab.
-
In the Event grid, input the following details:
-
Insurance Risk: Option set where the risks for each individual policy is shown, depending on the type of policy;
-
Estimated Loss Amount Currency: Choose the currency of the estimated loss amount;
-
Event Date: The date and time when the event happened;
-
Notification Date: The date and time when the event is notified;
-
Event Description: Describe the event inputting all the important details;
-
Event Count Limit: This field holds the maximum number of risks the policy covers. This field is read-only;
-
Deductible: This field holds the deductible amount that the client pays out of pocket in case of damage.
-
-
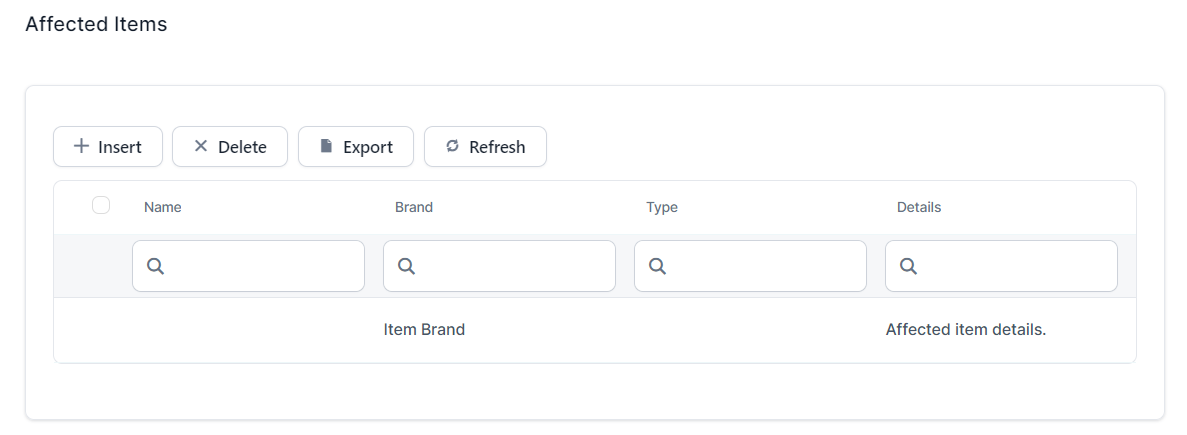
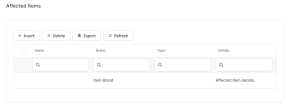
In the Affected Items grid, click Insert to input the details of covered items that have been affected by the event. You can select the number of the claim on which to attach the affected item.
-
Click Save and Close. The record is now registered in the Affected Items grid.
-
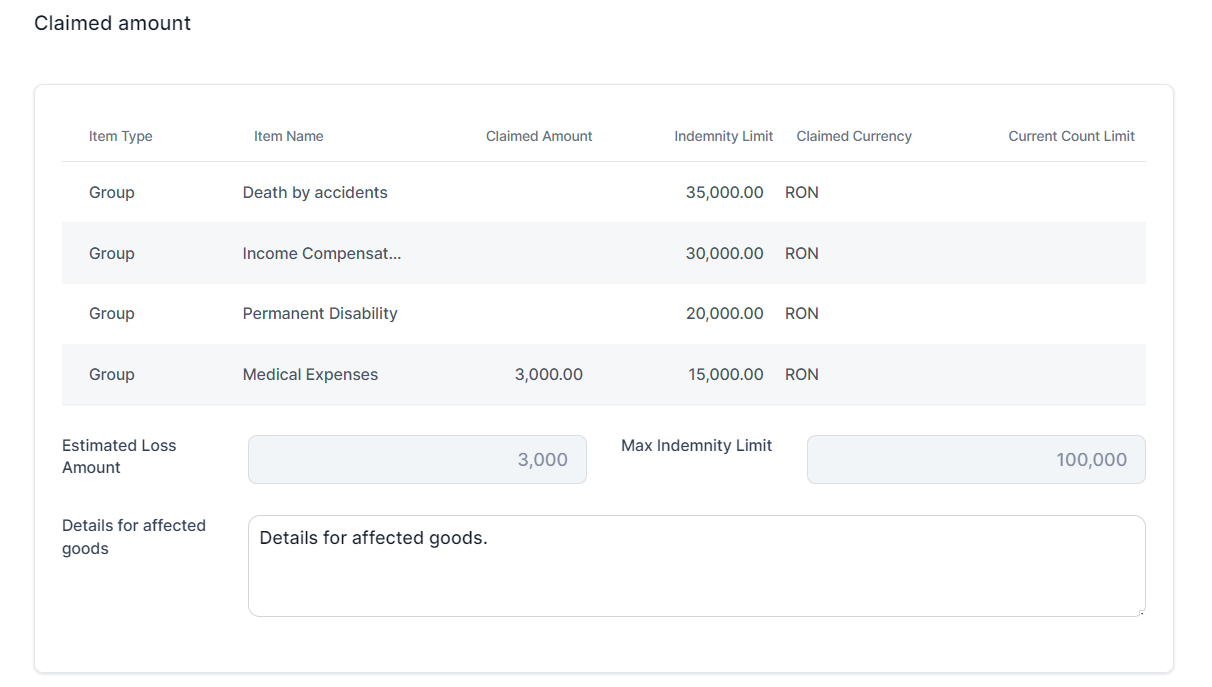
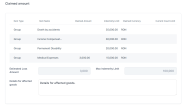
In the Claimed amount grid, you find the list of covered items, their indemnity limit amount and the currency. In the Claimed Amount tab of the affected item, input the amount you wish to claim for the event, and input the Details for the affected goods. The record is updated with the Estimated Loss Amount and the Max Indemnity Limit.
-
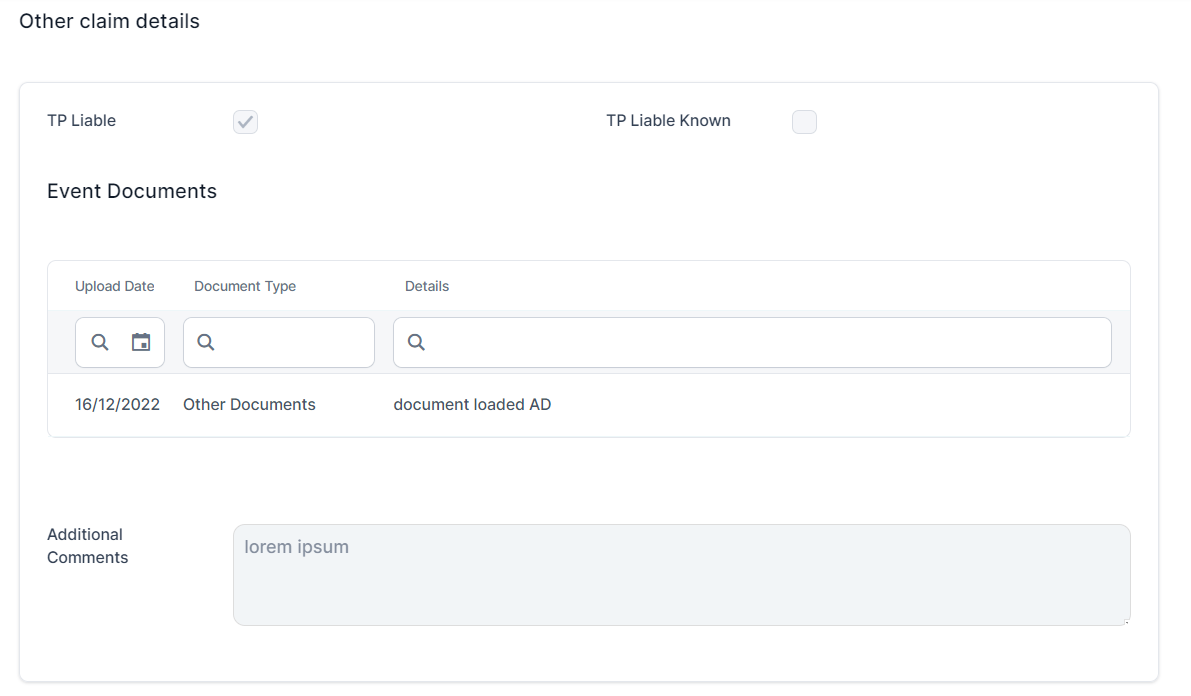
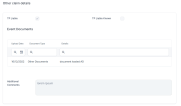
In the Other claim details grid, click Insert to add any event documents.
-
Click Create Claim. The record is now updated, and in Claim status.
-
Create a Claim based on the registered FNOL. Go to the Create a Claim page to learn how.