Define Profile Data
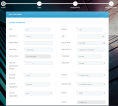
You can view the customer's identification data, contact information, timezone preferences, registered complaints, and their relationship with the financial institution (assigned bank division, business line, branch, and others) in the Profile tab.
All the data related to the customer's account is stored in the Account Information section:
-
Title: Select the customer's prefix from the option set.
-
Gender: Select the customer's gender from the option set.
-
Enter the customer's First Name, Middle Name, Age, Last Name, Place of Birth, and Date of Birth.
-
Account Type: Select the customer's account type - Individual person: for private individuals accounts, the unique identifier is the person's Personal Identification Number (PIN). For additional details see the Define Account Types section.
-
Citizenship: Select the customer's citizenship.
-
PIN: Enter a unique number allocated by the government to an individual used for taxation and other transactions purposes. The length depends on the country that issued the document.
-
Nationality: Select the customer's nationality.
-
Customer Segment: Select the customer segment: UHNW, Mass Market, Mass Affluent, Affluent, Private Banking or HNW.
-
Division: Select the business division to which the customer belongs. For more information, see the Define Business Divisions section.
-
Customer Subsegment: Select the customer subsegment: Standard, Dynamic or Top Dynamic.
-
Business Line: Select the division’s business line to which the customer belongs. For more information, see the Define Business Lines section.
-
Account Responsible: Select the employee responsible for the customer's account.
-
Branch: Select the business branch to which the customer belongs to.
-
Account Picture: Add or drop a picture for the customer's account.
-
Source: Select the record source. If the customer's profile is created through the FintechOS Portal, then the FTOS value is displayed. For external sources, the name of that particular source is displayed.
The customer's marital status and other related information are listed in the Civil Information section:
-
Education: Select the customer's education. The following options are available: Gymnasium Studies, High School, Higher Education, No Studies/ Primary School, Postgraduate Studies (MBA, MA, ACCA, CFA, etc.) or Vocational School
-
Marital Status: Select the customer's marital status. The following options are available: Consensual Union, Married or No Married.
-
Profession: Select the persons that the customer acts as a legal representative or guardian.
-
Number of Children: Select the customer's number of children.
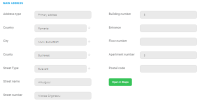
The customer's primary address is stored in the Main Address section. An account can have more than one address but only one primary address. Use the Open in Maps button to locate the main address in Google Maps.
In case a main address hasn't been set for the account, the main address is set automatically based on the following formula:
- If the account has one address, then the address is set as the main address.
- If the main address is not set, then the most recent Address type 1 is set as the main address.
- If there is no Address type 1 found, then the most recent Address type 2 is set as the main address.
- If there is no Address type 2 found, then the most recent Address type 3 is set as the main address.
If there aren't any valid addresses found on the customer's account, then an address cannot be set as main.
You can store multiple addresses for the customer, such as the address from their identity card, office address, alternative address, or others, in the Addresses section. Select either Active or Inactive from the drop-down list to filter the records.
Active addresses are valid, up-to-date addresses that the customer uses at the present moment. Inactive addresses are addresses that are no longer in use by the customer.
Addresses can be added manually by inputting the address details or by using the OCR functionality where the details are extracted automatically from the customer's identity document. When creating a new address:
-
Click the Insert button and fill in the following fields:
-
Main Address: If true, the record is set as the main address.
-
Status: The status of the number: active or inactive.
-
Address Type: Select the address type from the following options: Primary Address, Secondary Address, Billing Address, Social Address, Delivery Address, Home Address or Residence Address.
-
Country: Select the country from the customer's address.
-
City: Select the city from the customer's address.
-
County: Select the county from the customer's address.
-
Street Type: Select the street type from the customer's address. Select from the existing records or insert a new one.
-
Enter the Street Name, Street Number, Building number, Entrance, Floor Number, Apartment Number and Postal Code from the customer's address.
-
-
Once finished adding the address details, click either Save and Close, or Save and Reload to continue to edit the record.
-
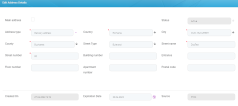
The Edit Address Details page displays and from here you can set a record to be Inactive by setting the following fields:
-
Created On: Enter the creation date of the record.
-
Expiration Date: Set the date the record is set to expire. Once this field is set, the record status is automatically changed to Inactive when the expiration date is set in the past compared to the system date.
-
Source: Select the record source. If the record is created through the FintechOS Portal, then the FTOS value is displayed. For external sources, the name of that particular source is displayed.
-
The Phone Numbers section stores the customer's active or inactive phone numbers. Here, you can set personal or work phone numbers and even their landline or fax number. By default, the active phone numbers are displayed. Select the Inactive status to see the phone numbers that are no longer used by the customer.
To create a new phone number record, click the Insert button and fill in the following fields:
-
Main Phone Number: Set the main phone number. If the main phone number is inactive, deleted, or there is no main phone number set, the system automatically determines the most recent phone number as main.
-
Status: Select the status of the number: active or inactive.
-
Type: Select the phone number type from the following options: Mobile, Landline, Fax, National or International.
-
Usage: Select the phone number usage from the following options: Work, Personal, Home or Office.
-
Phone Number: Input the phone number.
The customer's email addresses are stored in the Email Addresses section. Here, you can set the customer's personal, business, or marketing email address. By default, the active email addresses are displayed. Select the Inactive status to see the email addresses that are no longer used by the customer.
To create a new email record, click the Insert button and fill in the following fields:
-
Main Email Address: You can set the main email address manually. If the main email address is inactive, deleted, or there is no main email address set, the system automatically determines the most recent email address as main.
-
Status: Enter the status of the number: active or inactive.
-
Email Address Type: Select the phone number type from the following options: Business, Personal, Marketing or Other.
-
Email Address: Input the email address.
The Identity Cards section stores the customer's identity cards information from the following documents: ID card, Passport, Permit for residency, or other type of identification. The active identity cards are displayed by default but cards that are inactive can also be viewed.
Personal identification documents can be added automatically by using the OCR functionality or by manually inputting the information. When creating a new identity document entry, click the Insert button and fill in the following fields:
-
ID Card Type: The identity document type. Select from the following options: ID Card, Other Types, Passport or Permit for Residency.
-
ID Card Series: Enter the identity document series.
-
ID Card Number: Enter the identity document number.
-
Issued By: Enter the name of the institution that issued the identity document.
-
Issue Date: Enter the issue date of the identity document.
-
Expiry Date: Enter the expiry date of the identity document.
To update the document, click the Update ID Card button. The OCR Processor page opens. Follow the steps from the Using OCR Functionality page to easily scan the identity card.
The complaints associated with the customer's account are displayed in the Complaints section, where you can see details regarding the complaint type, the communication channel it was made through, the date it was opened or closed, and a description containing details about the incident that led to the issued complaint.
The customer's preferences based on their culture or location are listed in the Preferences section:
-
Culture: Select the customer's culture from the existing records or create a new.
-
Time Zone: Select the customer's time zone.
-
Reporting Currency: Select the customer's preferred currency from the existing records or create a new one.


