Manage Flow Control Rule for an Automation Processor
Building complex digital journeys is not for the faint of heart, but it can be made easy and accessible by creating rules for navigation between steps. Since each step gathers data and triggers actions of calculations, those fall into the realm of automation processors.
Task at hand
The task is to call the Business Workflow and eSign processor when a specific rule of navigation is met. In this guide, the form driven flow is a Personal Loan Origination (Online) where the bank customer applies for a loan which triggers a change in status, generates a contract to be signed with OTP type signature.
Before you begin
Before you launch into the present task, configure the following:
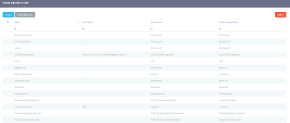
- Create an entity named Bank_Customer with the following list of attributes:
applicationAmount contractTypeId city fullName
applicationNr businessAgreement age
country contract address
creditProposalDate prefixPhoneMobile
currency applicationAgency email
applicationTypeId birthPlace consent - Create a data model extension to the entity FTOS_BARET_AccountApplication type related data extensions. The attributes from this entity are used in the eSign settings.
- Create a form driven flow named PersonalLoan_HowTo_Account with 6 steps.
- Create a Business Workflow with three statuses Newbie, Prospect and Customer with a transition rule between the Prospect status and the Customer.
- Create the Flow settings for the eSign in the FintechOS Portal.
1 Create the actions to be triggered
Follow the path: FintechOS Studio > Digital journey > Form Driven Flow.
This list is displayed on the page with the pre-existing form driven flows.
Add the first action
Select the FDF, and navigate to the Actions tab. Click on the Insert button. A new window pops up. Insert the name Status change. Click on the icon plus to add a new container row. Select Change business status to status. In the two status containers select first the Newbie status to transition to the Prospect status. Click on Save to record the setting.
For more details, see Defining Form Action.
Add the second action
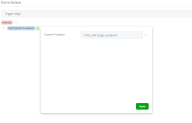
The second action points to the eSign processor. Select the FDF, and navigate to the Actions tab. Click on the Insert button. A new window pops up. Insert the name Trigger eSign. Click on the icon plus to add a new container row. Select the call custom processor. From the drop-down list, select the eSign setting you configured in the FintechOS Studio.
Please, meet the requirements in the prerequisites before accessing the FDF.
2 Add the actions to the FDF
Navigate to the Steps tab. Select the third step in your list. The first action will be placed in the third step.
Within the step, navigate to the Flow Control section, click on the Insert Flow Control Rules. Add a new condition if Annual income is greater than or equal to 93,072 RON the rule will trigger the change in status. Click the Save and close.
In Step 5, we will attach the action named Trigger eSign. Navigate to the step, open its Flow control, insert a new rule. The rule can modified as you like. For this purpose, the rule can be that the account type must be ''individual person''. Select the action and add the final sixth step to navigate next to.
For details, see Flow Control.
Congratulations! The automation processors are now used in your form driven flow.


