Data Model Designer
Data Model Designer is a graphical tool that simplifies data modelling and increases user productivity when performing data modelling.
Access the Data Model Designer
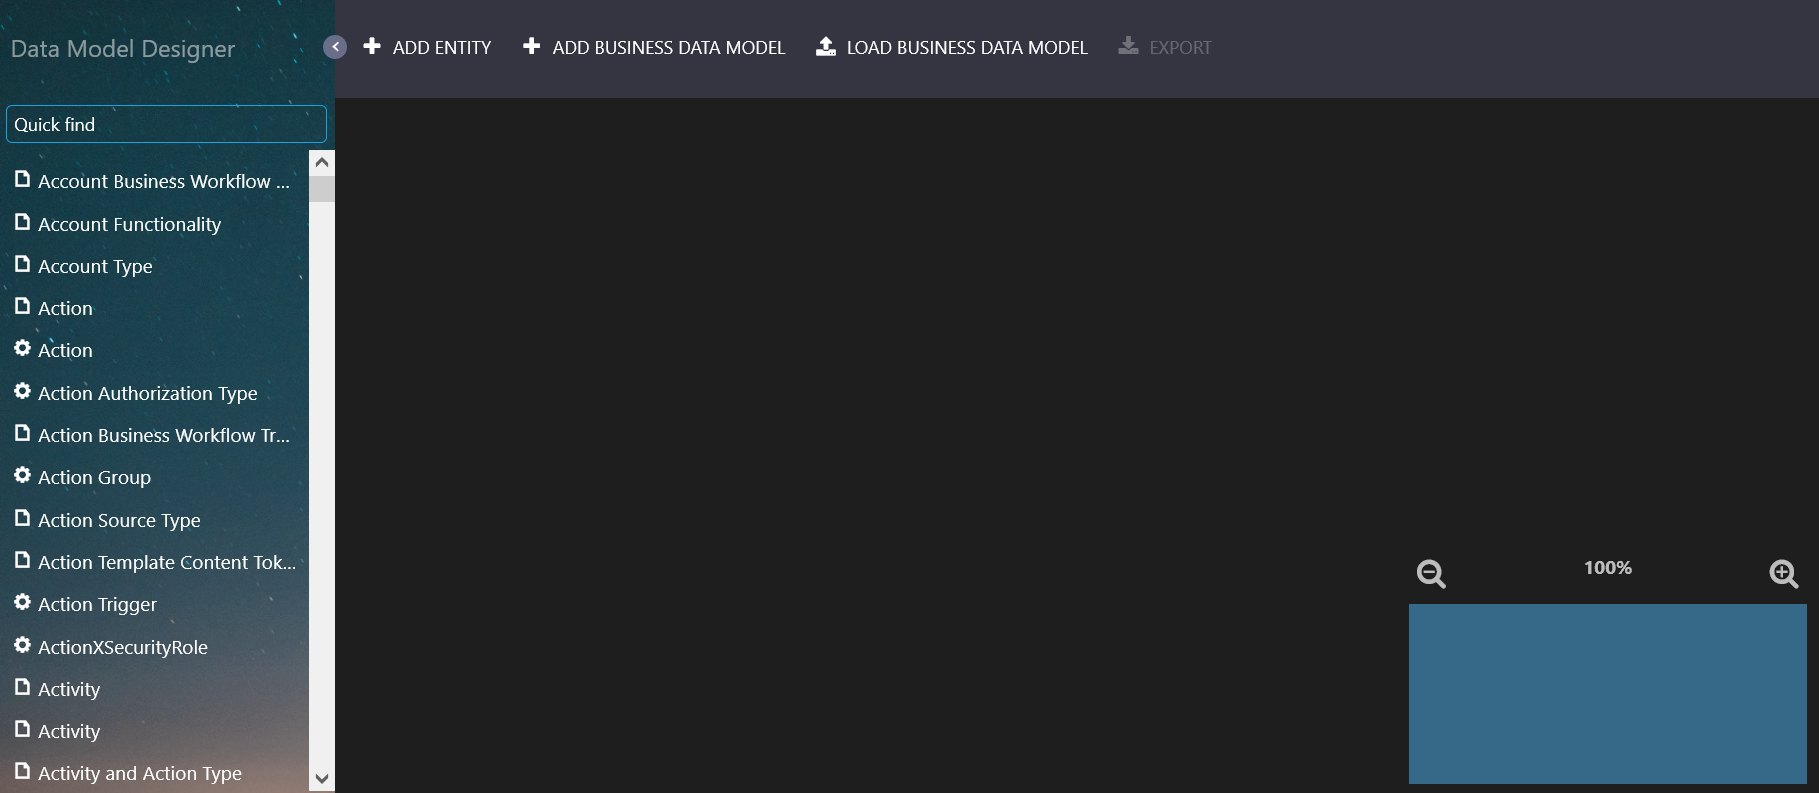
- Go to Evolutive Data Core > Data Model Designer. The Data Model Designer appears. By default, the Data Model Designer displays the most recently used data model. When first opened during a session, it displays an empty canvas.
Entities Panel
The entities panel lists all system entities and custom entities. You can hide/show this panel by clicking the Minimize / Expand arrow:
Use the Quick Find box at the top of the entities panel to filter entities. Also, hovering an entity name in the entity panel displays both entity name and entity display name. This is useful to identify entities with identical display names but different entity names.
Toolbar
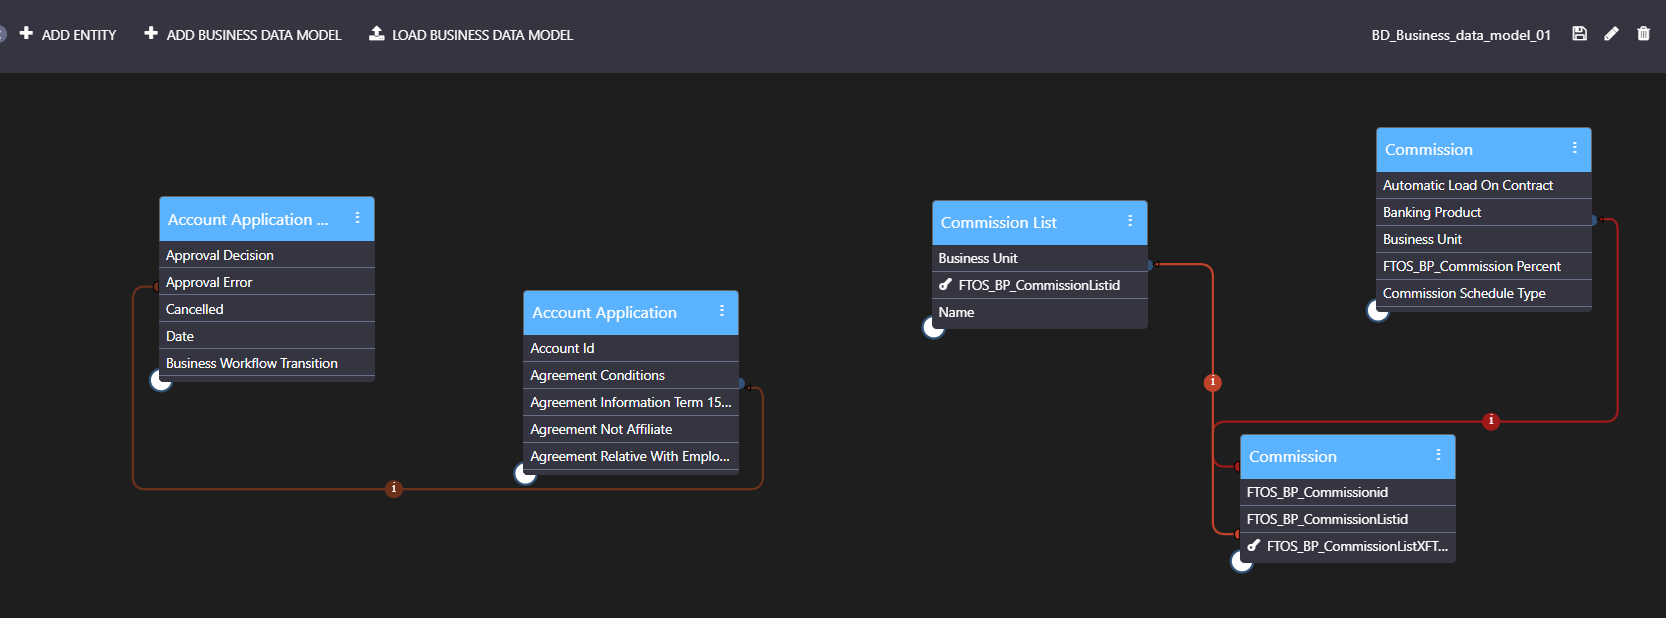
The Toolbar provides you with the buttons needed to perform common functions: Add Entity, Add Business Data Model, and Load Business Data Model. When a data model is open, the right-side of the toolbar contains additional icons which give you the means to save ( ), edit (
 ), or delete (
 ) the current data model.
Work Area Panel
This is where you can design your data model in a visual interface.
- Drag and drop entities from the entities panel to add them to the data model.
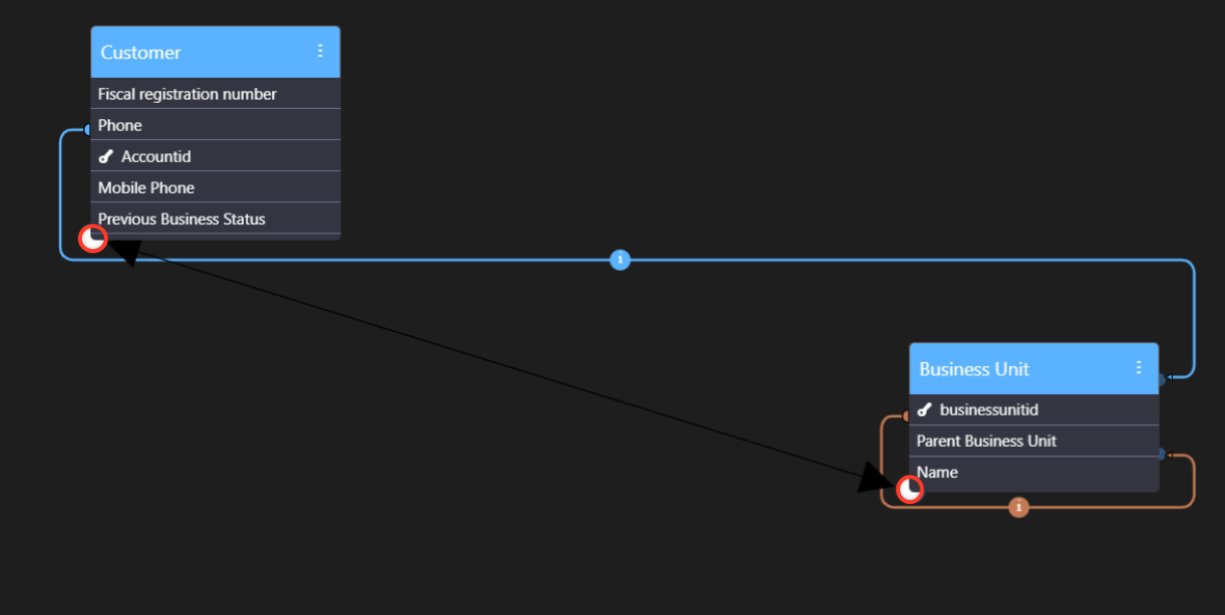
- Drag the bottom left corner of an entity to a related entity to define a relationship.
- The overview panel at the bottom right corner of the work area allows you to zoom in and out and displays the current view's outline within the canvas.
To create a well-defined data structure in a database, you need to identify the business concepts (entities, attributes, relationships), define data characteristics, and also define how the data is related.
The first step in creating a data model after you open the Data Model Designer is to add the data model.
1 Add Data Model
- Go to Evolutive Data Core > Data Model Designer > Add Business Data Model. The Add Business Data Model page opens.
- Type a name for the data model in the Name field, a brief description (optional) in the Description field, and click OK.
The page closes and the Data Model Designer opens the data model you've previously added, its name is displayed on the toolbar.
The next time you open the Data Model Designer, it will open on the data model you last worked on.
Now that you've added the data model, you can start adding entities.
2 Add Entities to Data Model
The next step in creating a data model is to identify all of the entities you will need. This could be a customer, an invoice, etc.
Once identified, make sure that you add the entities in FintechOS Studio. You can add entities in two ways:
- From the Data Model Designer - On the toolbar, click Add Entity, provide the mandatory entity information and save it. The entity has by default a set of system attributes. You can extend the data model by adding new attributes as needed.
- From the Data Model Explorer - In the Business Entity List, by clicking Insert. Fill out the required properties, and click Save and Close.
In Data Model Designer, locate the newly created entity in the Entities panel, and then drag and drop it on the Work Area.
3 Define Relationships
Identify relationships between the entities of your data model and describe the relationship. To define relationship between two entities of your data model, in Data Model Designer, select the circle displayed in the left bottom corner of one of the entities and drag it towards the circle of the other entity:
The Add Relationship page appears which allows you to define the relationship. For more information on relationships, their types and how to define them, see Editing Entities.
After you save the relationship between two entities, it is displayed as object in Data Model Designer, and connectors are shown between it and the entities which it links (that is, the entities between which you created the relationship).
Load Data Models
When you open the Data Model Designer, it opens up the data model you last worked on.
If you want to work on a different data model that you created in FintechOS Studio, from the toolbar, click Load Business Data Model. The Load Business Data Model page appears which lists all data models that you created in FintechOS Studio:
In the list of existing data models, select the data model you want to load. It opens in the Data Model Designer.
Edit Data Model Details
You can edit the details of a data model (name and description) at any time:
- Load the data model whose details you want to modify (if it's not the current one).
- Click Edit (
 ). The Edit Business Data Model page appears.
 - Update the details as preferred and click OK.
Make sure that you save the data model every time you edit it; otherwise, you lose the data when adding an entity or navigating to a different page.
Edit Data Models
In FintechOS Studio, you can edit a data model at any time by first loading it in the Data Model Designer, then add, Edit Entities or delete entities, attributes and relationships between entities to best suit your business model.
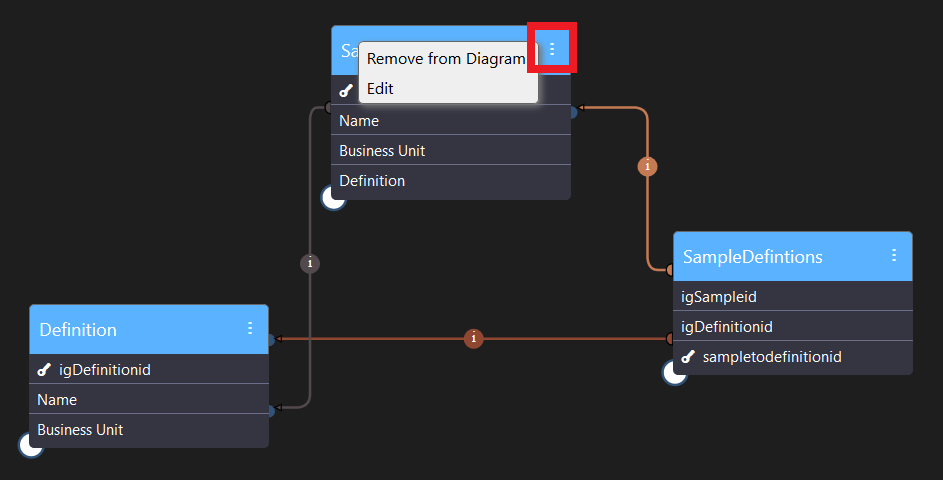
Use the ellipse button to edit or delete it.
Removing an entity from the diagram also erases the entity's relationship lines, but the lookup attributes used to define those relationships are still preserved in the entity.
Hovering over the letter displayed on the entity lines displays a short description of the relationship, for example "SampleDefinitions linked to Definition through <idDefinitionId>".
Relationship lines have a different color to enable easier tracking in complex data models. There is no color coding employed.
Delete Data Models
If you want to remove the current data model, on the toolbar, click Delete ( ) and in the confirmation pop-up, click Yes.
The data model deletion cannot be undone, so we recommend you think twice before removing it.
