Operation Authorization
Operation authorization allows you to initiate a multi-factor authorization process on-demand, whenever you wish to secure an operation in a form driven flow. This is particularly useful for sensitive actions, such as online payments, when you wish to impose an additional layer of security on top of the regular user authentication based on username and password. The authorization process is described below:

- The authorization process is initiated either explicitly by the user or automatically when the user progresses past a specific point in the form driven flow.
- The user receives a secret pass-code via an alternate communication channel (such as email) while a custom authorization page is displayed on screen.
- If the user authorizes the operation by entering the pass-code in the authorization page, a custom authorization script is run to continue the flow as desired. Otherwise, a different rejection script is used to guide the flow on a different path.
The sections below describe the components necessary to set up operation authorization and how to initiate authorization for an operation.
1 Prerequisites
Before you set up authorization for a specific operation, make sure the following items are in place:
- Bearer Entity - Make sure that the authorization process references a specific entity in the data model for data persistence. For instance, a payment authorization process could use a payment entity that includes attributes for the payment amount, source IBAN, destination IBAN, etc., as well as Business Workflows states to track whether the payment authorization is pending, approved, or rejected.
- Communication Channel - A provider that allows you to send the pass-code via an alternate communication channel, such as email. For more information, see the Omnichannel Communication Automation documentation.
2 Details Automation Script
The details automation script provides the inputs for the pass-code generation and the available tokens for the pass-code message and authorization page templates. The script output must include a JSON object called operation, containing keys for the operationDetails (the components that will be used to generate the pass-code) and operationInfo (the components that will be available as tokens for the pass-code message and authorization page templates).
For example:
setAdminMode(true);

var E = server.query.getAlias('myPayment');
var rows = server.query.from('myPayment', E)
.where(E.myPaymentId.equals(context.Data.recordId))
.selectColumns(E.Payeename, E.PaymentAmount, E.DestIBAN, E.SourceIBAN)
.executeAndMapComplex({ entity: E});
log("Rows = ");
log(rows);

var operation =
{
    operationDetails: {
        paymentAmount: rows[0].entity.PaymentAmount,
        sourceIBAN: rows[0].entity.SourceIBAN,
        payeename: rows[0].entity.Payeename,
        destIBAN: rows[0].entity.DestIBAN
    },
    operationInfo: {
        paymentAmount: rows[0].entity.PaymentAmount,
        sourceIBAN: rows[0].entity.SourceIBAN,
        payeename: rows[0].entity.Payeename,
        destIBAN: rows[0].entity.DestIBAN
    }
];

setData(operation);
3 Pass-Code Message and Authorization Page Templates
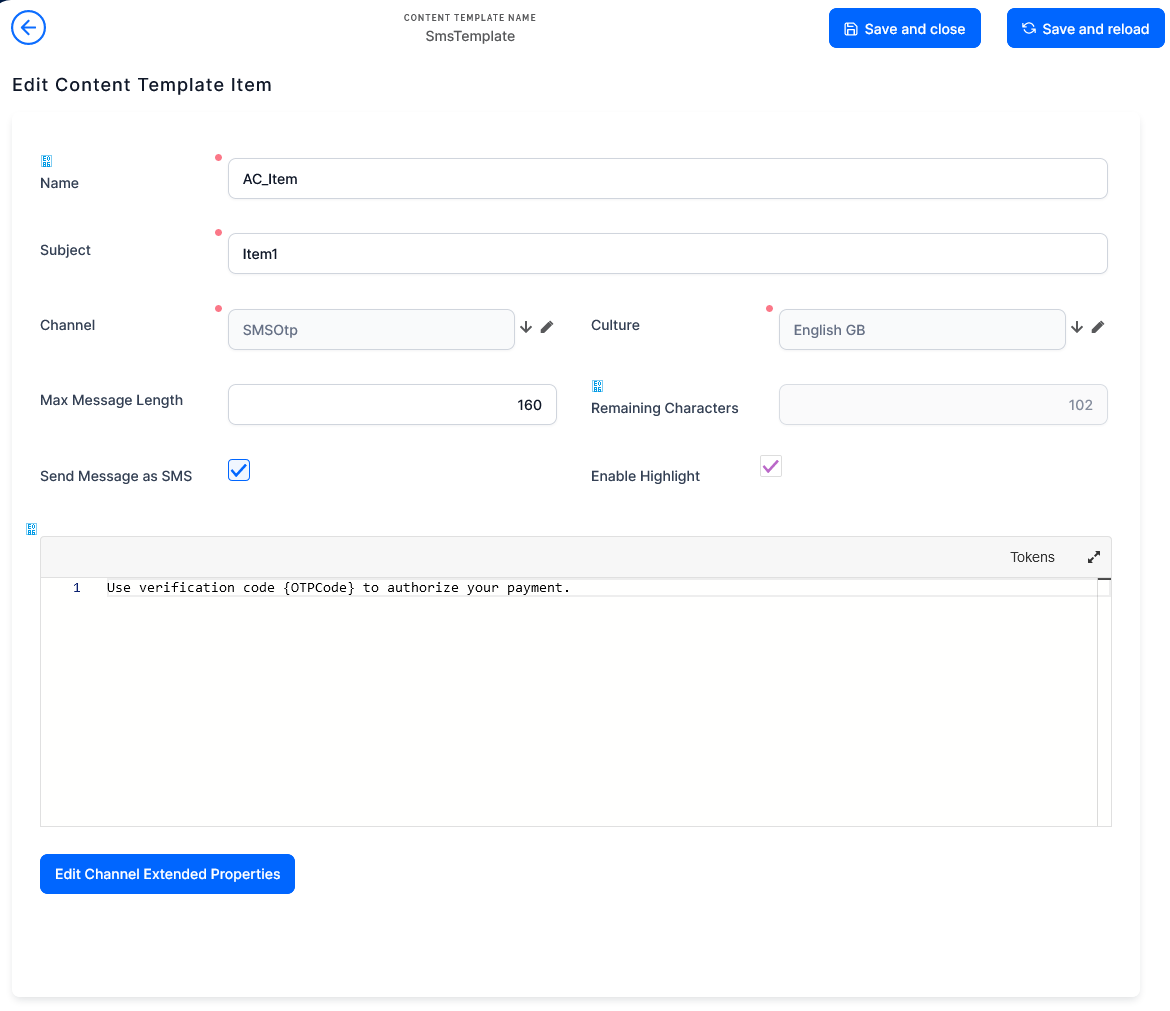
Use content templates and Custom Flows to create templates for the pass-code message and the authorization page respectively.
Template Tokens
- For the pass-code field:
- In the pass-code message, use the
{OTPCode}token. - In the authorization page, use the value defined for the
formTagkey, as specified in the Authorization Scenario field of the 5 Action Authorization Type.
- In the pass-code message, use the
- To include tokens for the operation information (such as the payment amount, payer name, account numbers, etc.), use the values defined in the
operationInfokey of the 2 Details Automation Script. - Use the
{btn:acceptButton:btn}and{btn:rejectButton:btn}tokens to place Accept and Reject buttons on the authorization page template. These will be replaced with a button tag with localized text. The localization resources areAuthorizePayment_AcceptandAuthorizePayment_Reject.
Pass-Code Message Template Example
Authorization Page Template Example
<ebs-resource data-resource-key="customPage" data-culture="ro-RO">Autorizezi plata sumei de {!paymentAmount!} din contul {!sourceIBAN!} pt {!payeename!} in contul {!destIBAN!}?</ebs-resource>
<ebs-resource data-resource-key="customPage" data-culture="en-GB">Do you authorize payment of {!paymentAmount!} from account number {!sourceIBAN!} for {!payeename!} to acocunt {!destIBAN!}?</ebs-resource>
<div data-resource-key="customPage">
</div>
<div class="show-mask">OTP:{OTP}</div>
{btn:acceptButton:btn} {btn:rejectButton:btn}
4 Authorization and Rejection Automation Scripts
Once the user accepts or rejects the operation, use the corresponding scripts to advance the flow along the desired path. These server-side scripts typically include instructions to navigate to a desired step in the flow. For example:
log("Payment authorized.");
setNavigationEdit("Payment", context.Data.recordID, "Payment", "2");
5 Action Authorization Type
You can define multiple types of authorization operations that you can apply in various scenarios, depending on the settings you wish to use for the communication channels, pass-code and authorization page templates, authorization and rejection automation scripts, etc.
To create an action authorization type:
- In FintechOS Studio, go to Main Menu > Advanced > Authorization Operation Types.
- Click Insert to open the authorization type editor.

- Fill in the following fields:
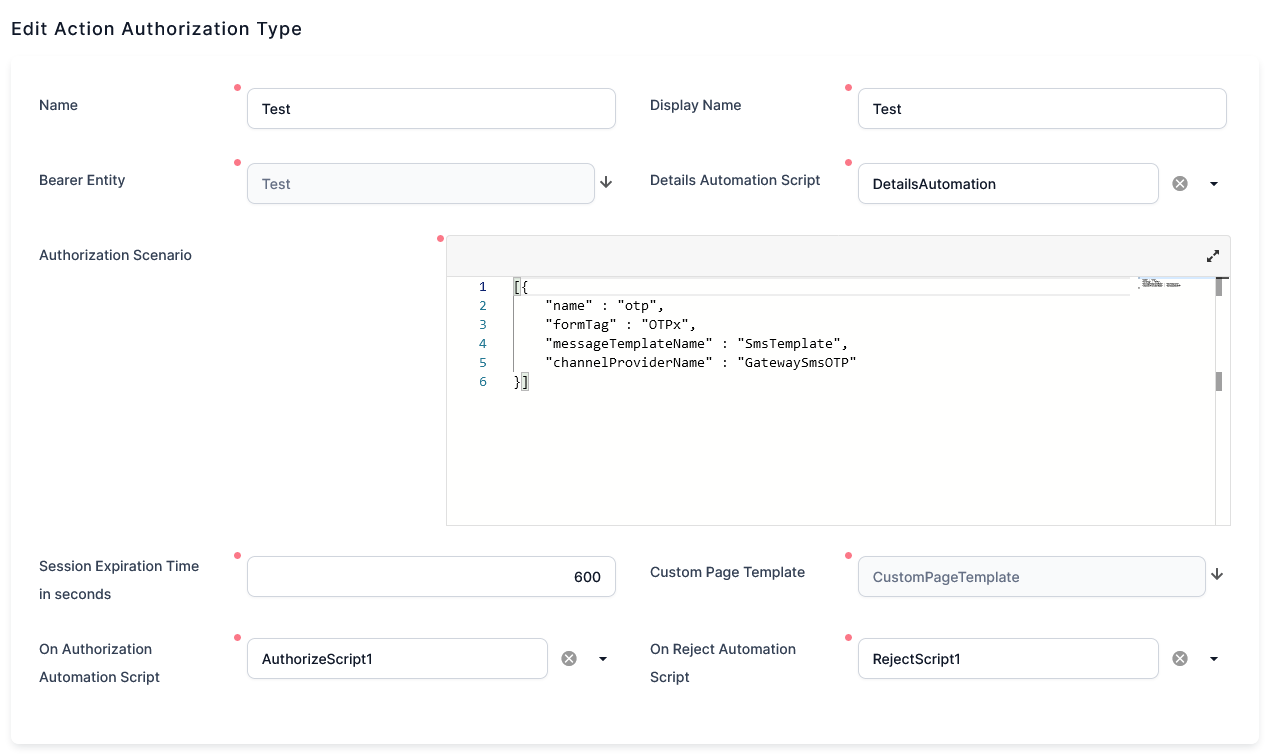
Field Description Name Name of the action authorization type. Display Name Name of the action authorization type as it will be displayed in the user interface. Bearer Entity Entity referenced by the authorization process for data persistence. For details, see 1 Prerequisites. Details Automation Script Server-side on-demand script endpoint containing the inputs for the pass-code generation and the available tokens for the pass-code message and authorization page templates. For details, see 2 Details Automation Script. Authorization Scenario JSON object containing keys for the: - Name of the scenario.
- Token used for the pass-code input field in the authorization page template (for details, see 3 Pass-Code Message and Authorization Page Templates).
- Content template used for the pass-code message.
- Channel provider used to send the pass-code message.
Copy[{
"name" : "otp",
"formTag" : "OTP",
"messageTemplateName" : "ContentTemplate",
"channelProviderName" : "GatewayEmailOTP"
}]Session Expiration Time in Seconds Number of seconds the user has to authorize the operation from the time the pass-code message is sent. If this duration is exceeded, the operation is rejected. Custom Page Template Template for the authorization page. For details, see 3 Pass-Code Message and Authorization Page Templates. On Authorization Automation Script Server-side on-demand automation script endpoint executed if the operation is authorized. For details, see 4 Authorization and Rejection Automation Scripts. On Reject Automation Script Server-side on-demand automation script endpoint executed if the operation is rejected. For details, see 4 Authorization and Rejection Automation Scripts. - Click Save and Close.
Initiate an Operation Authorization Process
Once you have an 5 Action Authorization Type in place, you can initiate an authorization process, either when the user explicitly interacts with a control in the user interface, or automatically when progressing to certain stage in the form driven flow.
To initiate an authorization process, use the requestOperationAuthorization Server SDK function. For example:
requestOperationAuthorization(context.id, "payment", "0093B783-E7A1-9C10-79C9689AB56B", "1C9A6B83-B1A4-C9A0-7C096C9A0501", "1A93C703-97AB-0C30-7929A69AB86B");