Reinstate a Policy
The policy reinstatement is the process of restoring an insurance policy back in effect after it has been previously terminated due to various reasons, most often scenario being that the insured has missed the premium payments. The reinstatement is usually done at the request of the Insured and can be accepted in most cases conditionally by the Insurer. The most encountered conditions could be:
-
The cover is not provided from the moment the premium passes it’s due date until it’s paid by the Insured;
-
The back premium is collected for the suspended period;
-
The quality of the risk has not changed (it has not degraded);
-
The duration of the period in which the cover of the policy is not active does not exceed a certain amount of time.
The Suspended status is a policy state between InForce and Lapsed. This only applies for policies with unpaid installments, where at the product configuration level, the Suspension field is set as Yes. During suspension, the installments are not modified. Payments can be allocated on unpaid installments and the payment schedule is updated with the subsequent status (e.g. Paid) for the installment. You can cancel a policy that is in Suspended status. Policies automatically transition to the Lapsed status one day after the Suspended period expires. You can configure the duration of the policy suspension. Learn how, by accessing the Configure the Policy Suspension Duration page.
View the workflow for the policy suspension and reinstatement below.
With Policy Administration, the policy reinstatement functionality facilitates a policy transition from Suspended back into InForce, or from Suspended to Canceled/Declined.
If a payment is allocated to an unpaid installment, where the payment date is less than the due date of the previously unpaid installment, then the policy is transitioned back into InForce without the need of a manual reinstatement.
A policy can be reinstated if its in the Suspended status, but only after the customer has paid the installment that they missed. The reinstatement process goes through multiple statuses. Learn about the reinstatement statuses by accessing the Business Workflows section of the Manage Core Policy Admin page. Follow the steps below to restoring an insurance policy back in effect after it has been previously terminated.
-
In the main menu, navigate to Policy Admin > Reinstatements. A grid is displayed, listing the reinstatement request issued within the system, with their statuses
-
Click Insert to open the policy search form.
-
Fill in the fields with details of the policy, and click Search.
-
Once the policy is found, click Choose Option, on the policy record to edit the reinstatement.
-
On the Request Details page, view the policy details, payment schedule, and information about the due premium, the start date and end date of the suspension. In the Payment Schedule grid, the Payment Delay is calculated as Last Payment Date - Due Date - 1.
-
Click Register. The Request Type and Reinstatement Request Date fields are now available to edit. You can only move forward and propose the reinstatement request after you have paid the unpaid installment. While the installment is unpaid, the Propose Request button remains inactive.
-
To pay the installment, go to Main Menu > Billing & Collection > Bank Statements. Here, the list of all the bank statements is displayed.
-
Click Insert to add a new record.
-
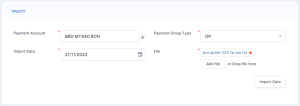
Input the data and attach the bank statement in the File field.
-
Click Import Data. The record is now registered, and the data from the bank statement file is displayed.
-
Click the second tab, Payments. Here, you can view the details of the incoming and outgoing payments.
-
In the Outgoing Payments tab, double click the Payment Order record.
-
Click Allocate. The Search Invoices and Installments grid is now displayed.
-
Input the policy number and click Search. The invoices and installments lists are displayed.
-
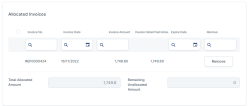
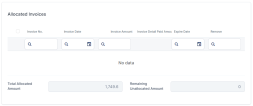
Click Add on the invoice record. The Allocated Invoices grid is displayed with the number of the invoice, the invoice amount, and the detailed paid amount.
-
Click Validate.
-
Go back to the reinstatement request record, and refresh the page. The installment is now paid.
-
The Request Type and the Reinstatement Request Date fields are automatically filled.
-
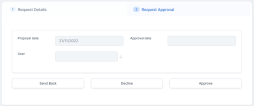
Click Propose Request. The Request Approval tab is now available. In order to move forward, you need to approve the reinstatement request.
-
In the Request Approval tab, you have the following options:
-
Click Approve, and the current status of the reinstatement request is changed to Approved. The policy is reinstated to the In Force status. In the Cover Suspension section of the policy, you can view the time in which it was suspended.
The Suspension End Date, in this case, is the date when the Reinstatement is approved. The Duration is measured in days.
-
Click Decline, and the current status of the reinstatement request is changed to Declined. The policy remains in the Suspended status.
-
Click Send Back, and you will be redirected to the Request Details page, where you can edit any mistakes you might have in the reinstatement request, and send it back to approval.
-
After you have approved a reinstatement request, you can also remove the payment made for the installment, and the policy returns to the suspended status. Follow the steps below to remove the payment:
-
Go to Main Menu > Billing & Collection > Payments. The list of all payment records is displayed.
-
Double-click the record of the payment you have made. The Client Payment page is displayed.
-
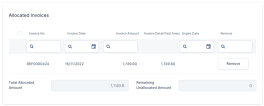
In the Allocated Invoices grid, click Remove on the invoice record for the payment.
-
Go to the respective policy record, and you can see that the Cover Suspension grid is unavailable, the installment is now set as Unpaid, and the policy is in Suspended status.
You can cancel a reinstatement request by following the steps below:
-
In the main menu, navigate to Policy Admin > Reinstatements. The grid listing the reinstatement requests is displayed.
-
Double-click the record of the reinstatement request that you want to cancel. The Request Details form is displayed.
-
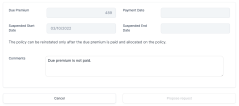
Write the reason in the Comments section, as per the example below.
-
Click Cancel. A pop-up message informs you that you are about to cancel the reinstatement request.
-
Click Proceed. The current status of the reinstatement request is changed to Cancelled, and the policy remains in the Suspended status.


