Configure Alteration Types
-
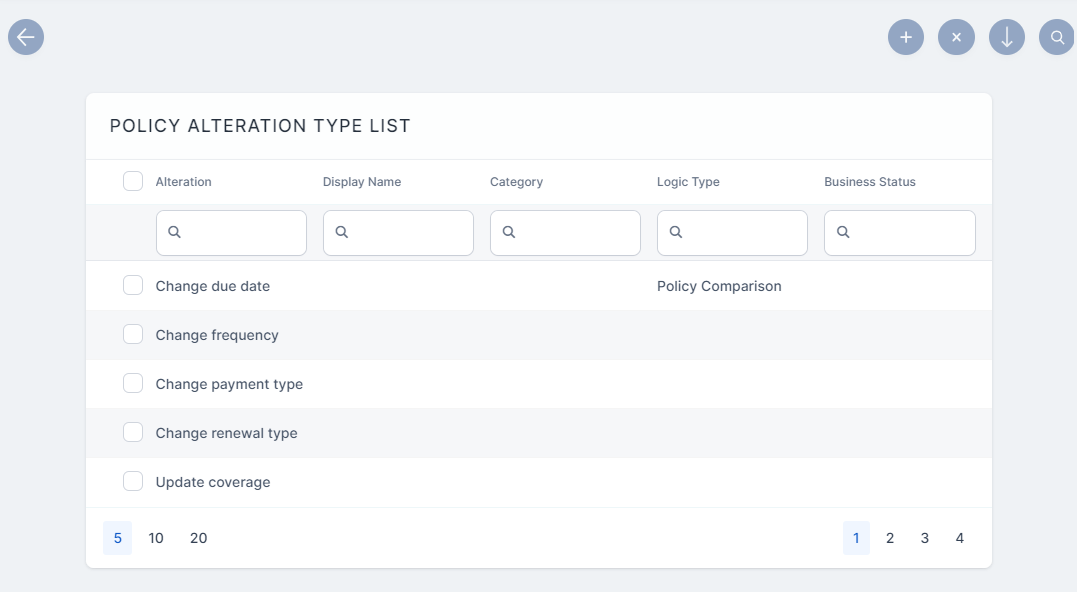
In FintechOS Portal go to Main Menu > Settings > Change Engine. The Policy Alteration Type List is displayed.

-
Click Insert to configure a new alteration type.
-
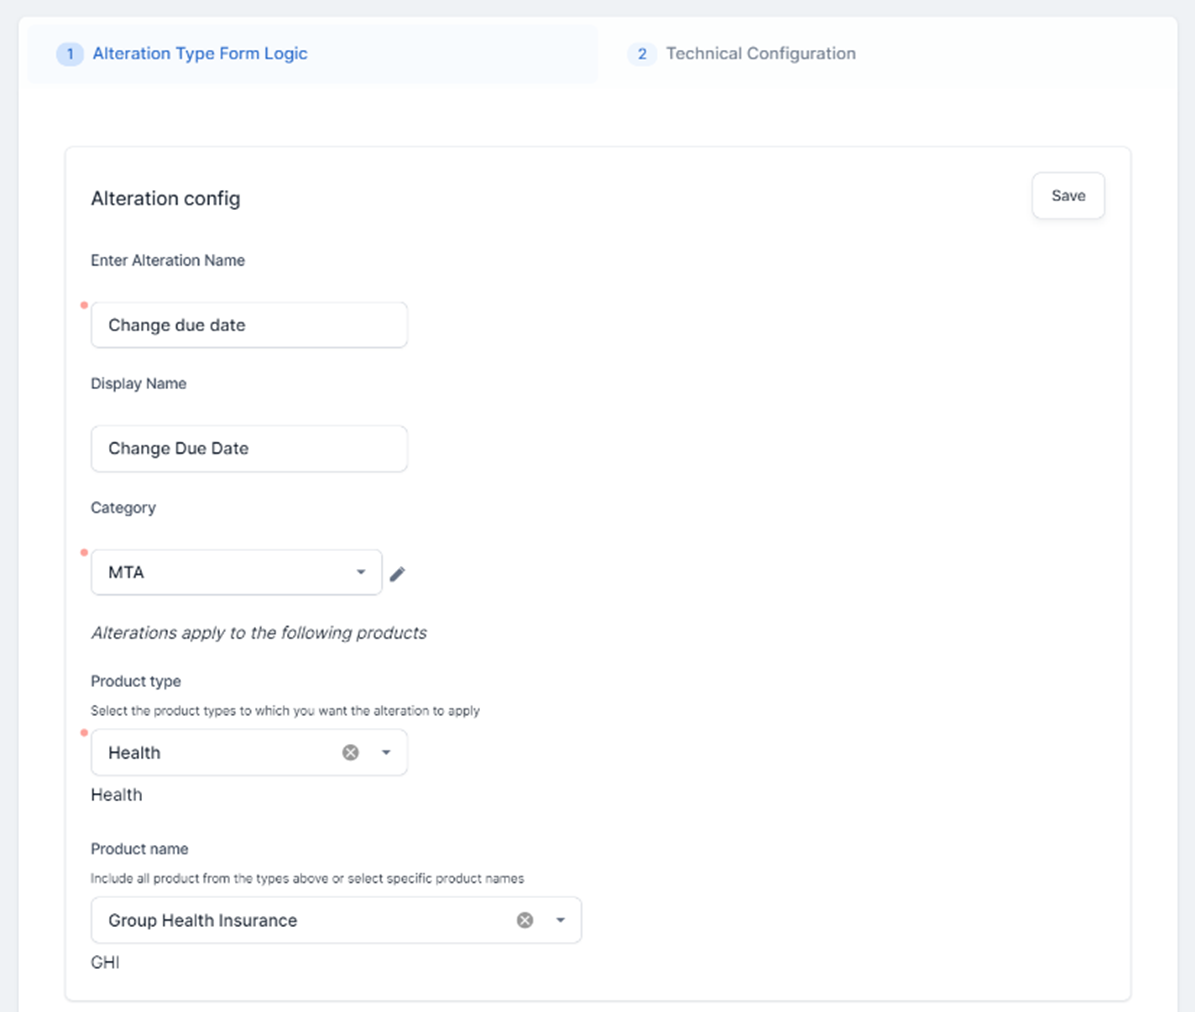
In the Alteration Type Form Logic tab, fill in the following fields in the Alteration Config section:
-
Enter Alteration Name: Input a unique name for the alteration type;
-
Display Name: Input a display name for the alteration type;
-
Category: Select MTA (Mid Term Adjustment) in the drop-down;
NOTEAlthough other options are displayed in the drop-down, only MTA is available at this moment.
-
Product type: From the drop-down, select one or more product types to which you want the alteration to apply;
-
Product name: Select an insurance product from the drop-down, filtered by the insurance type chosen above. If you haven't selected a product type, all insurance products are displayed in this field.

-
-
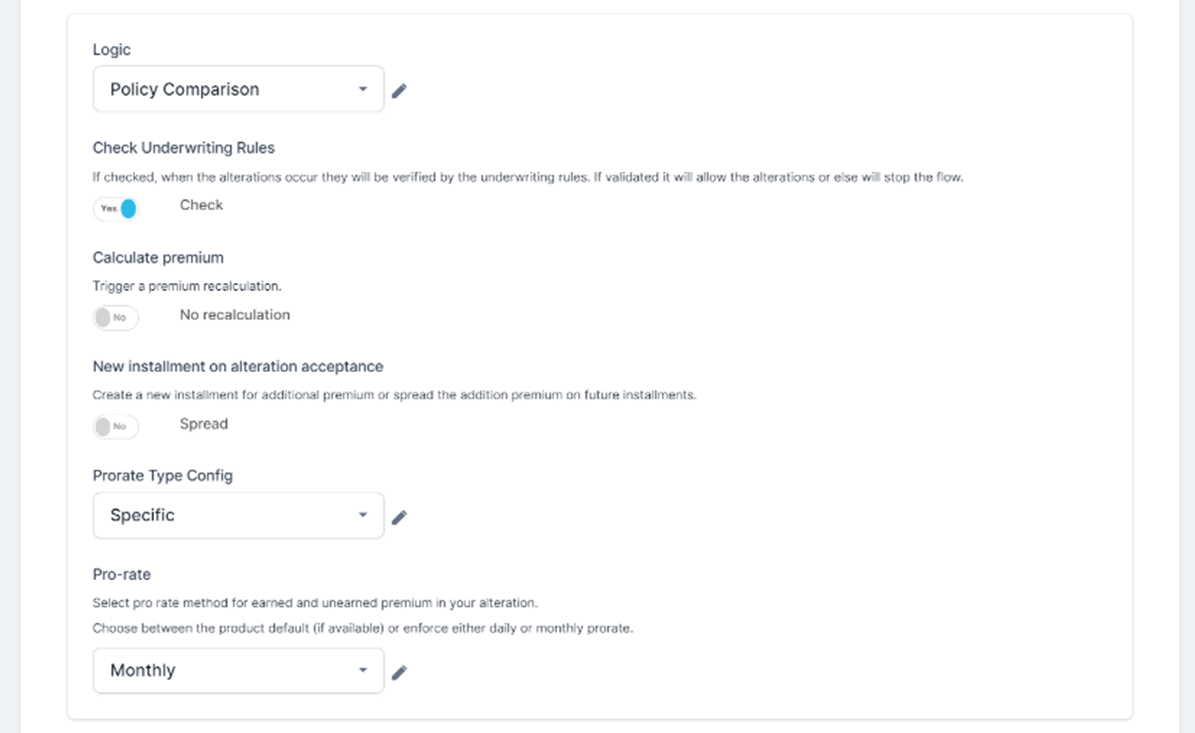
In the second section, populate the following fields
-
Logic: From the drop-down select either Policy Comparison or Specific Logic. The Policy Comparison logic is explained in the Register and Cancel an MTA Request section;
-
Check UW Rules: If you check this field, when the alterations occur, they are verified by the underwriting rules. If validated, this allows the alterations, or else the flow stops;
-
Calculate Premium: Check this field to trigger a premium recalculation;
-
New installment at MTA acceptance: Check this field to create a new installment for additional premium, or spread the addition premium on future installments;
-
Prorate Type Config: Select one of the following values from the drop-down: Product default, or Specific. If you select the Specific value, you can select a pro-rate method in the field below;
-
Pro-rate: Select the pro rate method for an earned and an unearned premium in your alteration. Choose between the product default, if available, or enforce either daily or monthly prorate.

-
-
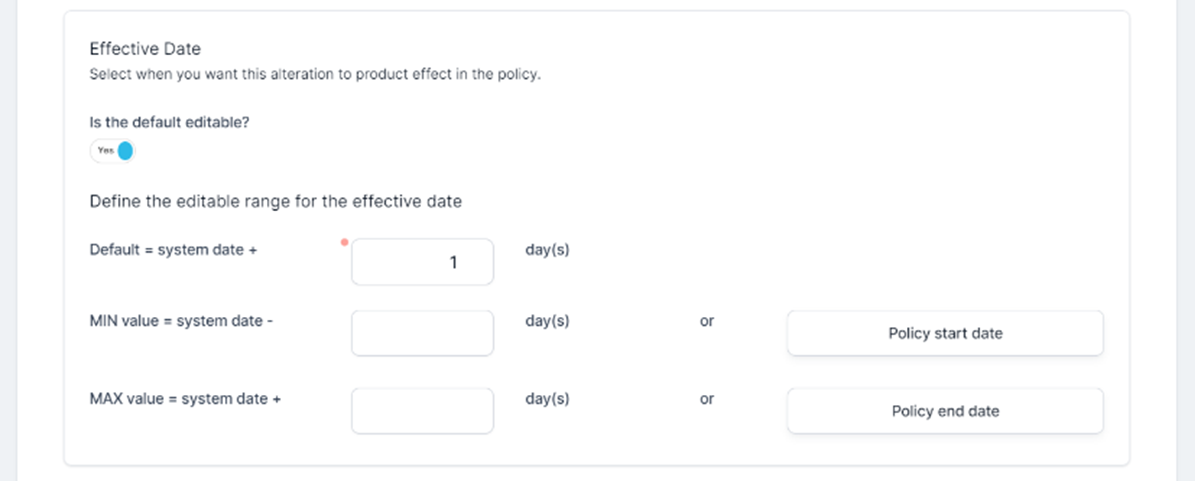
Configure the Effective Date of the alteration, and select when you want this alteration to product effect in the policy. If you check the Is the default editable? field, a new section unfolds where you can define the editable range for the effective date.

-
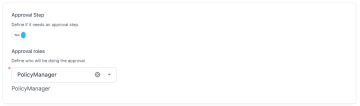
In the Approval Step section, check to define if the alteration needs an approval step. If you check the field, the Approval roles section is unfolded, where you can define who is doing the MTA approval.
-
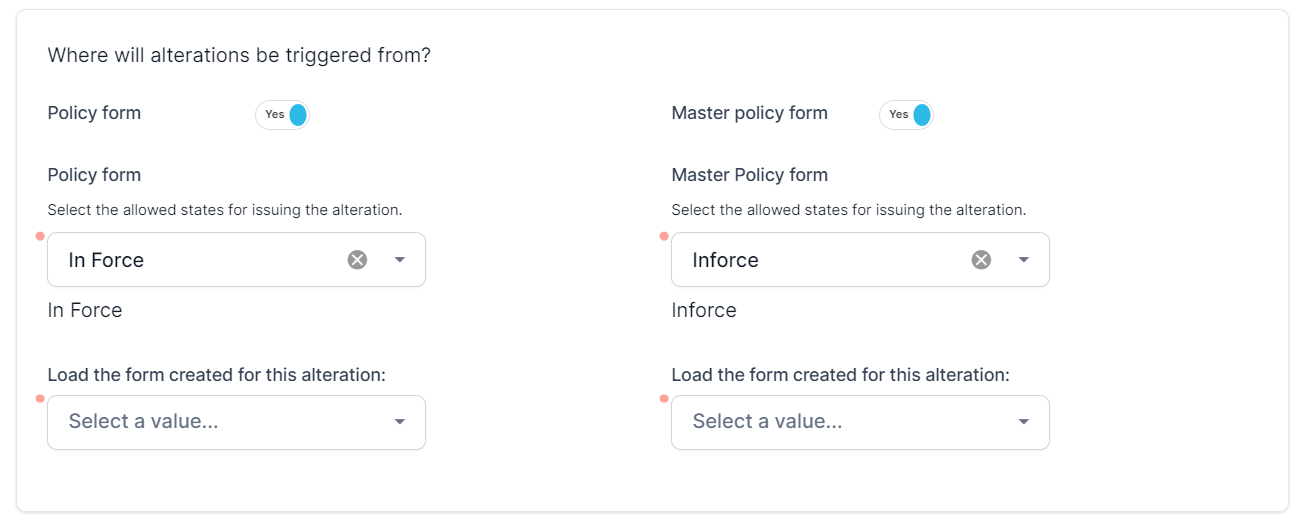
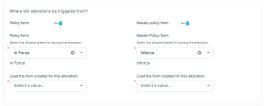
In the next section, Where will alterations be triggered from?, define if you want the alterations to be triggered from the policy form or from the master policy form. In both cases, if the fields are checked, a new section is displayed where you can select in which policy or master policy status the alteration can be issued. Also, select an alteration form driven flow to apply in this case. You can choose an existing flow, or create a new one, and select it.
-
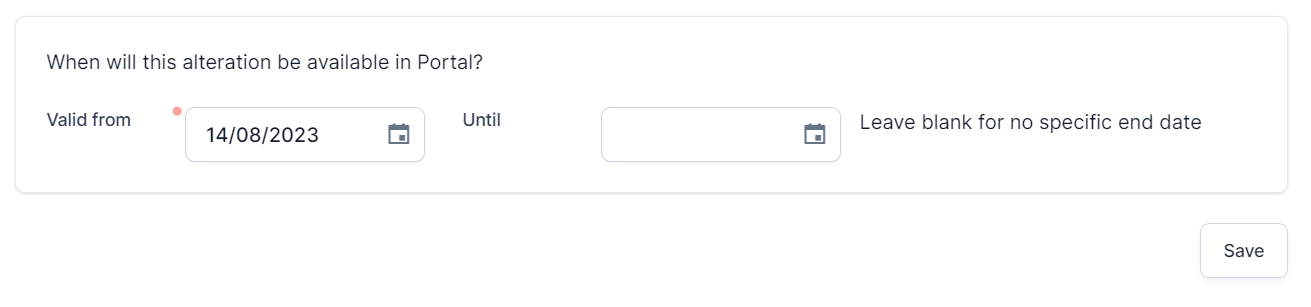
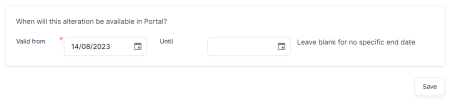
In the last section, When will this alteration be available in Portal?, define the validity time frame of the alteration. Choose a date for the Valid from and for the Until fields. You can leave the last field blank for no specific end date.
-
Click Save.
-
Go to the second tab, Technical Configuration, and populate the following fields:
-
Selection Server Side Lib Name: Enter the library that contains the method written in the
Selection Server Side Methodfield; -
Selection Server Side Method: Enter the method that is called when the alteration type is selected on the Alteration form;
-
Server Side Lib Name: Enter the library that contains the method written in the
Server Side Methodfield; -
Server Side Method: Enter the method that is called when the alteration type is validated on the Alteration form;
-
Summary Text: Enter the text to be displayed after validating an alteration type. It should contain tokens, for example:
Starting{effectiveDate} {identifier} {attributeDisplayName}is modified from{initialValueDisplayName}to{newValueDisplayName}The used tokens must be from the
PolicyAttributeChangeentity.
-
-
Go back to the first tab, Alteration Type Form Logic, and click Publish in Portal. You can now find the configuration record in the Policy Alteration Type List, and you can use it for your policies.