Manage Incidents
As an insurance agent, you can configure the incident types that the customer can view and choose as a claim in their journey, in the Select the Insured Incident Step. You can manage the list of incidents, and even add new records. Follow the steps below:
-
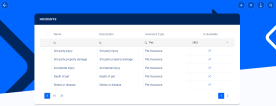
In FintechOS Portal, go to the main menu, and navigate to Incident List > Incidents.
-
The Incidents list is displayed. You can filter the type of incidents by the insurance type.
-
You can choose which of the incidents you want to be displayed in the journey, by checking or un-checking the Is Available option for each of the records.
-
You can delete any of the records by selecting it, and clicking the Delete button at the top right corner of the page.
-
You can download the list of existing records as an .xsls file, by clicking the Export button at the top right corner of the page.
-
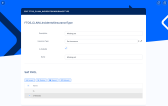
To add a new incident record, click the Insert button on the top right of the page.
-
Input the details in the displayed fields, and check the Is Available option, so the created incident can be displayed in the FNOL journey.
-
Click Save and Close.
-
You are redirected to the Incidents list, and the newly added incident is displayed.

