Direct Debit SEPA
The Billing and Collection solution helps SEPA* insurers to handle direct debit payment operations - starting with the direct debit activation procedure (in order to notify the bank about the payment arrangement between insurer and insured) up to the moment the payment is collected.
Follow the steps detailed in the Direct Debit page, for setting the solution to perform direct debit processing for SEPA* area.
For direct debit payments that respect some rules (such as providing the correct payment details), the process or billing and collecting is completely automated, and you can check the technical details about it on the SEPA Direct Debit page. Details about the automated jobs handling the direct debit payments can be found on the Flow Parameters And Scheduled Jobs page.
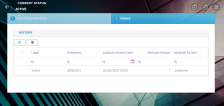
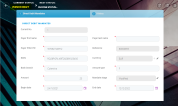
Below is an example of a mandate activated automatically, by the Billing and Collection solution:
The direct debit mandates cannot be deleted manually.
*Single Euro Payments Area (SEPA) allows customers to make cashless euro payments – via credit transfer and direct debit – to anywhere in the European Union.
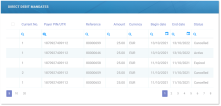
In your portal, the Direct Debit Mandates section offers you an overview of the SEPA direct debit mandates registered in your system - with the newest activated mandate at the top.
This view is permanently updating since many of the files are generated by the system, based on available connections with other third-party systems that feed different kinds of direct debit data into the Billing and Collection solution, and also based on different scheduled jobs that automate direct debit processing. Second to that, some functionalities allow manual interaction. Scroll down to the External Reports section, for more details.
This list also gives you the possibility to search and sort the mandates for easier processing. For example if you want to view all the mandates in Active status - that is mandates from which premiums are paid, you can use the Search by Status option and sort all your mandates accordingly.
Follow the steps below to view the SEPA direct debit mandates registered into your system:
-
In your FintechOS Portal, navigate down the main menu of the Billing and Collection solution.
-
From the dropdown list, click Direct Debit Mandates to open the Direct Debit Mandates list.
On the Direct Debit Mandates page:
-
To inspect a record from the grid, double-click it. The form allows you to see the direct debit mandate related details and its history, in a second tab. See details in the next section, below.
-
To add a new mandate, manually, click Insert, at the top right corner of the page, to open the Insert Mandate Form. See details in the Insert Mandate section, below.
-
To edit a mandate, press Edit Mandate and use the form to make your adjustments. Editing is available for mandates in Draft, Pending or Active status. See details in the Edit Mandate section, below.
You can export one or more records by pressing Export, at the top right corner of your screen.
The SEPA Direct Debit Mandate Form allows you to inspect, edit or cancel a mandate. The form is organized as follows:
Inside this first section, the following fields are automatically populated with details extracted from the direct debit activation file, coming from the bank and the related policy. These fields are not editable.
| Field | Description |
|---|---|
| Current No. | The number of the current mandate. |
| Payer first name | The first name of the payer. |
| Payer last name | The last name of the payer. |
| Payer PIN/ UTR | The Personal Identification Number or unique ID of the payer. |
| Reference | The reference for the payments - policy number. |
| IBAN | The IBAN code for the payments. |
| Currency | The currency for the payments. |
| Bank branch | The bank branch. |
| Amount type | The amount type. |
| Amount | The amount of the payment. |
| Mandate stage | The stage of the mandate. The options set values are: New, Deleted, Modified. |
| Begin date | The beginning date of the mandate. It is automatically completed with the current date - the date when the direct debit Instructions File (containing the instructions for the current mandate, also) is generated in the system. |
| End date | The end date of the mandate. |
The versioning functionality allows you to edit a mandate, and all your updates are logged into the system. After editing, you must manually approve the new mandate version. See the instructions below.
Mandates in Cancelled status cannot be edited.
1. Click Edit Mandate to allow the read-only fields to become editable.
Below , an example of a SEPA mandate ready to be adjusted:
However, some fields are still not editable (see the table below). Proceed to make your changes into the form. Inside this first tab, the fields are automatically populated with the direct debit record details. The following fields are available:
| Field | Description |
|---|---|
| Current No. | The number of the current mandate. Not editable! |
| Payer first name | The first name of the payer. |
| Payer last name | The last name of the payer. |
| Payer PIN/ UTR | The Personal Identification Number or unique ID of the payer. |
| Reference | The reference for the payments - policy number. Not editable! |
| IBAN | The IBAN code for the payments. |
| Currency | The currency for the payments. Not editable! |
| Bank branch | The bank branch. |
| Amount type | The amount type. |
| Amount | The amount of the payment. |
| Mandate stage | The stage of the mandate. The options set values are: New, Deleted, and Modified. Not editable! |
| Begin date | The beginning date of the mandate. |
| End date | The end date of the mandate. |
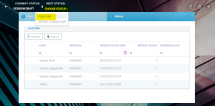
2. Use the Status picker, at the top left of the form, to approve your changes.
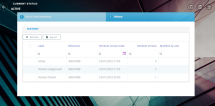
Below is an example of a SEPA mandate History tab and the Status picker (actually available on both tabs of the form):
3. Once approved, the History tab opens and you can check the logging of the version you recently created on the selected direct debit mandate.
4. Click Save and close.
Canceling a mandate triggers the cancellation of all its correlated invoices - that are in Generated status.
Follow the steps below, to cancel a mandate:
1. Click Cancel mandate to move the mandate into this final state.
Cancellation is irreversible and the mandate cannot be edited after this step.
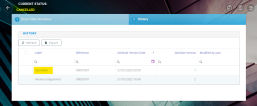
2. Once cancelled, the History tab opens and you can check the logging of this final adjustment you made on the mandate.
Below is an example of the History tab of a cancelled SEPA mandate:
3. Click Save and close.
Even if rare, there are cases when you need to manually insert a mandate, on behalf of a customer. For this, you use the Insert Mandate Form. All mandates inserted manually are registered in Draft status, with mandateStage =N (new) and Begin Date = null. Next, for all the mandates - SEPA and UK, registered in the system, the FTOS_PYMT_DirectDebitMandateStatus scheduled job moves the mandate in Active status, based on some rules. More on the SEPA Direct Debit page.
Manually, you can only add mandates with the mandate stage set to New. Additionally, a system validation is in place that prevents you from adding a mandate with the same reference (policy number) as any other mandate already existing in the system.
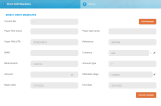
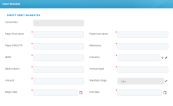
Below is an example of an Insert Mandate Form:
Follow the steps below to add a mandate:
-
In your FintechOS Portal, navigate down the main menu of the Billing and Collection solution.
-
From the dropdown list, click Direct Debit Mandates to open the Direct Debit Mandates list.
-
On the Direct Debit Mandates page, click Insert, at the top right corner of the page, to open the Insert Mandate Form.
-
Proceed to insert the necessary details into the form, as follows:
| Field | Description |
|---|---|
| Current No. | The number of the mandate. Not editable! Automatically generated by the system (unique number). |
| Payer first name | The first name of the payer. |
| Payer last name | The last name of the payer. |
| Payer PIN/ UTR | The Personal Identification Number or unique ID of the payer. |
| Reference | The reference for the payments - policy number. Not editable! |
| IBAN | The IBAN code for the payments. |
| Currency | Choose from the dropdown the currency for the payments. |
| Bank branch | The bank branch. |
| Amount type | The amount type. String values: M (maximum amount) or F(fixed amount). |
| Amount | The amount of the payment (with 2 decimals). |
| Mandate stage | The stage of the mandate. By default completed with N (new). Not editable! |
| Begin date | When the direct debit process should start. |
| End date | When the direct debit process should end. |
5. Click Save and close.
External Reports
The External Reports hold details referring to the management of direct debit mandates - the notifications sent by the bank regarding the activation of the mandate and also about its status (such as if the mandate is still active), the instruction files containing the payment requests for the selected installments, the details regarding the success or failure of the direct debit transactions, and more.
In the External Reports section, you can search inside the repositories by File or Import Date. You can inspect a record by double-clicking it.
The bulk of handling of these operations is done through automatic flows. Where file insert is possible, you will find an Insert button. Uploading direct debit data into the system, triggers automatic changes and tracking of those changes. Updates are made and logged for every record through FintechOS standard versioning mechanism.
Inside External Reports, the following sections are available:
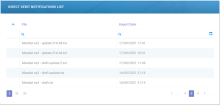
The Direct Debit Notifications sections displays all the files that contain notifications about changes made on the direct debit mandates registered on the system. A notified mandate is a mandate that received an update.
This section is permanently updating since many of the updates are generated by the system, also, based on different scheduled jobs that automate direct debit processing. For example if a request for payment through an active mandate is denied (a number of times), the system changes the status of the mandate to Deleted.
In this section, file import is possible. You can use this functionality to bulk upload notifications (updates) about the existing mandates. A Direct Debit Notification file must have .csv or .txt format in order to be processed and stored by the system.
There are also cases when you need to manually modify some details existing on mandate in Active status - for example, the policyholder's account number has changed and there is a business request to update the mandate urgently, instead of waiting for the automated jobs to handle the change. You can do this by importing a direct debit notification file with M (modified) type.
Follow the steps below in order to manually import a Direct Debit Notification file:
Below is an example of an Import Form:
1. While in the same section, click Insert, at the top right corner of your screen.
2. When the Import Form opens, click on the Select File button and insert your Direct Debit Notification File and then click Import Data.
You must import an M type direct debit Notification File in order to modify an Active mandate.
3. (Optional) Check the tabs of the record, for further details. See also the next paragraph that explains how the record is organized.
4. Click Save and close.
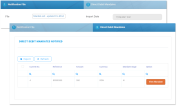
Inside any Direct Debit Notification record, the details about the notified mandate are organized as follows:
-
The Notification File tab - This first tab includes the actual File with the notification for payment and the auto-populated Import Date field.
-
The Direct Debit Mandate tab - This second tab includes a View Mandate button which allows you to visualize the actual mandate record.
All the details from this section are automatically filled in by the system and they are not editable.
A direct debit job runs daily in the system, verifying all the policies with direct debit payment type and their payment schedules, for all the insurance products that are in Active status. Where the case, for all the qualifying installments, this job generates invoices and automatically sends to the bank a request for payment in form of a direct debit instruction file containing the invoice details.
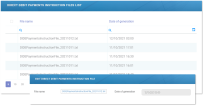
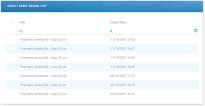
The Direct Debit Payment Instruction Files section hosts all your files containing the instructions for direct debit payments generated by the system. You can search inside this repository by File or Date of Generation. You can inspect a record by double-clicking it. If you want to inspect the details inside any Direct Debit Payment Instruction File, you must download the file.
In this section, file import is possible. A DIDE Payment Confirmations File must have .txt format in order to be processed and stored by the system.
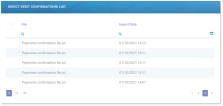
The DIDE Payment Confirmations section contains details about all the direct debit payments confirmed in the system. This section is permanently updating since many of the files are generated by the system, based on different scheduled jobs that automate direct debit processing.
You can search inside this repository by File or Import Date. You can inspect a record by double-clicking it. If necessary, you can manually import a DIDE Payment Confirmations file. See right below:
Below is an example of an Import Form:
1. While in the same section, click Insert, at the top right corner of your screen.
2. When the Import Form opens, select your file and then click Import Data.
3. (Optional) Check the tabs of the record, for further details. See also the next paragraph that explains how the record is organized.
4. Click Save and close.
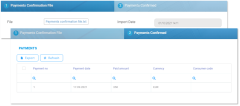
Inside any Direct Debit Confirmation record, the details about the confirmed payment are organized as follows:
The first tab - includes the actual File with the confirmation of a payment for a specific mandate and the auto-populated Import Date field.
The second tab - includes a grid containing every confirmed payment extracted from the imported file. For the case when there are many records listed, you also can search inside this grid by different keywords - such as Payment no, Payment date, Paid amount, Currency, or Consumer code.
In this section, file import is possible. A Direct Debit Denied must have .csv or .txt format in order to be processed and stored by the system.
The Direct Debit Denied section contains details about all the requests for direct debit payment that were denied by the bank and are registered into your system. This section is permanently updating since many of the files are generated by the system, based on different scheduled jobs that automate direct debit processing.
You can search inside this repository by File or Import Date. You can inspect a record by double-clicking it. If necessary, you can manually import a Direct Debit Denied file. See right below:
Below is an example of an Import Form:
1. While in the same section, click Insert, at the top right corner of your screen.
2. When the Import Form opens, select your file and then click Import Data.
3. (Optional) Check the tabs of the record, for further details. See also the next paragraph that explains how the record is organized.
4. Click Save and close.
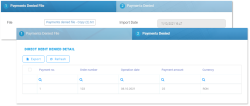
Inside any Direct Debit Denied record, the details about the denied payment are organized as follows:
The first tab - includes the actual File with the details of the denied request for direct debit payment for a specific mandate, from the bank and the auto-populated Import Date field.
The second tab - includes a grid containing every denied payment extracted from the imported file. For the case when there are many records listed, you also can search inside this grid by different keywords - such as Payment no., Order number, Operation date, or Payment amount.
For more information about the import rules and configurations, consult also the Direct Debit and the Flow Parameters And Scheduled Jobs pages.

