Add Option Set Attributes
An option set attribute allows you to define a list with several options available for selection. When you add an option set field to a data form, you can specify multiple values that will be available for users to select. When users fill out the data form, they can select one value displayed in a drop-down list.
Users who are familiar with FintechOS Studio (know how to navigate through pages and pop-ups with minimal clicks and actions) can add an option set attribute, then add options sets and items. FintechOS Studio beginners should define the options set, then add the option set attribute.
This section walks you through the steps you need to follow in order to add and define an option set attribute.
STEP 1. Define the option set (picklist)
- Select Admin > Option Sets. The Option Sets List page will be displayed.
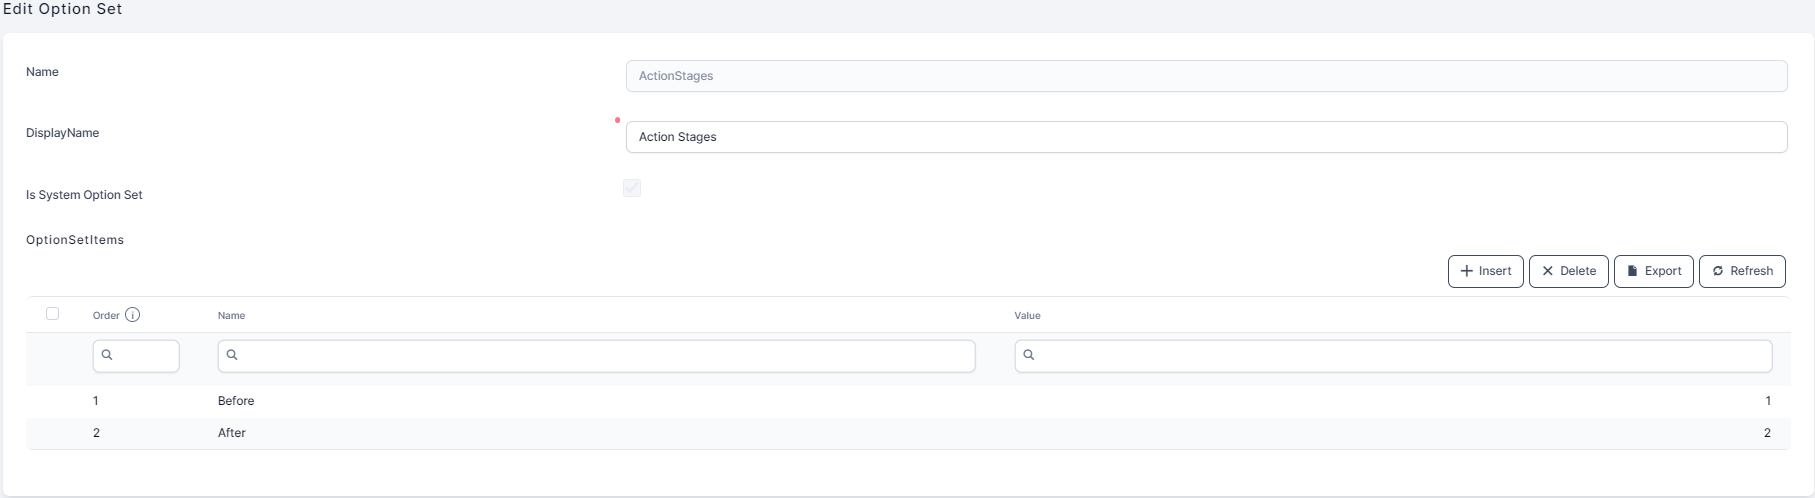
- Click Insert, fill-in the Name (must be unique and is not visible in the UI), and DisplayName (displayed in the UI).

- Click Save and reload . The Add Option Set page is replaced by the Edit Option Set page. The Items section displayed at the bottom of the page allows you to create, edit, delete and change the order in which options are presented.
Now that you’ve created the option set, you can start adding items.
STEP 2. Add new option set items
Double-click the desired option set and in the Edit Option Set page follow these steps:
- From the Items section, click Insert and fill-in the following fields:
Field Description Name The option set item name which will be used by the system. Display Name The option set name which will be displayed in the user interface. NOTE
The maximum length of the Display Name for Option Set Items is 200 characters.Value It is used for mapping (e.g., if you want to get from a script the optionsetitem). The value must be unique within the options. We recommend that you add incremental values in this field as the value might be useful in workflows, flow automation and business rule engines. Id Unique ID automatically assigned by the system for the option set item. No user input is required. StatusId
The drop-down has two options: Active and Inactive. Select Active to make the business option available.
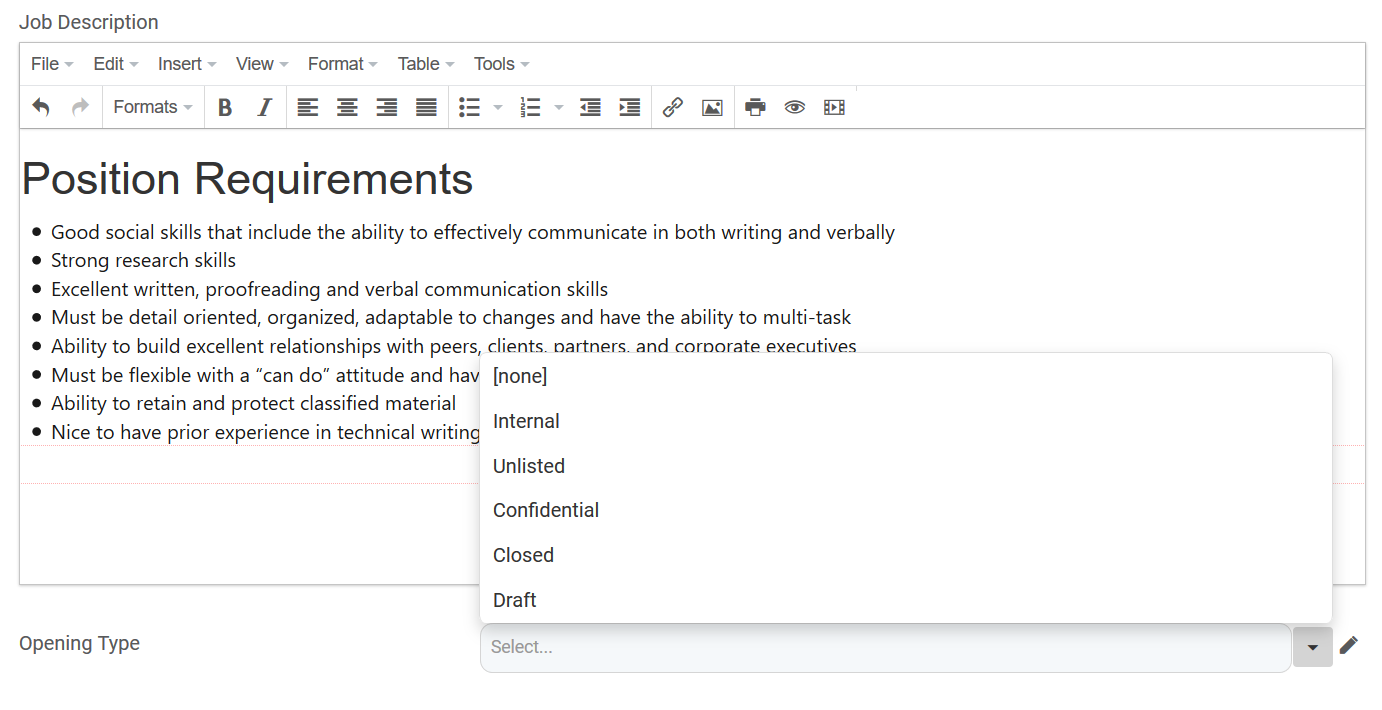
Option set entity attributes will not list inactive option set items in the user interface. For instance, an option set may contain values for internal, external, contractor, unlisted, confidential, closed, and draft job openings:

During a hiring freeze, a decision is made to suspend external and contractor job openings and the corresponding option set items are set as inactive, making them invisible in the user interface for any entity attribute that uses the option set:
Once the hiring freeze is over, the option set items can be activated again.
- Click Save and reload . The page refreshes and the option set option is listed in the Items section.
You can add as many option set items as you want to fulfill your business needs.
Change the items order
You can change the order of the items by dragging the items from one position to another in the items list.
Edit option set items
You can edit an existing option set item from the Edit Option Set page. In the Items list table, double-click the desired item. The Edit Option Set Item page displays where you can change the Value, Display Name and Status Id.
To save the changes, click Save and reload.
Delete Option Set Items
Select the item from the Items list, click Delete, and click Yes to confirm deletion.
If you remove an option that has already been used in entity records, the data in those entity records becomes invalid; therefore, you should not remove the option but mark it as obsolete. To do so, double-click it and from the Status Id drop-down list, select Inactive.
STEP 3. Define the option set attribute
To add a new Option Set attribute to an entity, follow these steps:
- Select Evolutive Data Core > Data Model Explorer. The Business Entities List displays.
- Double-click the entity to which you want to add the option set attribute. The Edit Business Entity page displays.
- Expand the Data Model section and click Insert. The Add Attribute page displays.
- Provide the following properties:
| Property | Description |
|---|---|
| Name | The name of the attribute. Make sure that you use the following naming convention: 'optionset name' + suffix 'Id', Example: an attribute 'AccountTypeId', where 'Account Type' is the optionset name. |
| Attribute Type | Select Option Set from the drop-down list. The Option set name (only if optionset) field becomes mandatory. |
| Display Name | The name of the attribute that will be displayed on the data form in the user interface if the Auto-generate data form checkbox is selected on the entity level. |
| Table Column Name | The name of the attribute which will be automatically generated in the database. This field is not visible in the end user interface. NOTE To avoid affecting data integrity and consistency, do not change the value prefilled by the system. |
| Option Set | The name of the option set (picklist) you defined. You can either enter the option set name or click the drop-down arrow on the right side of the field and double-click it. If you have many option sets displayed within the list, you can use the search feature available to search the one you want to add to the option set attribute. |
| Option Set - default value | This property allows you to display a default value in the drop-down list on the data form. For usability purposes, enter the value which is more likely selected in most cases by users from the drop-down list on the entity data form. |
Example: Create an option set