Creating Data Models
Introduction
To create a well-defined data structure in a database, you need to identify the business concepts (entities, attributes , relationships), define data characteristics and also define how the data is related.
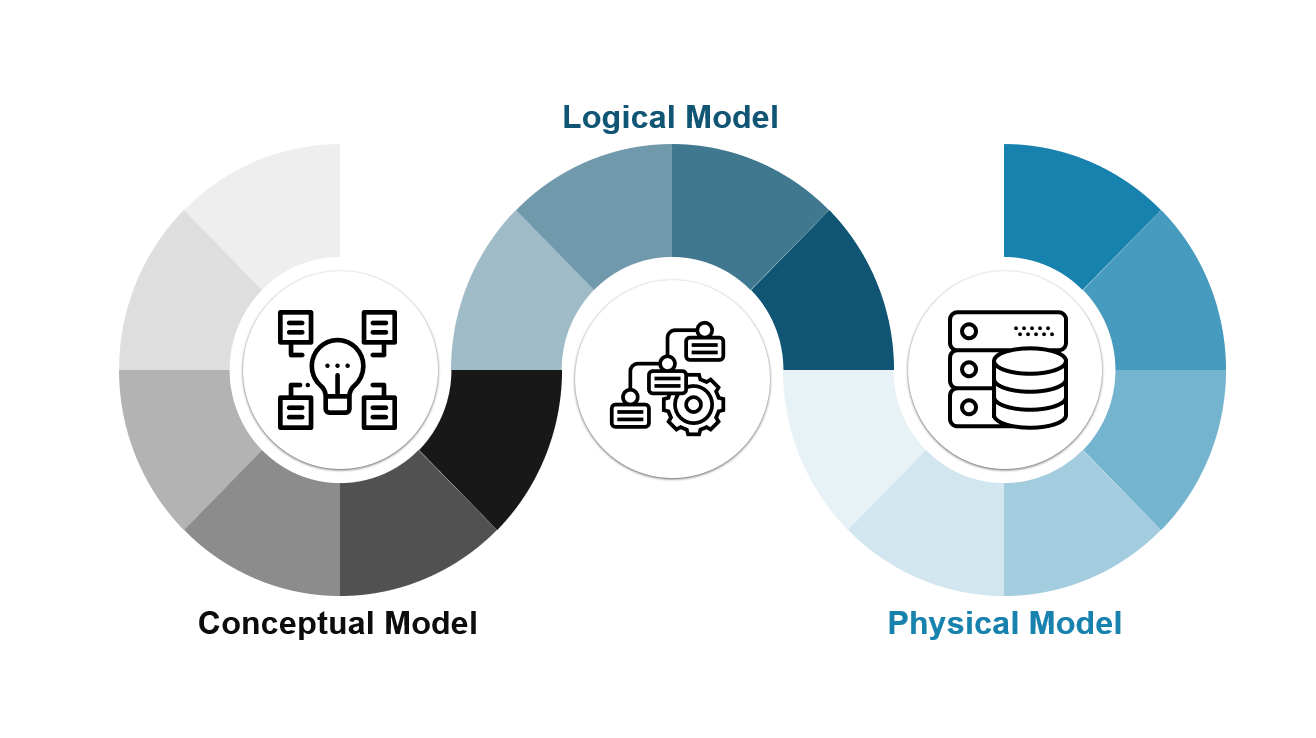
A Conceptual Data Model is fundamental to understanding how data is organized and how data elements are related to one another. It identifies basic data concepts, commonly referred to as entities, and the relationships between entities. Entities are comprised of attributes to define the characteristics of entity records – think of them as atomic characteristics such as age, date of birth, height, weight, or eye color.
Defining the attributes is part of the logical model while creating the relationships between entities is the physical model.
This section describes how to create a physical data model using Innovation Studio Data Model Designer.
How to Create a Data Model
The first step in creating a data model after you open the Data Model Designer is to add the data model.
STEP 1. Add the Data Model
- Open the Data Model Designer.
- On the toolbar, click the Add Business Data Model button. The Add Business Data Model page opens.
- In the Name field, type a name for the data model you're creating.
- (Optional) In the Description field type a brief description of the data model.
- Click OK or press Enter on the keyboard to add the data model.
The page closes and the Data Model Designer opens the data model you've previously added, Its name is displayed on the toolbar.

The next time you will open the Data Model Designer, it opens on the data model you last worked on.
Now that you've added the data model, you can start adding entities.
STEP 2. Add Entities to the Data Model
The next step in creating a data model is to identify all of the entities you will need. This could be a customer, an invoice, etc.
Once identified, make sure that you add the entities in Innovation Studio. You can add entities in two ways:
- From the Data Model Designer - On the toolbar, click the Add Business Entity button to open the Add Business Entity page, provide the mandatory entity information and save it. The entity has by default a set of system attributes. You can extend the data model by adding new attributes as needed.
- From the Data Model Explorer - Save your current data model by clicking the Save icon, then click the Add Entity button in the toolbar. Fill out the required properties in the Add Business Entity page, and the click Save and Close. In Data Model Designer, locate the newly created entity in the Entities panel, and then drag-n-drop it on the Work Area.
After you add entities to your data model, the next step is to define the relations between the entities.
STEP 3. Define Relationships
Identify relationships between the entities of your data model. Look at two entities, are they related? How are they related? Describe the relationship. To define relationship between two entities of your data model, in Data Model Designer, select the circle displayed in the left bottom corner of one of the entities and drag it towards the circle of the other entity:
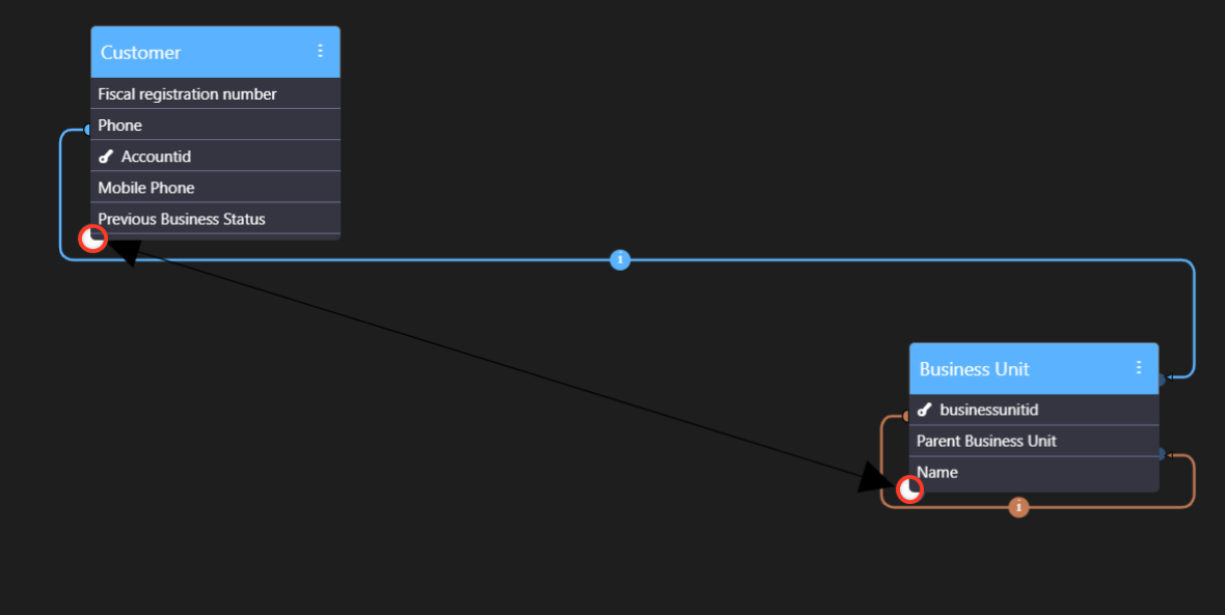
The Add Relationship page appears which allows you to define the relationship. For more information on relationships, their types and how to define them, see Editing Entities.
After you save the relationship between two entities, it is displayed as object in Data Model Designer and connectors are shown between it and the entities which it links (that is, the entities between which you created the relationship).