Product Admin Configuration
After creating an insurance product in the Product Factory, go to the Product Admin Configuration form to set pricing rules, policy rules, claims, formula mapping, and payment types.
-
In Studio, click the main menu and navigate to the Product Admin Configuration. Click Add Product Configuration and select Insurance Product Admin.
-
Click Save and Reload. The Product Admin Configuration form opens.
-
Under Insurance Products, select your product that you want to attach to this configuration.

-
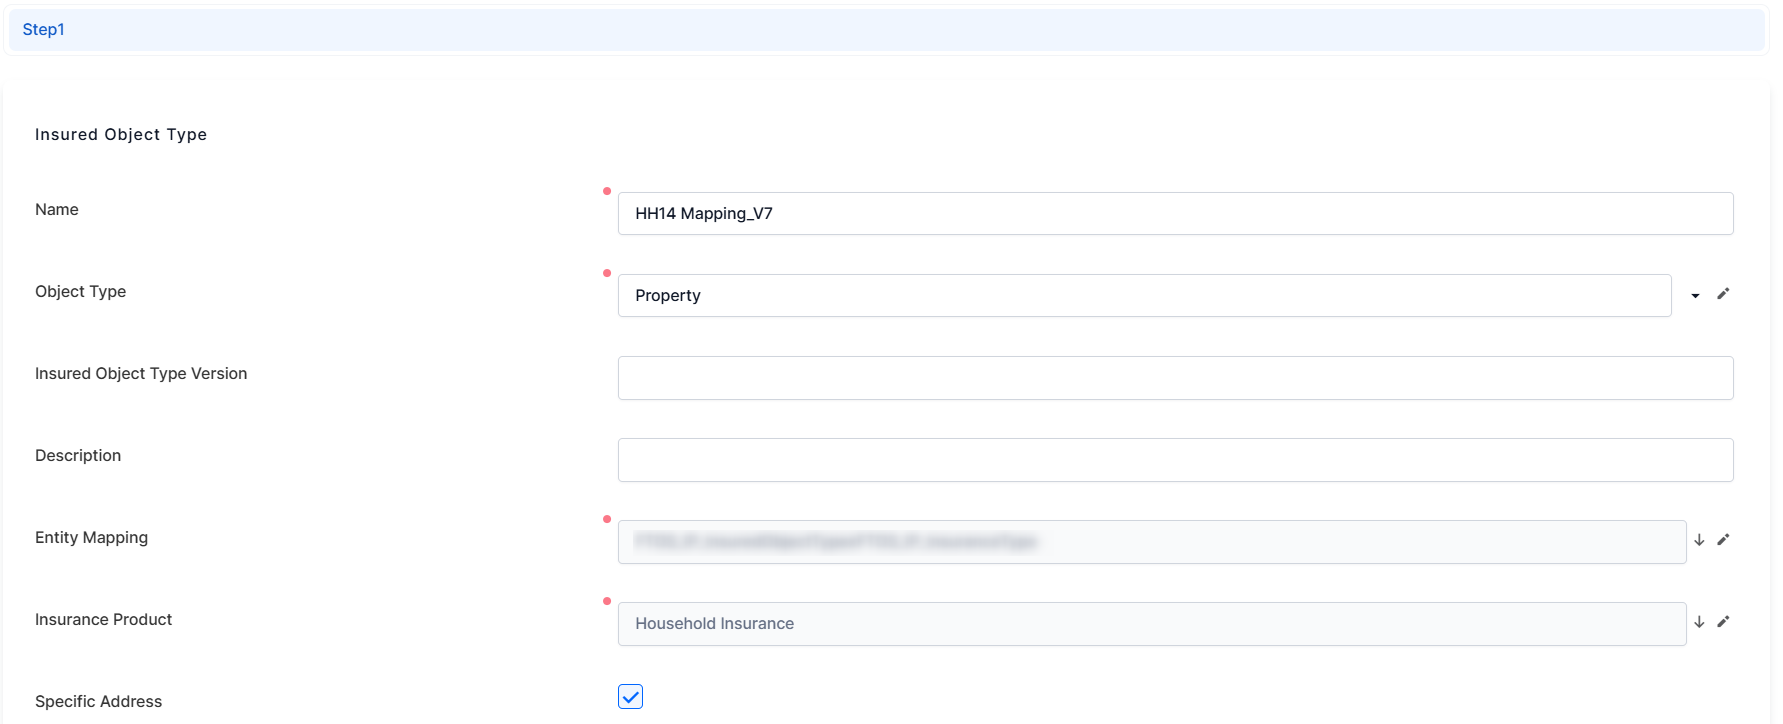
Click Configure Insured Object.
-
in the Entity Mapping field, add the entity built in the project as an extension of the Insured Object entity.
-
Specific Address: tick the box to display the address for the insured object. When generating the policy with GeneratePolicy API, make sure to include the addressId inside the call to display the specific address for the insured object in the policy..
-
under Dimensions, map each attribute from the entity developed for this project.
-
-
Under the Pricing Rules category, tick the box under the MQ Individual Offer to allow only one quote under the Master Quote to be selected as a beneficiary. If left unchecked, all quotes under the MQ policy must be selected.
-
If you tick the box under MQ Issuance for Passed Quotes so that quotes that pass the underwriting (UW) rules are generated even if not all rules are satisfied. If left unchecked, if any rule fails, no quotes will be generated.

-
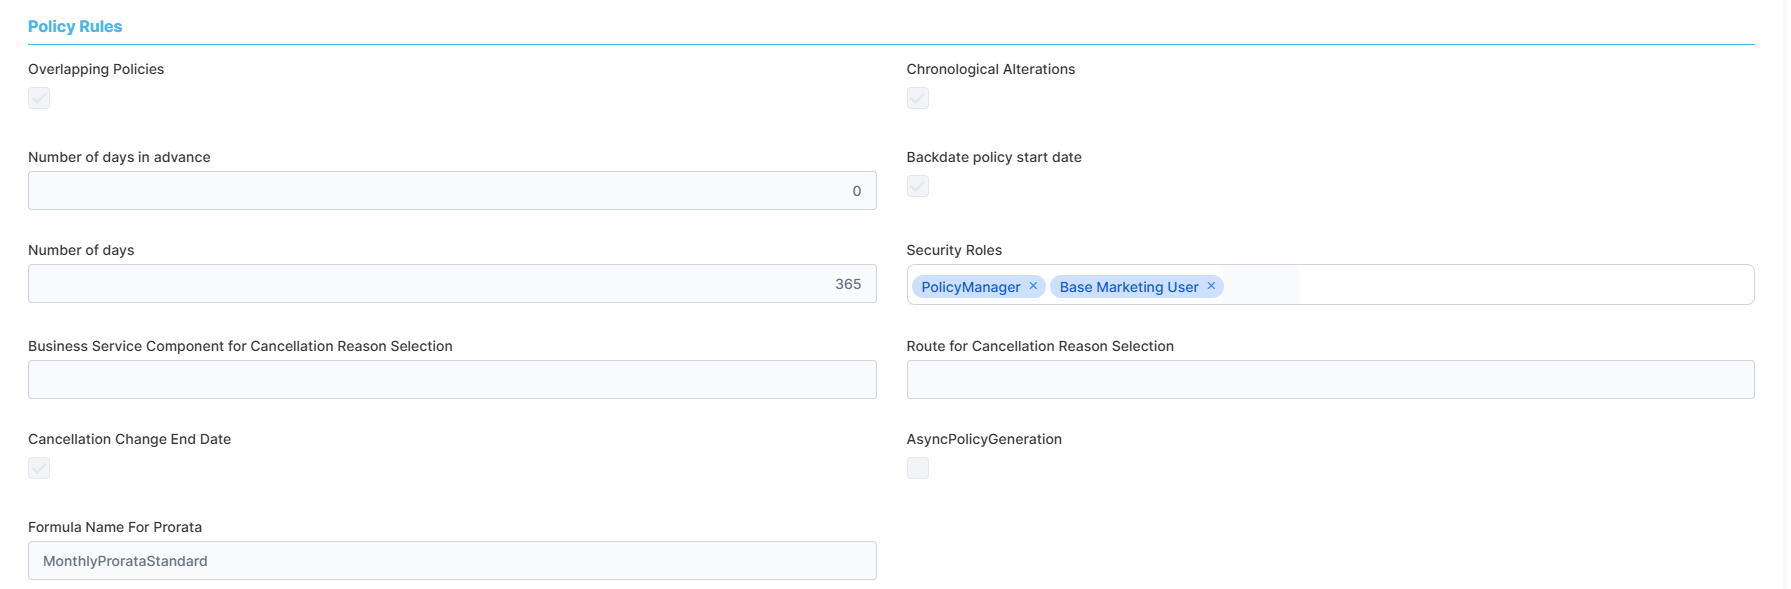
In the Policy Rules category, tick the box under the Overlapping Policies to allow a customer to hold multiple policies for the same product.
-
Select the Chronological Alterations option to ensure that all policy changes are recorded and applied in the order they occur. Leave this option unselected to allow non-chronological changes. For more details, see the Configure Alteration Types page.
-
In the Number of days in advance field, add the maximum number of days for when the coverage starts. This is for future dated policies.
-
Tick the Backdate policy start date to allow backdating the policy. This expands two additional fields:
-
Number of days: add the maximum number of days for backdating policies. This is calculated as the difference between the system date (the current date) and the policy start date.
-
Security Roles: select the security roles the user needs to have to be allowed to backdate policies.
-
-
The Cancellation Change End Date box establishes whether or not the policy's end date can be changed during the cancellation flow. The default value here is false. For the cancellation flow, you can create your own reason type, other than the ones provided by default. Create your custom business service component with route for the selection of cancellation reason types offered during the cancellation flow. For this you need to add:
-
Business Service Component for Cancellation Reason Selection: the data source for cancellation reasons.
-
Route for Cancellation Reason Selection: the route which determines which reason types, including custom ones, are available during the cancellation flow.
-
-
Add the Formula Name For Prorata from dailyProrataFormula or monthlyProrataFormula, default Insurance Parameters. This is used for calculation when a mid term adjustment is made.
You can configure the due date of any additional installments that might be resulted from an alteration to a fully paid policy. In this use case, the policy is fully paid, which means that all of its attached installments are in status Paid or Statement Generated. The options presented below allow you to configure the flow, i.e. when the due date of additional installments is set, in the case of alterations being made.
-
Under the Payment Schedule Rules category, click the Additional Installment Due Date drop-down and pick one of the available options:
-
Applies to alteration effective date: the installment’s due date is the reference date, which is defined as the later of the alteration effective date or the current system date.
-
Applies to default collection day: the due date is set to the policy’s default collection day in the month and year of the reference date. If the due date is on or before the reference date, then it is moved one month later if that new date is before the policy end; otherwise, the due date is set to the reference date.

-

-
Under the Claims category, in the Total Indemnity Limit, enter the maximum indemnity limit for the policy.
-
In the Claim Notification Period Limit field, define the maximum notification period limit (in hours) for claims submission.

-
In the Premium Calculation Formula Mapping category, click Insert to add the Insurance Product Item Formula defined for your product.
-
Click Save and reload.
Mapping Data for Different Scenarios
-
Map Quote Admin Data: Use this when mapping data for renewals with new offers.
-
Go to the Definition screen, select Master Entity, and add the project-developed entity extension.
-
On the Input screen, map the attributes required by the formula.
-
Map Policy Data: Required when configuring mid-term adjustments (MTAs).
-
Go to the Definition screen, select Master Entity, and add the project-developed entity extension.
-
On the Input screen, map the attributes needed for MTAs.
-
-
Map Quote & Bind Data: Use this for recalculating quotes in the origination journey.
-
On the Definition screen, select Master Entity and add the relevant entity extension.
-
On the Input screen, map the attributes as per the formula.
-
You need to define an audience segment in order to be able to map the attributes.
-
Under the Underwriting Formula Mapping category, click Insert to add the formula required for underwriting as defined in your project.
-
Click Save and reload.
Mapping Data for Underwriting Scenarios
- Map Quote Admin Data: Use this when mapping data for renewals with new offers.
-
Go to the Definition screen, select Master Entity, and add the project-developed entity extension.
-
On the Input screen, map the attributes required by the formula.
-
Map Policy Data: Required when configuring mid-term adjustments (MTAs).
-
Go to the Definition screen, select Master Entity, and add the project-developed entity extension.
-
On the Input screen, map the attributes needed for MTAs.
-
-
Map Quote & Bind Data: Use this for recalculating quotes in the origination journey.
-
On the Definition screen, select Master Entity and add the relevant entity extension.
-
On the Input screen, map the attributes as per the formula.
-
You need to define an audience segment in order to be able to map the attributes.
For Mid-Term Adjustments (MTAs) and Renewals that require pricing and underwriting, the resolve mapping used as input when calling the Product Factory will also be applied to the output. This ensures that the returned values are saved in the configured fields.
Shows the payment type the user selected when they created the insurance product. At product creation, the available options are bank transfer, broker collection, direct debit, card payment, recurring card payment.
Add a grace period for each payment type, if applicable, by clicking the Grace Period column, typing in the number of days and press Enter or click outside the field.

Insurance policy reinstatement refers to the process of restoring a lapsed insurance policy to its original status after it has been canceled or terminated due to non-payment of premiums or other reasons. Configure the following options:
-
Waiver security roles: pick the security roles for users to have the ability to override back premium collection during the reinstatement of suspended policies.
-
Defer Security Roles: pick the security roles with the capacity to defer back premium collection during the reinstatement of suspended policies.
-
Has Approval Step:
-
ticked: the flow for reinstatement follows the steps: Register > Propose Request > Approve.
-
unticked: the Propose Request step is removed, and only the Approve step and button remains on the form. This makes the reinstatement process faster.
-
-
ProductVersionId: pick the insurance product for which these reinstatement configurations apply.

This section displays the configuration for generating invoices. Invoice generation in insurance is the process of creating a document that details the premium amount owed by the policyholder, along with policy information, payment terms, and due dates. It's used to request payment for the insurance coverage provided.
Configure the following settings:
-
Premium Invoice Generation: set the day when the invoice is to be generated. Pick from the following options:
-
Default: uses the value of the insurance parameter No. of Days in Advance (SGDAY). This parameter sets the day for generating the statement (invoice) in advance with a number of days before the payment's due date.
-
Specific SGDAY: when you select this, the No. of Days in Advance (SGDAY) field becomes available, allowing you to set a value for SGDAY only for this product. One that is different from the insurance parameter mentioned in the previous paragraph.
-
Specific Day: when you select this the following mandatory fields becomes available:
-
Specific day of the month: select the day when the invoice is generated. The day is set on the product, meaning it applies only for this specific product.
-
Installments Days in Advance: set the number of days for installments to be included in the invoice. For example, if you have invoices upcoming in the next 10 days, set the number to 10 so they will be included in this invoice.
-
-
-
Invoice Group By: pick one of the options, Policy, MasterPolicy, Product, Payer, to group invoices. Keep in mind that products with different grace periods or write-offs cannot be groupped.

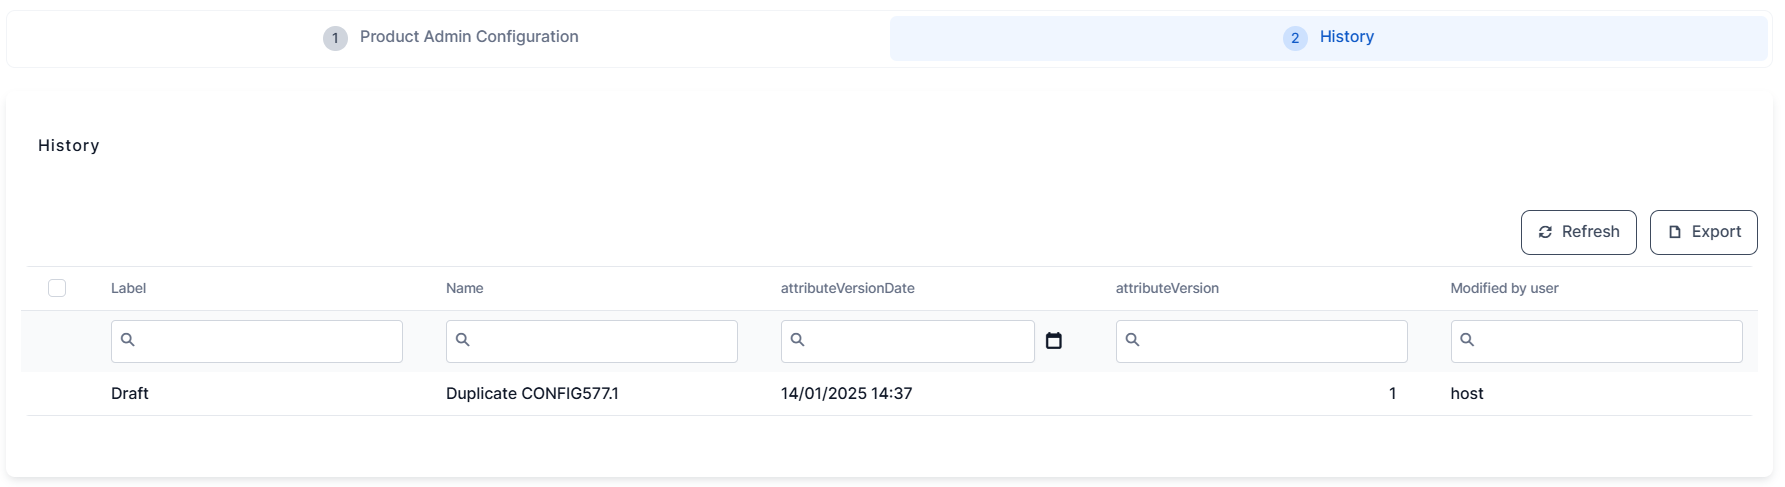
This tab displays a history of all operations to the current product configuration, mainly when and who modified the status of the product, for example from Draft to Approved.