Cancel a Policy
This functionality streamlines the termination of the insurance policies by ensuring cancellation requests, coming from insured or insurer, are reviewed against policy terms and processed accurately. Once approved, any applicable payments are issued directly to the insured or an authorized third party. By automating these routine scenarios, the module enhances operational efficiency and reduces the risk of errors.
The system ensures that the same policy cannot be present in two cancellation flows at the same time. However, a policy can be accessed sequentially by different users within a single cancellation flow. For instance, while one user handles the cancellation process, a higher-level user (e.g., a supervisor) may be required to approve the Returned Premium payment.
Conditions for Policy Cancellation
A policy is terminated and is not considered active if:
-
The first installment wasn’t paid. If so, after the prescribing period, the policy becomes Withdraw;
-
The customer wants to terminate the policy before 14 days from issuance. If so, the policy becomes Withdraw on Client Request;
-
The policy reached Maturity;
-
The customer didn’t pay the installment. If so, after the grace period, the policy becomes Lapsed;
-
The customer wants to terminate the policy even the payments are up to date. If so, the policy becomes Cancelled;
-
The customer’s risk class was changed into unacceptable risk. If so, all the customer’s active polices are terminated with Decline by Screening status;
-
The insurer reserves the freedom to decline the policy for any Other reason.
The above conditions currently shape the policy termination flows but Service Insurance is a highly customizable solution and you are able to change it according to your needs. For doing so, read the Policy Configurations page.
The system supports backdated cancellations for policies and master policies. Cancellations can be registered back to the original start date or renewal start date, with the requested end date determining refund calculations, even when alterations exist between the requested cancellation date and today. Once approved, backdated cancellations cannot be revoked, ensuring compliance and preventing user errors. The process generates: a cancelled policy version, updates premiums, and creates negative installments to reflect refunds, which are fully traceable in the premium reimbursement view.
Once approved, a backdated cancellation can’t be revoked. Only future dated cancellations can be revoked, before the cancellation takes effect on the policy. The process is proposed, pending approval, and only then approved, in order to exclude user errors.
In order to process a policy cancellation request, you must access the Policy Cancellation List that displays all the available Policy Cancellation requests.
- In the main menu, navigate to Policy Admin > Cancellations. The Cancellation List is displayed.
- In the Policy Cancellation List page:
- Add a new Policy Cancellation record, by clicking Insert.
- Edit a Policy Cancellation record from the grid, by double clicking it. When opening an existing Cancellation request, the Edit form becomes available, with the information previously introduced. Use the form to update the desired fields. Click Save and Close.
- Delete a Policy Cancellation record from the grid by selecting it and clicking Delete.

Alternatively, you can initiate the cancellation flow explained above from the policy form. The Actions section at the end of the form enables you to trigger this journey directly from the policy. Click the Cancel Policy button to initiate the flow.
-
To find a specific Policy Cancellation record, click Insert on the Cancellation List page.
-
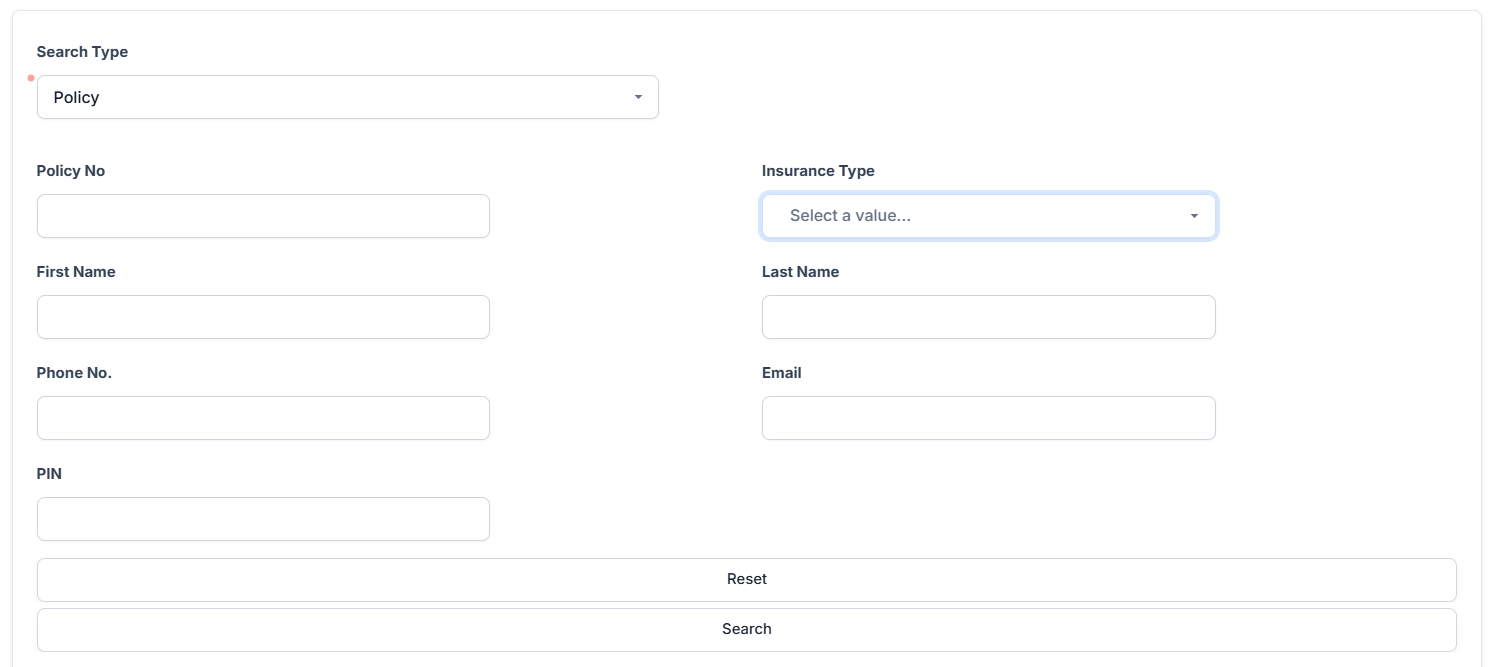
The Policy Search form is displayed. Use it to input data about the policy you need to cancel and hit the Search button to find it.
NOTEThe same Search form is used for both type of customers: individuals and companies. Only the policies that are in the status of InForce are displayed in the list of policies.
-
Click Search. A new list of policies is displayed. Choose the policy to be closed.
-
Click Refresh to reload the existing search results. If needed, reset the search process by clicking Reset. All the information displayed in the previous search is erased.
-
From the search results, you can choose only one policy for the Policy Cancellation. Click Choose option near the policy record. A new form related to the cancellation process is displayed.
-
At this stage, a new cancellation record is registered by default in Draft status. This record is later transitioned to other statuses according to the Policy Cancellation process steps. You cannot save a request if there is no owner or no policy.
-
Proceed forward with the change request form.
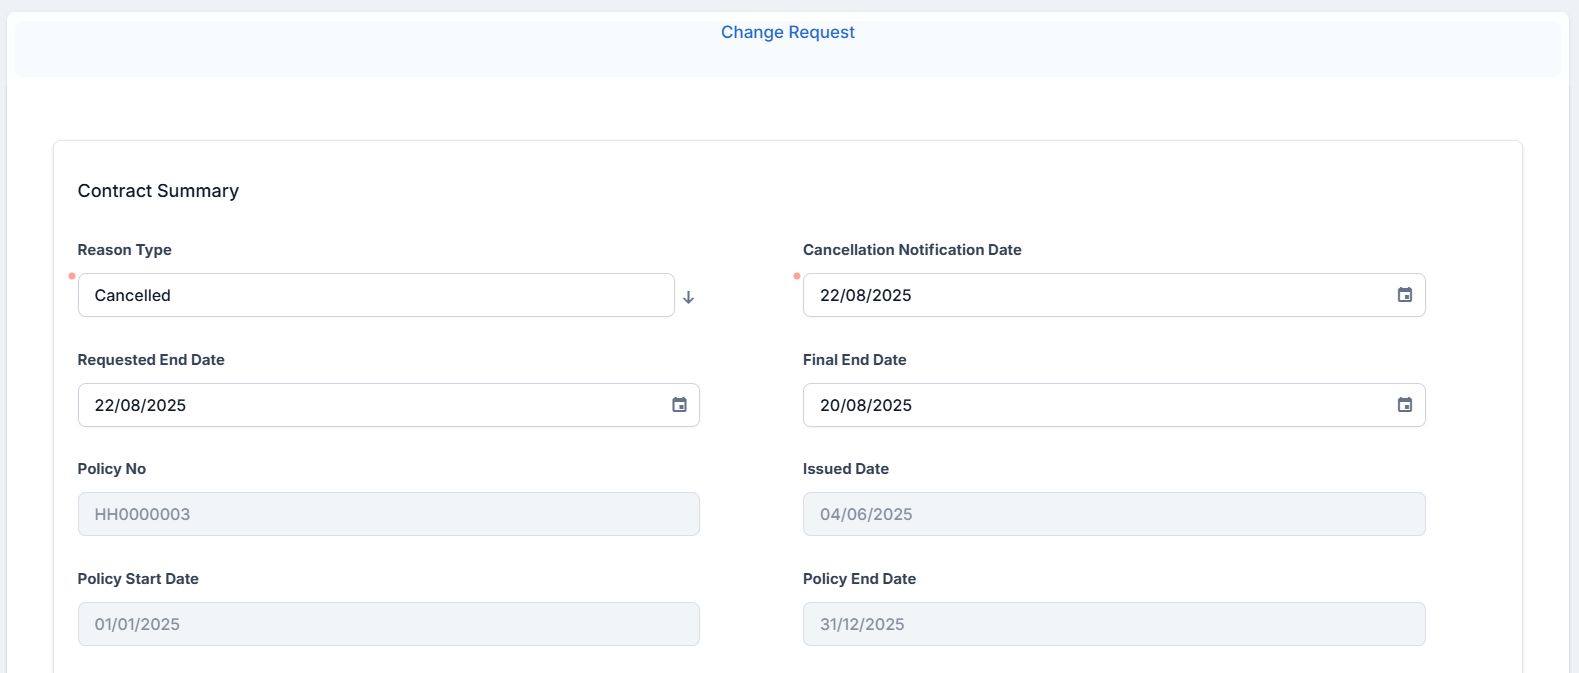
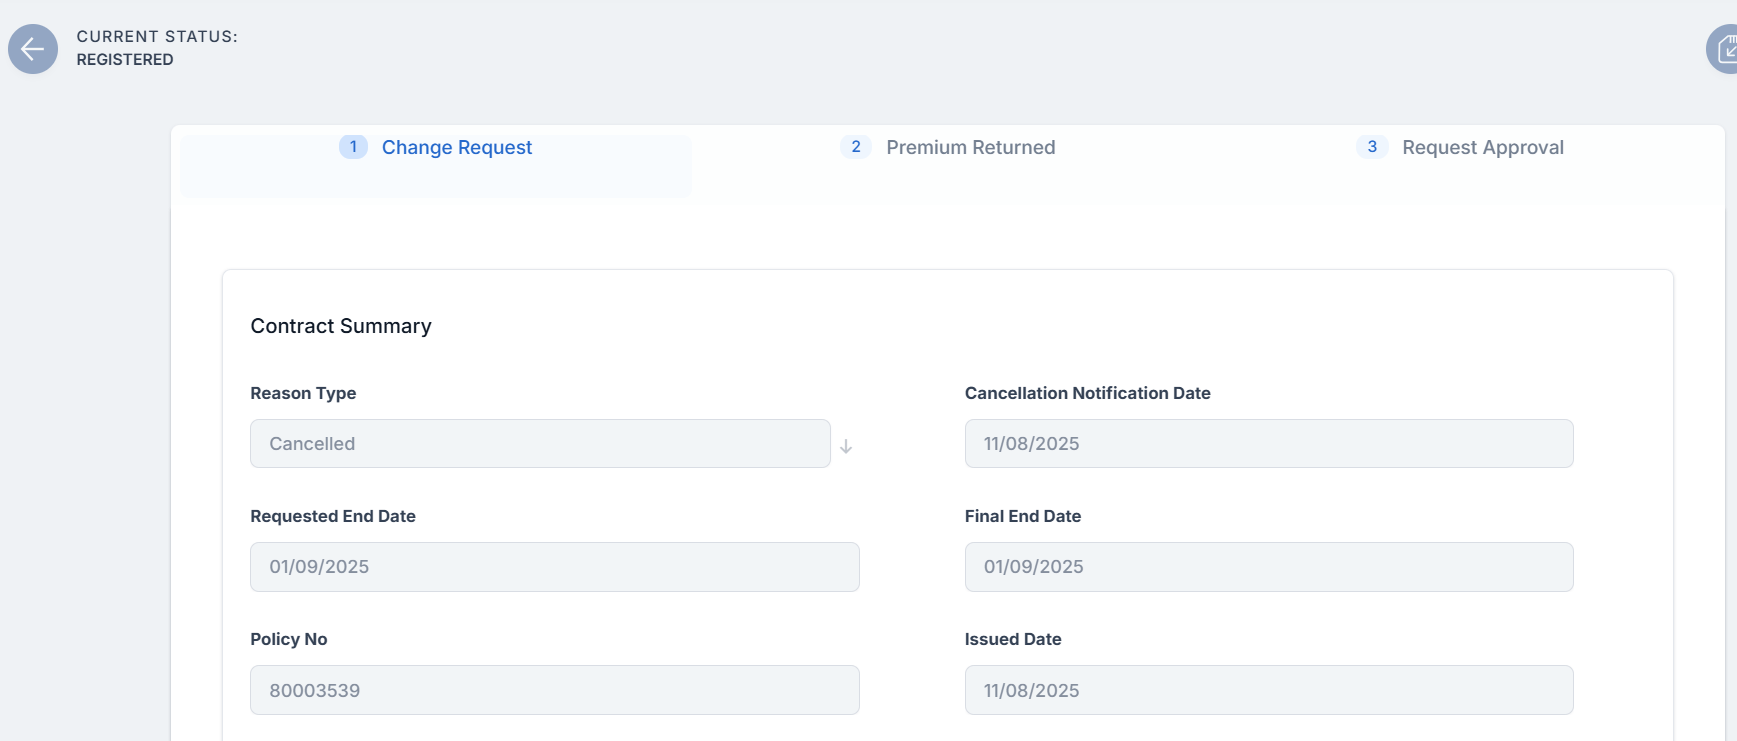
This is where the registration of the request for the policy's cancellation begins. The Edit form of a new Policy Cancellation record opens with Change Request Complete the Change Request Summary fields to trigger the calculations for the payment amounts to be returned to the customer.
-
Choose a Reason Type. This triggers the calculation for the Requested End Date and the Final End Date fields as per the table below. The Requested End Date is the final end date used further on for calculating the refund.
Reason Type Requested End Date Final End Date Cancelled This reason type is the only one that accepts backdating cancellations. In this case, the Requested End Date is overwritten. This is also the case for renewed policies.
It is automatically filled in with the Cancellation Notification Date + 21 days to go.
If the Requested End Date meets the rule explained above, the Final End Date is filled with the Policy Begin Date.
In case of backdated cancellations, the Final End Date is overwritten. This is also the case for renewed policies.
Cancelled by Client Manually add any date. If Notification Date -Policy (Issued) Date <= 15 then this field will be automatically filled in with the Policy Begin Date with the possibility to be adjusted.
Otherwise this will be automatically filled in with the Notification Date + 21 days to go.
Closed by Claim It is pre-filled with Notification Date + 21 days from the present on. It is filled with the value from the Requested End Date but with the possibility to edit. Decline by screening In this case, it can be manually filled in with any date. It can be filled with the value from Requested End Date but with the possibility to edit. Insured Death In this case, the Requested End Date is set to any day before or including the day of the request for cancellation, same as Property sold. The Final End Date is filled with the value from Requested End Date but with the possibility to edit, same as Property sold. Pet passed away The Requested End Date is set to any day before or including the day of the request for cancellation, same as Property sold. The Final End Date is filled with the value from Requested End Date, but with the possibility to edit, same as Property sold. Property sold
The Requested End Date is set to any day before or including the day of the request for cancellation.
The Final End Date is filled with the value from Requested End Date but with the possibility to edit.
Withdrawal In this case, it is automatically filled in with the Policy Begin Date. In this case, it is automatically filled in with the Policy Begin Date. -
Fill in the Cancellation Notification Date field, which is the date that the system is going to use as the effective date for the policy version in status Cancelled.
-
Add a comment explaining the reason why this policy is undergoing changes. From the Resolution Reason drop down, choose an appropriate option from: Product reasons, Other reasons, Company Reason, Withdraw.
-
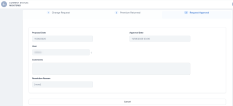
Click Register and the cancellation request moves to the Pending Approval status. The Premium Returned tab is now displayed.
The Premium Returned tab has details regarding the chosen policy, the fields are automatically filled. The pre-filled details are extracted from Policy basic information section and from the results of the calculation made by selecting the information in the Change Request Summary section. The returned premium is the amount refunded to the client when a policy ends early, calculated as the paid premium minus the earned premium, meaning the client gets back the portion of their payment that corresponds to the period they were not covered.
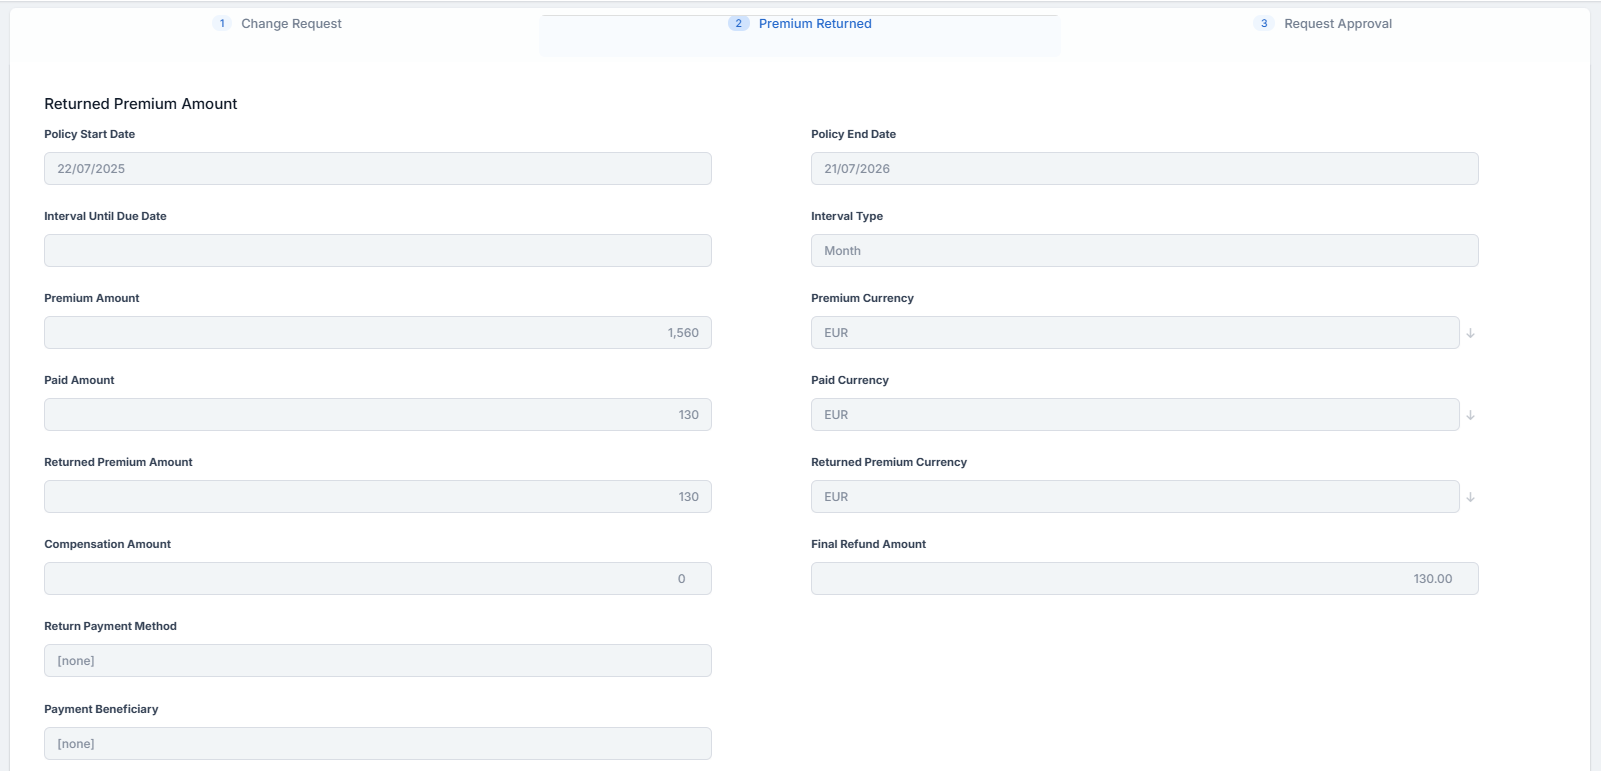
| Field | Description |
|---|---|
| Policy Start Date | The day when the policy becomes enforced. |
| Policy End Date | The day when the policy is no longer be available, according to the contract. |
| Interval Until Due Date | Shows the time interval until the payment due date. |
| Interval Type | The payment frequency of installments. |
| Premium Amount |
The premium amount of the policy. |
| Premium Currency | The currency of the policy. |
| Paid Amount | The total amount of the payments made by the customer on a contract. |
| Paid Currency | The currency in which the amount has been paid. |
| Returned Premium Amount | The sum of premium amounts of all the included policies. |
| Returned Premium Currency | The currency of the returned premium. |
| Compensation Amount | The amount the insurer pays to cover losses, costs, or contractual obligations caused by ending the policy early. |
| Final Refund Amount | The portion of the payment after deducting the portion of the premium for the period they were covered, the compensation amount. |
-
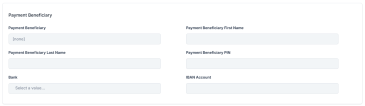
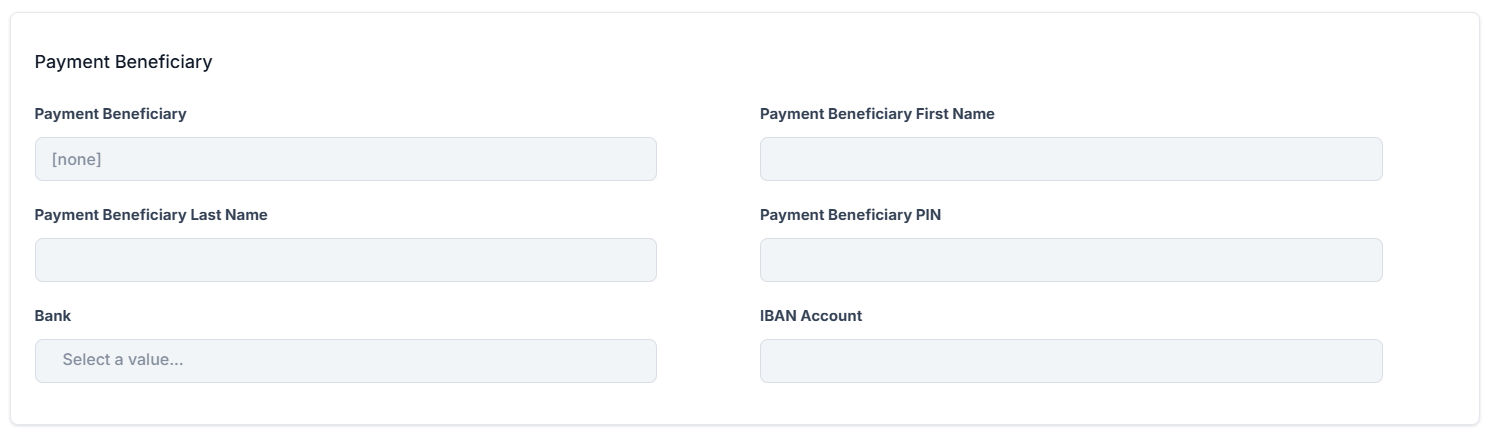
Fill in the information regarding the customer to whom the payment must be made, in the Payment Beneficiary section. Provide the information for all the fields in this section, in order for the payment to take place. If the returned premium is higher than 0, then a Premium Reimbursements request is created in Draft status if the data for the beneficiary is incomplete, or Approve if the data was fully filled in during the cancellation request.
Fill in the fields based on the type of payment:
 Bank Transfer
-
Payment Beneficiary: choose from Policy Beneficiary, Insured, Policy Holder, or Other Person. For the first three options, the data is automatically filled in. For the last option, you need to add:
-
Payment Beneficiary First Name;
-
Payment Beneficiary Last Name;
-
Payment Beneficiary PIN;
-
-
Bank: pick the bank from the list.
-
IBAN Account: type in the IBAN account.
Direct Debit UK
For Direct Debit UK or SEPA, if the policy is paid with direct debit, then a valid mandate is in the system. Tick the checkbox Use current mandate to prefill the fields. Otherwise, fill the fields for Direct Debit UK:
-
Payment Beneficiary: choose between Contractant and Other person;
-
Account Holder: prepopulated with the First Name of the contractant;
-
Account Number;
-
Bank Sort Code.
Direct Debit SEPA
For Direct Debit UK or SEPA, if the policy is paid with direct debit, then a valid mandate is in the system. Tick the checkbox Use current mandate to prefill the fields. Otherwise, fill the fields for Direct Debit SEPA:
-
Payment Beneficiary: choose between Contractant and Other person;
-
Payer first name: prepopulated with the First Name of the contractant;
-
Payer last name: prepopulated with the Last Name of the contractant;
-
Payer PIN/UTR: prepopulated with the PIN of the payment beneficiary;
-
IBAN;
-
Bank branch;
-
Amount type;
-
Amount;
-
Begin date;
-
End date.
-
-
The Comments and Resolution Reason sections are available here as well.
-
Click Propose Change Request for it to go for approval. Click Cancel to cancel the whole process.
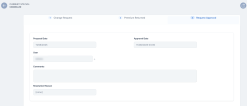
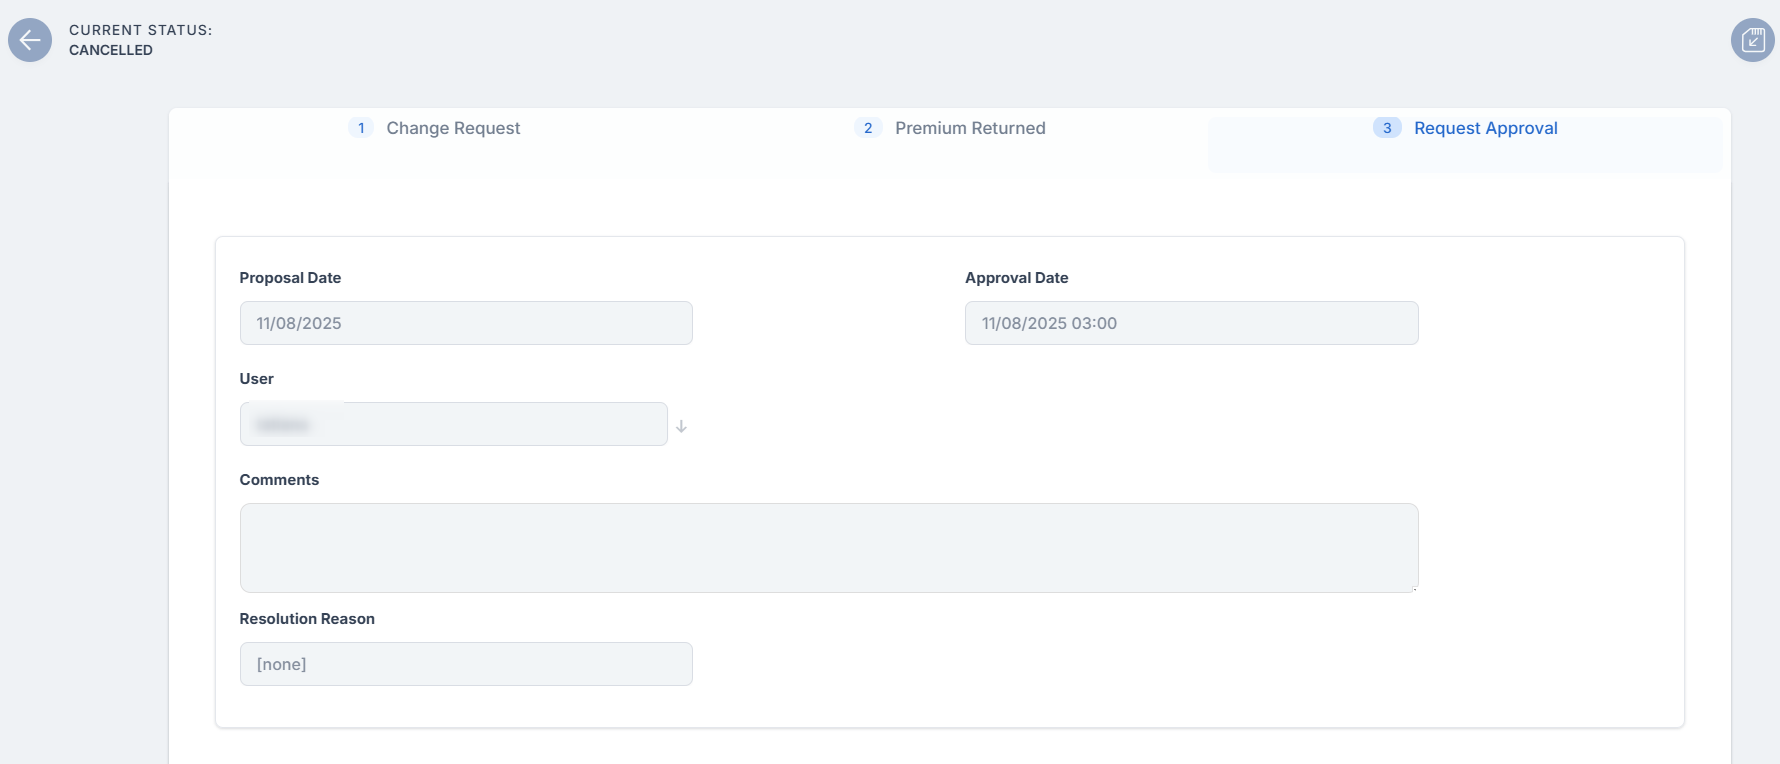
Approving the request for policy cancellation requires the intervention of a Policy Admin Super User who holds the necessary security rights to approve or reject such cases.
| Field | Description |
|---|---|
| Proposal Date | The date when the cancellation request was scheduled for approval. It is completed with the current date. |
| Approval Date | The date when the request was approved. It is completed with the date the cancellation application is approved. |
| User | It is automatically completed with the name of the Policy Admin Super User who is logged in at the approval moment. |
| Comments | It can be filled with relevant information regarding the approval process or the cancellation flow. |
| Resolution Reason | In case of declining, the Policy Admin Super User must offer information on why the cancellation application was not approved. |
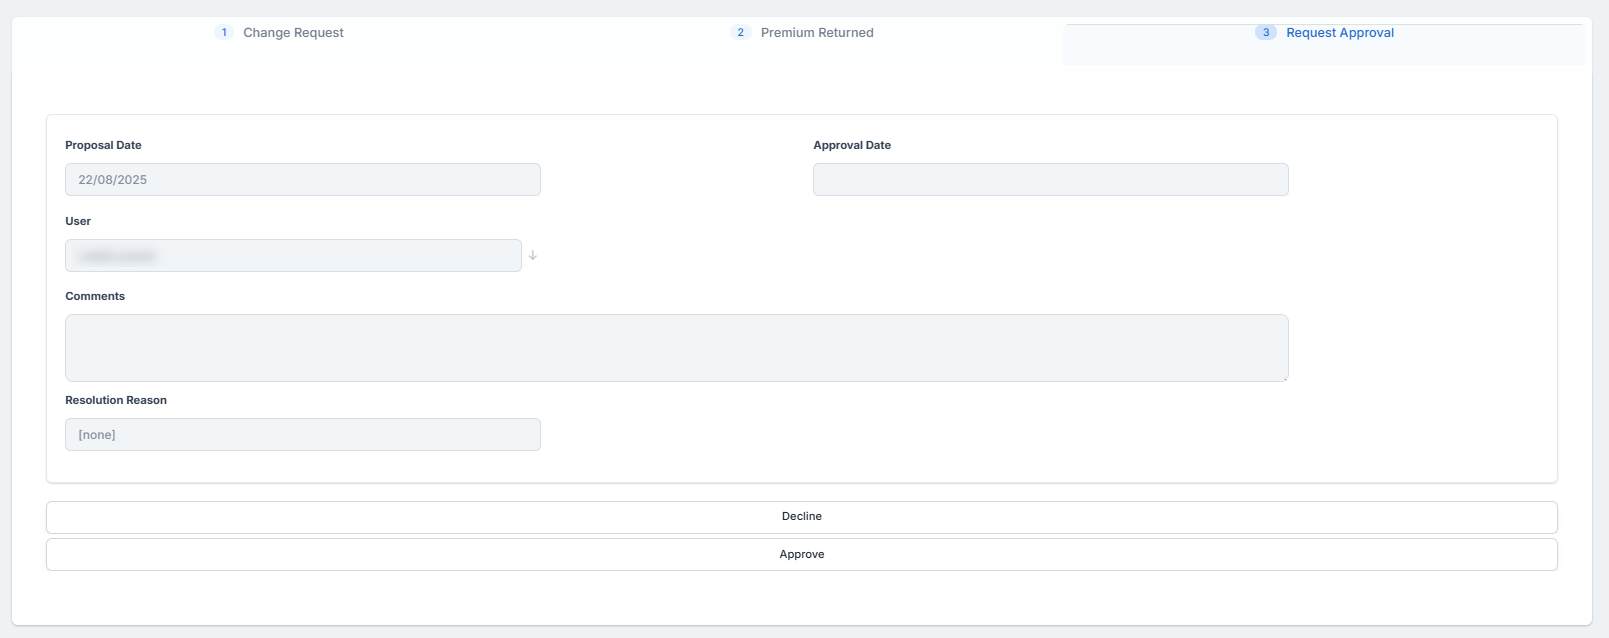
Clicking Approve, refreshes the form and makes the Comments and Resolution Reason sections editable,
Click Approve again, and the flow continues on the approved branch as follows:
-
If the Returned Premium Amount is equal to 0 then the process ends and the status changes from Pending Approval to Registered.
-
If the Returned Premium Amount is not equal to 0 then the process continues with the Payment Return flow, explained in the Billing and Collection chapter. In addition, the status changes from Pending Approval to Registered. The system redirects the user to the tab where the date of the scheduled payment is displayed.
When the case is Declined, the status changes from Pending Approval to Declined. The process reaches the end without the possibility of starting again.
You can cancel a policy when it is subjected to the MTA process, and the MTA is in Processed status. The condition is that the MTA's Requested Effective Date is lesser than the cancellation Final End Date.
In the example below, a policy has an MTA in the Processed status.
-
Open the policy's MTA record and check its Requested Effective Date. In this case, it is August 22nd, 2025.
-
Click Cancel, and the MTA is successfully cancelled.
-
The status of the policy is now Pending, and when it reaches to the Final End Date, it transitions to the Cancelled status.

Let's say that for the same MTA record, the cancellation Final End Date is August 20nd, 2025. If you click Cancel on the MTA change request, a warning message is displayed, and you cannot cancel the MTA "as long as there are MTA's issued with an effective date higher than cancellation final end date!"
You cannot cancel a policy if it has an MTA request in Draft or Registered status. If you try to cancel it in this condition, an error message is displayed.
There are 3 possible scenarios then you choose to subject to Cancellation a policy that is to be renewed:
In case you are subjecting to a Cancellation process a policy to be renewed, while the automatic renewal offer process is going on, then when the cancellation process is completed (Approved), the renewal offer corresponding to the cancelled policy is invalidated after a call from Policy Administration. An error message is displayed, as the quote is invalidated.
If during the Cancellation process the renewed policy is issued based on the previously issued renewal quote, the Cancellation process cannot be completed as long as the new renewal policy is in a Proposed, Issued or InForce.
Within the initiated cancellation journey, a warning message is displayed that persists until the renewal policy status is either Proposed, Issued or InForce.
In case a Cancellation is In Progress or Accepted, then the Renewal Offer process for that policy is not triggered.
You can cancel an already Registered cancellation for a policy if the Final End Date of said cancellation is greater than the system date. Another condition is for the policy to have no MTAs in Accepted status with the Final End Date greater than the Final End Date of the cancellation.
In the example below, the cancellation is Registered, and the Requested End Date is set as greater than the system date.
-
Go to the Request Approval tab, and click Cancel.
-
The cancellation record transitions from the Registered to the Cancelled status, and the policy transitions to versionUnapproved.
If the two conditions for this cancellation are not met, the cancellation is not possible, and an error message is displayed.

Policy Transitions and Notifications
The Policy Cancellation statuses are as follows:
| Status name | Description |
|---|---|
| Draft | When you create a cancellation request, its status is draft. |
| Pending Approval | It is the status after clicking Register Request on a draft entry. |
| Registered | This status signifies that the cancellation is approved by the Policy Admin super user. |
| Declined | The cancellation request is declined by the Policy Admin super user. |
| Expired | The cancellation request is no longer active, the policy stays in force, and if the customer still wants to cancel, a new request must be submitted. |
| Cancelled | The cancellation request is cancelled. |
The system automatically informs the client of the Policy Cancellation process for their insurance contract through a specific notification sent to them.
The policies which are included in the notification are those which have the Policy Status = Decline by screening/ Closed by Claim/ Withdraw on client’s request/ Cancelled, transitioned due to a Cancellation process.
The notification is sent when the policy status is changed to a specific cancellation status, on the effective date.
The following are the tokens used in the notification:
-
Contractor name;
-
Policy number;
-
Insurance type;
-
Policy End Date (new End Date) - the Effective date from the Cancellation process which will be updated on the last active version of the policy;
-
Email template name : HomeInsurance_ClientPolicyCancelledNotification.
Similarly to the cancellation process, the system informs the client of the Policy Lapsing process for their insurance contract through a specific notification sent to them.
The Policies included in the notification are those which are in Lapsed status. Policies in Suspended status with a suspension duration of zero transition directly to the Lapsed status. In business terms, this means the policyholder loses coverage right away, without a grace period or opportunity for reinstatement. The lapse date is automatically determined based on the due date plus any applicable grace period and suspension duration.
The following are the tokens used in the notification:
-
Contractor name;
-
Policy number;
-
Insurance type;
-
Email template: homeInsurance_ClientPolicyStatusLapsed.