Perform Master Policy Mid Term Adjustments
Masterpolicy MTA’s comprise of a collection of alterations that apply in the same way for all the policies that are part of said Masterpolicy. These MTA types are: Change frequency, Change payment type, Change due date.
You can make alterations either to a Masterpolicy or to a single policy that is part of a Masterpolicy.
Prior to opening a change policy request, you have to look for the masterpolicy on which the MTA Masterpolicy adjustments needs to made. The Masterpolicy searching form is the first step of opening an MTA.
-
Choose from the Policy Admin menu, the Alterations menu entry. This displays the list of records of policies and masterpolicies that are going trough a mid term adjustment process.
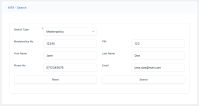
- Click the Insert button to open the MTA - Search form.
-
In the Search Type field, you can select to alterate either a Masterpoilcy or a single policy that is part of a Masterpolicy.
-
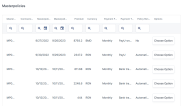
Click Search, and the Masterpolicies grid unfolds, as shown below:
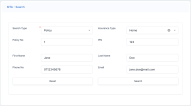
Alternaitvely, choose to modify a single policy belonging to a Masterpolicy.
After searching for a specific Masterpolicy the process of completion for the open change Masterpolicy request can start.
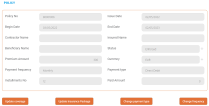
The first two sections on the Change Masterpolicy Request tab are related to general information regarding the request:
-
Masterpolicy No. instead of Policy No.;
-
Without beneficiary and insured;
-
The Paid Amount is the total of payments for all policies included in a Masterpolicy.
After completing the general information regarding the change policy request, you have the possibility to choose from the available policy alternation types, a type of modification.
The Update Coverage button is displayed on each policy line from the Policies grid in the interface.
Based on your chosen option, the specific selection is displayed. Multiple alteration types are permitted in the same MTA, so you can expand multiple selections at the same time, complete and validate them in the desired order.
After you have made all the modifications regarding the payment and/or the frequency, and validated them, all the policies related to the Master policy update their Payment Type according to the new value selected in the Master Product.
-
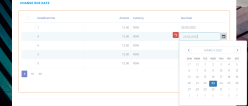
Click the Change Due Date button. A grid is expanded, that contains the payment schedule associated with the Masterpolicy. The payment schedule for the MTA only contains the columns up to Due Date.
-
Update the due dates that you want to change inline, within the schedule. You can modify one or more installments' due dates. Only the Due Date can be edited, the other fields are read only.
-
Click the Validate button in order to save and validate the changes.
The due date in the installments grid on the Masterpolicy are updated after you click the Register button and reach the Effective Date set on the alteration request.
-
Click the Change Frequency button. The Change Frequency grid expands, containing the Payment Frequency and New Frequency fields.
-
Choose the New Frequency from the field drop-down. This contains the same values as for new payment frequency existing on the policy alterations.
-
Click the Validate button.
The Payment Frequency field is retrieved by default from the Masterpolicy and is not editable. The New Payment Frequency field is the new payment frequency selected.
-
Click the Change Payment Type button. The Change Payment Type grid expands, containing the Payment Type and New Payment Type fields.
-
Choose the New Payment Type from the field drop-down.
-
Click the Validate button.
The Payment Type field is retrieved by default from the Masterpolicy and is not editable.
After you make the modifications, the Masterpolicy Alteration Summary section is available with the following details:
| Field Name | Description |
|---|---|
| Effective Date | Defaulted with the Requested Effective Date from the first section. Editable and mandatory. Effective Date >= Policy Begin Date. |
| End Date | Not editable and mandatory. |
| Additional Premium | Not editable and mandatory. The additional premium is calculated. For the discounted amount, a negative amount is displayed upon clicking the Register button. |
| Currency | Not editable and mandatory. |
| Policy alteration type | Not editable and mandatory. The policy alteration type is determined. If at least one alteration included requires the issuance of an MTA, the value is the MTA needed upon clicking the Register button. |
| MTA No | Not editable and mandatory. Sequencer automatically generated. |
| Policy mentions | Editable and not mandatory. |
| Comments | Editable and mandatory only if you cancel the request by clicking the Cancel button form the bottom of the page. |
After reviewing the request made, you have the possibility to either Cancel or Register the request.
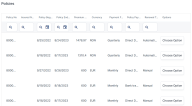
Similarly to registering altertions on a Masterpolicy, after in the MTA - Search section you have selected the intended policy, you are redirected to said policy, in the form for the MTA used for a single policy.
-
Choose from the available policy alternation types, a type of modification. The following buttons are available:
-
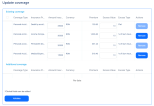
Click Update coverage, and the Update coverage grid expands, where you can edit the Amount Insured and Excess Value.
-
Click Validate, and the policy is now updated with the new Amount Insured And Excess Value.
-
Click Change payment type, and the Change payment type grid is unfolded, where you can select a new payment type, as per below.
-
Click Validate to save the changes, and the policy is updated with the new payment type.
-
Click Change Renewal Type, and the Change Renewal Type grid is unfolded, where you can select if you want the policy to be automatically renewed, or not. You can also change the type of renewal.
-
Click Validate, and the policy is updated with the new renewal type.
-
Click Change frequency, and the Change frequency grid is unfolded, where you can select a new payment frequency, as per below.
-
Click Validate, and the policy is updated with the new payment frequency type.
Total Premium Adjustments
Each policy has a premium adjustment that can have a positive or a negative value. You can operate multiple coverage adjustments for multiple related policies.
In the Policy Alteration Summary section, a grid is displayed that only shows the related policies that had a change in premium for the current master MTA flow that you have initiated. The following fields are displayed: Insured, Policy No, Insurance Product Item, Premium Adjustment Value, Adjustment Type.
The Master MTA Premium Adjustment field is also displayed, showing the sum total of the Premium Adjustment Values for all the policies displayed in the grid, and affected by the current master MTA through coverage update.
Through this MTA, you are able to update coverages for a specific policy included in a masterpolicy. This means that for each policy included in the policies grid, the Update Coverage grid is displayed. By clicking this grid, you are redirected to a new Policy MTA request for the selected policy.
The new Policy MTA is opened in Draft status. This contains all the information regarding the already completed request with the same information as for the Masterpolicy request, without the possibility to adjust these information. Also, the user is able to already see the Update Coverage grids centered.
All the initial fields needed in the normal Policy MTA take over the values already collected and available in the Master policy, such as the Request Date, Notification Date, and Request Effective Date. The Request No is automatically incremented.
The affected policies take into account the Masterpolicy MTA number.
The workflow for the Update Coverage grid is the following:
-
This section allows you to Edit, Remove or Add coverages on the current policy;
-
For the first grid, by clicking the Edit/Remove button:
-
The Edit action makes the Amount Insured/Indemnity Limit field available;
-
The Remove action removes the item from the existing coverage grid, and it is available in the Additional Coverage grid.
-
-
For the second grid, you have the possibility to add a new coverage for the current policy:
-
The Amount insured/Indemnity Limit for existing coverages on product level is equal to the value set on product factory, but if a new coverage is added, the Amount insured/Indemnity Limit is editable;
-
The Amount Insured/Indemnity limit field is mandatory for adding a new coverage;
-
When adding the Amount Insured/Indemnity limit for new coverages, the Premium Amount for each new coverage is auto completed in the grid
-
By updating the Amount Insured/Indemnity Limit when Editing/Removing/Adding an insurance coverage, the Premium Amount and Premium Percentage on the policy is also updated according to the modifications. The update is triggered when registering the request.
The Return to Masterpolicy MTA button redirects you to the Master Policy MTA Change Request view. This button is displayed instead of the Register button on the actual Policy MTA request.
Beside it, the Cancel button is also displayed in the form.
-
Click the Return to Masterpolicy MTA button to be redirected back to the Masterpolicy MTA request. The status for the Policy MTA request is changed from Draft to Registered.
-
Click the Cancel button, to change the Masterpolicy's status from Draft to Cancelled. Once cancelled, you can re-initiate the update coverage alteration flow on a Masterpolicy MTA. A validation checks the existing Policy MTA request opened in Draft status from a Masterpolicy MTA. If it is already an existing one, then you are redirected to that one, otherwise a new one is registered.
All changes made in the policy MTA, even if not validated, are saved, and when you return to finish the flow or modify, update the changes done, you don't have to input the data again.
In case an coverage update done at policy level is not validated, you cannot validate the overall Master policy MTA. If this case occurs, the system displays the following error message “There is still an MTA pending for policy no. <'policy no of the MTA that is not validated;>”.
The Update Coverage Open column marks if for the correlated policy an update coverage alteration request is opened or not:
-
If the value is Yes (checked), then an existing update coverage request is already opened by clicking the near Update Coverage button, and you are redirected to the existing Draft, Registered, Accepted Update Coverage request;
-
If the value is No (not checked), then the policy does not have an update coverage request opened on it by clicking the near Update Coverage button, and you are redirected to a new update coverage request in Draft status.
By clicking the Update Coverage button for a policy, the Update Coverage Open is marked and remains checked until the update coverage request is Cancelled or Declined.
-
Update Coverage Open checked = request in Draft, Registered or Accepted status;
-
Update Coverage Open not checked = request in Cancelled or Declined status.
You are able to approve or decline a MTA request according to the customer's decision regarding the modifications on the policy.
On the Change Master Policy Request tab, beside the displayed policy information, you can find the Accepted and Decline buttons which trigger its specific status transitions. These buttons are displayed only for change policy requests which are in Registered status.
-
When you click the Accepted button the following actions are triggered:
-
The status transition is made from the Registered to the Accepted status;
-
The MTA No is updated from the first tab in the Master Policy Alteration Summary;
-
The transition specific for policy versioning is made to the Approved policy version.
-
-
When you click the Declined button the following actions are triggered:
-
The status transition is made from the Registered to the Declined status;
-
The transition specific for policy versioning is made to the Unapproved policy version.
-
