Manage Incoming Payments
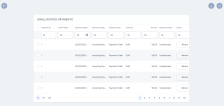
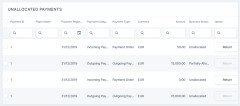
In order to manually deal with a payment in Unallocated or Partially Allocated business status, you must go to the Unallocated Payments List page and double-click the desired record to launch the allocation flow.
The details of an incoming payment record are not editable. You can only (partially or entirely) allocate, deallocate or return the payment. When the payment is fully allocated, the record changes its business status to Closed. See more on the Unallocated Payments page.
Allocate an Incoming Payment
Follow the below steps to allocate incoming payments:
-
In FintechOS Portal, go to Main Menu > Billing & Collection > Unallocated Payments. The list of records of the unallocated payments is displayed.
-
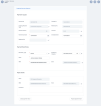
Double-click a record to launch the Unallocated Payments form. The business status of the record can be either Unallocated or Partially Allocated.
-
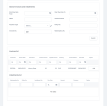
Click Allocate. The Search invoices and installments grid is unfolded.
-
Input the details of the invoices and installments and click Search. The invoices and installments are displayed.
-
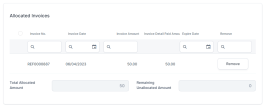
Click Add on the invoice record. Now it is redirected to the Allocated Invoices grid.
-
Click Validate. The payment is now allocated, and the record is now in Closed status.
-
Click Save and Close. The record is no longer found in the Unallocated Payments list.
Before validation, the form allows you to allocate and remove allocations easily. For fully allocated amounts, the Return button becomes unavailable after validation.
If, by chance, you did not allocate all the amount, you can validate your current allocations and leave the rest of the amount to be sent back to the payer. This is done by pressing the Return button to initiate the return flow yourself. For more details, consult the page about Returning Payments.
Deallocate an Incoming Payment
There are cases when you need to deallocate the amounts previously added to incoming payments. For example, when an allocation error happens or a customer asks for a correction on a payment made for a future installment, and so on.
By using the Remove button, you can easily deallocate any amount when necessary. For doing so, take the below steps:
- In FintechOS Portal, go to Main Menu > Billing & Collection> Payments.
-
Open a payment record, and click Remove, on the invoice record in the Allocated Invoices grid. The record is now removed from the grid. In case there are multiple invoice records, you can choose to remove one or more records.
-
Click Validate to save your updates on the current payment record. In this case, the status of the payment is now Unallocated. In case you have removed one record out of many, the status of the payment becomes Partially Allocated.
After removing the paid amount, you can find the payment record in the Unallocated Payments section.
Return Incoming Payments
There are cases when you need to return the payment back to the payer. For example, when you cannot allocate the amount because the payment details are missing, such as providing the correct unique identifier for the installment or the number of the policy. Another example is when you cannot allocate the whole amount of the incoming payment and need to return the rest.
The return of the Unallocated Payments can be handled automatically. The FTOS_PYMT_Payment_ReturnUnallocatedAmount job creates payment return instructions for all the payments which are in Unallocated status for a number of days, that you can configure. For more details, consult the Flow Parameters and Scheduled Jobs page. However, Partially Allocated Payments can be managed only manually.
You can only return payments that are Unallocated or Partially Allocated status. You cannot return payments that are Closed.
Follow the steps below to return an incoming payment:
-
In FintechOS Portal, go to Main Menu > Billing & Collection > Unallocated Payments. The Unallocated Payments List is displayed.
-
To launch the return flow, you can either click the Return button of an unallocated payment record, or open a record and click the Return button in the form to generate the outgoing payment request.
-
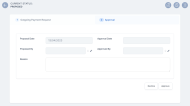
Fill in the mandatory details of the outgoing payment request:
-
Payment Due Date: The payment due date;
-
Scheduled Date: The payment scheduled date;
-
Beneficiary Type: Set the payment beneficiary type. The option set values are as follows: Payer, Insured, Contractor , Policy Beneficiary, Broker, Service Provider, and Other;
-
Beneficiary Category: Set the beneficiary category. The option set values are as follows: Other, Individual Person, and Legal Person;
-
Name: The full name of the payment beneficiary;
-
IBAN: The IBAN of the beneficiary;
-
Comments: Insert details relevant for the user that is going to approve your request for payment.
-
-
Click Propose Payment Return to submit the request to the outgoing payments flow. The record is now in Proposed status.
-
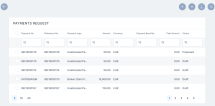
Approve the request. Go to Main Menu > Billing & Collection > Outgoing Payments > Payment Requests. Here, you find the record of the Proposed outgoing payment record, in the Payment Request grid.
-
Open the payment request record and go to tab 2. Approval.
-
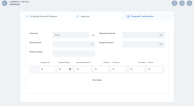
Click Approve. The record is now in Approved status, and in tab 3. Payment Confirmation, you can see the details.
