Creating Insurance Products
The Insurance Product Factory helps you to evolve a diversified digital collection of re-usable insurance components - such as types, perils, or product coverages, that you further utilize as building blocks for the assemblage of highly personalized insurance products. A product coverage can be configured to have its own charging and underwriting structure, and a product can include multiple coverages, with different configurations. No coding skills required!
With the solution, you can create an unlimited number of insurance products by configuring insurance types, product coverages, perils, premiums, fees, conditions; and also by specifying the coverage, conditions for generating invoices, limit the availability of your products and more.
This solution uses FintechOS Business Formulas to help you reduce completion time for premium amount calculations, insurance peril scoring and underwriting evaluations, or for testing different product prices. For example, you can configure the system to calculate the premium at coverage level - this is especially useful in products that combine multiple Lines Of Business (LOB), or buckets of portfolios within the same LOB but with different peril profiles. For more details, consult also the Insurance Business Formulas section, from the Managing The Product Factory page.
Once built, your products can be edited, versioned, cloned, multiplied. When activated, a product becomes digital journey-ready, that is you can embed it into different digital journeys and expose it to your potential customers, through different digital touchpoints, channels, or portals.
Create A New Insurance Product
To create an insurance product by using the Insurance Product Factory wizard, in Innovation Studio, follow the steps below:
-
In Innovation Studio, at the top left corner of your screen, click the main menu icon to open the main dropdown list.
-
From this main list, click Insurance Product Factory. A second panel opens, to the left.
-
Next, click Insurance Products to go to the Insurance Products List.
-
On the Insurance Products List page, click Insert, at the top right corner of the page, to add a new record. The Insurance Product dynamic form opens.
-
Use the available product configurations tabs listed below, for creating your product:
Main Info - You start from here! Read also the Before Adding Your First Product instructions.
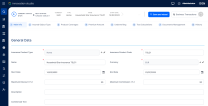
Below, you can see the product creation wizard, for an example property Product, in Draft status:
Before Adding Your First Product
-
The dynamic form allows you to create your desired product and configure the product settings.
-
To complete the creation journey for any product, you go through all the tabs listed above.
-
Filling in information in the first tab activates the next tabs and lets you move forward.
-
Having at least one Insurance Product Type defined and one Insured Object Type approved, helps you move faster through the creation journey. However, you also have the option to insert these details when configuring the product, instead of picking them from a list of existing items.
-
The wizard displays different product configuration options, based on what you establish as product behavior when filling in information in the first tab.
-
If you need to interrupt your journey, you can use the Save and close button to save your product as Draft. While the product is in Draft business status, the form is still editable, and you can complete the journey at a later time.
-
Keep the product in Draft status until you are confident the design is finished. A Draft product is always editable. So, you can come back to edit it, as many times as needed.
-
Once a product is in Approved business status, it cannot be edited the same way the Drafts products can be. For editing an Approved product, you must create a new version of it. For that, you use the versioning (+) button, at the top right corner of the page. For more details, go to the Versioning Products section, on Product Operations page. After adding a new version to your product, you must manually approve it.
-
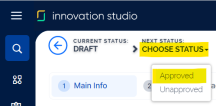
After you finished configuring it, you must activate your product by using the status picker, at the top left corner of your product screen.
Below, an example of the status picker:
Product status determines if your insurance product is used in digital journeys targeting potential customers. In order to make it available to different digital journeys, the product should be in the Approved status. For more details, see the Product Life Cycle page.

