Transaction History
This section of Online and Mobile Banking displays the history for the following banking products:
- Current, basic and saving accounts
- Term deposits
- Loan accounts (personal and mortgages).
To view this section, a user must have account statement ticked in Back-Office Administration, if not the toast message You don’t have the rights to generate account statements and You don’t have the rights to see the transaction history for this account are displayed.
There are two paths to view the Transaction History:
- To view the independent history of each account in particular:
- click View account and scroll down to the history section.
There is a dedicated section to the transaction history of that account with the payments initiated and received. It has the same functioanlities as the standard Transaction History page: filters for searching for determined transfers, downloading statements, expanding the details of a transfer.
- click View account and scroll down to the history section.
- Access the Homepage of Online and Mobile Banking, and scroll down to the history section.
This widget displays the last ten transactions from all the accounts or the last transactions from the current account.
Click the View more button that opens the whole transaction history on all accounts.
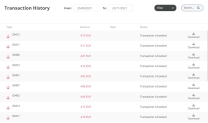

The grid Transaction History has the following fields:
| Field | Description |
|---|---|
| Transactions | The debtor name is displayed for a debit transaction. For a credit transaction, the creditor name is displayed. In case the beneficiary has an alias set, that alias is displayed. If no Alias is configured for the beneficiary, the account number is displayed. |
| Amount | It displays the value of the transaction in the currency of the account in which it was received (ISO3 format). |
| Date | The date when the transaction was executed. Depending on this date, the transactions are displayed from the last transaction to the oldest. |
| Status | The status of the transaction. |
| Download | Click this button to download the transaction receipt. |
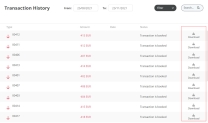
To view the Transaction History expanded:
- Click View more.
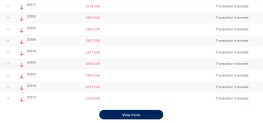
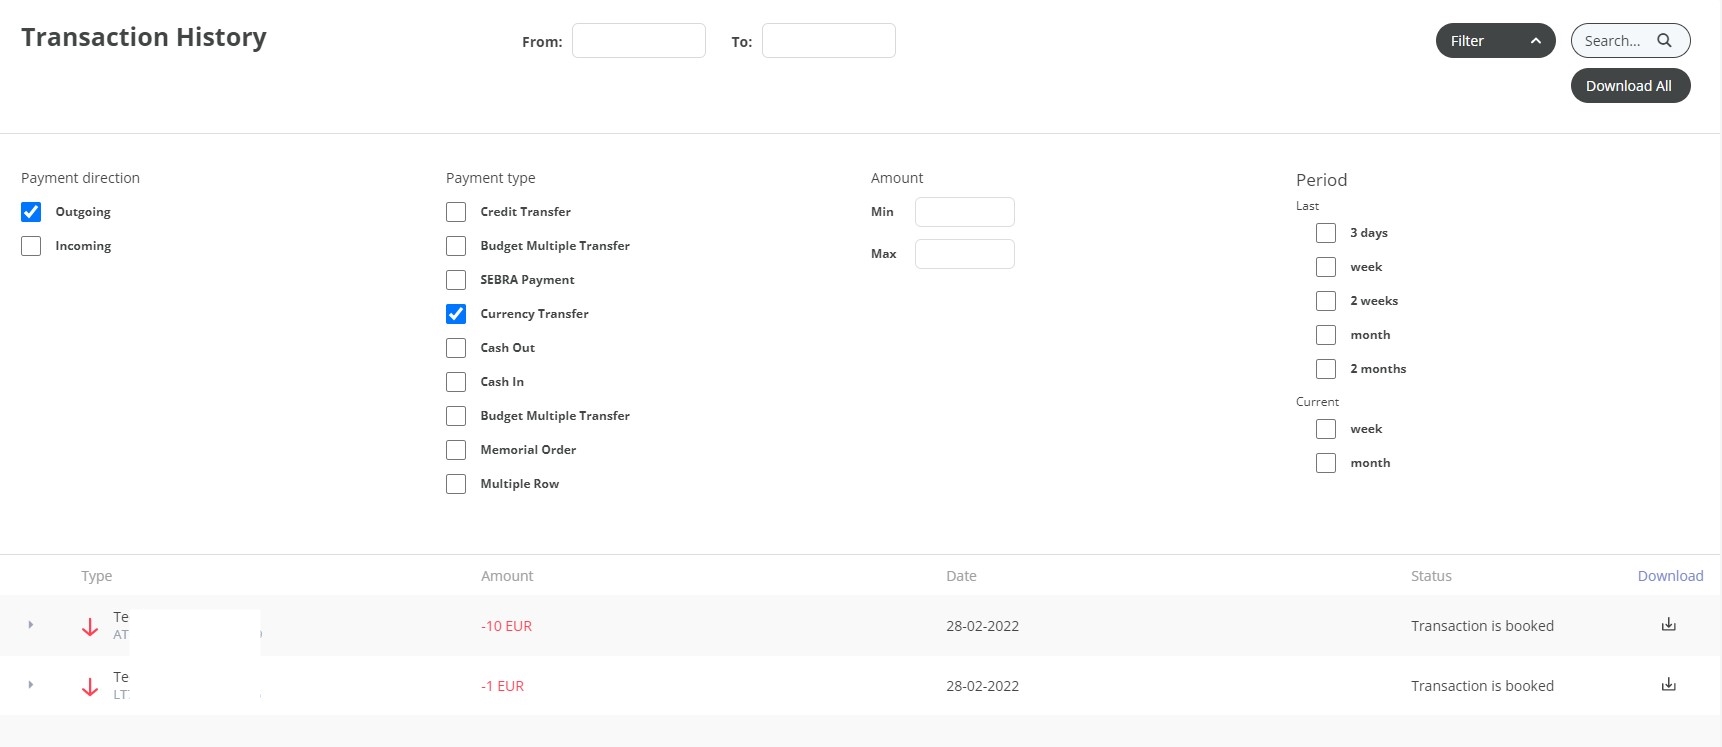
- The page contains the list of transactions, the filters, the search button.
Click Apply filter to search for a transaction based on the criteria you need, such as:
- from (select a beginning date)
- to (select the ending date).
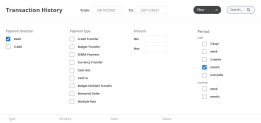
Be sure to insert dates in both fields, in order for the system to determine an interval of time when to search for transactions. Click again on Apply filters after the dates have been inserted.
or
Click Filter to open additional filters:
Field Description Payment Direction Select between:
- Debit: Click to display only the debit transactions;
- Credit: Click to display only the credit transactions.
Payment Type
Select between:
- Credit Transfer
- Budget Transfer
- SEBRA Payment
- Currency Transfer
- Cash Out
- Cash In
- Budget Multiple Transfer
- Memorial Order
- Multiple Row.
Amount Select between:
- Min: Insert the value (e.g., 45);
- Max: Insert the value.
Period
Select between (after a checkbox is selected the From and To field are populated by the system with the dates):
Last
- 3 days
- week
- 2 weeks
- month
- 2 months.
Current
- week
- month.
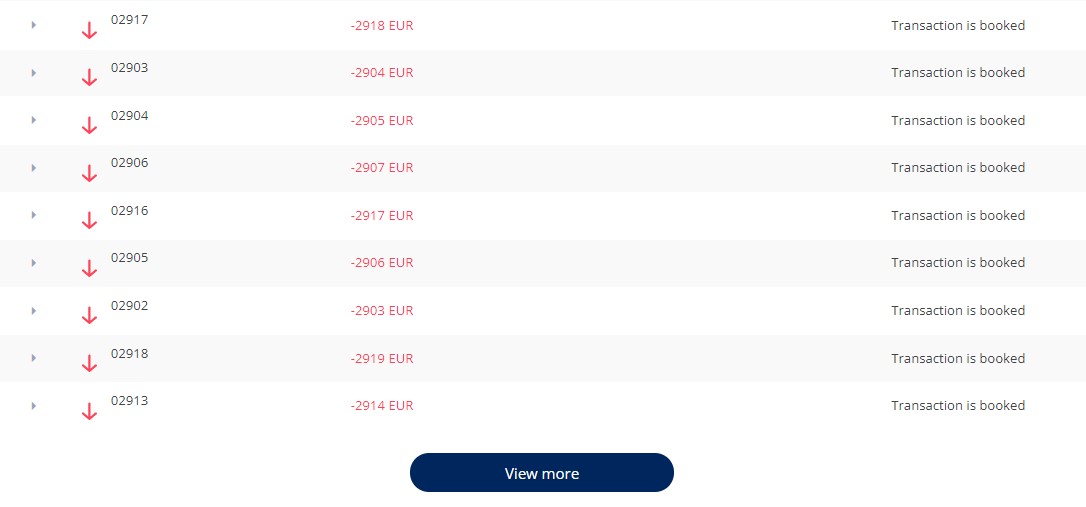
In the row of each transaction, an arrow is displayed to indicate whether the funds were sent or received. The green arrow pointing down signifies that the funds were received and the red arrow pointing up signifies that the funds were sent to an account.
Details presented for budget payments are:
- regulatory report type
- creditor payment category
- debitor payment category
- document number
- document date
- ultimate debitor name
- tax payer type
- tax payer ID
- begin date
- end date.
Download bank statements
At the end of each row of each transaction, there is the possibility to download the pdf with the transfer statement. Three types of files are generated:
- file with details about one transaction
On the Transaction History page, click Download to have the statement on the local device.
- file with all/specific transactions

- From the homepage, click View account.
- From the Account page scroll down to the Transaction History.
- Filter the transactions using the criteria to view specific transactions. The system displays the relevant transactions based on the filters applied.
- A pop-up is displayed asking you to choose the file extension. Choose between EXCEL or PDF.
- Click Download all to generate the file only with all/the selected transactions.
See Details of a Transaction
The details of the transaction are:
![]()
| Field | Description |
|---|---|
| Transaction Id | The id given to each payment. |
| Amount in local currency | The value in local currency. |
| Currency pair | The two currencies. |
| Currency exchange Rate | The rate at which the bank exchanges the amount. |
| Payment type | The type of payment used. |
| Transaction type | The type. |
| Value date | The date of execution. |
| Booking type | The type: credit/debit. |
| Balance after transaction | The amount left after the transaction. |
| Balance at beginning of day | The amount at the start of the day. |
| Registration date | The date when the payment was registered. |
| Processing Date | The date it was processed. |
| Payment details | The details inserted by the user for the payment. |
| Creditor Agent | The BIC code of the reciever’s bank. |
Redo Payment
A previously executed payment can be re-initiated with the same data. Depending on the type of payment, it saves all the fields that had values inserted. Some payment schema types have more fields than others.
To redo a transaction, a payment must meet the following criteria:
- they have the status
Executed, - they were initiated by the user in the Online and Mobile Banking application, i.e., they were not over-the-counter transactions
- they are not utility payments and bulk payments.
To redo a payment, follow these steps:
- From the homepage, access Transaction History. NOTE
This functionality may not be displayed here if the system parameter Parameterization does not have the right value. - Click to expand a payment.
- Click the Redo button. The system displays the Make a Payment screen with the fields already filled in with the data for the previous payment.
- All the fields are editable.
- Click Review Payment. The page Review Payment Details is displayed. It contains the read-only data:
Field Description From The source account. To The beneficiary name and account. Available balance The sum available in the FROM account. Total The total amount to be paid in the currency of the source account. Payment amount The amount to be transfered. Payment type The type of the payment: Non-SEPA SWIFT Payments/Intra-BankOwn Account/Foreign Exchange/Intra-BankOther customer from the same financial institution/Instant Payments/High-value domestic payments OR Urgency/Small value domestic payments/SEPA Instant/SEPA Payments/TARGET2. Execution Date The date when the amount arrives in the account of the beneficiary. Payment reason The reason for the transfer. To proceed, click Confirm. To cancel, click Back.
- The page Terms & Conditions is displayed with the message The OTP Service is to protect the use of your account by requiring you to authenticate your identity using a one-time password ("OTP"), which shall be transmitted through the short message service ("SMS") by Bank to your mobile number registered under your account, for transactions that require such OTP for authentification purpose. We'll use the phone number +40*******44. Click Send.
A pop-up window is displayed with the message: Please insert the code received in order to authorize the payment of value and currency for a to account the account number. To sign the payment, an email was sent with a code. To verify the identity of the user, the code must be inserted in the Online and Mobile Banking page. The email address is taken from the database. There are six boxes where to insert each letter of the OTP. To verify the OTP inserted, click Authorize.
If the code was not sent, click Re-send code.
If you have trouble seeing the code, click Call me.
If the code inserted was wrong, then the user is directed to the page Wrong authorization code with the following message: You have 4 remaining retries. If you want to try again, click Send. If you want to try again later, select Try again and you will be directed to the Homepage. The payment will remain initiated, and you will be able to sign it for the Order List.
Click Send to reinitiate the signature process.
Click the Try later button to save the payment and re-initiate it from the List of Orders and Multiple Authorizations of a Payment.
On the confirmation page, the message Your payment has been registered successfully. is displayed. If it is the case to be a joint signature, there is the message The payment has been posted in the Order List for the joint authorized Approver to sign. Click Home to return to the Homepage. The payment Id is in the status authorized.
NOTE
At every two minutes, the scheduled job named FTOS_IB_PaymentsQueue runs to send the payment to Core Banking after it has been authorized by all the persons needed and its status isAuthorized.
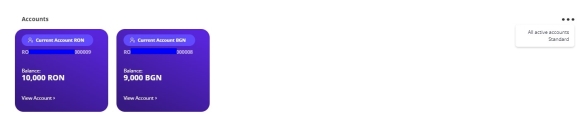
Account details
The following details are displayed:
| Field | Description |
|---|---|
| Name of the account | This displays the alias of the account. |
| IBAN | The bank account number which identifies the account. |
| Account type | The type of account. |
Overdraft | It displays if the account has an overdraft. |
Available amount | The balance. |
Overdraft limit | The limit of the overdraft. |
Used amount | The amount used. |
Due date | The maturity date of the overdraft. |
Interest rate | The interest rate paid for the overdraft. |
Request Account Statement
From the Account Detail section, click Request account statement. The Account Statements section is displayed generated for the respective account specifying a period.
The following fields are displayed:
| Field | Description |
|---|---|
| From | The current date minus 30 days. |
| To | The current date. |
| Account | The account number (IBAN). Select another IBAN if you which to see the statement from another account. Select All to see the statement from all accounts of that customer. |
Click Generate Account statements. A list of statements is displayed:
- to download a particular statement, click the download icon on the same row as the statement in question.
- to download all the statements, click the button Download all at the top of the list.