Returning Payments
There are cases when you need to return the payment back to the payer. For example, when you cannot allocate the amount because the payment details are missing - such as providing the correct unique identifier for the installment or the number of the policy. Yet another example is when you cannot allocate the whole amount of the incoming payment and need to return the rest.
Unallocated Payments can be either handled by the system, automatically or managed manually, by you. For the automatic return, the FTOS_PYMT_Payment_ReturnUnallocatedAmount job creates payment returns for all payments which are in Unallocated status for a number of days that you can configure. Fore more details, consult the Flow Parameters and Scheduled Jobs page. For the manual return, you use the Return button to initiate the return flow by yourself. More details to follow.
Partially Allocated Payments, however, need to be managed only manually. That is: for each partially allocated payment, you need to initiate the return flow by yourself. You can do this easily by pressing the Return button inside the selected payment record.
For returning payments, take the below steps:
-
At the top left corner of your FintechOS Portal, click the main menu icon to open the main dropdown list.
-
From the main list, click Billing and Collection. A second dropdown opens.
-
Next, click Unallocated Payments to go to the Unallocated Payments List.
-
Inside the Unallocated Payments List page, use the search functionality to find the desired payment record.
-
Double click the record to open it. Or click the Return button next to it, right away. (If you choose to do so, jump to the Fill in the Return Details step, below.)
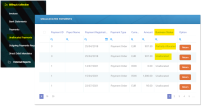
Below is an example of the Unallocated Payments List page, with Return button next to the records.
-
Once the record is opened, inside the header section, locate the Return button and click it.
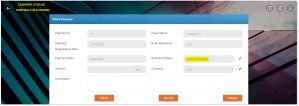
Below is an example of a payment record in Partially Allocated status, with Return button.

Proceed to the next step.
When you press Return, you create a request for payment, in Draft status. Inside the Unallocated Payment record, scroll down to the Outgoing Payments section and double click on the Draft request to open it.
Below, you can see the bottom section of a payment record with one outgoing payment request in Draft status.
When you open the Outgoing Payment Request form, you can see all the details of the Draft request that the system automatically fills in - into the Payment Request, Payment Beneficiary and Payer Details sections. These details are not editable.
| Field Name | Description |
|---|---|
| Payment No | The number of the incoming payment. |
| Created On | The day when the Outgoing Payment Draft request is created. |
| Payment Amount | The amount to be returned. It is automatically calculated. |
| Currency | It matches the currency of the incoming payment. |
| Reference No | The reference number for the outgoing payment. It is automatically generated to match the number of the incoming payment. |
| Payment Type | It matches the payment type of the incoming payment. The outgoing payment types are as follows:
|
| Proposed By | The user who registers the initial payment. |
| Bank | In the Payment Beneficiary section, it is the bank that sent the incoming payment. |
| Name | In the Payer Details section, it is the name of the payer - that is your company. |
| IBAN | In the Payer Details section, it is the IBAN of the payer. |
| Bank | In the Payer Details section, it is the bank of the payer. |
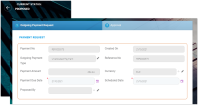
Below, you can see an outgoing payment request in Draft status.
Proceed to fill in the necessary details into the following editable fields:
| Field Name |
Description |
|---|---|
| Payment Due Date |
The payment due date. |
| Scheduled Date |
The payment scheduled date. |
| Beneficiary Type | The payment beneficiary type. The types are as follows:
|
| Beneficiary Category | The beneficiary category. The category types are as follows:
|
| Name |
The name of the payment beneficiary. |
| IBAN |
The IBAN of the beneficiary. |
| Comments | Insert details relevant for the user that is going to approve your request for payment. |
Proceed to the next step.
Once finished, press the Propose Payment Return button, at the bottom of the form, to submit the request to the outgoing payments flow.
After pressing Propose Payment Return, you can see, at the top left of your screen, that your record is in Proposed status. However, if you press Save and close before this step (submitting your request), the record is saved in Draft status and you can come back at it, at a later date. Below is an example of an outgoing payment request in Proposed status.
The next step of this flow is the Approval of the request. If you have the necessary security role to do the approval, you can continue with the Outgoing Payment Request flow. If so, consult the Outgoing Payment Requests page for more details about approval. If not so, you can leave the record as such, that is in the Proposed status.
Click Save & Close at the top right of your screen.


