Outgoing Payment Requests
The Outgoing Payment Requests is the section where you find all the outgoing payments registered into your system.
For some of your recurring outgoing payments scenarios, you can configure Billing and Collection to automatically approve and allocate those types of outgoing payments. For other scenarios, you have an outgoing payment request manual approval flow that lets you approve or decline such requests, according to your needs.
With Billing and Collection you can effortlessly manage payment requests received from different sources or systems - such as Claim payments, Commission, Broker Balance (Credit), etc. See the examples below:
Payment requests are automatically registered into your system when you use the Bank Statements functionality to upload your bank statement files. Your import triggers the automatic parsing, sorting and matching of the Payment data - contained by the file, with the Outgoing Payments already configured or scheduled by you - such as broker commissions. For payment requests that respect some rules - such as providing the correct unique identifier for a broker or the number of the policy under brokerage, the allocation flow for the outgoing payment is completely automated. After import, you can find all the new outgoing payments into the Outgoing Payment Requests section. You can recognize the automatically allocated outgoing payments by their Paid business status. If necessary, you can open a record to see the paid amount. More details about how the system does the sorting of the received payment data, in the Import Bank Statements documentation.
Another example is the receiving of payments request through the Generate Outgoing Payments API. For example, an insurer uses an external Claims system that calls the Generate Outgoing Payments API to register a new request for a claim payment. Once received, the payment request is processed by the Billing and Collection module and automatically registered into the system, in Draft status. Further, you use the manual approval flow to approve, or decline the request, accordingly.
Yet another example is when you decide the return of an unallocated incoming payment. You can return the whole amount or the amount remained after the allocation operation. The return of Unallocated Payments can be done automatically, after a configurable number of days. However, for the case of a Partially Allocated payment, you need to initiate the return flow by yourself. For more details, see the Returning Payments section. When you press the Return button, you create a Draft payment request that is automatically populated with the necessary data and transitioned by the system into the Outgoing Payment Requests section.
Finally, this is also the place where you go in order to manually insert a request for an outgoing payment into the system, when the case.
The Payments Instruction File
The Payments Instruction File is an important element of the automatic payment management featured by the Billing and Collection solution. This File contains instructions that trigger the payments from the insurer’s bank account. The FTOS_PYMT_OutgoingPayment - the Outgoing Payments Requests entity, is the source of the Payments Instruction File. A daily job automatically examines the outgoing payments requests registered into the system - irrespective of the source, process, or system it came from. Next, it prepares the File containing the payment instructions for the eligible requests - for example, for the outgoing payments in Scheduled status. The File is then transmitted to the bank and the amounts are disbursed from the insurer’s bank account, according to the instructions.
Outgoing Payment Requests View
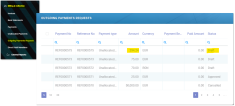
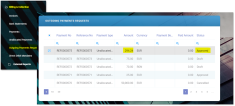
In your portal, the Outgoing Payment Requests section offers you an overview of the payment requests registered into your system, with the newest record registered into the system, at the top.
This is an all-inclusive view; yet, you also have the possibility to search and sort your records for easier processing. For example, if you want to view all the payment requests in Draft status, you can use the Search by Status option and sort all your records accordingly.
Follow the steps to view your outgoing payments:
-
At the top left corner of your FintechOS Portal, click the main menu icon to open the main dropdown list.
-
From the main list, click Billing and Collection. A second dropdown opens.
-
Next, click Outgoing Payment Requests to go to the Outgoing Payment Requests List.
In the Outgoing Payment Requests List page:
-
To Inspect a record from the grid, double click it. Depending on security roles, you can Approve or Cancel a payment request.
-
To Add a record, at the top right corner, click Insert. For details, see the Adding Payment Requests page.
Outgoing Payment Requests Form
When you double click a record, in order to manage an outgoing payment, you actually launch the Outgoing Payment Request Form. This form allows you to propose, approve or, if the case, cancel a payment request.
The Outgoing Payment Request Form contains the following sections:
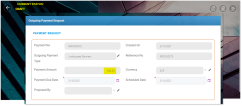
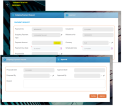
This is the header section. You use this section to insert or to inspect the Outgoing Payment details. Depending on the case, the fields are editable or not. For example, for returning a payment, the details in this section are already filled in by the system and you only need to use the option sets to select the Payment Due Date and the Payment Date. You also use this section to check the status of the record, at the top left of your screen.
Below, you can see the header section of a record in Draft business status.
This is the middle section, which is editable. You use this section to fill in details about the Payment Beneficiary for the selected outgoing payment. The option sets make it easier for you to complete the Beneficiary Type and the Beneficiary Category fields. For more details about the option set values, see the table below. Depending on the type of outgoing payment, it is possible to see the Bank field already completed and displayed in a non-editable form. For example, this is the case of a return payment - where the system already knows which bank sent the payment.
Below, you can see the middle section of an outgoing payment record, with Bank details already filled in.
Inside the Payment Beneficiary section, the following fields are editable:
| Field Name |
Description |
|---|---|
| Beneficiary Type | The payment beneficiary type. The types are as follows:
|
| Beneficiary Category | The beneficiary category. The category types are as follows:
|
| Name |
The name of the payment beneficiary. |
| IBAN |
The IBAN of the beneficiary. |
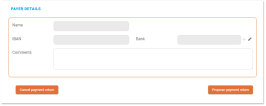
This is the bottom section and it contains your company's details. Here, most of the fields are auto-filled and non-editable. However, in the Comments field, you can insert any relevant information to be considered by the user that is going to approve your request for payment. Write something like "This payment was allocated only partially and we need to return the rest of the amount." or "This is a payment return." or "Please, approve this return by noon. Thank you!".
Below, you can see the bottom section of an outgoing payment record, in Draft status.
This is also the section where you can find two buttons - Cancel payment return and Propose payment return. You use either of the buttons in order to submit your request to the manual approval flow or cancel the request. When you click the canceling button, the status of the record changes to Cancelled. Respectively, when you click the proposal button, the status of the record changes to Proposed. For more details about the approval, see below.
Approving Outgoing Payment Requests
See details about how to find your desired record in the Outgoing Payment Requests View section, at the top of this page. If your record is in Draft status, you must first make a proposal for an outgoing payment. If your record is in Proposed status already, go to the Launch the Approval Flow step, below.
Take the below steps for approving payment requests:
In order to approve an outgoing payment, you must go to the Outgoing Payment Requests List page and double click the desired record to open it. You can find more details about the steps to reach this list in the Outgoing Payment Requests View section.
Below, you can see an example of an outgoing payment record, in Draft status.
Double click the selected record to launch the Outgoing Payment Requests Form.
You can check the status of your record, at the top left of your screen.
Inside the Outgoing Payment Requests Form, fill in the necessary details as described in The Payment Beneficiary section.
Once finished, move to the next step.
At the bottom of the form, locate the Propose Payment Return button and click it.
Below, you can see the bottom section of an outgoing payment record, in Draft status.
When you click Propose Payment Return, the selected record is submitted to the manual outgoing payment request approval flow.
You can check the status of your record, at the top left of your screen. Your record is currently in Proposed status, as in the example below.
Continue to the next step.
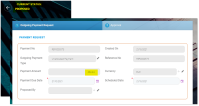
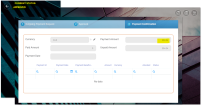
After pressing the Propose Payment Return button, the second tab of the Outgoing Payment Request form becomes available. In the first tab you can still inspect the details of the request and in the second tab, you can use the buttons to either approve or decline the request. Continue to the next step.
Below, you can see an example of an outgoing payment request form (the header section), with tabs.
In the approval tab, click Approve to validate the outgoing payment. When you click Approve, you can see, at the top left of your screen, the that the business status of the current record changed from Proposed to Approved.
Below there are two examples of the same record in Approved status.
After approval, the outgoing payment is submitted to the automatic allocation flow. When the confirmation of payment is registered into the system - at bank statements upload, the Billing and Collection solution automatically parses the payment data, inserts the necessary details into the payment confirmation fields and changes the status of the record to Paid.
Click Save and close at the top right corner of your screen to close the form.
