Editing Digital Assets
When you open a digital asset, several configurations are available. A detailed description of each section available for configuration is described below.
General
The following fields are available for editing in the General tab of a digital asset:
- Code
- Name
- Description
If you click Set as context digital asset, the digital asset will record all the configuration items created and add them automatically to the list. The name of the digital asset will be displayed next to the Innovation Studio logo, .
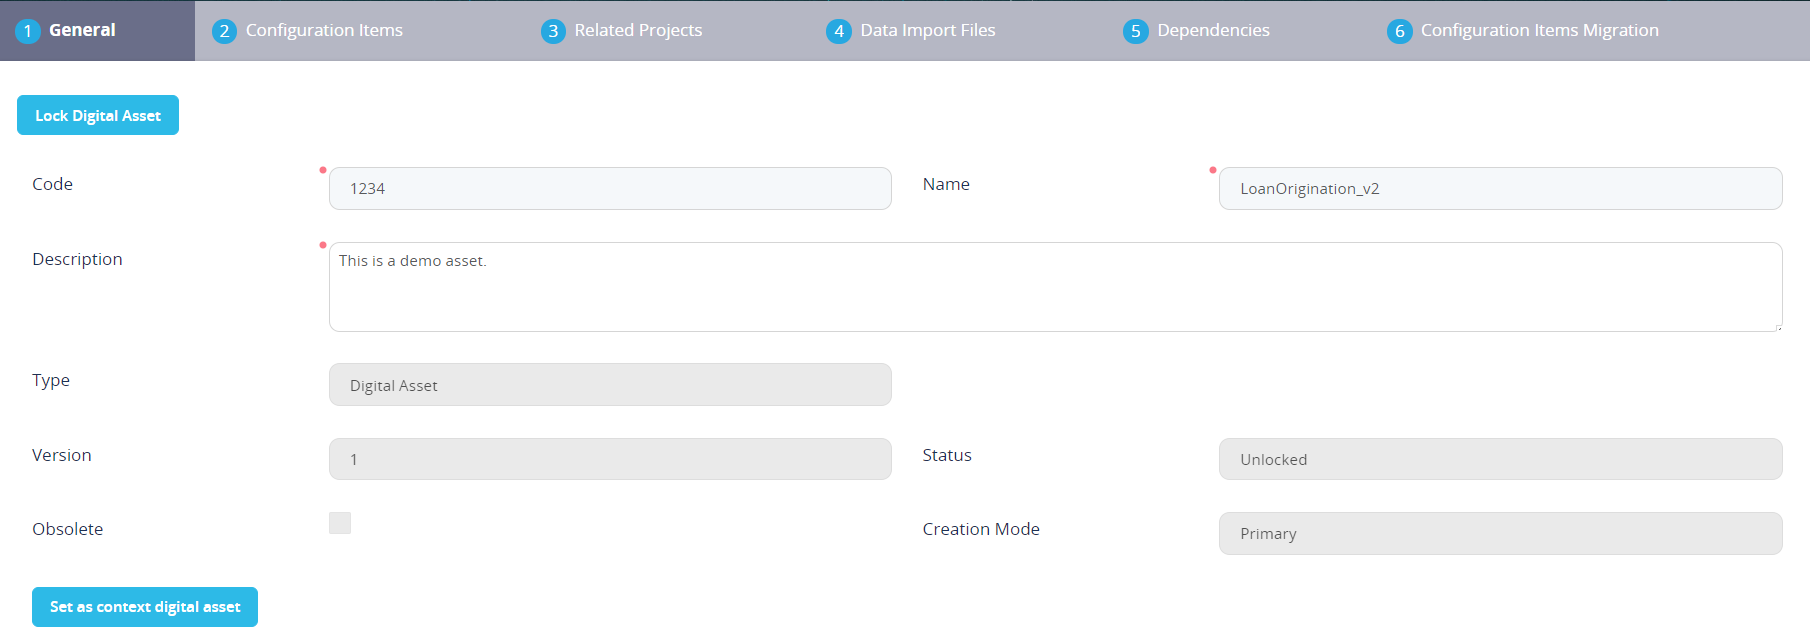
To close the context digital asset, click Close Digital Asset.
Configuration Items
This section tab houses all the components required for the digital asset to work, such as entities, form driven flows, entity views, scripts, configurations for the automation processors, and any other configurations made while the digital asset was set as context.
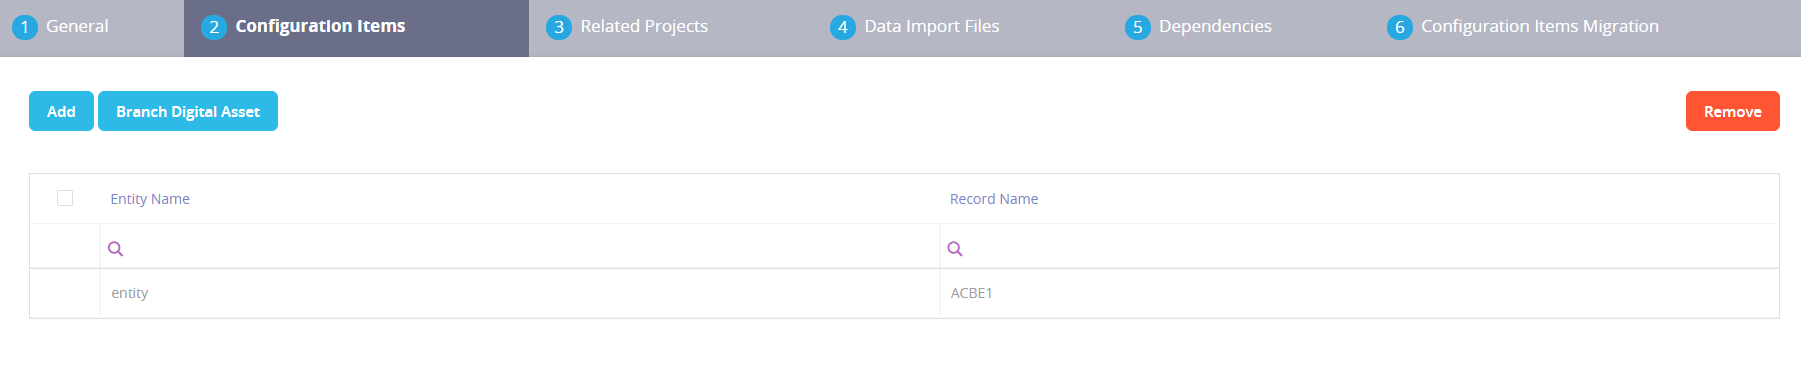
The section tab has three buttons above the grid. The Branch Digital Asset button merges two digital assets by transferring all the configuration items from one asset to the other. By clicking the button from the current asset, the configuration items will be moved to another asset and deleted from the currently displayed asset. For details, see Branching Digital Assets.
To add configuration items to the digital asset, click Add.

The Add Digital Asset Configuration Item page is displayed. The Type field allows you to select the type of configuration item:
- Action group
- Advanced analytics
- Attribute
- Business Data Model
- Business Entity
- Business Entity Extension
- Buisness Workflow
- Business Workflow Configurations
- Chart
- Client Script library
- Code Blocks
- Configuration Data definition
- Custom Form
- Dashboard
- Data Import Template
- Data Set
- Data Source
- DB Task
- Digital Document
- Digital Journey
- Email Template
- Endpoint
- Entity Form
- Entity View
- Formula
- Formula Parameter Mapping
- Menu Item
- Option Set
- Portal Profile
- Report
- Sequencer
- Server Automation Script
- Server Automation Script Library
- Style Sheet
- System Parameter
- User Competence
- Web Api Cient Library
- Widget
Once the type is selected, the system will automatically display the grid with the available configuration items.
To remove configuration items from the digital asset, click Remove and confirm. This action also removes child dependencies, such as when removing an entity, it removes the entity default view, attributes, default form, or relations. Once removed, the configuration item becomes unallocated and can be used by other digital assets.
Related Digital Solutions
This section tab displays the digital solutions where the digital asset is included. For more information, see Digital Solutions.

Data Import Files
This section tab displays the Data Import Templates and the Data Config Definitions which allow you to populate the digital asset’s metadata and data (see Data Import Template and Configuration Data Definitions for more information). From here, you can set the configuration items’ templates and the records’ data models that you will use for your imports, then you can perform the actual imports.
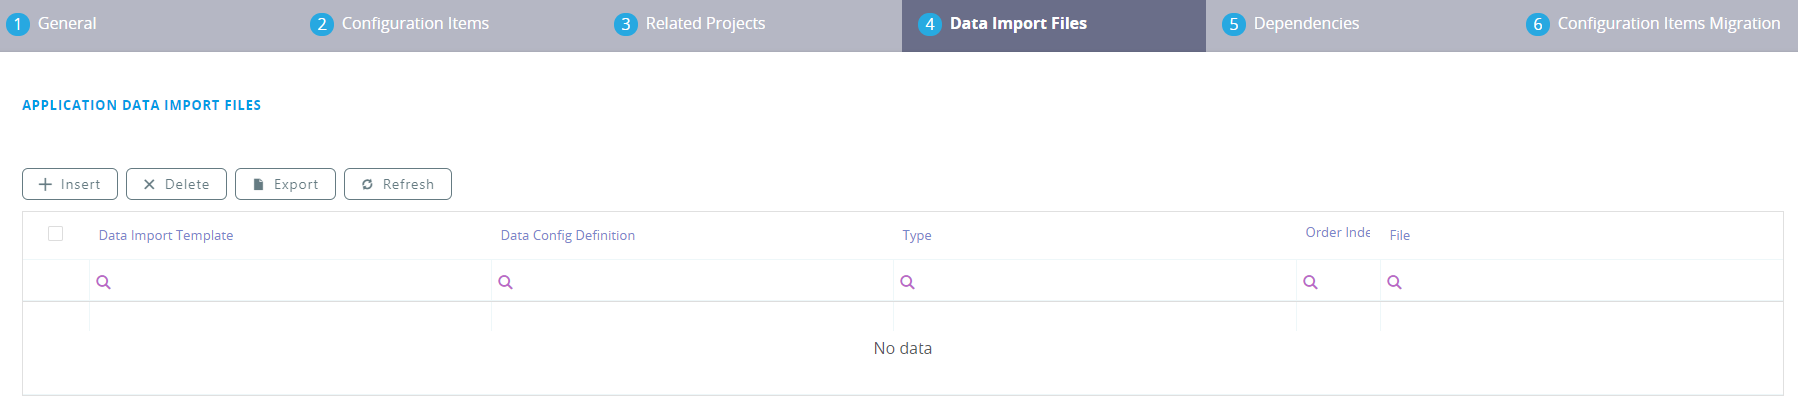
- To add a new package, click Insert. Select the Type:
- Based on Data Import Templates
- Based on Data Config Definitions.
- Depending on what was selected for the type, two new fields are displayed, Data Import Templates/Data Config Definitions. Select the name of one of the templates/definitions.
- Click Select file. The local File Explorer opens. Select the desired file and add it to the template/definition.
- Click Save and reload.
From this section tab, you can download the templates which were previously displayed:
- Navigate to the Application Data Import Files grid .
- Select from the grid the template you wish to consult.
- Click the desired record in the grid. The Edit Application Data Import File page opens.
- To download a file already imported into the digital asset, click the file and it will download on the local drive.
Dependencies
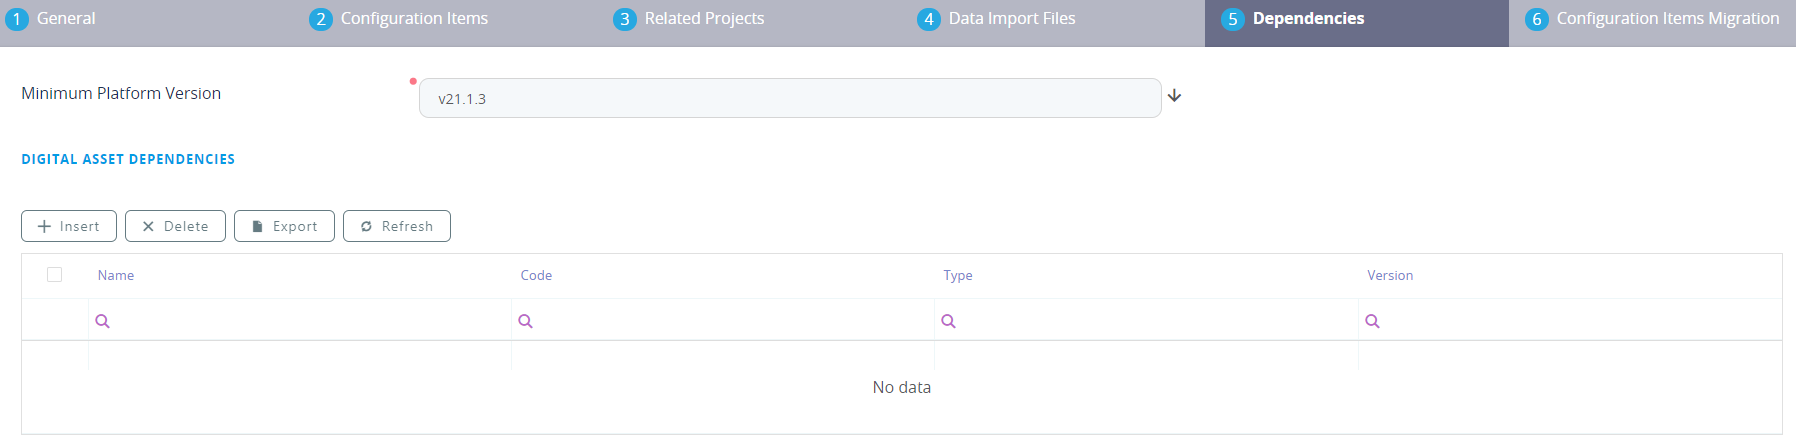
To add more dependencies for the digital asset:
- In the grid labeled Application Dependencies, click Insert.
- The Add Digital Asset Dependency opens with the field labeled Referenced Digital Asset. Click the drop-down arrow and select from the list the digital assets.
- Click Save and close.
- Repeat as many times as needed.
To delete a dependency, in the grid, select the digital asset by clicking once, then click the Delete button.
Configuration Items Migration
Migration is the process of importing a deployment package (including deployment packages from prior releases that don't support configuration management) into an existing digital asset. This allows you to easily upgrade your legacy applications to take advantage of the configuration management capabilities available starting with release 21.2 (digital assets, digital solutions, digital solutions packages, etc.).
To migrate a deployment package, follow the steps:
- From the field Choose deployment package for migration, click the arrow and from the list, select the deployment package to migrate to.IMPORTANT!
You cannot migrate an obsolete digital asset. If you attempt to migrate an obsolete digital asset, a toast message is displayed to inform the user. - Click Migrate. If the migration is successful, a grid will be displayed below the deployment package. From the grid, use the Export button to export records and see all deployment packages that were migrated.