
Flow Control
The Flow Control feature enables you to create the path through the Form Driven Flow or Digital Journey for customers and Portal users.
The flow control is available only for Form Driven Flows of type wizard.
Before setting the flow control of a Form Driven Flow, you need to understand how it is working.
For a form driven flow comprised of steps, the execution order is the following:
- The main Form Drievn Flow is executed. First the beforegenerate.js of the digital journey is executed and then the aftergenerate.js.
- For each step of the Form Driven Flow when activated: step elements (HTML, CSS) are loaded and the Form Driven Flow is also rendered. Then aftergenerate.js of the step is executed.
Control Digital Journey Flow
The execution order of a digital journey which is comprised of steps is given by the OrderIndex of the steps as set on the digital journey > Steps tab, if not otherwise specified on the steps.
There are two ways in which you can change the execution order of a digital journey . On step you can:
- override the default next step.
- set a specific rule and choose the next step or cancel the transition and display error message.
When clicking Next in the digital journey, the flow is:
- BeforeSave on the step is executed.
- The conditions of type Cancel Navigation are evaluated and only the first one is executed.
- The data is saved.
- The conditions of type NavigateToSection are evaluated and only the first one is executed. It changes the default nextStep given by the OrdexIndex with the step specified on step.
- The AfterSave on the step is executed and the digital journey takes the user to the next step .
Overriding the default next step set trough OrderIndex
To override the default next step set though the digital journey order index, go to the step from which the transition will be done, select the next step using the Option set.
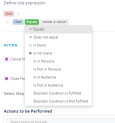
In the Default Navigation Rule, if the ''Close flow'' bool is true after the step 2 is displayed, the flow is closed. If the bool ''Navigate to another step'' is true, the flow will continue to another step selected in the option set. If the bool ''Navigate to another flow'' is true, then the next step will belong to another flow.
At the top-right corner of the page, click the Save and close button to save the step.
Control Form Driven Flow based on rules
To add rule at a step level to control the default flow of a digital journey, follow these steps::
- Go to the desired step edit form and click the Flow Control tab.
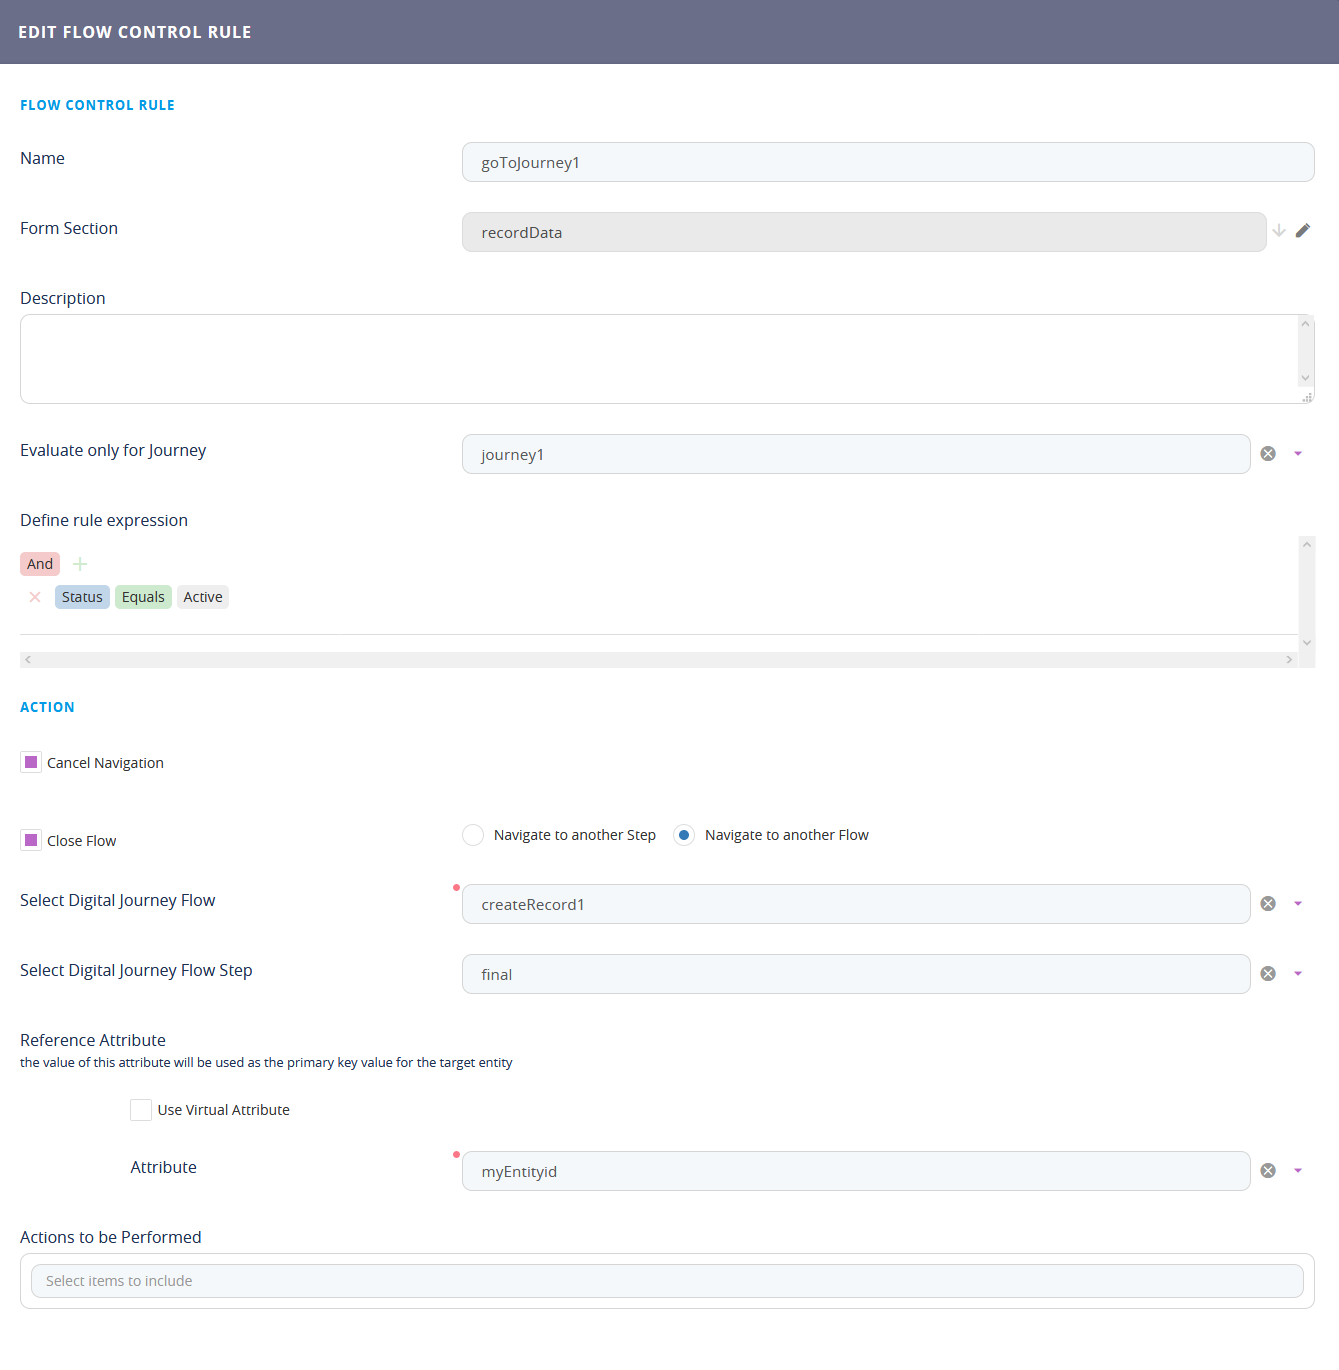
- Click the Insert button. The Add Flow Control Rule page appears.
- Provide a Name for the rule to be run on step. In the Form section, the name of the step you are editting will be automatically filled in.
- Insert the proper description for the rule.
- If you wish to evaluate the rule only in the context of a specific digital journey, select the corresponding journey from the Evaluate only for Journey drop-down box. For information, see Digital Journey Context.
- Define rule expression based on which specific action happen. It is possible to add a condition or to add a group. When adding a condition it is possible to add a ''Checking with Custom Processor''.
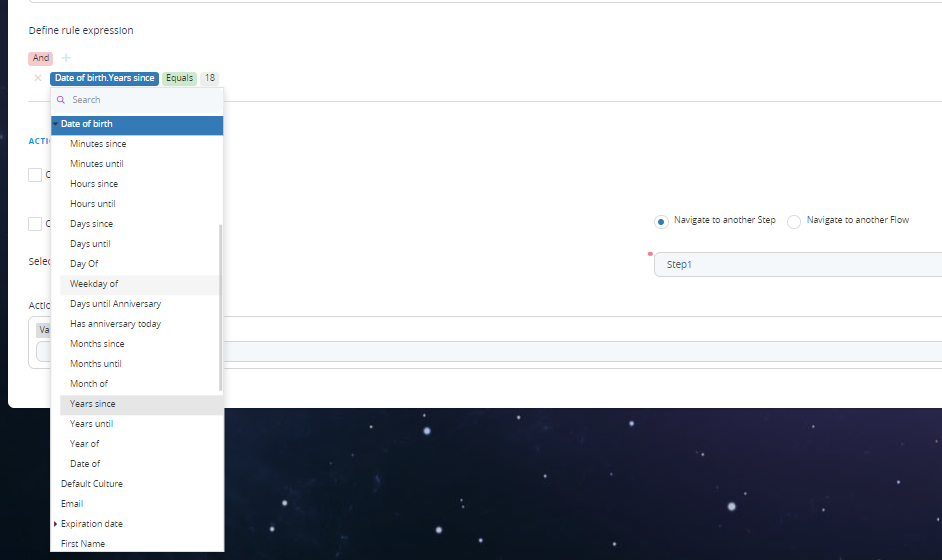
When adding a condition, first select the attribute on which the condition will apply. For some attributes if you click on the little black arrow on the left of the attribute itself it will open a new set of options such as:
- minutes since
- minutes until
- hours since
- hours until
- days since
- days until
- day of
- weekdays of
- days until anniversary
- has anniversary today
- months since
- months until
- month of
- years since
- years until
- year of
- date of
The following choice is to select the rule. Based on the type of attribute a set of possible rules will be shown:
- contains
- does not contain
- starts with
- ends with
- equals
- does not equal
- is blank
- is not blank
- equals
- does not equal
- is less than
- is greater than
- is less than or equal to
- is greater than or equal to
- is blank
- is not blank
- is in between
or
For attributes such as user it is possible to set:
- equals
- does not equal
- is blank
- is not blank
- is in Persona
- is not in Persona ( see Customer Persona)
- is in Audience ( see Audience management)
- is not in Audience
- Business condition is fulfilled
- Business condition is not fulfilled
After selecting the two fields enter a value.
For example, add a condition for the age of a client to be greater than 18 years old.
- Select the action:
Navigate to section – navigates to the specified step instead of the next step
Cancel Transition – displays an error message and nothing happens.
If you choose to Cancel Transition to the next default step, you need to provide a Cancel Navigation Message.
- Select the ''Actions to be Performed''. From the list created in Defining Form Actions select the Action to be triggered when the rule is applied.
- Save the rule by clicking the ''save and close'' button and add as many rules as you need.

Checking with Custom Processor
It is possible to create a rule that checks the attribute mappings of an endpoint to return the values true or false from the boolean attribute.
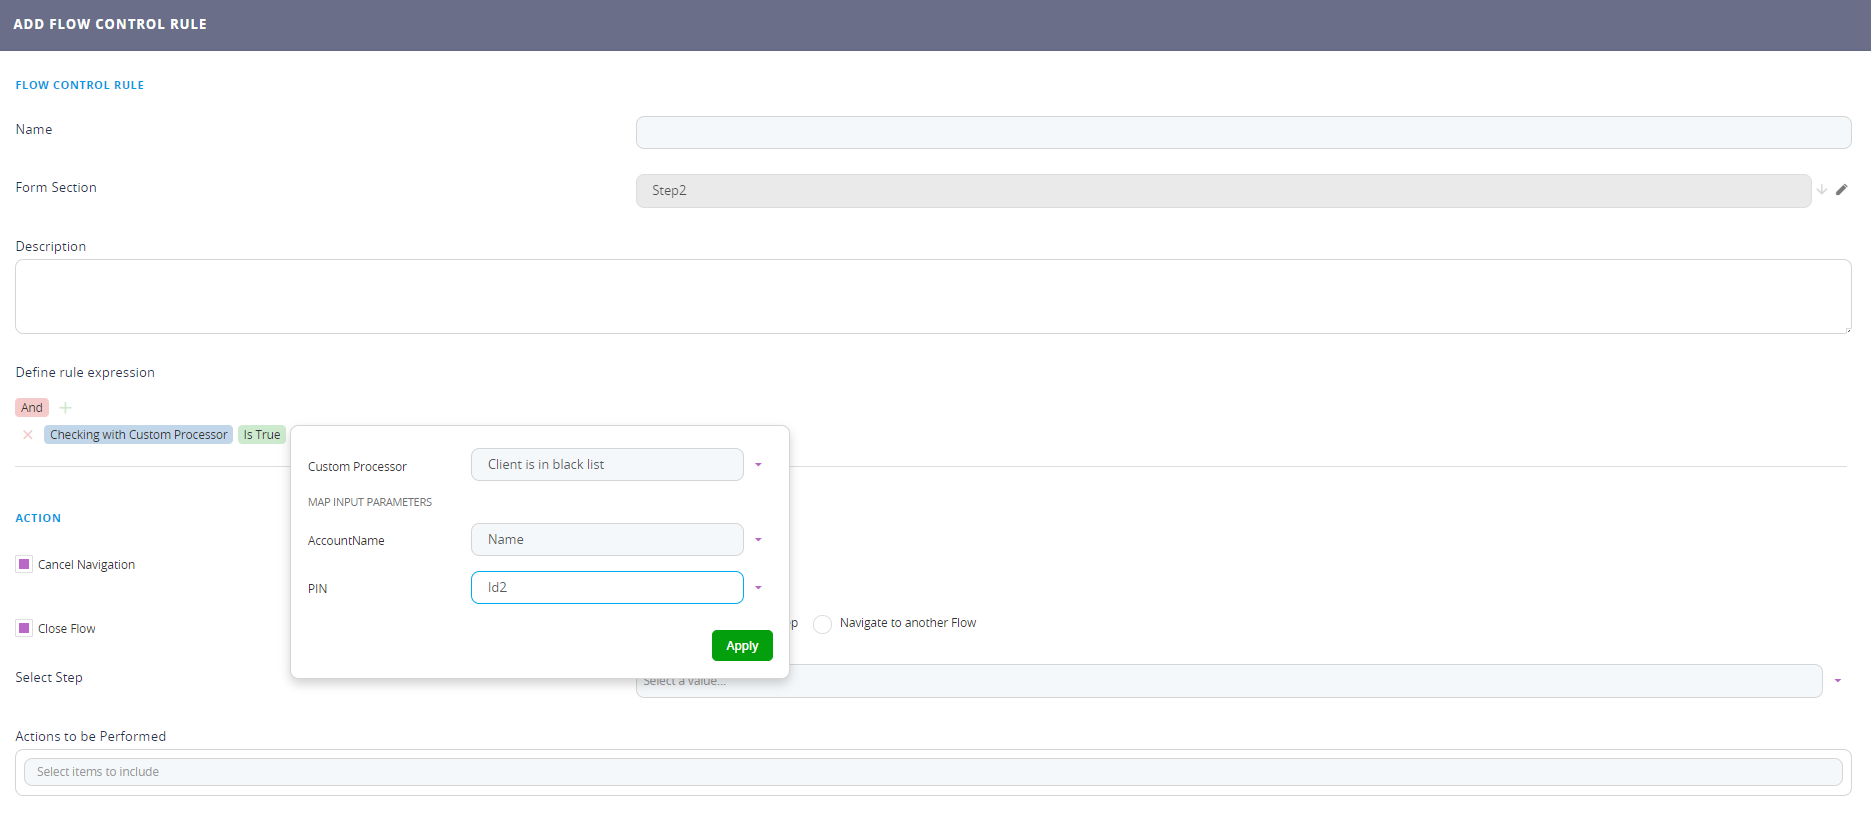
- Create the endpoint with the input and output mappings as bool in Server Automation Scripts. In the code section write the following line:
- Navigate to the Form Driven Flow, to the Flow Control, click the insert Rule.
- In the rule add the condition with checking the custom processor.
- Select from the option set the name of the endpoint and map the input and out put to the bool attributes you wish to have the data in.
- Click the ''Apply'' button.
- Select the next step where to navigate and click the ''Save and close'' button.
context.result = true;