FintechOS Identity Provider
The FintechOS Identity Provider is an OpenID compliant identity and access management solution based on the Keycloak authentication server. All FintechOS Platform components, such as FintechOS Studio, FintechOS Portal, or FintechOS API, are represented in the FintechOS Identity Provider as different clients of the same FintechOS realm.
The FintechOS Identity Provider supports two primary scenarios, depending on your infrastructure requirements:
-
Acting as an identity provider
-
Acting as an identity broker
| Use case | Identity Provider | Identity Broker |
|---|---|---|
| Create/Update Users | User accounts, including service accounts, must be created, updated, activated, or deactivated in FintechOS Studio. Changes are automatically synchronized with FintechOS IDP. User details such as phone number, user type, and name are also managed in Studio and synced accordingly. | Users are created and managed in an external identity provider, such as Microsoft 365. When a user logs into Studio, FintechOS IDP receives a token from the external IDP. If the user doesn’t exist in FintechOS IDP, it is created automatically, including mapped roles and business units. Studio then creates or updates the user based on the token. |
| Security Roles | All security roles, including business roles, are defined in Studio and automatically propagated to the FintechOS IDP. Role assignments for users are handled in Studio and synced with FintechOS IDP. Roles for service accounts are assigned directly in FintechOS IDP. | Roles are defined and managed in the external IDP (e.g., Microsoft 365). These roles are included in the token claims sent to FintechOS IDP, then mapped and passed to Studio, where they are assigned or updated accordingly. Roles for service accounts are not applicable in this scenario, as service accounts and their roles are managed externally or handled differently depending on the IDP setup. |
| Business Units | Creating, updating and assigning business units to user accounts is done in Studio. | Business unit mapping is based on token claims. If a business unit in the token doesn’t exist in Studio, it is created automatically under the root using the name provided in FintechOS IDP mappings. |
| Login Flows and Password Policies | Login flows and password change rules are managed directly within the FintechOS IDP. | Authentication, login flows, and password management are handled entirely by the external identity provider (e.g., Microsoft 365), not by FintechOS IDP or Studio. |
The FintechOS Identity Provider supports identity brokering, allowing users to log in to FintechOS applications and services using any external identity provider that supports the OpenID Connect standard. You can find examples for common external identity providers configurations below:
In the FintechOS Cloud Configuration Manager, set up the following secrets:
| Key Path | Key Name |
|---|---|
| kv/<environment>/<application>/app-settings | EBSDefaultAuthentication |
| kv/<environment>/<application>/app-settings | core-setting-external-auth-provider-key-url |
| kv/<environment>/<application>/app-settings | core-setting-external-auth-provider-issuer |
| kv/<environment>/<application>/app-settings | openid-client-id |
| kv/<environment>/<application>/app-settings | openid-client-secret |
| kv/<environment>/<application>/app-settings | openid-discovery-endpoint |
| kv/<environment>/<application>/app-settings | openid-callback-url |
| Key Name | Key Description |
|---|---|
| EBSDefaultAuthentication |
Specifies the identity provider:
IMPORTANT! In a non-standard scenario where a regular portal using FintechOS Identity Provider is linked to a B2C portal using legacy authentication, it is recommended to have each portal reside on a separate domain. The requests will pass successfully only if coming from FTOS IDP towards B2C (the other way around, errors may occur).
|
| core-setting-external-auth-provider-key-url | Link to the FintechOS Identity Provider public keys used to validate the digital signatures of the access tokens. E.g.: https://myHPFI.myDomain.com/auth/realms/fintechOSRealm/protocol/openid-connect/certs |
| core-setting-external-auth-provider-issuer | FintechOS Identity Provider instance identifier as provided in the issue field of the authentication token. This value is case sensitive. E.g.: https://myHPFI.myDomain.com/auth/realms/fintechOSRealm |
| openid-client-id | Your FintechOS Platform component's corresponding Client ID as defined in the FintechOS Identity Provider. E.g.: admin-portal, myInnovationStudio. In the FintechOS Identity Provider admin console, you can find the list of Client IDs in the Clients section of your FintechOS realm. 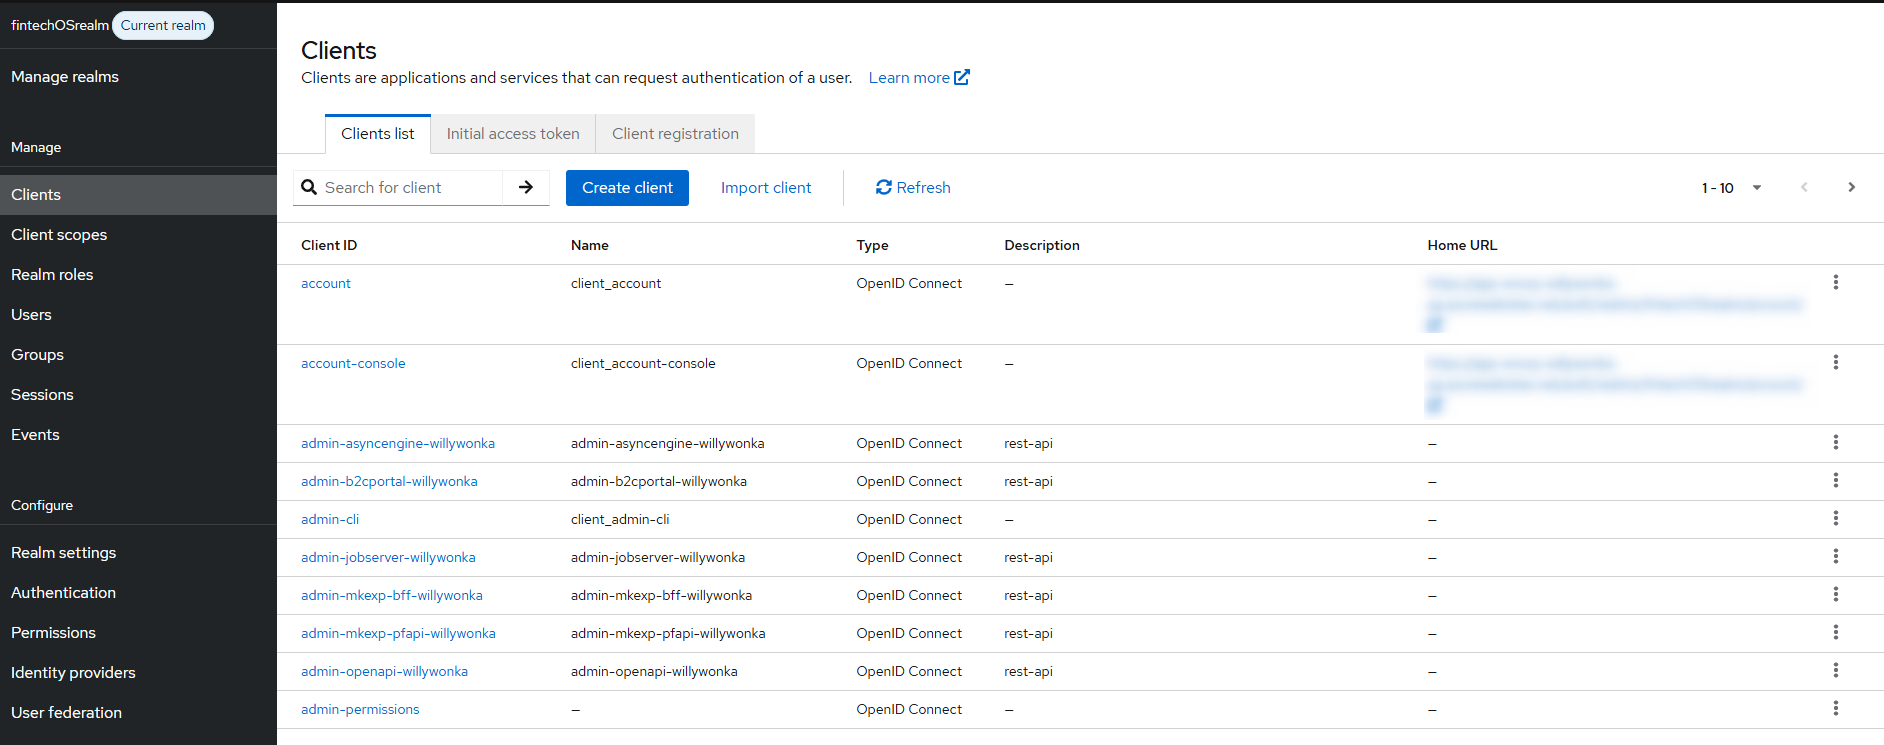 |
| openid-client-secret | Your FintechOS Platform component's corresponding client secret generated by the FintechOS Identity Provider. In the FintechOS Identity Provider admin console, you can find the client secret in the Credentials tab of your client's page.  |
| openid-discovery-endpoint | FintechOS Identity Provider endpoint. E.g.: https://myHPFI.myDomain.com/auth/realms/fintechOSRealm/.well-known/openid-configuration In the FintechOS Identity Provider admin console, you can find the discovery endpoint address in the Realm Settings section. 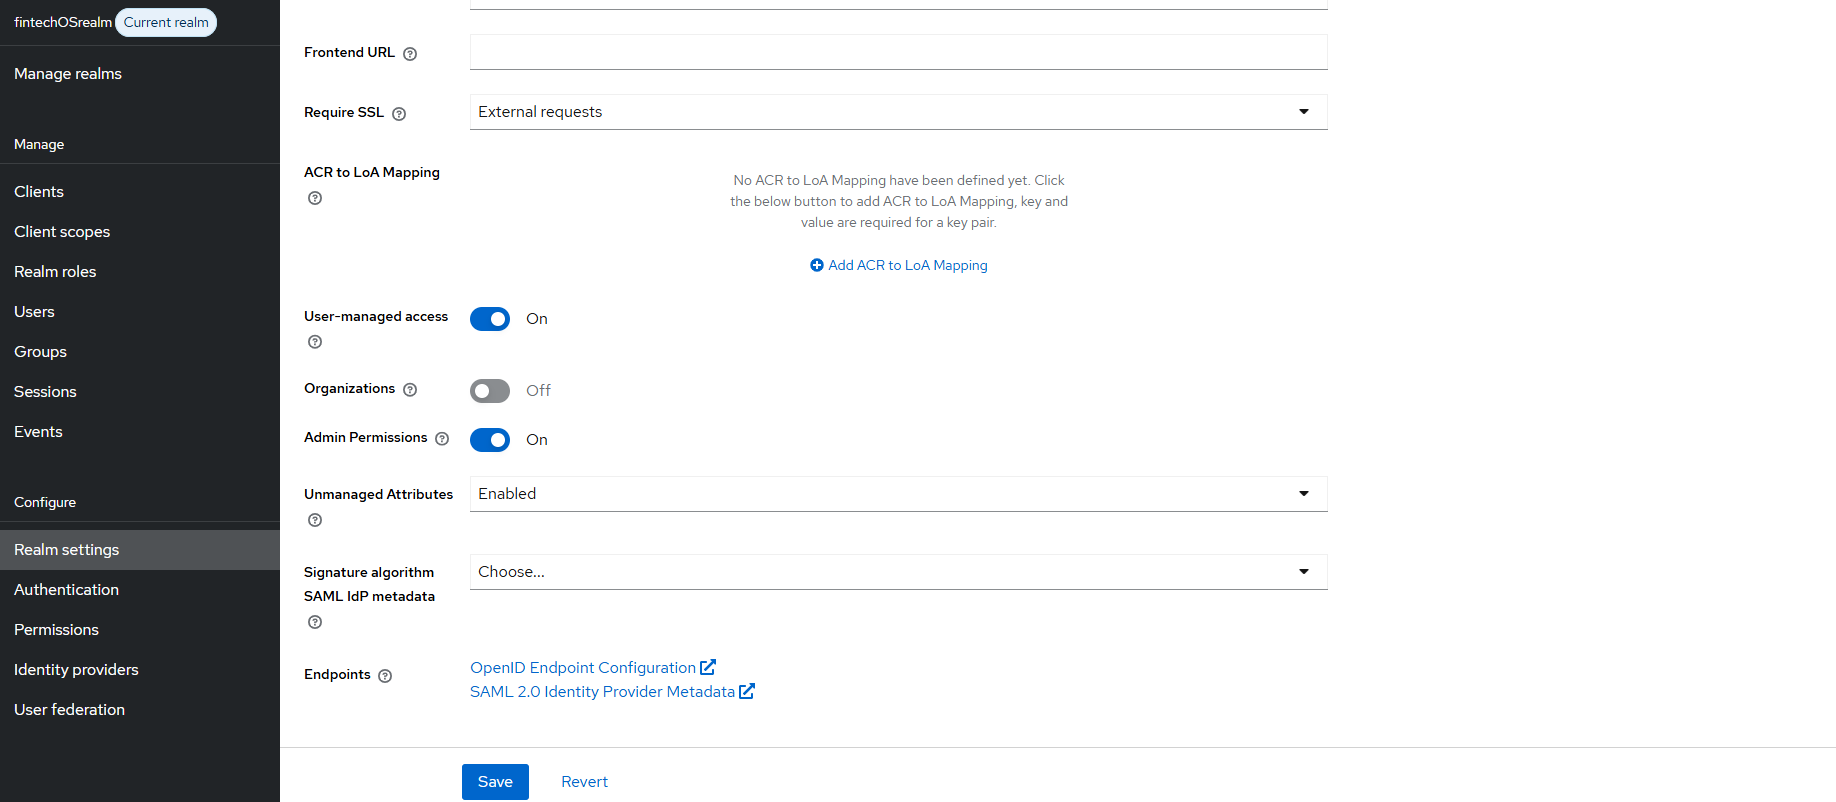 |
| openid-callback-url | URL where the user agent is redirected after a successful login. The default value is {<Studio/Portal base URL>/Account/LogonCallback. A matching entry must be configured in the FintechOS Identity Provider as a valid redirect URI for the client. |
Users Log in the Portal or Studio
When accessing the FintechOS Platform Portal or FintechOS Studio, users who have an active OpenID session are logged in automatically. Otherwise, they are displayed the FintechOS Identity Provider single sign-on login page and will use the OpenID account credentials to log in to the FintechOS Platform Portal or FintechOS Studio.
Activate User Login Logs
To view user logins on a certain environment, you need to use the Save Events option in the Identity Provider. The data retrieved is user ID, IP address, session ID, errors.
-
Login to the FintechOS Identity Provider for your environment.
-
Go to Realm settings > Events > User event settings.
-
Toggle Save events to On. The logging is activated and in IDP database, the Event_Entity table is populated with information about the login sessions. An entry is created at each successful user login.
-
Use a query in the database to retrieve the list, for example:
SELECT id, client_id, details_json, error, ip_address, realm_id, session_id, event_time, type, user_id FROMevent_entity WHERE type = 'LOGIN';.
To retrieve data about the current logged in user in Studio, use the ebs.getCurrentUserSessionsHistory Client SDK method.
FintechOS Platform User Account Automatic Synchronization
When a user logs in to FintechOS Platform Portal or FintechOS Studiousing the FintechOS Identity Provider single sign-on, the following information stored in the corresponding FintechOS Platform user account is updated automatically based on the FintechOS Identity Provider account settings:
- First Name
- Last Name
- Security roles
- External user ID (uniquely identifies the user by an external identity provider)
Service Accounts are a type of privileged accounts that gives the user elevated rights within the platform. Such accounts are set up in the FintechOS Identity Provider and are visible in Studio as well. They are client accounts and are not subject to regular password policies. This decreases the level of support needed to operate the platform and minimizes business disruption. Follow the steps below to create a service account:
-
Log in to the FintechOS Identity Provider admin console.
- Select your FintechOS Platform realm.
- Click Clients, select Create Client.
- Type in a name for the service account.
- In the Capability Config section, switch Client authentication on, and select Service accounts roles, click Save.
- To assign a role, go to Service accounts roles and select Assign role.
- Choose a role from the list.
- To make the account visible in Studio, in the Postman collection, add the new service account username to
auth.clientid. - In the Postman collection, get the token for the user, and then use GetEntities Metadata. The user is now visible in Studio > Security > System Users.

To unassign a role from a Service Account, use the options in the System Users menu entry.
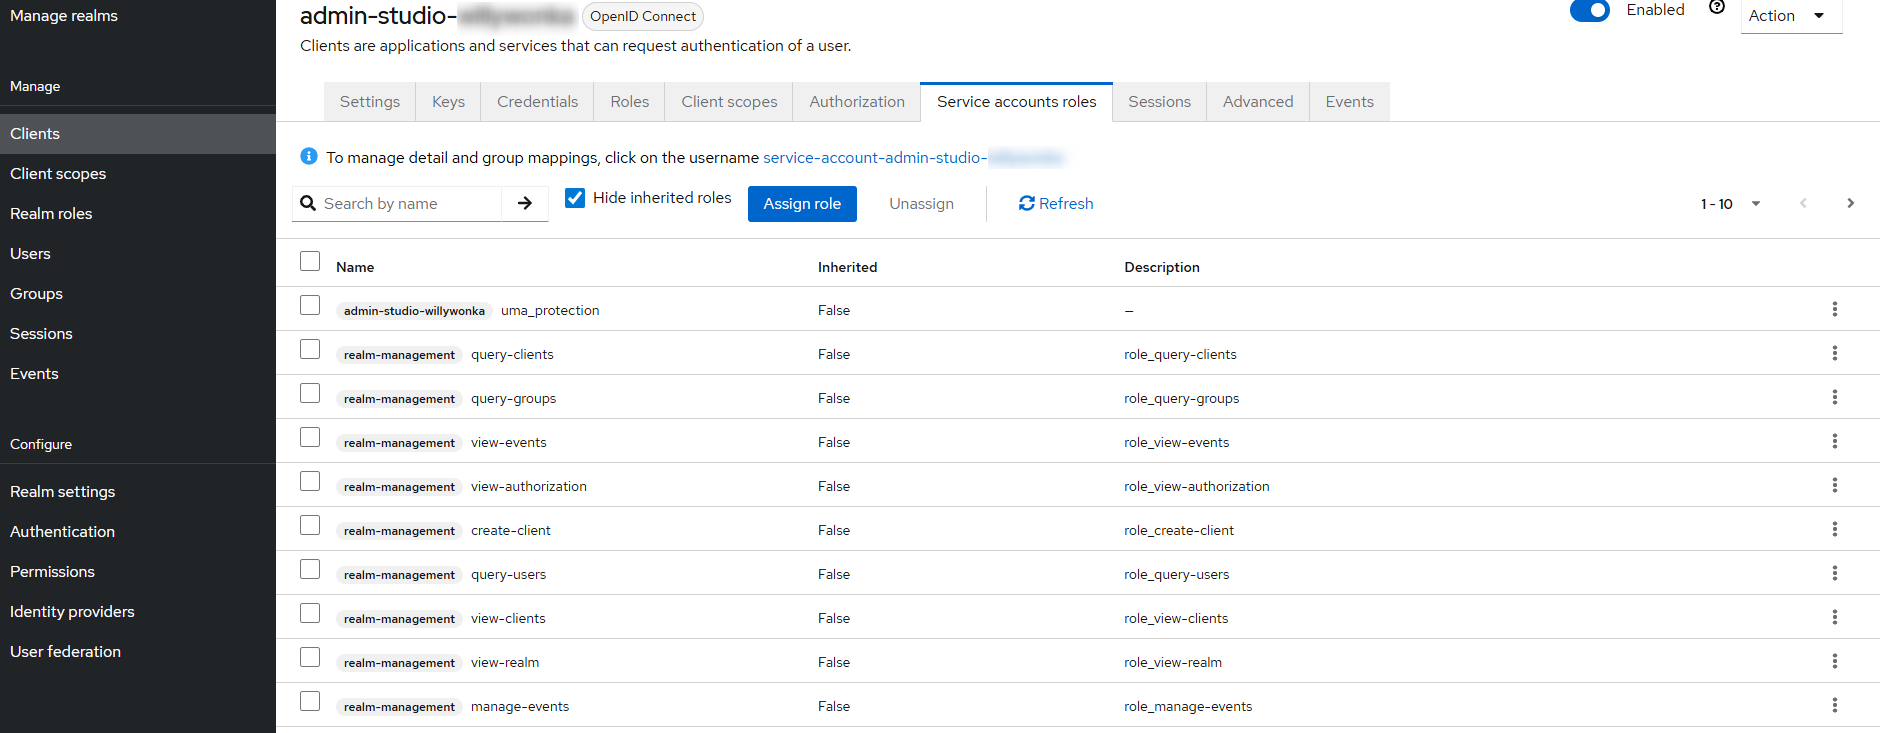
Add Roles to Service Accounts
FintechOS Studio clients require full privileges for membership management (CRUD operations with users, password change/reset, etc.). Roles for service accounts can be added from the FintechOS IDP or Studio. The following steps show how to add roles from the FintechOS IDP. Check the Manage Users page for how to add roles from Studio.
- Log in to the FintechOS Identity Provider admin console.
- Select your FintechOS Platform realm. From the main menu on the left, click Clients.
- Open the Studio client, and go to the Service accounts roles tab.
- Click Assign role and pick the roles from the list that opens. Click Assign to save.
Using a scheduled job, you can configure inactive accounts to be automatically deactivated after a certain period of time. Inactive accounts are accounts with no successful logouts or session expiry for a period of time that you previously defined.
Brokered users or service accounts or any technical identities used by platform components cannot be deactivated using this feature.
After the account is deactivated, the user receives an email informing them of this action. They can contact their administrator to have the account reactivated if needed. The administrator can activate the account by navigating in Studio to Security > System Users > Inactive Users, open the user details and tick the IsAuthorized box.
To deactivate user accounts manually, go to Studio and follow the steps described on the System Users page.
Configure the Scheduled Job
Follow the steps below to configure the scheduled job for deactivating users that haven't logged on or been active for a predefined period of time:
-
Login to the Configuration Manager for your environment. Navigate to Services and Triggers.
-
Under Services, update the
userInactivityPeriodparameter and add your own value. The default is 60 days. -
Under Triggers, find the
FTOS.DisableInactiveUsersServiceand update theEndTimeparameter for running the job and theExpressionfor when the job should be ran. -
Restart the Job Server app services.
Users receive an email informing them their accounts were deactivated and that they should contact their administrator for reactivation.
If the capability is configured to monitor auth activity on multiple realm clients, then inactivity on any of them will lead to deactivation on all.