System Users and Service Accounts
As with any secured application out there, to access FintechOS Studio you need a user account, referred as system user accounts. These user accounts can be created in Studio, by navigating to Security > System Users from the main menu.
Another type of users in FintechOS are service accounts. These are a type of privileged accounts that gives the user elevated rights within the platform. Such accounts are set up in the FintechOS Identity Provider and are visible in Studio as well. Service accounts can be created in the FintechOS IDP interface, as explained on the FintechOS IDP page, or from Studio, starting with v24.4.
When it comes to security roles, one or more can be associated at user level, enabling a simple process for promoting or revoking rights. You can grant access to the platform to both users within your organization, and to persons outside your organization who use company data to make decisions (external users). Users have access to the platform functionality based on the security role assignment. By default, all users are able to view and manage their account data in the My Account section.
Users with security roles such as Security Role Management, User Management, and User Admin can manage users.
In FintechOS, user type is a grouping for the users based on platform high level access (to not be confused with system roles).
The platform distinguishes three system user types:
-
Back Office - The user type that all users have when created. It does not have a special access scope, it is just a category.
-
Guest - It is just a category, it does not have any special platform access meaning. There can’t be two users with this type.
-
Portal - Used in implementation if there is a DNN Portal created that gets data from FintechOS.
Add System Users
- From the menu, click Security > System Users. The Active Users List page appears.
- Click Insert. The Add System User page appears.
- In the appropriate fields, provide the user credentials the user uses to log into the platform (Username, Password, Confirm Password).
- From the Business Unit drop-down, select the business unit to which the user belongs to.
- If you want the user to have full access privileges within the platform (Admin user), tick the Is Administrator checkbox.
- Tick the Is Guest box if the user you are creating has a guest account.
- Activate the user by ticking the Is Authorized checkbox. Unticking this box, deactivates a user account.
- Select the System User Type by selecting from existing user types or insert new ones based on your needs.
- Click Save and reload. The Edit System User page appears.
- From the Security Roles Role section, define the role assignment by clicking Insert existing and selecting the desired security role. A user can have multiple role assignments. The user has the access privileges and the level of access as defined by the security items within the selected security roles.
- Click Save and close to save the user updates.
Root is an important business unit that comes by default with FintechOS. A user configured under the root business unit can see all the records of the entities based on granted access rights.
You can now pass the credentials to users and recommend them to change the password at first login.
Change Password
At first login, system users should change the default password to a different one that also abides by the strong password rules. Passwords must contain a combination of uppercase letters, lowercase letters, numbers, and symbols.
-
In FintechOS Studio, in the top right corner of the screen, click Profile > My profile > Edit System User.
-
In the Edit System User screen, click the Change Password button at the bottom of the screen. A modal window opens where you need to add the current and the new passwords.
-
When done, click Save and reload.

Create Service Accounts
Depending on your infrastructure, you can manage service accounts from the FintechOS IDP, or create accounts in Studio, as explained below. Make sure you are working in a digital asset of type resources or digital app, and it is set to context, when creating service accounts. When creating a digital package, make sure to tick the Include Security Configuration to export this service account and its security roles as well. At import, the client secret is not imported in the destination environment, but rather a new client secret is generated.
-
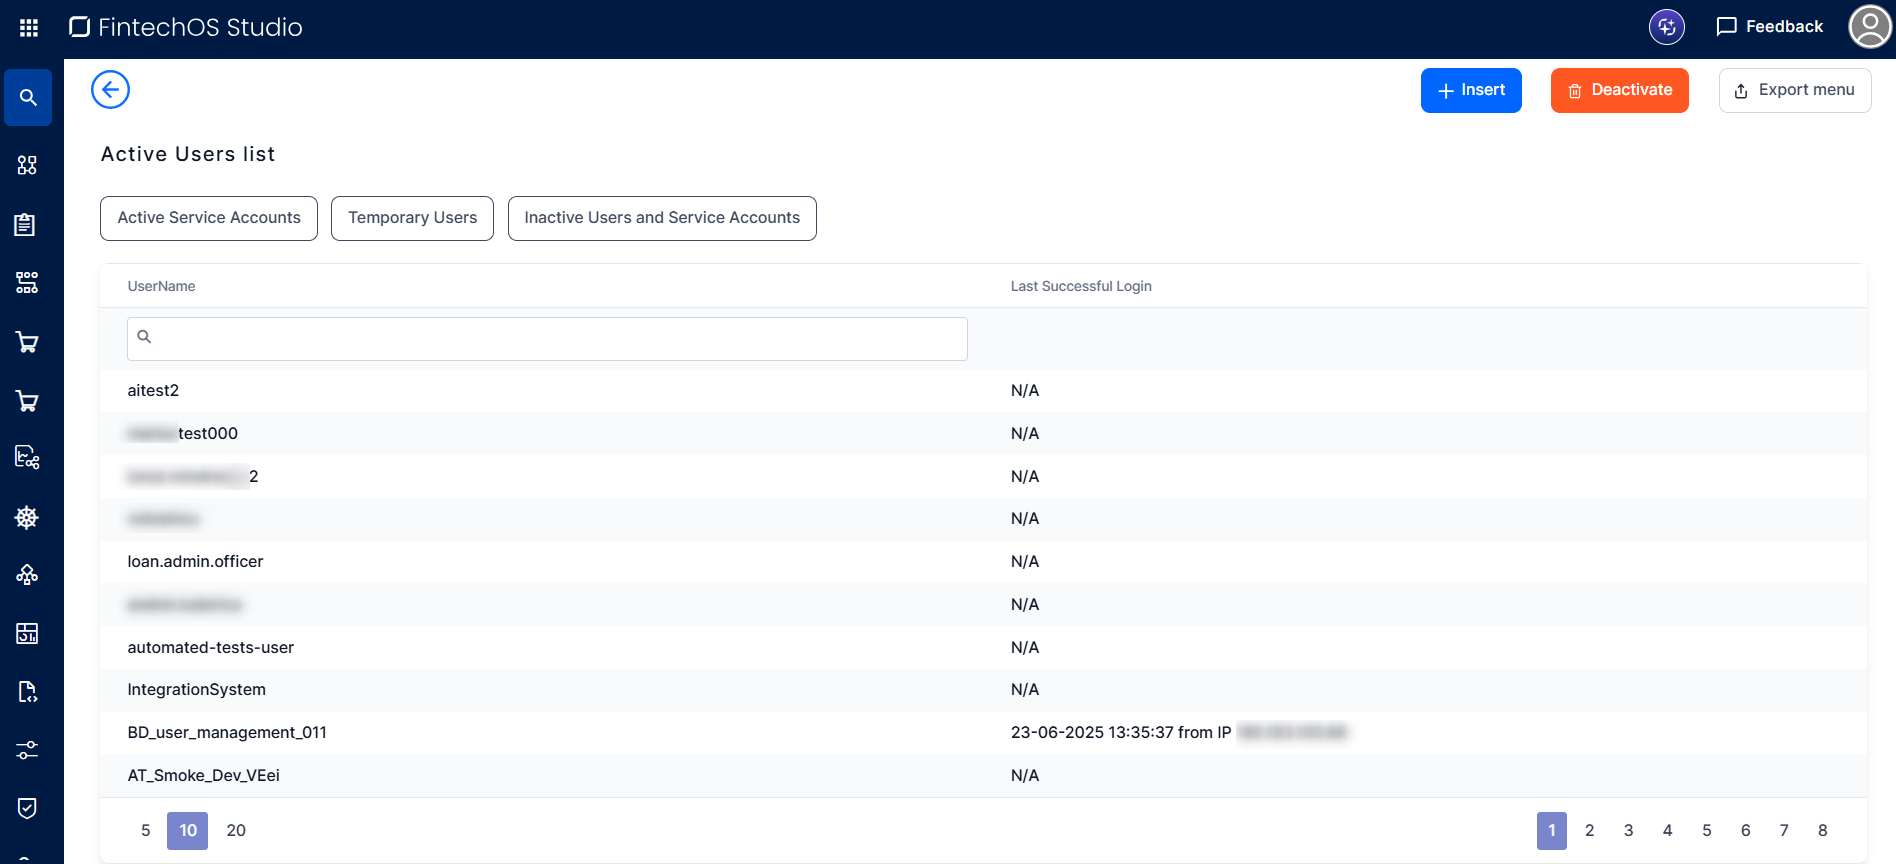
From the menu, click Security > System Users. Click the Active Service Accounts button, the Active Service Accounts list opens.
-
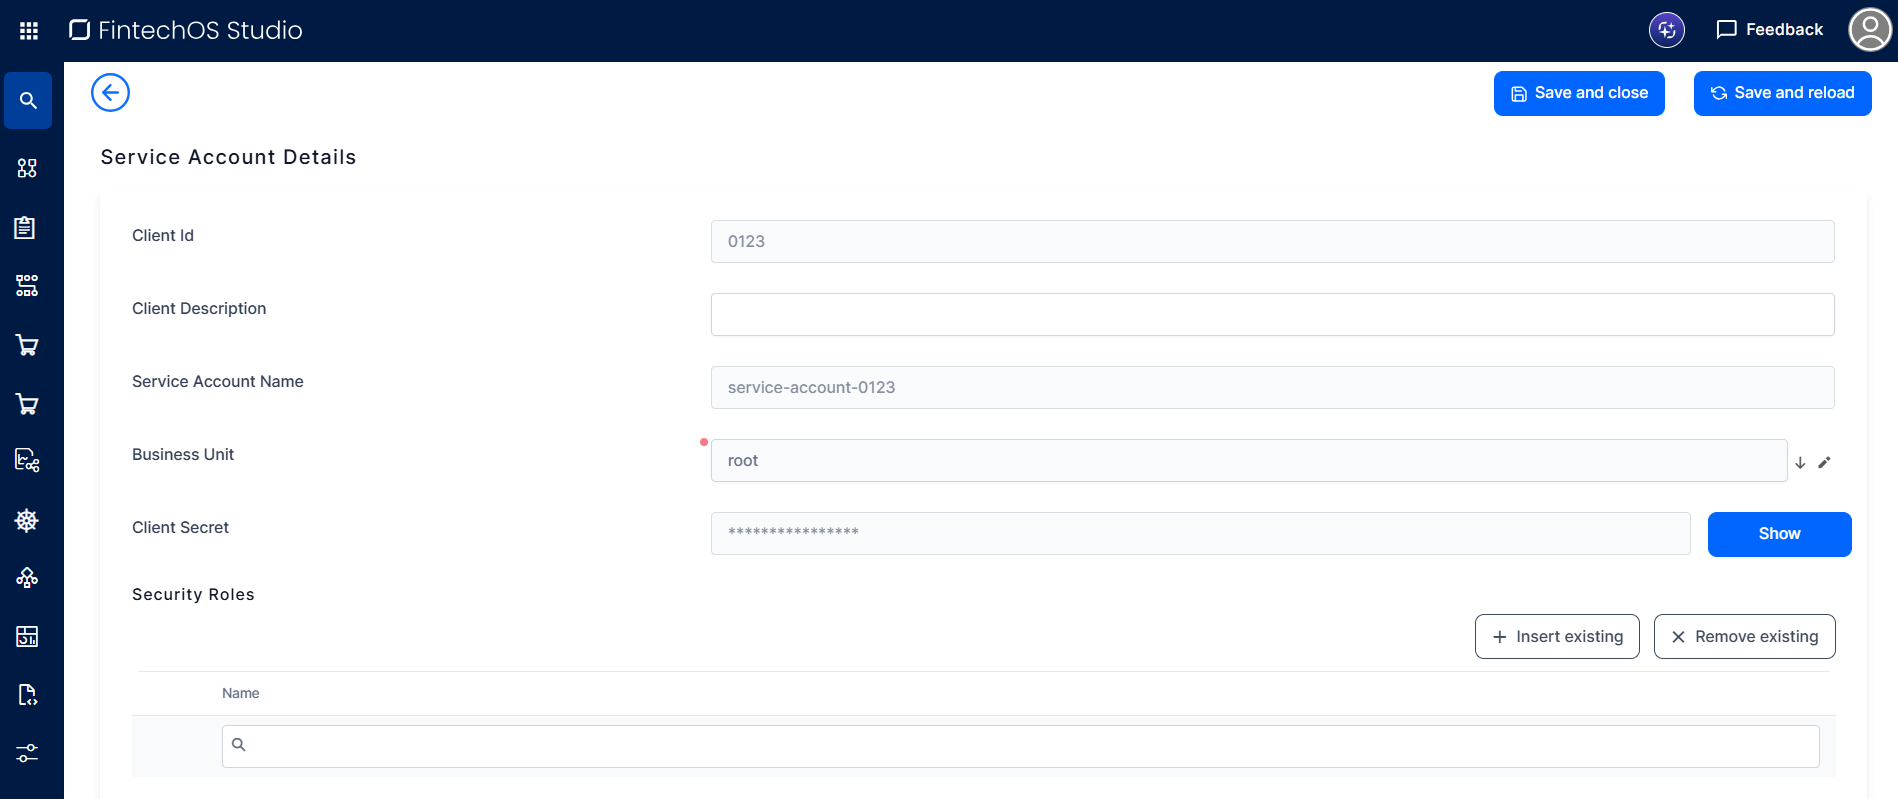
Click Insert Service Account, the Add Service Account form opens.
-
Add the Client Id. The name of the service account will be in the form
service-account-clientID, for example, if the client ID is 0123, the username will beservice-account-0123. -
Write a description explaining the purpose of this service account.
-
From the Business Unit drop-down, select the business unit to which the user belongs to.
-
Click Save and reload. The form is reloaded and the Client Secret is inserted. To view the secret, click the Show button.
-
From the Security Roles Role section, define the role assignment by clicking Insert existing and selecting the desired security role. A user can have multiple role assignments. The user has the access privileges and the level of access as defined by the security items within the selected security roles.
-
Click Insert to add other Business Units if necessary.
-
Click Save and close to save the service account.
Edit System Users or Service Accounts
You can edit users by changing their details, adding new security roles, editing existing ones, or removing security roles.
User management, more specifically manual user activation and deactivation, should be done from Studio.
To edit a user, from the Active Users list, double-click the active user whose details you want to edit. The Edit System User page opens. Make the desired changes and click Save and close.
This users view also displays the last successful login date, hour, and IP address.
The username field is read-only, you cannot edit it.
Click Active Service Accounts, Temporary Users or Inactive Users and Service Accounts to display lists of these types of users. If you have admin rights, you can delete temporary users by clicking the Delete Temporary Identity button.
You can also export lists of users by clicking the Export menu button.
Service Accounts in Digital Assets
Service accounts can be included in digital assets of type resources and digital apps. When adding a configuration item, choose System User from the drop-down and pick your service accounts from the list. Security roles linked to the service accounts are also included in the digital asset. When exporting a digital solution package the configuration rules related to security are the same as for all metadata.