Adding a User to Online and Mobile Banking
After the online request was registered, the user must visit a branch within seven days to activate the service of Online and Mobile Banking. Now the process involves the bank representatives (maker and, subsequently, the checker) who searches for the existing customer and associates the user to the customer.
The process has the following steps:
- Search for the customer
The maker looks for the customer in the database.
- Search for the user to associate them with the selected customer
The maker looks for the user in the database. If the user is not found, they create the user.
- Send the UserxCustomer for approval to the checker
The maker sends the record to the checker for verification.
- Approve a record/ Reset modifications
The checker decides to approve and activate the service for the user or returns the record to the maker for modifications if necessary.
1 Search for the Customer
This part of the process searches for the customer (and their accounts) to whom the user is going to have access.
A bank representative can search for the customers in Core Banking as well through the use of the integration done through an endpoint. However, it is not possible to insert/ create new customers.
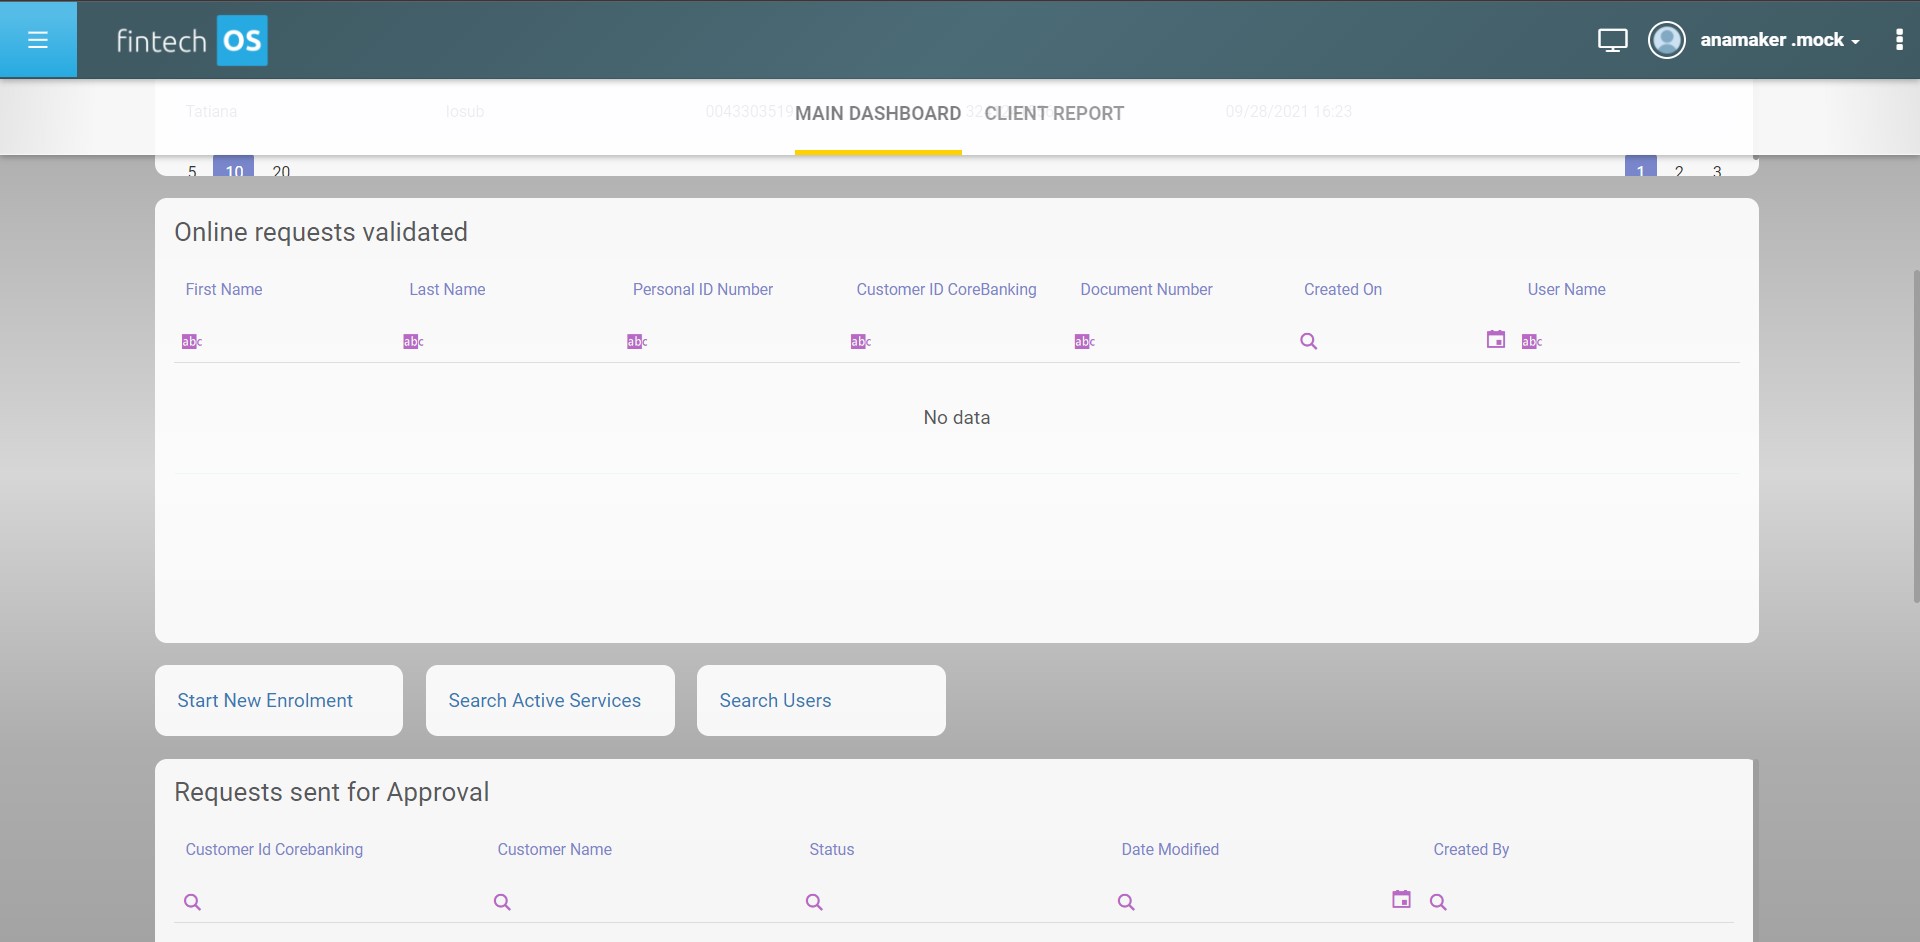
- Log in to the FintechOS Portal.
- Click the button Start New Enrolment from the dashboard. The page Customer Search in Core Banking is displayed.
- To search for an existing customer in Core Banking, fill in the following fields. When filling in the fields, it is mandatory to fill in at least three characters in any one of the fields. If three characters are not filled in, a toast message is displayed with the label Fill in at least three characters.
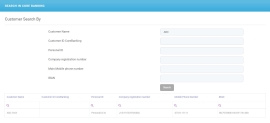
Fields Type Description Customer Name Text Insert the name of the customer. Customer ID CoreBanking Text Insert the ID of the customer. Personal ID Text Insert the Personal Identification Number of the customer. Company registration number Text Insert the company registration number (applicable for legal entities). Main Mobile phone number Text Insert the mobile phone number of the customer. IBAN  International Bank Account Number
Text Insert the International Bank Account Number of the customer. HINT
The search is done using the ''start with'' type of search, i.e. the customers are filtered through using the first three letters the begin with the letter/ numbers typed in. If you type a % symbol before the letters, the search type ''contains'' is activated, i.e., in Core Banking the search is done for the string of letters/ numbers also found inside.When no customer is retrieved from Core Banking, a toast message is displayed No customer found.
- Click Search. It returns the customers depending on the data inserted in the list.
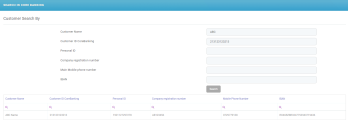
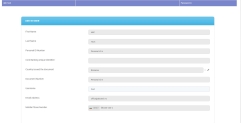
- Click on the entry displayed from the query to open a page with multiple section tabs. The first section tab is labeled Customer Info. To read more on each section tab, see Back-Office Administration. To continue the process of adding a user, proceed to step 2.

In step 2, there are two scenarios possible:
- when the user exists in the database
or
- when the user does not exist in the database
To check the existence in the database, search for the user first.
2 Search for the User to Associate them with the Selected Customer
Search of the user :
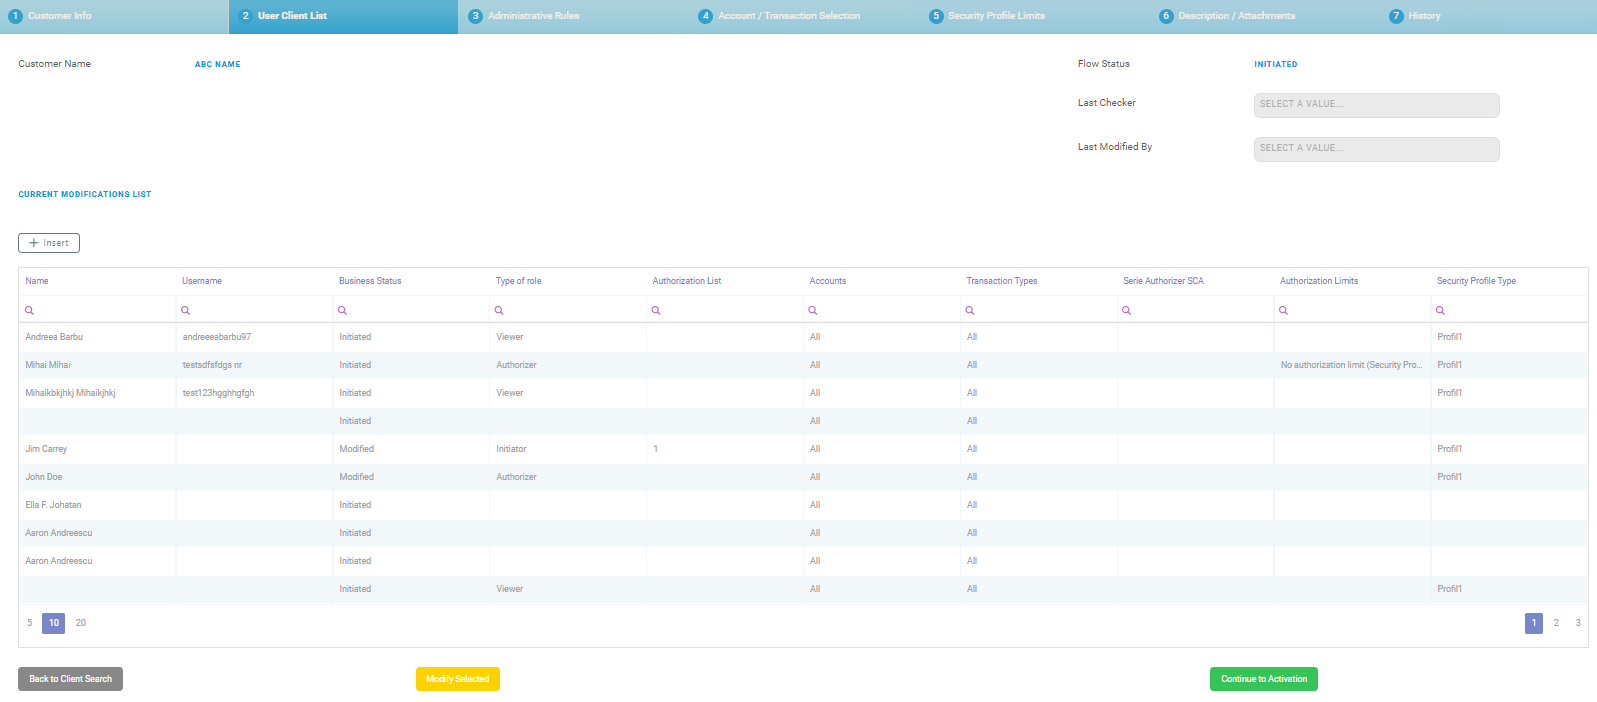
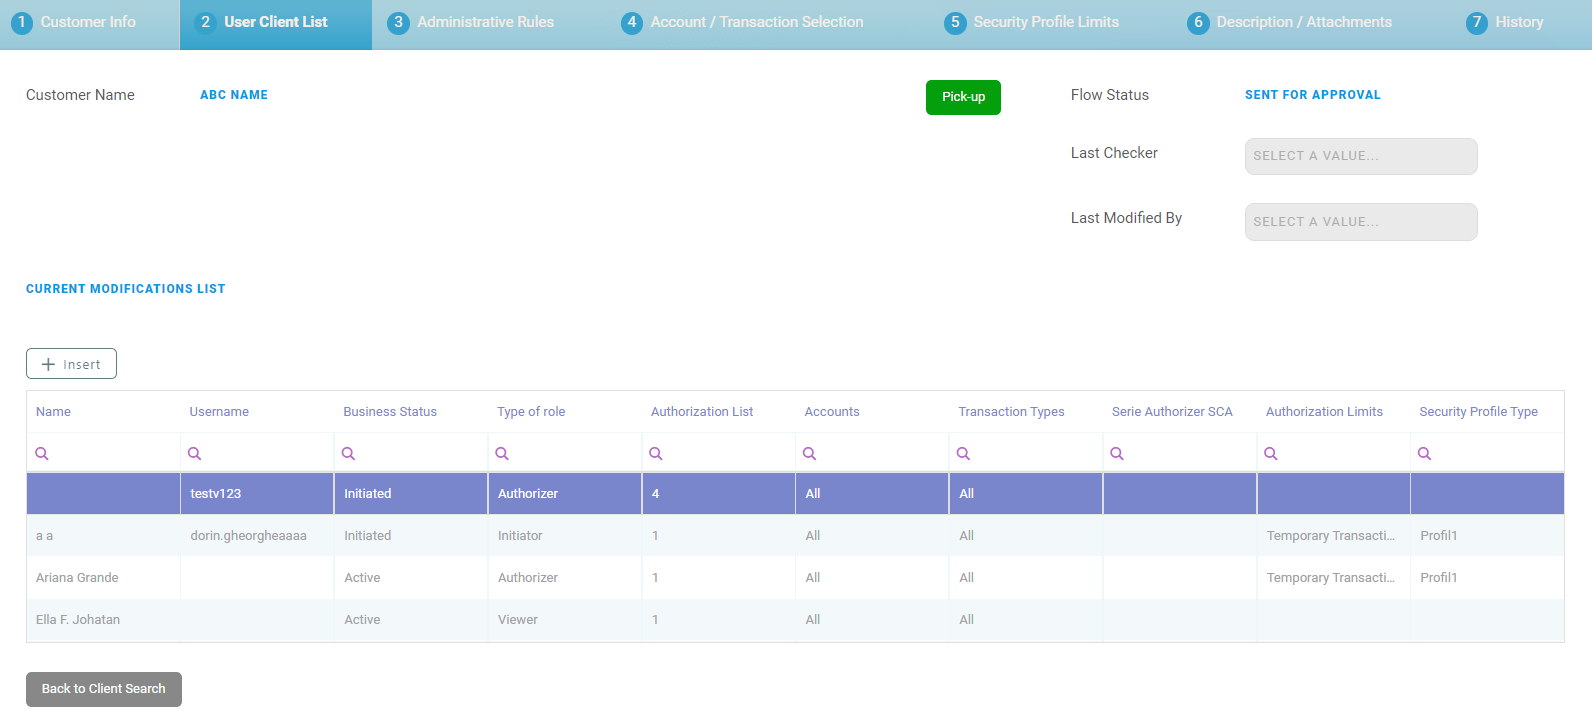
- On the User Client List page, navigate to the grid Current Modifications List.
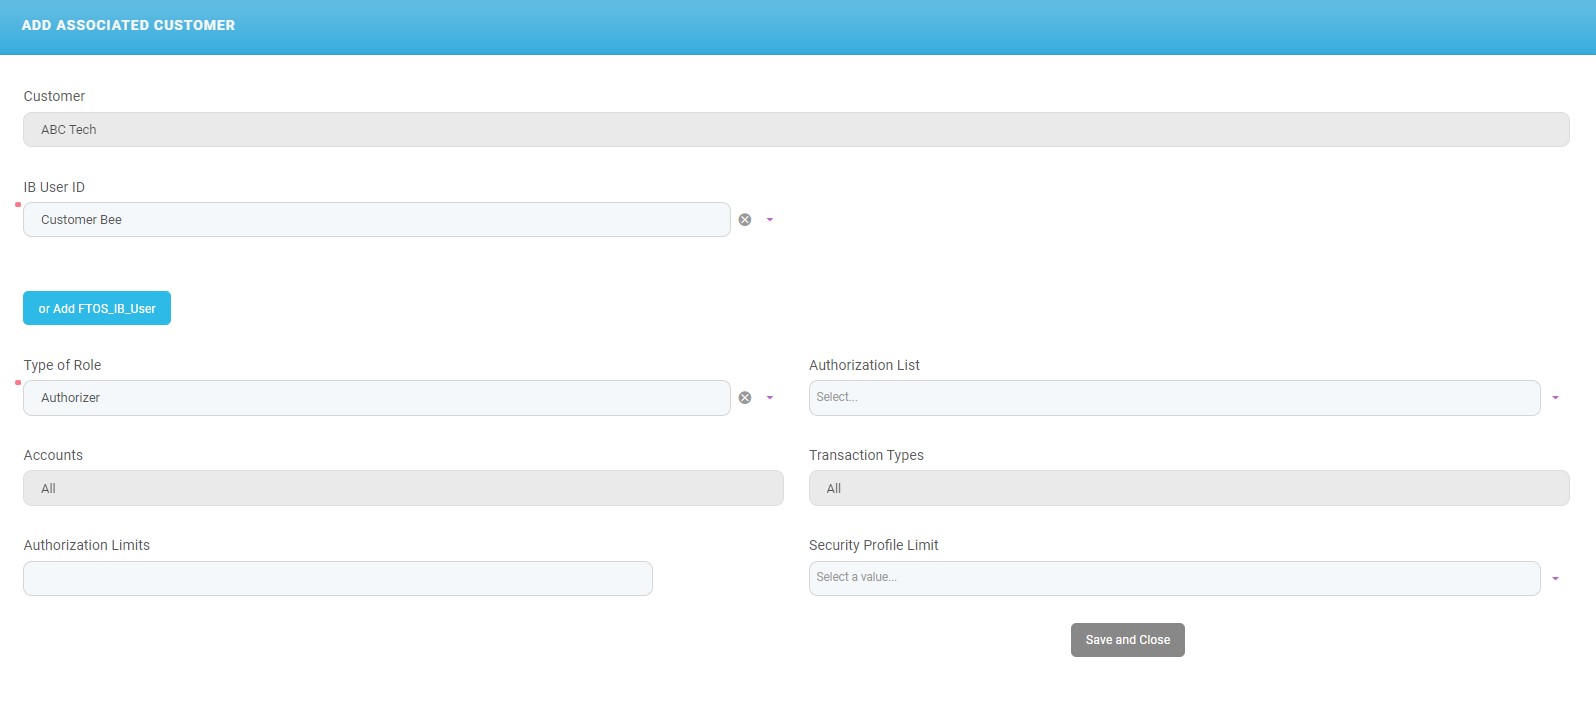
- Click Insert. The Add Associated Customer page is displayed. NOTE
This page is where the liaison between user and customer is done.
- Search for the user in the field IB User ID by clicking on the drop-down arrow to expand the list.
- Select the user by clicking their name. The field IB User Id is automatically filled in.
If the desired user ID not found in the drop-down list, follow the steps for:
From the drop-down list, select the name and fill in the data from the page Add Associated Customer.Creating a UserIf the user is not found on the page Add Associated Customer, then you have to create the user.
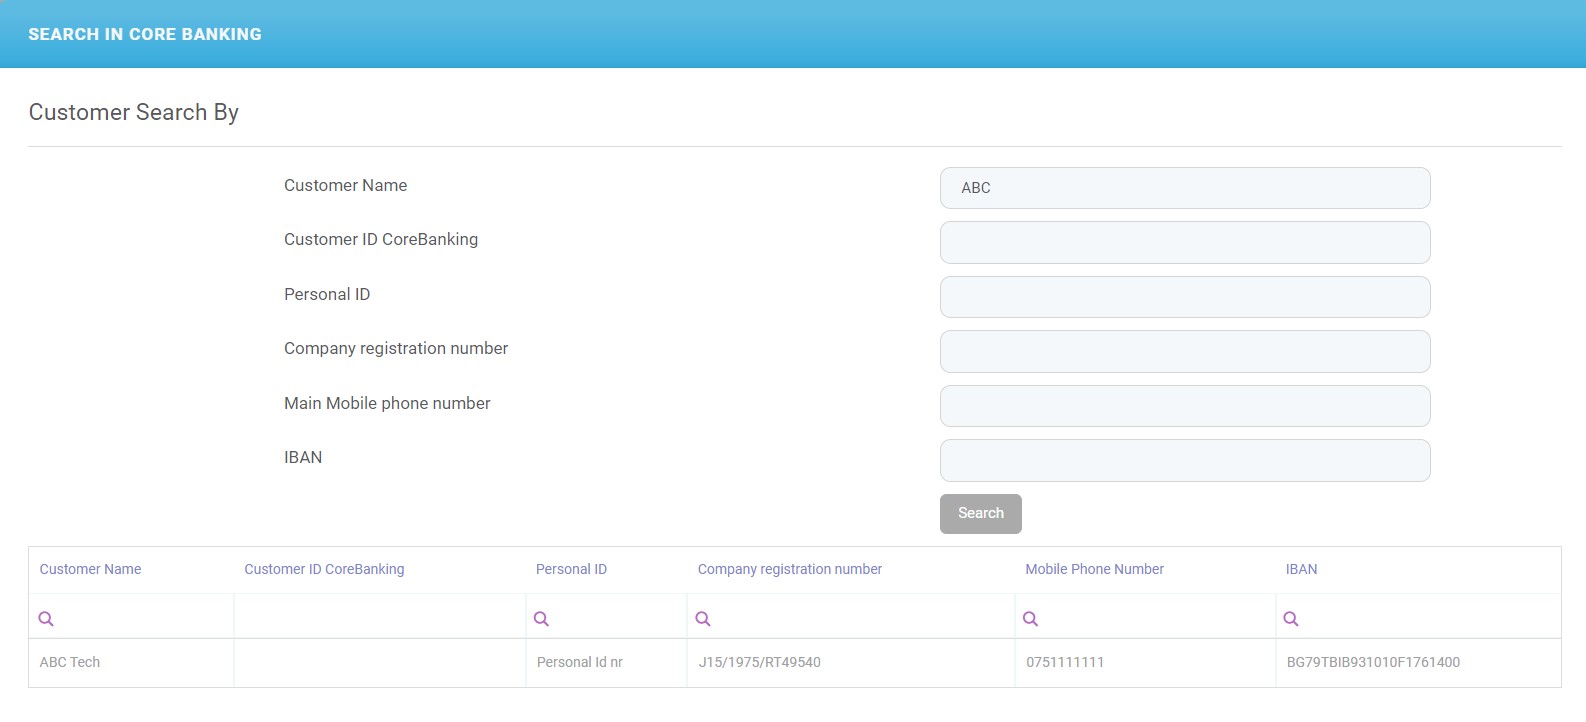
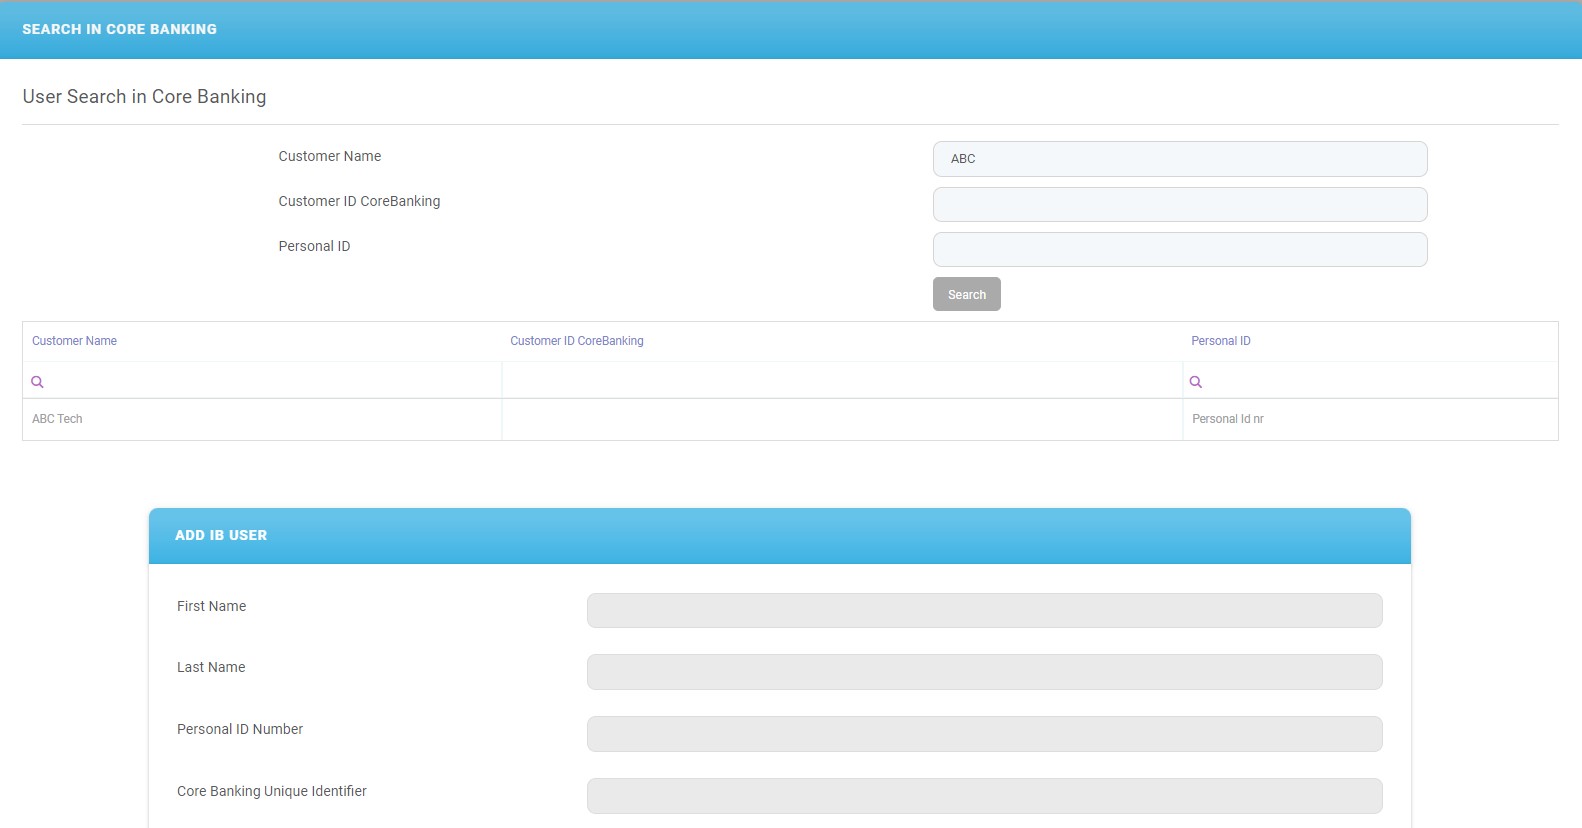
- Click the Add FTOS_IB_User button. The Search in Core Banking page is displayed.
- Fill in the following fields:
Field Data type Description Customer Name Text Insert the name of the user. Customer ID Core Banking Text Insert the ID of the user. Personal ID Text Insert the Personal Identification Number of the user. - Click Search. IMPORTANT!
For the search to be successful, there must be a record with:- First and Last name filled in
- Unique PIN
- Core Banking ID filled in
- Unique Email (the same email used in)
- Valid phone number.
- From the list of customers, select the row with the user.
- In the Add IB User section, the data is filled automatically with the information about the user:
Field Data type Description First name Text It is automatically filled in after the selection of the user. Last Name Text Personal ID Number Text Core banking Unique identifier Text Country issued the document Text Document number Text Username Text Email Address Text Mobile Phone Number Text - Click Create User. You are redirected to the page Add Associated Customer.
Field Data type Description Client ID Option set It displays the name of the customer on whose account the user is going to have access. Name Option set From the drop-down list, select the name of the user to be added to Online and Mobile Banking. The users displayed in this list already exist in the system.
If you are looking for a user who does not exist in the drop-down list, click the button Or Add FTOS_IB_User.
Type of role Option set Select the type of role the user has on transactions:
- Initiator (can view and input payments, but not to authorize any payments. An initiator has access to Account balance & Details, Account statements, and initiate payments)
- Viewer (can only view account information such as Account balance & Details, Account statements, but cannot initiate payments or authorize them)
- Authorizator (can authorize payments. An authorizator has access to Account balance & Details, Account statements, Initiate payments, Own Account transfers, Domestic payments, Budget Payments, Foreign currency payments, Bulk payments, Open New Products).
Authorization List Option set Select the authorization list to which the user belongs to:
- 1 (signs a payment first)
- 2 (signs a payment second)
- 3 (signs a payment third)
- 4 (signs a payment fourth).
HINT
These settings for the order of the signatures can be turned off using a system parameter. People can belong to different lists, but a user from any list can sign the payment regardless of the number they belong to.For details on authorization, see Signature Engine & Administrative Rules.
Accounts Option set Select between the two options:
- All (access to all accounts)
- Selected (access to some accounts).
The default value is All. To change the value it is possible only by navigating to the section tab Account/ Transaction Selection.
Transaction Types Option set It has two options:
- All (can initiate/view/authorize all types of transactions)
- Selected (can initiate/view/authorize some types of transactions).
The default value is All. To change the value it is possible only by navigating to the section tab Account/Transaction Selection.
Authorization Limits Option set Insert the maximum value the user can sign as payment.
The field enables setting up a maximum transaction limit for the cases in which there is no need for list-based signature schema.
Security Profile Limit Option set Select the profile desired for the user from the list. Depending on this profile, transaction limits are set. This is where the maximum value for which the user can sign a payment.
HINT
For example, if the Security Profile Limit is $1000, but the authorization limit is $700, the user is able to sign a payment valued at $700 maximum!- Click the Save button. The section tab User Client List is displayed.
If the user is already linked to the customer, then a toast message is displayed: The user is already associated with this customer!
The bank representative returns to the section tab User Client List. From here the maker sends the liaison to the checker to approve and activate.
- Click Continue to activation as explained in step 3.

At this point, the liaison is not active and cannot be used in Online and Mobile Banking. The checker must pick it up and activate it for the process to be 100% finished.
3 Send the UserxCustomer for Approval to the Checker
- For the Current Modifications List, click on the record you wish to send to the checker to approve and activate. The record has the status
Initiated. - After clicking on the record, click Continue to Activation. The field labeled Last Modified by is filled with the name of the maker who has sent it to be activated by the checker. The Flow status is now
Sent to approval.
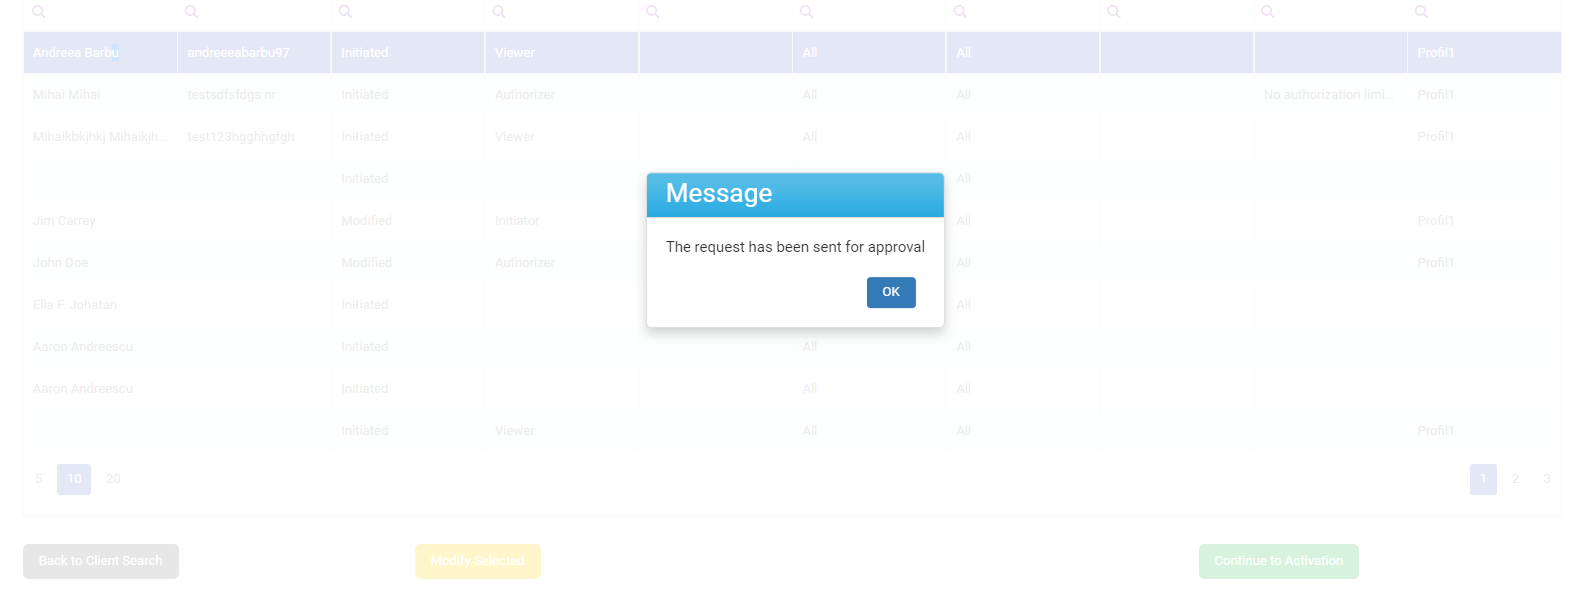
- A message is displayed: The request has been sent for approval.
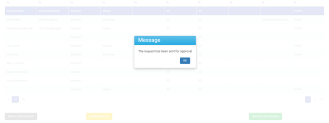
Click Ok.
From here, the checker can do the following things:
- approve and activate the record
or
- reject the record.
4 Approve a Record/Reset modifications
A checker must:
- Open the Innovation Studio.
- Navigate to the grid named Requests sent for approval.
- From the grid, select the record which was sent to activation.
- In the section tab User Client List, click Pick up. The Pick Up button saves the value of the current admin user in all records that have the flow status
Sent to Approvaland triggers the system to automatically change the flow status for all records inSent to ApprovaltoIn Progress Approval.
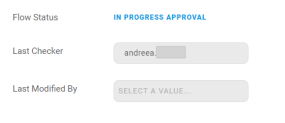
The button is disabled for the user that appears with the status
InitiatedorModifiedorTo Be Inactivated. In the field Last checker, the name of the checker is filled in. The flow status isIn progress approval. From here, there are two possible paths, a checker can do:- Approve & Activate the record
- Click Approve & Activate. The flow status is
Approved. The business status of the record isActive. The process has ended, and the system displays a pop-up message: Your request has been approved!. Now the user has access to Internet & Mobile Banking and can make payments!IMPORTANT!
All the records in the Current Modifications List with the statusInitiatedbecomeActivewhen the checker clicks the button Approve & Activate. - Click Ok. You are redirected to the homepage of the FintechOS Portal.
or
- Click Approve & Activate. The flow status is
- Reset Modifications to the maker.
- Click Reset Modifications. This button sends the record back to the maker to modify. The flow status is
Initiated.From this point, the maker does the adjustments. Then, the maker clicks Continue to Activation and the flow is the one described above.
- Approve & Activate the record
