Signature Engine & Administrative Rules
For SMEs and corporate customers, the application enables the possibility to define simple and complex joint signature schemas.
Signature Engine allows the definition of rules, the granularity of the set up can include:
- Specific/all accounts
- Specific/all transaction types (Foreign Currency Payments, Domestic Payments, Own Account Transfers, etc.)
- Specific/no limits per each transaction
- Specific currency for any limit set-up.
The engine allows the definition of up to 4 joint signatures, covering any complex case in the corporate area.
The rules are define based on lists and multiple users can be added to a list. This simplifies the rule administration and also reduces the number of changes in the system (e.g., whenever a user leaves the company and needs to be replaced).
The engine can be parametrized to either allow the signatures to be done in the exact same order as the lists are defined or in any order, as long as all signatures in the rule are present.
After a payment was initiated, it must be signed. To sign a payment, there is a rule (or multiple rules in place) deciding who signs it depending on the amount of the transfer and the users. These users have three roles in relation to the transaction:
- Initiator (can view and input payments, but not to authorize any payments. An initiator has access to Account balance & Details, Account statements, and initiate payments)
- Viewer (can only view account information such as Account balance & Details, Account statements, but cannot initiate payments or authorize them)
- Authorizer (can authorize payments. An authorizator has access to Account balance & Details, Account statements, Initiate payments, Own Account transfers, Domestic payments, Budget Payments, Foreign currency payments, Bulk payments, Open New Products).
A company has within the financial department five employees. Those employees have various levels of authority within the department. One bookkeeper and his trainee and several other accountants. With the aid of the signature engine, a bookkeeper can initiate a transaction and one of the accountants who is responsible for the type of transaction can approve it, while the trainee can never approve a payment. A trainee can only view the account and bank statements. The bookkeeper initiates the salaries bulk payment and the accountant who is responsible for the employee budget can approve it.
There are several configurations done in the back-office to allow the user to successfully authorize a payment:
- set the amount up to which an authorizer can sign
- set the people signing the type of transaction and the amount, i.e. the transaction types granted on certain accounts
- set the list to which an authorizer belongs.
| Transaction Types | Accounts | Amount (Maximum value) | Authorizer |
|---|---|---|---|
|
Bulk Payments |
BGXXX8745 |
EUR 5,000 |
One person from List 1 has to sign. |
| Foreign Currency Payments | ROXXX092323 | EUR 10,000 | Two people from List 1 have to sign. |
| Foreign Currency Payments | ROXXX093452 | EUR 100,000 | One person from List 3 and one person from List 4 have to sign. |
| Foreign Currency Payments | BGXXX6745 | EUR 9999999,999 | One person from List 1. |
This engine allows up to n authorizations on any transaction on any account, however, for the package has it set as 4 ( list 1, 2, 3, 4). When defining an administrative rule as defined below on this page, a user is placed in one of those lists.
Signature Schema
- Single signature
- Standard joint signatures
- Joint signatures and multiple limits
- Mixed signatures – Multiple S’s (Si Case)
- Mixed signatures S, A, B Case
- Mixed signatures multiple limits - Si, Aj, Bk
- Mixed Restricted joint signatures
A signature group is made of multiple levels of authorization for a payment, minimum 2 levels of authorization.
| Type | Number of signatures and people | Flow | Limits |
|---|---|---|---|
| Single Signature | One signature: one or many persons with authorization rights with equal signature rights. To authorize a payment, one signature is required. | The user initiates a payment, a person with authorization rights approves it. | Since there is one authorization needed to sign, only one limit for the amount can be set or no limits at all for those persons. |
| Standard joint Signature | Two signatures per payment are needed minimum 2 users, each with one level of authorization. | The user initiates the payment and two people approve it, two people with two different authorization levels part of the same signature group. |
|
| Joint signatures and multiple limits | Two signatures per payment are needed. Many people with authorization rights minimum 3, with two-level signatures. Each level contains one or many persons with the same signature type. | The user initiates the payment. The 1st level authorizer signs the payment within their limit. The second level authorizer signs the payment within their limit. |
|
| Mixed signatures – Multiple S’s (Si Case) |
To authorize a payment, one signature is required. Each signature has a different limit. Above a specified limit, a joint signature is required. |
The user initiates the payment. Any of the authorizers signs the payment within the limit. The user inputs the payment. Only the authorizer within the limit can sign the payment. The user inputs the payment. The first single signature authorizer signs the payment within their limit. The second single signature authorizer signs the payment within their limit. |
One limit per signature single signature and over individual limits the combination of the combined signatures. Business-wise, limits are defined on signature combinations. Limits applied: • Payments under 200,000 S1 or S2 (single) • Payments between 200,001 and 500,000 S2 (single) • Payments over 500,001 S1 & S2 (joint) |
| Mixed signatures S, A, B Case | Single and joint signatures and multiple limits. Users with single signature right have no limit. Above a specified limit, the joint signature is required. |
The user inputs the payment. Only the authorizer within the limit can sign the payment. The user inputs the payment. The first single signature authorizer signs the payment within their limit. The second single signature authorizer signs the payment within their limit. |
• In case no limits are set for any of authorizer users, the combination rule will be respected, single signature will fully authorize the payment and for the joint signature the 1st level and 2nd level signatures are expected as following next. • No limit per single signature. One limit per signature group is possible. • Business-wise, limits are defined on signature combinations. Limits applied:
|
| Mixed signatures multiple limits - Si, Aj, Bk | Single and joint signatures and multiple limits. Users with single signature right have no limit. Under a specified limit, single authorization scheme. Above a specified limit, joint signature is required. |
The user inputs the payment. Only the authorizer within the limit can sign the payment. The user inputs the payment. The first single signature authorizer signs the payment within their limit. The second single signature authorizer signs the payment within their limit. |
Limits applied: Payments under 10,000 S1, S2, A1A2, A1B1, A1B2, A1B3, A2B1, A2B2, A2B3 Payments between 10,001 and 100,000 S1, S2, A1A2, A1B2, A1B3, A2B2, A2B3 Payments between 100,001 and 200,000 S1, S2, A1A2, A1B3, A2B3 Payments between 200,001 and 500,001 S2, A2B3 Payments over 500,001 S1S2 |
A user can be an authorizer having the rights to view an account and a rule in Administration Rules enabling them to sign.
1 Setting an Authorization List
A maker sets the authorization list for the first time when they associate the user to the customer, see Authorization List for details. To edit the authorization list of a user:
- Open FintechOS Portal.
- Navigate to the Customer List.
- Select the customer for whom the modification is done. The page Customer info opens.
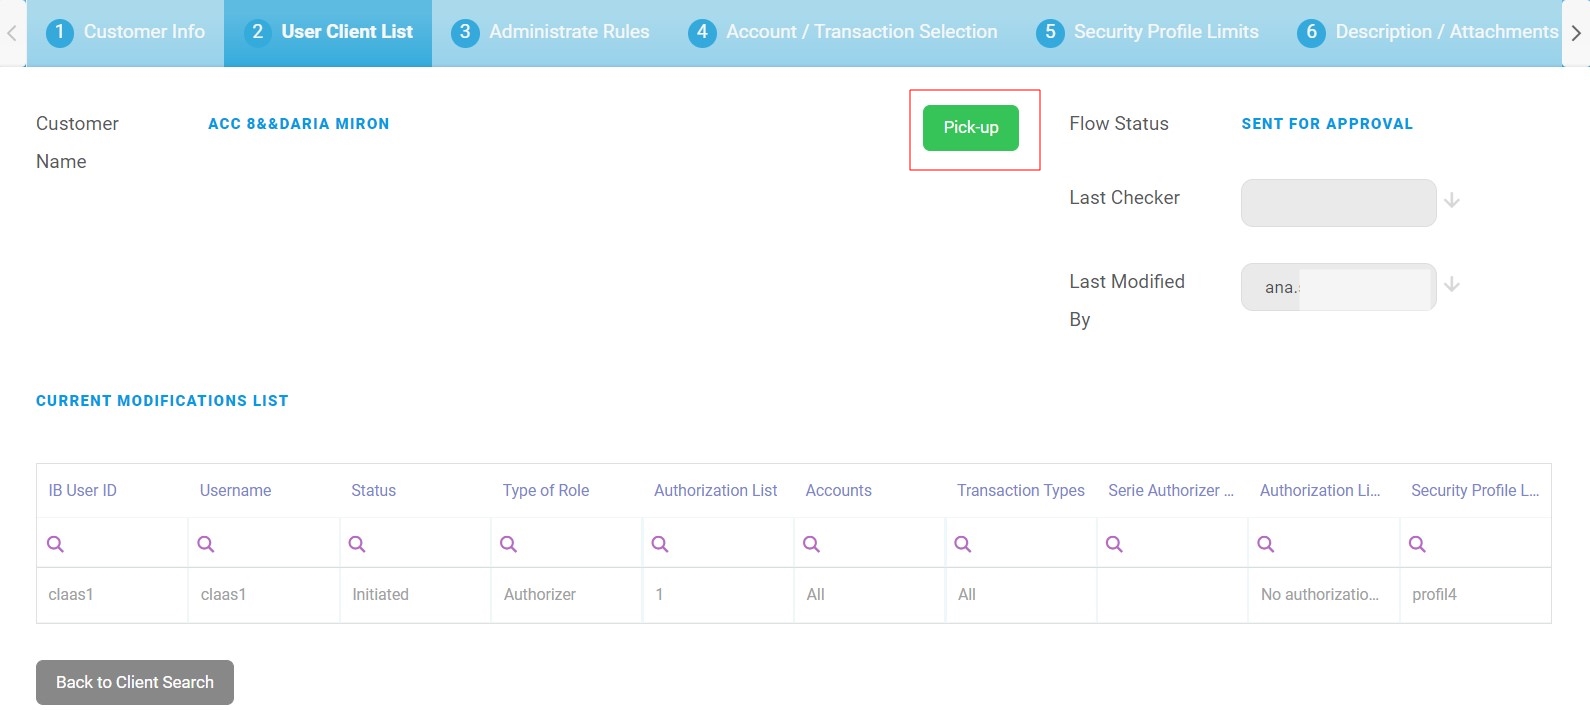
- Select the section tab User Client List.
- From the grid Current modifications list, select the user for whom the authorization list is modified by clicking once on the grid row.
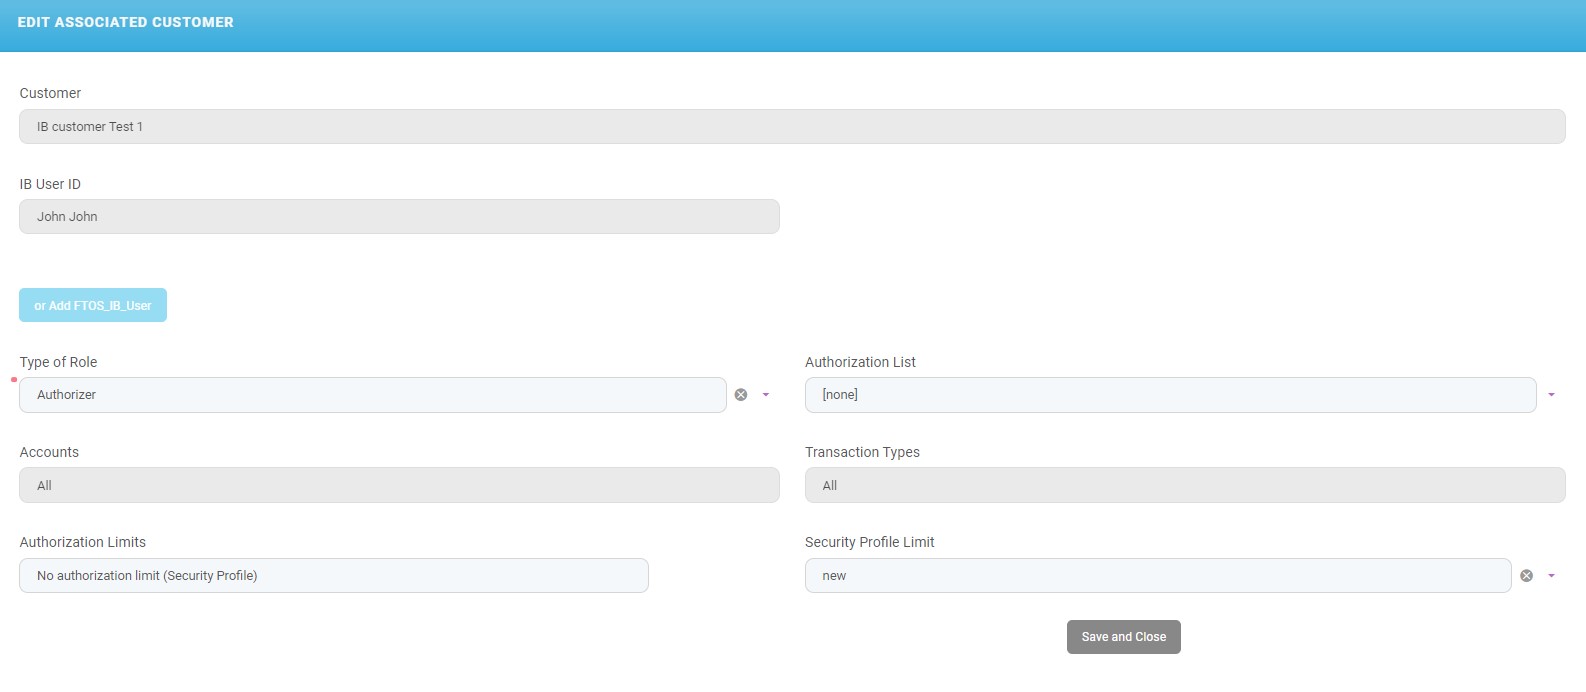
- Click Modify selected. The page Edit Associated Customer opens.
- For the field Authorization List, select from the drop-down the authorization list to which the user belongs:
- 1
- 2
- 3
- 4.
HINT
These settings for the order of the signatures can be turned off using a system parameter. People can belong to different lists, but a user from any list can sign the payment regardless of the number they belong to. - Click Save and Close.
- Click Continue to Activation. The field labeled Last Modified by is filled with your name, the name of the maker. The Flow status is
Sent to approvalbecause now the modification was sent to the checker for approval.A message is displayed: The request has been sent for approval.
- Click Ok.
From here, the checker can do the following things:
- Approve and Activate the record
or
- Reset Modifications.
Use this button when you do not wish the configuration to be approved.
Approving/Returning the Modification of a Customer
The checker must do the following:
- Open the Innovation Studio.
- Navigate to the grid named Requests sent for approval.
- From the grid, select the record which was sent to you.
- The section tab User Client List, click Pick up. The Pick Up button saves the value of the current admin user in all records that have flow status
Sent to Approvaland triggers the system to automatically change the flow status for all records inSent to ApprovaltoIn Progress Approval.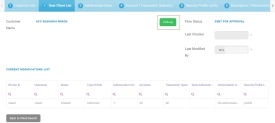
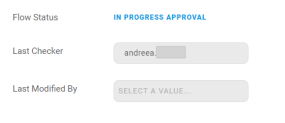
In the field Last checker, your name, the name of the checker is filled in. The flow status is
In progress approval.From here there are two possible paths:
- Approve & Activate the record
Click Approve & Activate. The Flow status is
Approved. The business status of the record isActive. The process has ended. Now the user has access to Online and Mobile Banking and can make payments.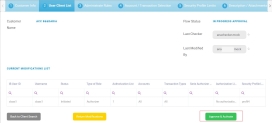 IMPORTANT!
All the records in the Current Modifications List with the statusInitiatedbecomeActivewhen the checker clicks the button Approve & Activate.or
- Reset Modifications.
Click Reset Modifications. This button sends the record back to the maker to modify. The flow status is
Initiated. From this point, the maker does the modifications necessary and can, then, click Continue to Activation and the flow is the one described above. - Approve & Activate the record


2 Setting Administrative Rules
This section tab holds the information regarding the setting for Signature Engine. The bank employee must do the following to create the rule that applies when the users sign a payment:
- Open the FintechOS Portal.
- Navigate to the Customer List.
- Select the customer for whom the rule is created by double-clicking on the entry. The Customer info page is displayed.
- Click Administrative Rules section tab. Two grids are displayed: Current Modifications List and Active Settings (Before Current Modifications).
- Click Insert for the grid Current Modifications List. The page Add IB Signature Rule is displayed.
- Fill in the following:
Field Data Type Description Transaction Type Lookup Select from the list the type needed. Accounts Lookup Select from the list accounts owned by the customer. List 1 Option set Select from the list: - 1
- 2
- 3
- 4.
List 2 Option set Select from the list: - 1
- 2
- 3
- 4.
List 3 Option set Select from the list: - 1
- 2
- 3
- 4.
List 4 Option set Select from the list: - 1
- 2
- 3
- 4.
Amount Numeric Insert the value. Currency Lookup Select from the list the currency for that amount. - Click Save to register the modification.
or
To call off the modification, click Cancel.
Approving/Returning the Modifications to a Rule
A checker must do the following:
- Open the Innovation Studio.
- Navigate to the grid named Requests sent for approval.
- From the grid, select the rule which was sent to you.
- The section tab User Client List, click Pick up. The Pick Up button saves the value of the current admin user in all records that have flow status
Sent to Approvaland triggers the system to automatically change the flow status for all records inSent to ApprovaltoIn Progress Approval.In the field Last checker, your name, the name of the checker, is filled in. The flow status is
In progress approval.From here there are two possible paths:
- Approve & Activate the rule
Click Approve & Activate. The flow status is
Approved. The business status of the record isActive. The process has ended. Now, the rule has been approved.or
- Reset Modifications.
Click Reset Modifications. This button sends the rule back to the maker to modify. The flow status is
Initiated. From this point, the maker does the modifications necessary and can, then, click Continue to Activation and the flow is the one described above.
- Approve & Activate the rule
Modifying a Rule
To modify a rule, a maker edits the rule and sends the rule for activation to the checker. A rule must have the first status Active before any modification. The grid Active Settings (Before Current Modifications) displays the entry from which a modification is in progress. The entry has the status Active, while the first grid has the same entry with the status Modified.
The maker does the following:
- Open the FintechOS Portal.
- Click the button Search Users.
- Type a value in one of the columns: User name, first name, last name, mobile phone number, email address, personal ID number, Core Banking Unique Id, System User Id.
- Select the user needed for the modification from the grid.
-
On the page Edit IB User, in the grid Associated Customers, select the customer. The User Client List page is displayed.
- Click Administrative Rules section tab.
- In the grid Current Modifications List, select a rule and click Modify selected. The page EDIT IB SIGNING RULE is displayed.
- Modify the rule as needed and click Save. The record has the status
Modifiedin the grid Current Modifications List and the statusActivein the grid Active Settings (Before Current Modifications).
Approving/Returning a Modification
A checker does the following:
- Log in the FintechOS Portal with the given credentials.
- From the grid Requests sent for Approval, double-click the record with the business status To Be Inactivated. The page Administrative Rules opens.
- Click the section tab named User Client List.
- Click Pick up. The Pick Up button saves the value of the current admin user in all records that have slow status
Sent to Approvaland triggers the system to automatically change the Flow Status for all records inSent to ApprovaltoIn Progress Approval.In the field Last checker, the name of the checker is filled in. The flow status is
In progress approval.From here there are two possible paths:
- Approve & Activate the rule
Click Approve & Activate. The flow status is
Approved. The process has ended. Now the rule has been approved.or
- Reset Modifications.
The checker clicks Reset Modifications. This button sends the rule back to the maker to modify. The flow status is
Initiated. From this point, the maker does the modifications necessary and can, then, click Continue to Activation and the flow is the one described above.
- Approve & Activate the rule
3 Inactivating a Rule
Inactivating a rule means that the rule is no longer in use and the configurations are not applied on payments.
A maker does the following:
- Open the FintechOS Portal.
- Click the button Search Users.
- Type a value in one of the columns: User name, first name, last name, mobile phone number, email address, personal ID number, Core Banking Unique Id, System User Id.
- Select the user needed for the inactivation from the grid.
-
On the page Edit IB User, in the grid Associated Customers, select the customer. The User Client List page is displayed.
- Click Administrative Rules section tab.
- In the grid Current Modifications List, select the active rule by clicking once on the entry in the grid.
- Click Inactive. IMPORTANT!
You cannot inactivate a rule from the grid Active settings (before current modifications). A toast message is displayed. First click Reset the modifications or click Activate & Approve for the rule, then turn the rule inactive.The record is saved automatically. The rule is displayed in the grid Current Modifications List with the business status
To Be Inactivated.
From here, it is the checker who finishes the inactivation.
Approving the Inactivation
A checker does the following:
- Log in the FintechOS Portal with the given credentials.
- From the grid Requests sent for Approval, double-click the record with the business status
To Be Inactivated. The page User Client List is displayed. - Click Pick up. The Pick Up button saves the value of the current admin user in all records that have flow status
Sent to Approvaland triggers the system to automatically change the flow status for all records inSent to ApprovaltoIn Progress Approval.In the field Last checker, the name of the checker will be filled in. The Flow status will be
In progress approval. From here there are two possible paths:- Approve & Activate the rule
Click Approve & Activate. The flow status is
Approved. The business status of the record isActive. The process has ended. Now the rule is inactive.or
- Reset Modifications.
Click Reset Modifications. This button sends the rule back to the maker to modify. The flow status is
Initiated. From this point, the maker does the modifications necessary and can, then, click Continue to Activation and the flow is the one described above.
- Approve & Activate the rule
Scenarios of authorization of payments
If an Authorizer has rights granted in the section tab Accounts/Transactions selection to view and initiate a certain transaction type and doesn’t have rights for authorization based on the transaction types, however in Signature Engine (Administrative Rules) they are part of a rule which enables that, the rule has priority and they are able to sign according to the rights in Signature engine.
If an Authorizer has rights granted in the section tab Accounts /Transactions selection to view and initiate a certain transaction type, but in Signature Engine (Administrative Rules) they have some rules which do not include explicitly those types of operations (view and initiate), then they cannot see the transaction and are not able to sign a payment.
If an Authorizer doesn’t have rights granted in the section tab Accounts/Transactions selection to view a certain account, but in Signature Engine (Administrative Rules) they are part of a rule which is enabled on All accounts, they cannot view the payment for authorization and are not able to authorize because they do not have rights to view on that account.