Premium Amount
The Premium Amount tab allows you to configure how premium amounts are calculated for your insurance product, or product items (coverages), by attaching calculation formulas to them. You can also change previous configurations by deleting attached formulas and inserting new ones, if needed.
Based on the Tariff Type - previously chosen in the Tariff Configuration section, on this tab you can either see the Insurance Product Formula grid or the Insurance Product Item Formula grid.
Only one formula can be attached to a specified product, or product item (coverage), at a time.
Add Insurance Product Formula
Prerequisite: You must have previously selected the Per Product tariff type, in the Main Info product tab. This selection makes the Add Insurance Product Formula insert form available in the Premium Amount tab.
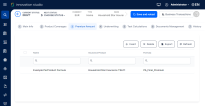
Below, an example of the insurance product with an attached insurance product formula:
The insert form is editable. You can delete a configuration and attach some other formula - instead of the previously chosen one, if needed.
To add a formula that helps you calculate the premium amount per product, follow the steps below:
-
In the Premium Amount tab, click Insert.
-
The Add Insurance Product Formula insert form opens. Notice the name of the insurance product being auto-completed and not editable.
-
In the insert form, fill in a descriptive Name for the formula.
-
Use the picker (arrow) to select from the list a Formula to be appended to the current product for premium amount calculation.
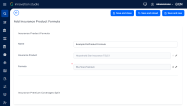
Below, an example of the insurance product formula insert form, with some filled in details:
-
Click Save and reload.
-
Move to the next step, below.
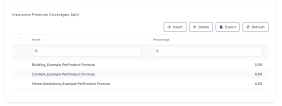
After Save and reload, the Insurance Premium Coverages Split section becomes available, too - at the bottom of the form.
Below, an example of the coverages split grid, available after save and reload:
There are cases when the Premium Coverage Split is necessary for the premium calculation - for example when you make a Proposal Configurator API call in order to get prices for different coverages that might be interesting for customers looking for an insurance quote.
The percentage for every coverage is 0 by default and, when not set, you cannot activate the product.
Proceed with indicating the premium coverage split, as follows:
-
Go to the Insurance Premium Coverages Split grid.
-
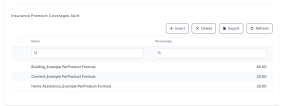
Next to each item from the grid, set the percentage used to calculate the premium amount per each coverage included in the product.
Below, an example of the Insurance Premium Coverages Split grid, with filled values:
-
Once finished, click Save and reload.
-
Move to the next step, below.
Mapping data is a mandatory step in order for the system to know from where to fetch the product data necessary for the formula engine to run.
After Save and reload, the Map Data buttons become available.
These buttons allow you to define a single data mapping, for either a Policy Admin or a Quote and Bind flow. When clicking either of the buttons, you can select a Master Entity (any master entity that you need, for your calculations). This way, you get access to use the values of the selected entity's attributes as formula input keys, to obtain a certain output (and this output is registered on some other entity).
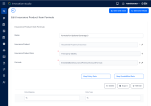
Below, an example of the insert form for the insurance product formula - with Map Data buttons available, after save and reload:
Proceed with mapping the necessary data for the attached formulas, as follows:
-
Click the Map Data button - either Map Policy Data or Map Quote&Bind Data, depending on the mapping you need to perform. The Formula Parameter Mapping form opens.
-
In the Definition tab (first tab), notice the Data Mapping Type, the Operation Name (the actual formula name), the Name (the mapping name) fields being auto-completed and not editable.
-
Use the arrow selector to indicate a Master Entity from which the system will extract the input keys for the formula. .
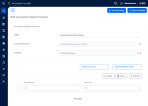
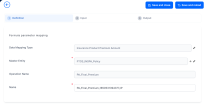
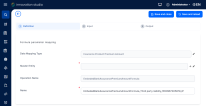
Below, an example of a Formula Parameter Mapping form, with definition details:
-
Click Save and reload.
-
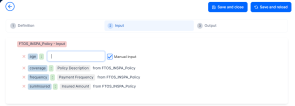
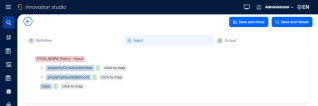
Go to the Input tab (second tab) and use the Click to Map buttons, next to each formula input key (in blue), in order to indicate the attribute (belonging to the previously chosen master entity) from which the system will extract the value needed for calculation.
Below, an example of an input mapping to the Policy entity: -
Click Save and reload.
-
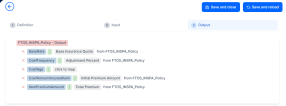
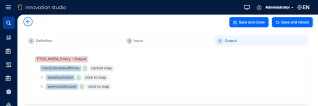
Go to the Output tab (third tab) and use the Click to Map buttons, next to each formula output key (in blue), in order to indicate the attribute to which the system will make updates (insert the value obtained) after the calculation.
Below, an example of an output mapping for the Policy flow: -
Once finished, click Save and close. You can now see the attached formula in the Data Mapping grid, at the bottom of the insert formula form, example below:
Add Insurance Coverage Formula
Prerequisite: You must have previously selected the Per coverage tariff type, in the Main Info product tab. This selection makes the Add Insurance Product Item Formula insert form available in the Premium Amount tab.
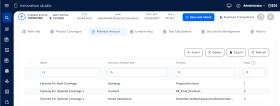
Below, an example of an insurance product with formulas attached to each of its coverages:
To add a formula that helps you calculate the premium amount per coverage (product item), follow the steps below:
-
In the Premium Amount tab, click Insert. The Add Insurance Product Item Formula insert form opens. Notice the name of the insurance product being auto-completed and not editable.
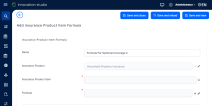
Below, an example of the form for adding insurance coverage formulas :
-
In the insert form, fill in a descriptive Name for the formula.
-
Use the dropdown to select the Insurance Product Item (coverage).
-
Use the picker (arrow) to select from the list a Formula to be appended to the coverage you indicated in the former step.
-
Once finished, click Save and reload.
-
Repeat these steps for all the coverages that your product has.
Mapping data is a mandatory step in order for the system to know from where to fetch the product data necessary for the formula engine to run.
After Save and reload, the Map Data buttons become available.
These buttons allow you to define a single data mapping, for either a Policy Admin or a Quote and Bind flow. When clicking either of the buttons, you can select a Master Entity (any master entity that you need, for your calculations). This way, you get access to use the values of the selected entity's attributes as formula input keys, to obtain a certain output (and this output is registered on some other entity).
Below, an example of the insert form for the insurance coverage formula - with Map Data buttons available, after save and reload:
Proceed with mapping the necessary data for the attached formulas, as follows:
-
Click the Map Data button - either Map Policy Data or Map Quote&Bind Data, depending on the mapping you need to perform. The Formula Parameter Mapping form opens.
-
In the Definition tab (first tab), notice the Data Mapping Type, the Operation Name (the actual formula name), the Name (the mapping name) fields being auto-completed and not editable.
-
Use the arrow selector to indicate a Master Entity from which the system will extract the input keys for the formula.
Below, an example of a Formula Parameter Mapping form, with definition details, for a per coverage data mapping:
-
Go to the Input tab (second tab) and use the Click to Map buttons, next to each formula input key (in blue), in order to indicate the attribute (belonging to the previously chosen master entity) from which the system will extract the value needed for calculation.
Below, an example of an input mapping to the Policy entity: -
Click Save and reload.
-
Go to the Output tab (third tab) and use the Click to Map buttons, next to each formula output key (in blue), in order to indicate the attribute to which the system will make updates (insert the value obtained) after the calculation.
Below, an example of an output mapping to the Policy entity: -
Once finished, click Save and close. You can now see the attached formula in the Data Mapping grid, at the bottom of the insert formula form, example below:
Changing the Tariff Type option set value, triggers the automatic removal of any formulas previously attached on a product, or product item (coverage).
You can design your formulas to calculate the Premium Amount for a Product, or a Product Item in steps, allowing for some input data to be received from third-party systems.
Check the Insurance Business Formulas page, for more formula use cases. For creating your own formulas, consult the FintechOS Business Formulas documentation. Additionally, the Insurance Product Factory solution comes with an optional import package containing some demo formulas. Read about them on the Insurance Demo Formulas page.
