Export an Entity and its Records
This knowledge is useful when data from an environment must be exported to be used for other purposes such as analytics or to be later imported to another database or system. Since data must be readily available, exporting it easily and in time is a key feature.
Task at hand
You will be exporting an .xml for the entity FTOS_Pricing. We will be exporting the metadata first ad secondly, the records inserted into the entity.
Before you begin
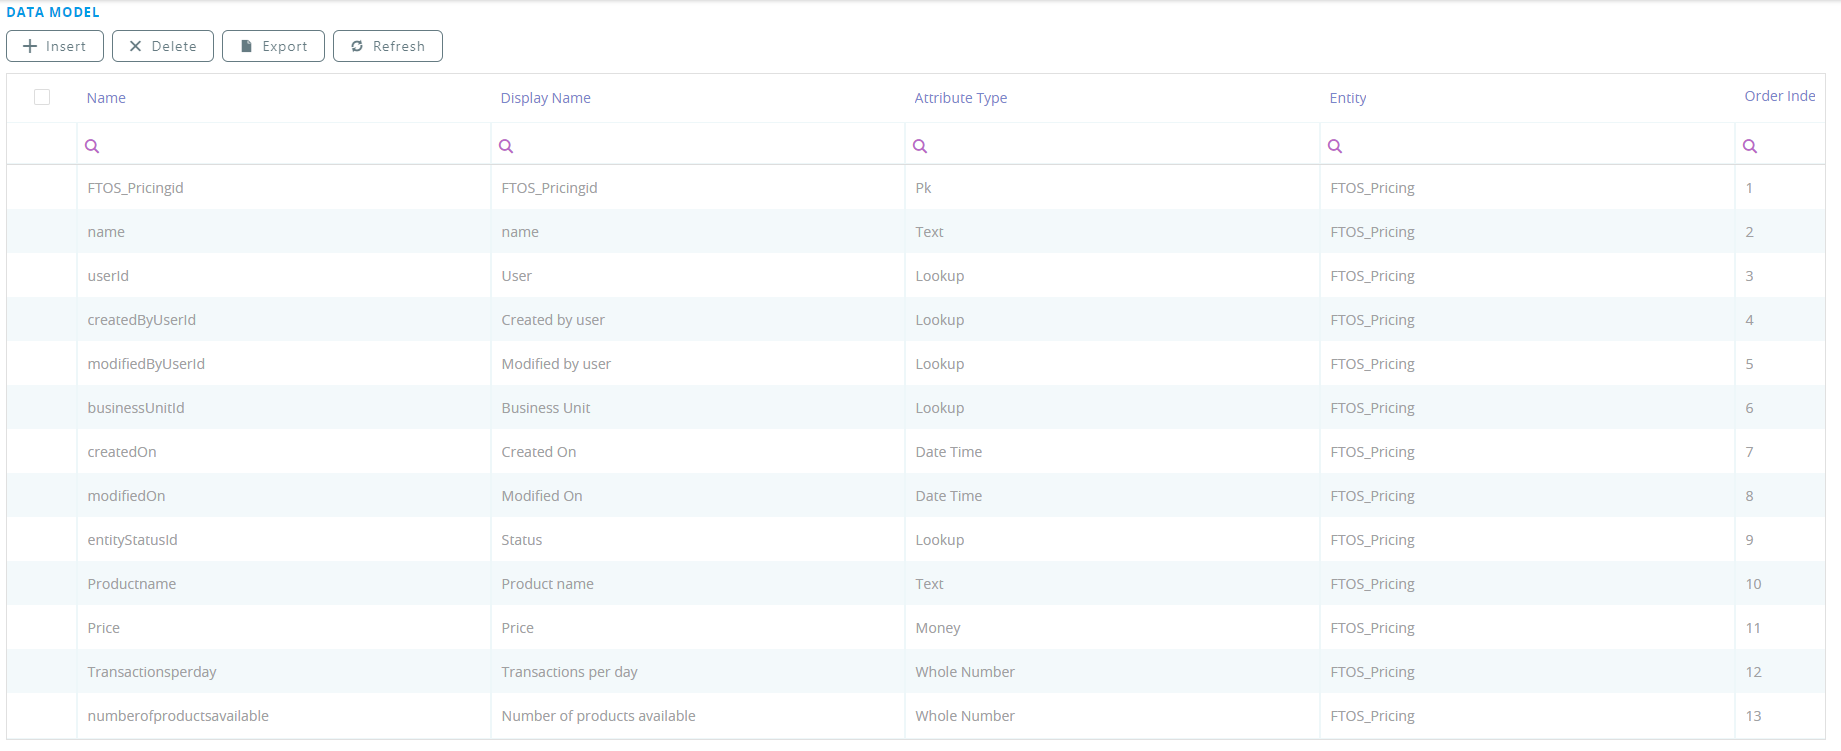
- Create the entity FTOS_Pricing with the following attributes: price, transactions per day, number of products available.
Name Display name Attribute type FTOS_Pricingid FTOS_Pricingid Pk name name Text userId User Lookup createdByUserId
Created by user
Lookup
modifiedByUserId
Modified by user
Lookup
businessUnitId Business Unit Lookup createdOn Created On Date Time modifiedOn Modified On Date Time entityStatusId
Status
Lookup
Price
Price
Money
Transactionsperday
Transactions per day
Whole Number
numberofproductsavailable
Number of products available
Whole Number
- Expose the data form of this entity to the FintechOS Portal and create records inside a dashboard, e.g. Notebook and Mug and their price £40 and £20.
1 Create a unique constraint for the entity
Follow the path: FintechOS Studio > Evolutive Data Core > Data Model Explorer > FTOS_Pricing > Entity Unique Constraints.
The unique constraint determines that the attribute must be unique because when importing it to the destination environment (where there might be a record with the same value, the system must know what constraint to use).
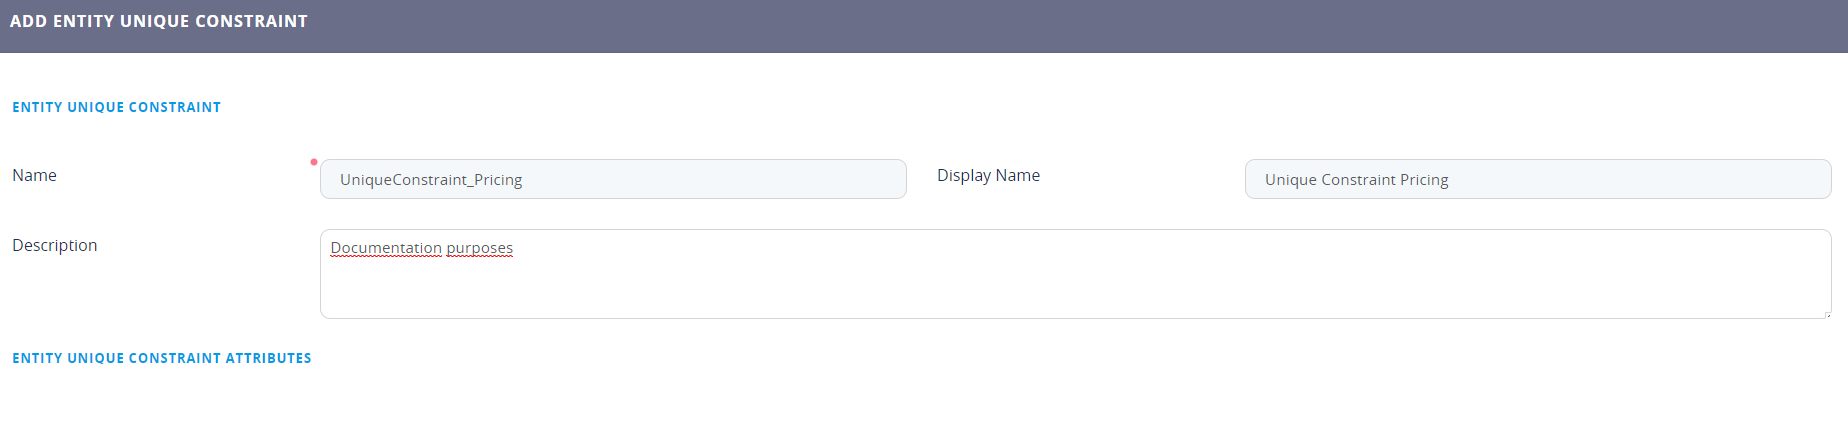
Navigate to the FTOS_Pricing entity created. For any entity we choose to export, it is mandatory to set the unique constraint we wish to use to identify the unique set of data. Click the Insert button to add a unique constraint. Insert a name, display name and a description. The name is UniqueConstraint_Pricing. Click the Save and reload button. The Entity Unique Constraint Attributes grid will open.
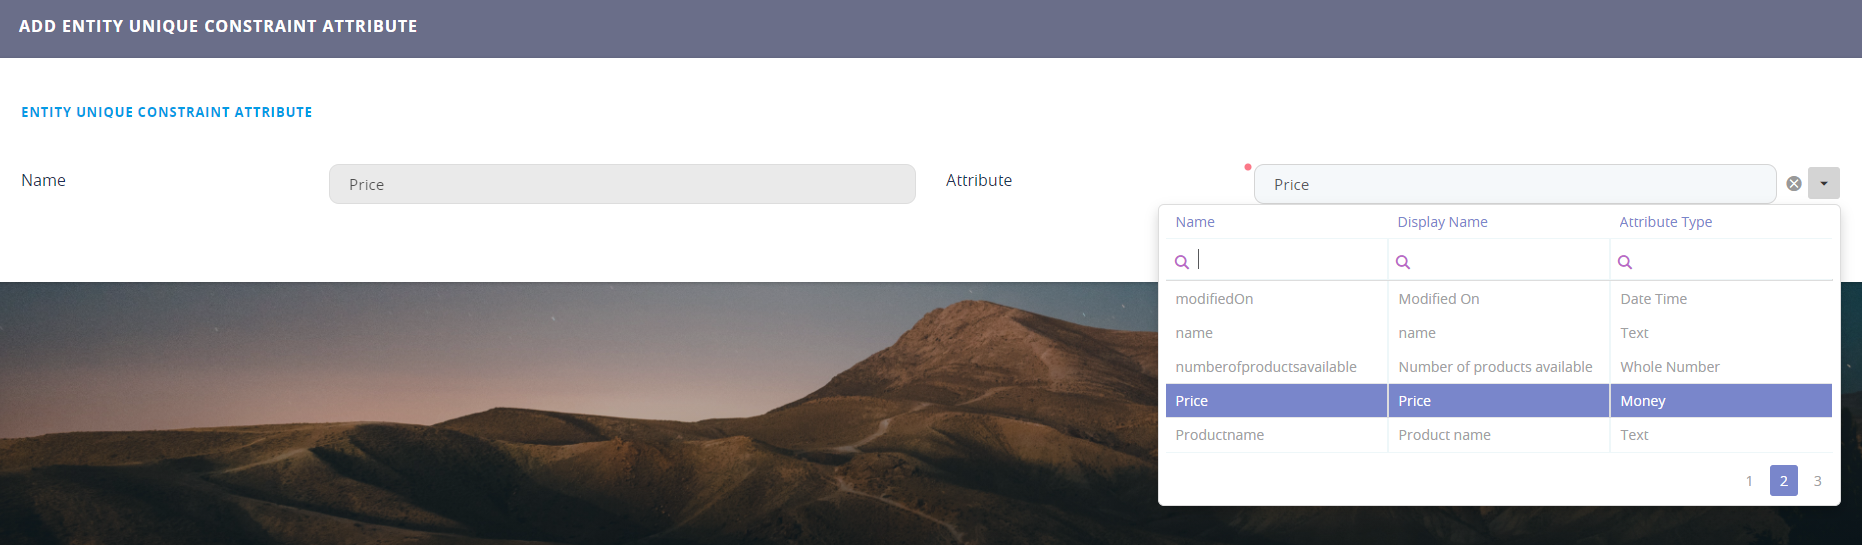
Click the Insert button for the attribute constraint. Select from the list the attribute Price. The name will populate automatically once the attribute is selected. Click the Save and close button.
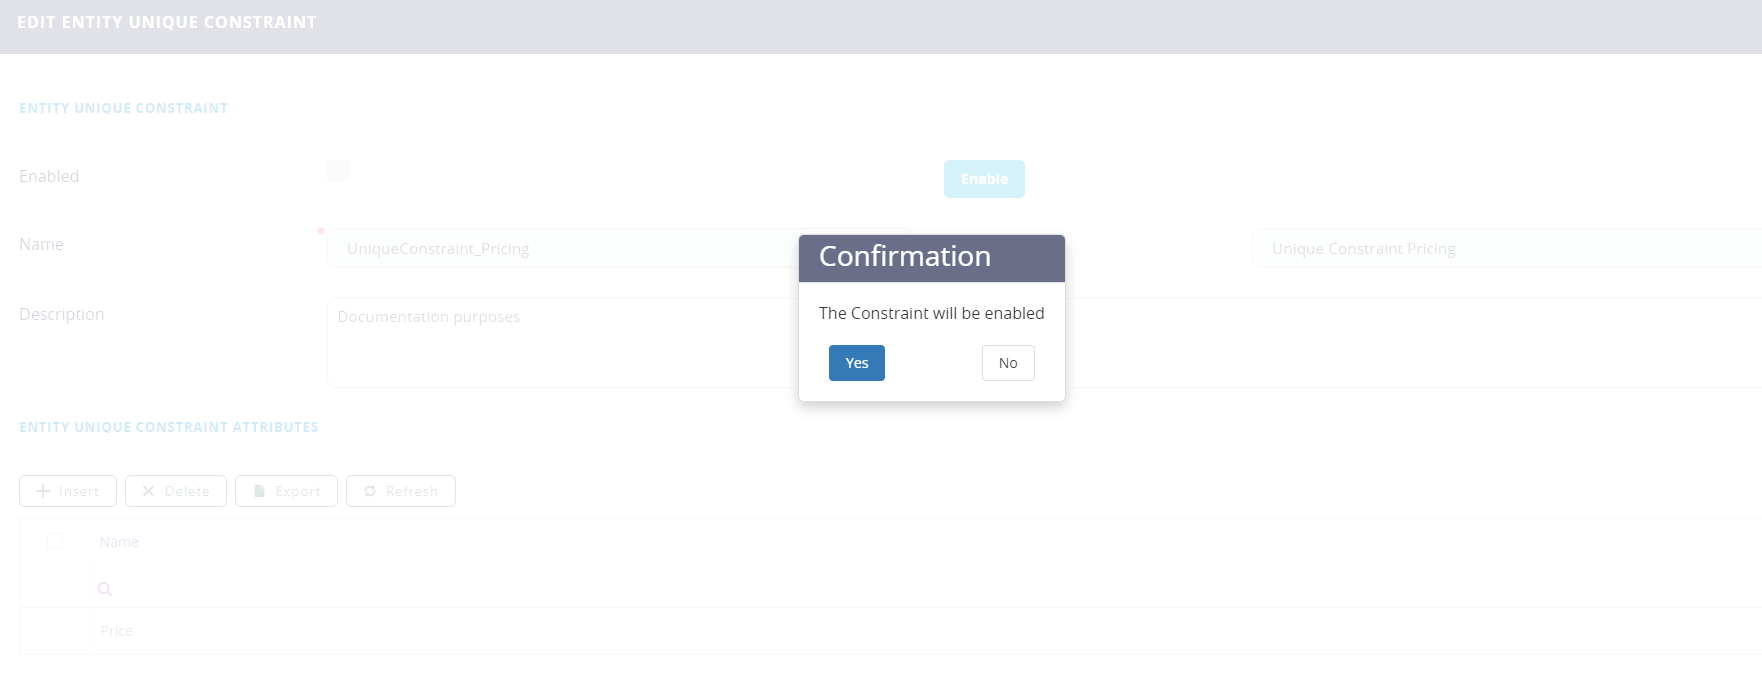
The attribute grid will update. Now it is time to enable the constraint by clicking the Enable button. Once agreed to the constraint, the boolean Enabled will be true. Click the Save and close button.
For details, see Entity Unique Constraints.
2 Create the deployment package to export the metadata
Follow the path: FintechOS Studio > DevOps > Deployment Package.
The page Add Deployment Package will open. Fill in the following:
| Fields | Details |
|---|---|
| Type | It is automatically selected Basic. |
| Package name | Insert a name, e.g. FTOS_Pricing_Deployment. |
| Version | Insert the number of the version, e.g. 1. |
| Display name | It will be rendered automatically by the system once saved. |
| Deploy Audit Config | It is read-only. |
Click the Save and reload button.
Next, add the components to the package. Click the Insert button. The component type list will open with the list of data to be exported. Select from the list business entity. A new grid with the list of entities will open. Search for FTOS_Pricing and add it by clicking the Insert button. To this component, a name will be automatically given.
At this stage, you can stop and export the metadata of this entity by clicking the Export basic deployment package.

For details, see Exporting a Deployment Package.
3 Create the data definition to export the records
Follow the path: FintechOS Studio > DevOps > Configuration Data Definition.
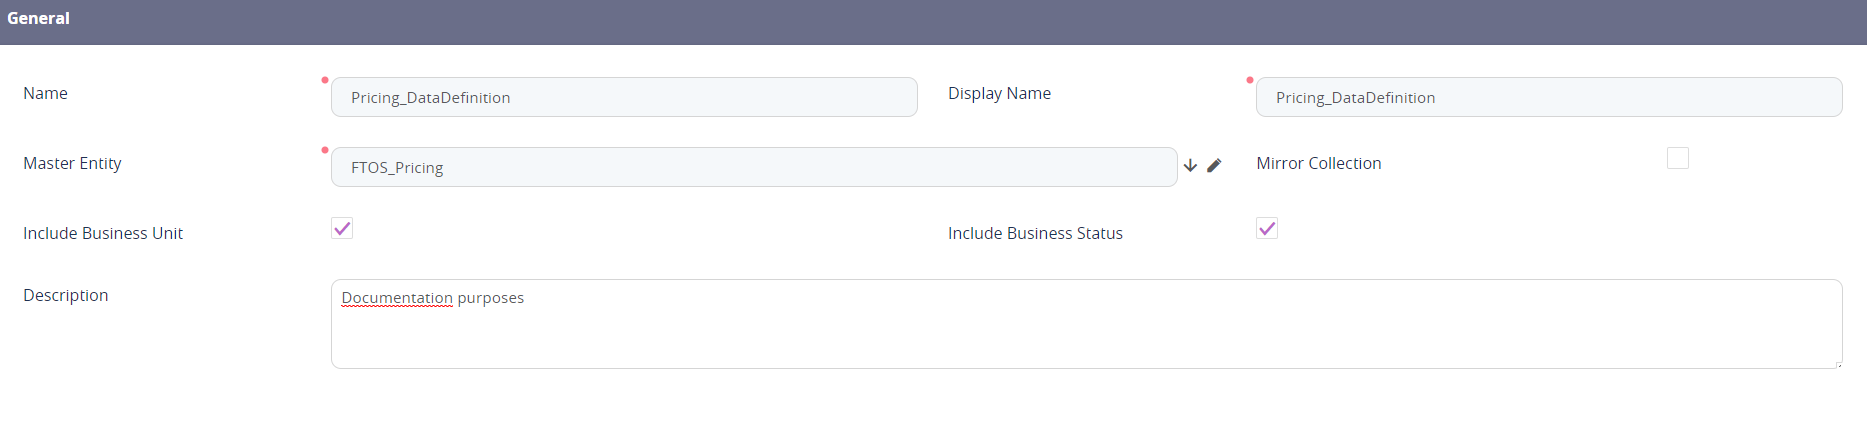
In this stage, the source from where the package will be constituted is selected. Click the Insert button to add a new data definition. The General page opens. Fill in the fields:
| Fields | Details |
|---|---|
| Name | Pricing_DataDefinition |
| Display name | Pricing_DataDefinition |
Master Entity | FTOS_Pricing. |
Include business unit | The boolean is true. The xml will include the business unit. |
Include business status | The boolean is true. The xml will include the business status. |
Description | Insert a suggestive description. |
Click the Save and reload button. The second tab will open, named definition.
Click on the second tab to open the Definition. Click on the Edit button on the right-hand corner of the screen for each entry. The following fields are displayed:
| Fields | Description | Options | Description |
|---|---|---|---|
| Type | It defines the type of relationship for the entity in the definition tree. | root | Master entity |
| Lookup Attribute | Standard lookup relationship | ||
| N to N | Many to Many relationship defined between this entity and the Root | ||
| Parent | The root has a lookup to this entity and the relationship type is set to “IsChildOf” | ||
| Details Collection | The entity is a child of the entity above it (its relationship type is set to “IsChildOf”) | ||
| Include | Choose if we want to export data for that entity or not. Only root and DetailsCollection (children entities) will have actual data exported.For the other types, the include flag marks only that we export\import the lookup reference for that entity (otherwise, on import this will be null) | ||
| ReferenceOnly | Marks if we export only the reference or the whole data (in most cases this is set as read-only) | ||
Add the attribute with the unique constraint, e.g. Price. Click the Save and close button.
For details, see Configuration Data Definitions.
4 Insert the records in the deployment package
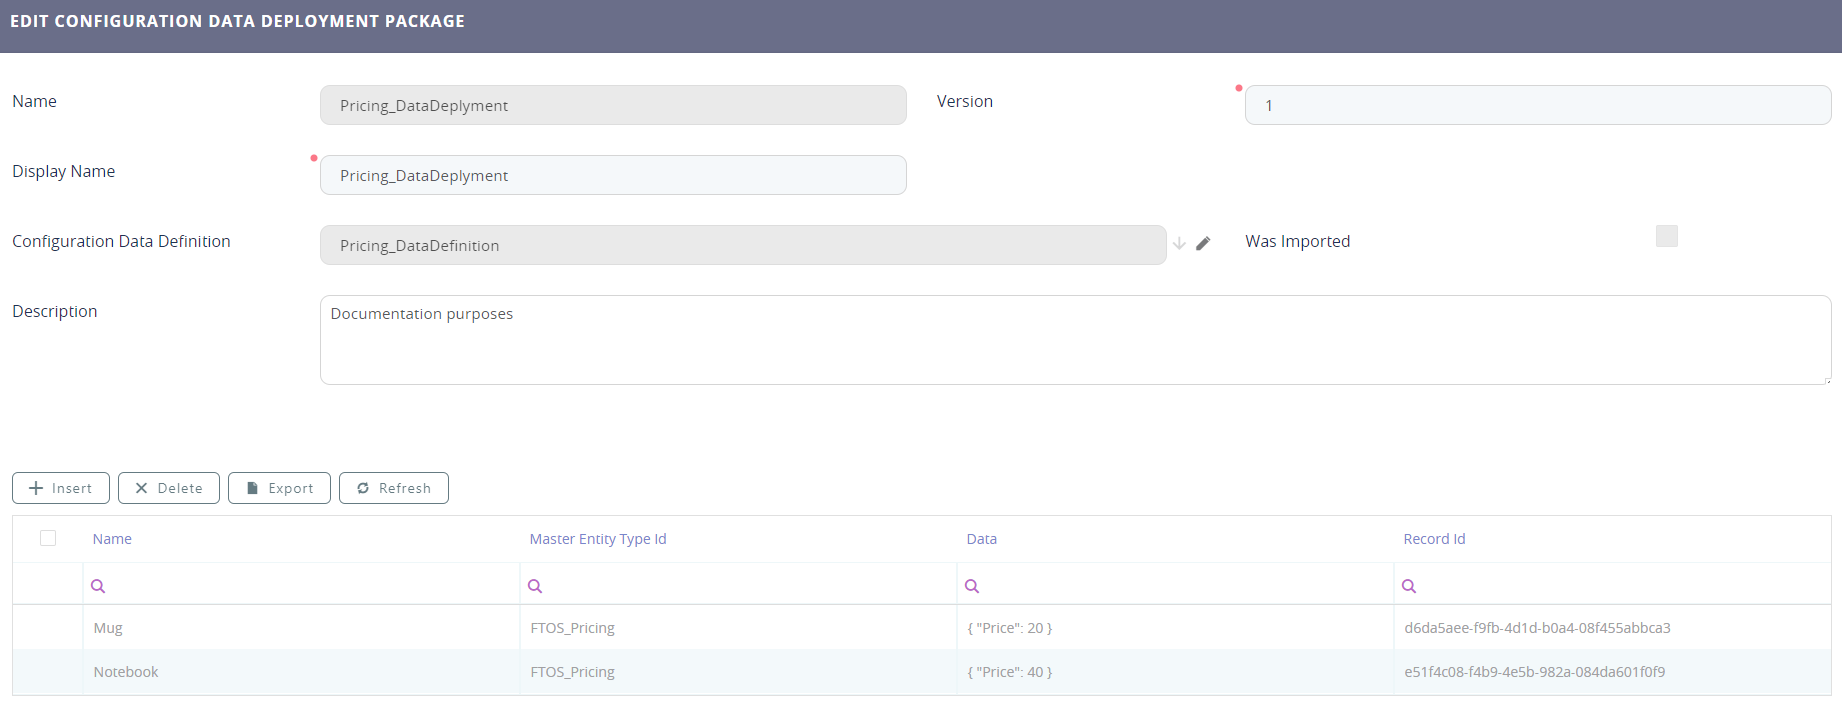
Follow the path: FintechOS Studio > DevOps > Configuration Data Deployment Package.
| Fields | Details |
|---|---|
| Name | Insert a name, e.g. Pricing_DataDeployment. |
| Version | 1 |
| Display name | Insert a display name, e.g. Pricing_DataDeployment. |
| Configuration Data definition | Select from the drop-down |
| Was imported | This boolean is true if the package was imported into the working environment. It is not the case here, here we are exporting. |
| Description | Insert a suggestive description. |
Click the Save and reload button. The grid below opens. Click the Insert button to add the actual records existing in the entity. It will display the records from the attributes which have a unique constraint.
To add the items, the boolean has to be true by ticking it. After adding them, click the Insert button under the Master entity.
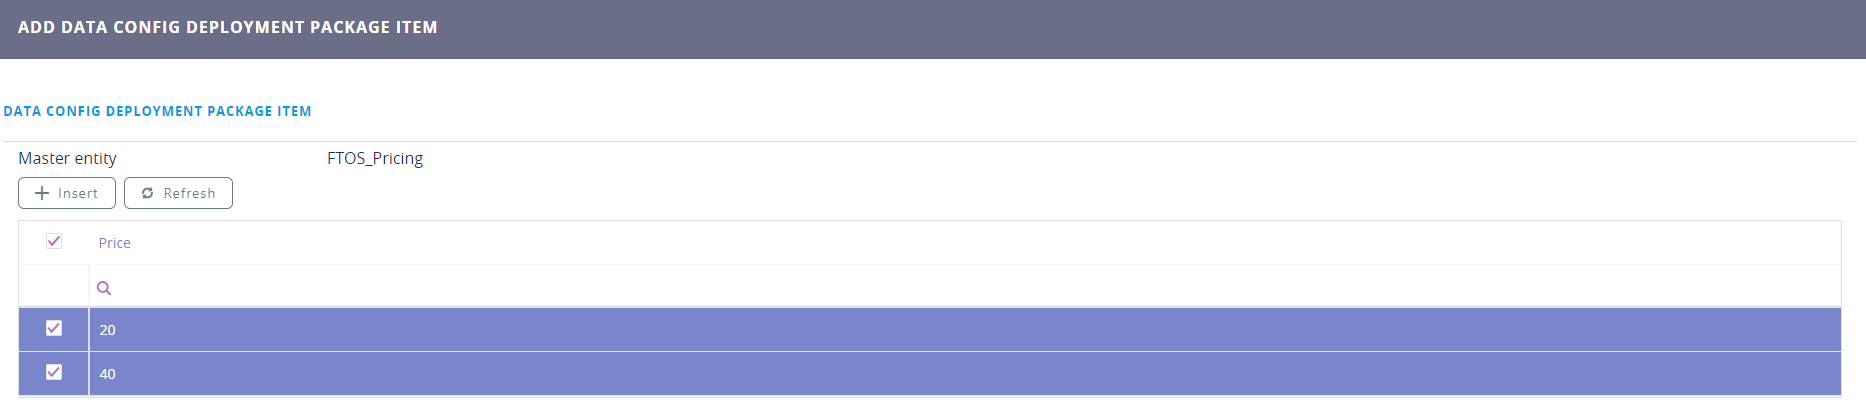
The package will update automatically with the two records.
From here, you can export the records, but ONLY the records, not the entity.
5 Export the packages
There are two ways to export depending on the situation:
- To export the entity, stop at step 2.
- To export the entity and its records, follow all the steps until now. From here add the data definition to the deployment package from step 2.
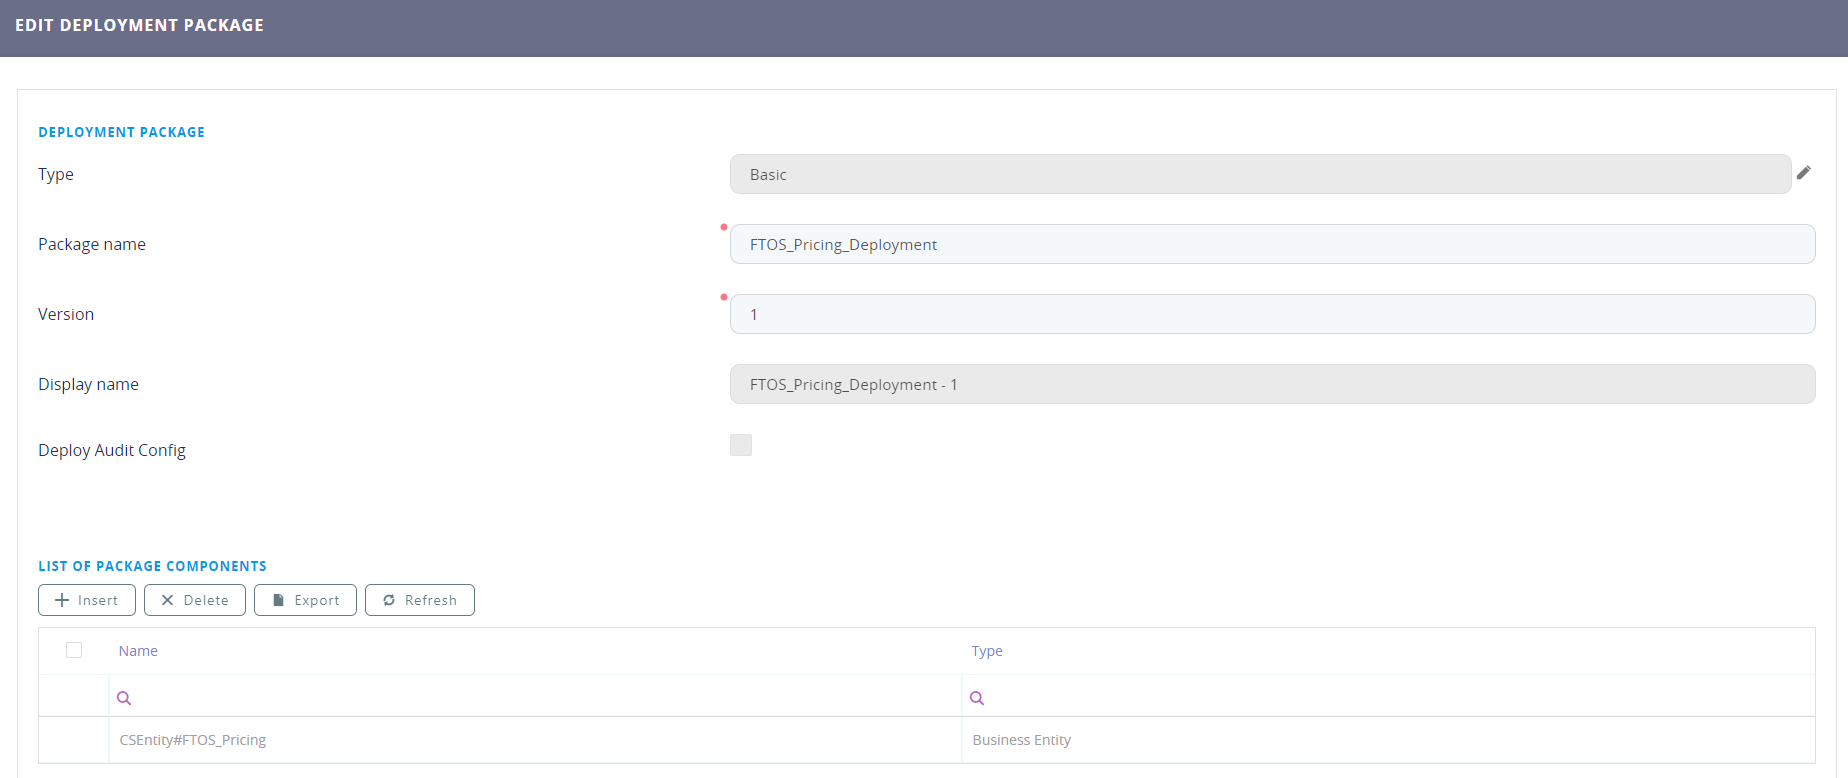
Follow the path: FintechOS Studio > DevOps > Deployment Package.
In the FTOS_Pricing_Deployment created in step 2 where the entity was added in the List of Package Components, add the data definition by clicking the Insert button, selecting the Type Data Config definition. Once selected, the grid with a list of the definitions created is displayed. From the list select the Pricing_DataDefinition created in step 3. Click the Insert button. The Edit Deployment Package page will load. Click the Save and reload button.
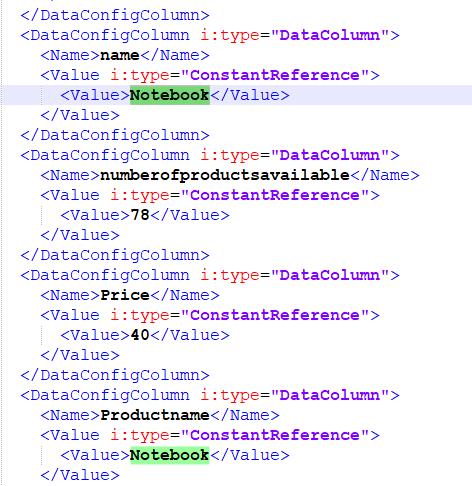
To export, from the page EDIT DEPLOYMENT PACKAGE, on the right-hand corner click the Export Basic Deployment package. An xml package will be exported locally.
The package looks something like the photo below. Search for one of the records.
Congratulations! You have exported a package.