Onfido
FintechOS integrates with Onfido to provide automated identity verification within digital journeys. Onfido uses a combination of AI-powered document analysis and biometric checks to validate end-user identities, reducing manual effort, preventing fraud, and supporting regulatory compliance.
Through this integration, end users can capture identity documents and selfie photos or videos directly in the browser, while FintechOS handles the orchestration: creating applicants, loading the Onfido SDK, triggering checks, and receiving results asynchronously via webhooks.
The integration covers four core KYC capabilities:
-
OCR (Document Data Extraction): Scans the front and back of an identity document to extract personal data (name, date of birth, document number, address, etc.) and autofill entity records in FintechOS.
-
ID Validation: Checks the authenticity of the submitted identity document using AI and fraud detection models. Returns a clear/suspect result indicating whether the document is genuine.
-
Face Similarity (Selfie): Compares a selfie photo taken at the time of verification with the photo on the identity document, producing a confidence score to confirm the person's identity.
-
Liveness Detection: Verifies that the person interacting with the journey is a real, live human (not a photo, video, or bot). Supports both standard selfie and video-based liveness modes.
Map Parameters
-
To add Onfido integration to your Customer or Backoffice Workflow, click the "+" symbol and pick Integration from the modal.
-
Click Onfido Studio eIDV. Add a name to the integration.
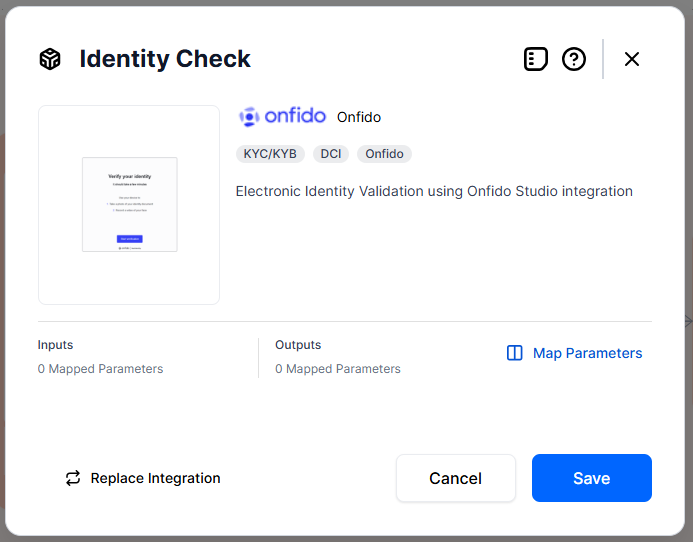
-
Click Map Parameters. This opens a data mapper where you link each parameter to a Data Domain attribute. For inputs, the mapping tells the system where to pull data from your Data Domain to send to the external service. For outputs, it does the reverse, storing the returned results back into your Data Domain. In both directions, the Data Domain is your side of the exchange.
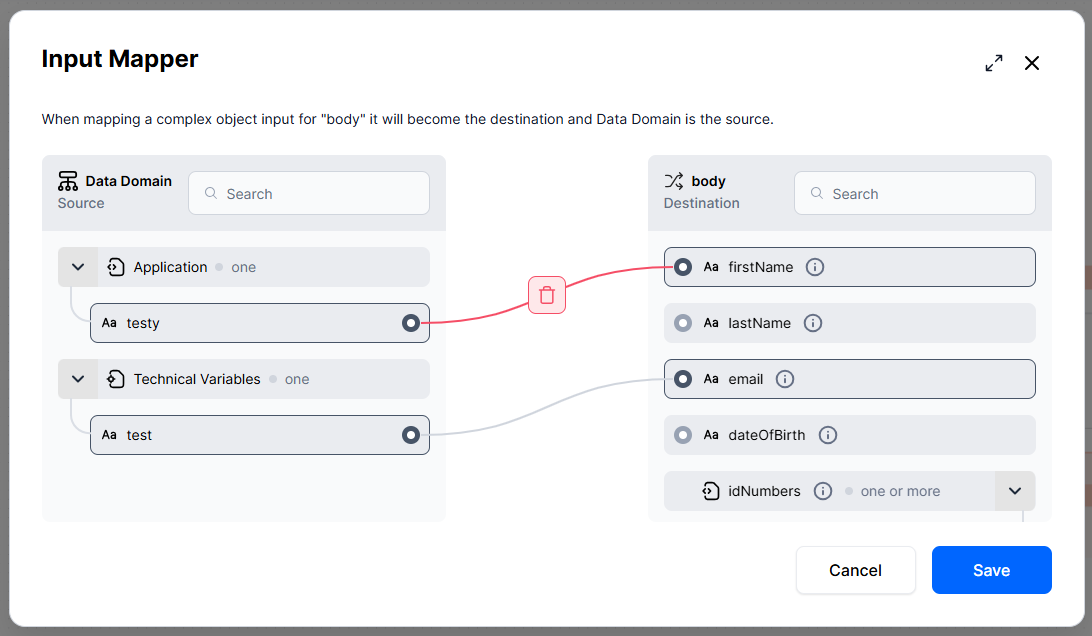
You can save your mapping progress at any point without completing all properties. After saving, the mapper button displays the mapping status (for example, 3/7 properties mapped) and changes its visual state to indicate whether all or only some properties have been mapped.
NOTE
The mapping mechanism offers a low-code, visual way to handle parameters from the automation block's metadata configuration, which in their raw form are unstructured and hard to read. Instead of working with that raw metadata directly, you simply map each parameter to the right attribute in your data flow through an intuitive UI.
Configure Integration
After mapping parameters, the Configuration section lets you define how the platform authenticates to Onfido and how it behaves at runtime, including UI branding. If an integration does not support complex configuration, both Activation Settings and Behavior Settings are disabled. An informational message explains why the settings cannot be interacted with. This applies by default to all custom services.
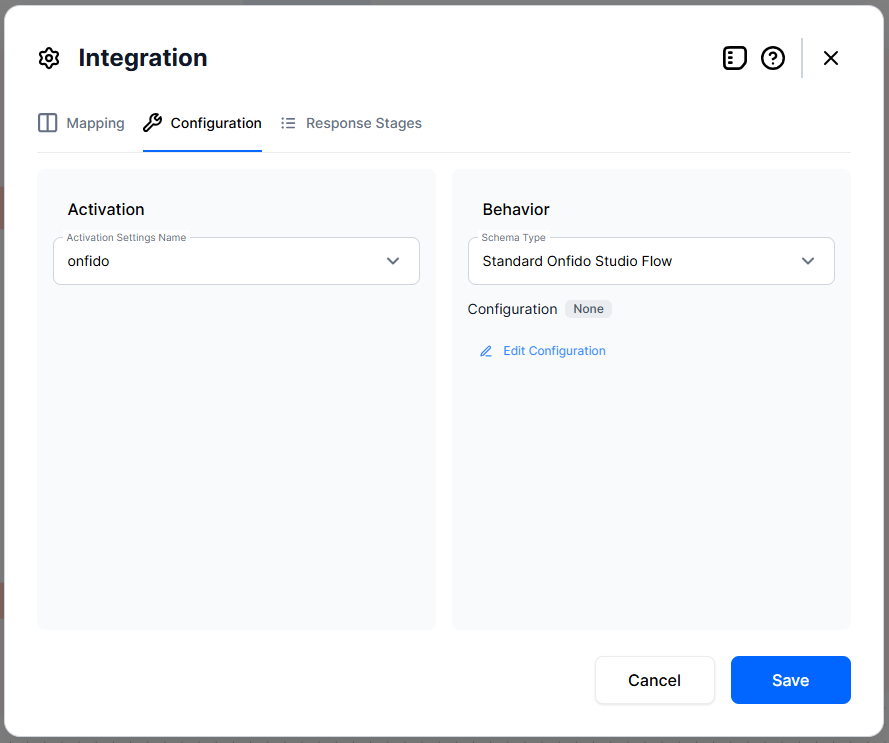
Activation
In Configuration Manager, you define how you want the Onfido service to authenticate. Some services use bearer, or subscription keys. Here, you add the settings name. The items available here are based on the configuration from Vault.
Behavior
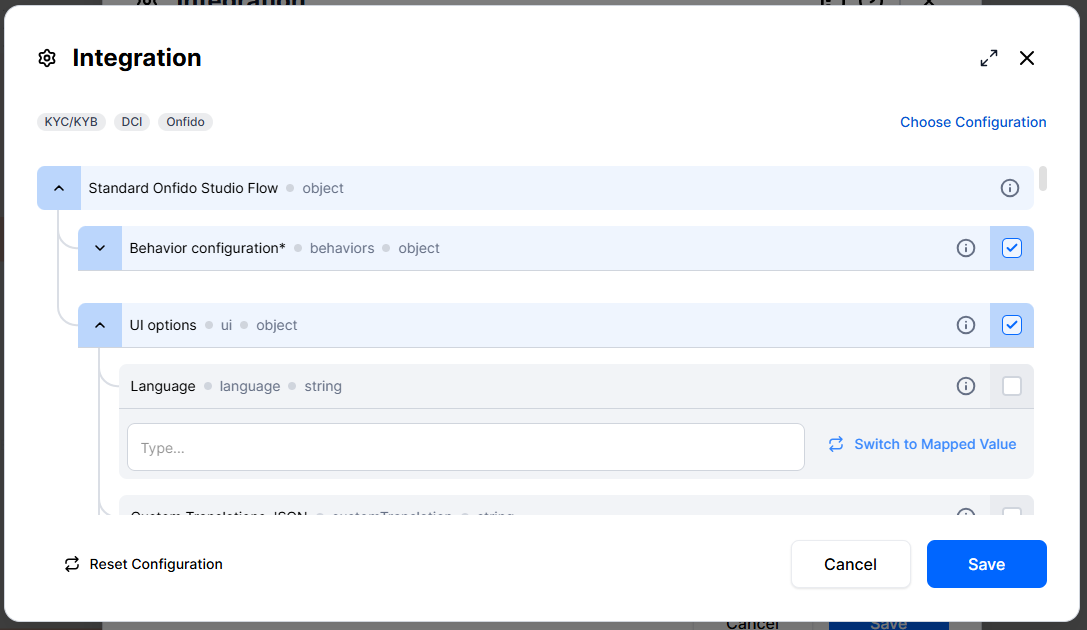
This is also part of the configuration metadata, just like input mapping. It functions based on JSON schema, with a JSON Editor built especially for this to make it easier to work with. Keep in mind, that fields with "*" are required.
-
Onfido Studio Workflow ID*: Here, you can configure runtime behavior, not neccesarily input or output, and describes the behavior of the provider or your account at provider level, in our case Onfido.
Onfido provides you with an account where you configure and declare workflows in Onfido Studio, similar to the Workflow Designer in FintechOS. Each workflow has an ID. In Onfido Studio Workflow ID field, enter the ID of the Onfido Studio workflow you want to run.
This ID can also be stored as a dictionary attribute in FintechOS and then linked using Switch to Mapped Value. This is the recommended approach, especially if you have separate DEV, QA, and Production environments.
For example, if you want to add a task to an OCR flow, you would first add it in a DEV environment in Onfido Studio to avoid breaking Production. Then, use Switch to Mapped Value in FintechOS Studio to test the flow before promoting the change to QA and eventually to Production.
-
Referer*: The Referer is used for security purposes. It is the URL of the page that linked or directed a user to the current page, when your browser requests a new page, it typically sends a Referer header in the HTTP request, telling the server where the request came from.
Here, you need to add the URL that the user will use to access the Onfido flow. If any other URL is provided, the user may be blocked from accessing the flow. This prevents users from sharing confidential and sensitive personal data with anyone other than the bank or insurance company running the flow.
-
SDK Version: Onfido periodically releases new SDK client versions. FintechOS continuously updates the platform with these new releases, typically almost instantly. However, if you want to lock your flow to a specific SDK version, you can enter that version number here.
Keep in mind that depending on new settings you configure in Onfido Studio, the application may advise you to update your SDK version to a later one. In that case, you need to update it here in FintechOS Studio as well.
-
Switch to mobile methods: This is the way in which you want to reroute users to mobile: QR code, SMS, etc.
-
UI options:
-
Language — Sets the language for the Onfido UI. The default is English.
-
Custom Translations JSON — Used for languages that are not available in the list of supported languages. To configure this, please contact our support team.
-
-
UI Theme: Allows you to customize the Onfido UI with your company's styling and branding, including support for a dark theme.
Set Response Stages
This is especially created for asynchronous integrations, which usually generate events or callbacks (webhooks). This automation block has an async integration because it does not instantly send its responses back.
This section normalizes the data generated after the event, that is to say after the service completes the identity verification and sends back the results to FintechOS. Part of the data is handled by FintechOS Studio in the Output Mapper section, where it stores the returned results from the event back into the Data Domain. The fields here come back asynchronous via the webhook.
On response stages, a provider can send multiple webhooks depending on your settings at provider level. Here, you can instruct the service to let FintechOS Studio know after the user's facial identity was successfully validated, or their ID card, or even after they've signed a document, in the case of other providers. This can act a decision stage to progress the user to a certain screen, for example.
If no response stage is set, the platform considers that there was one single webhook, it maps it and completes the stage.
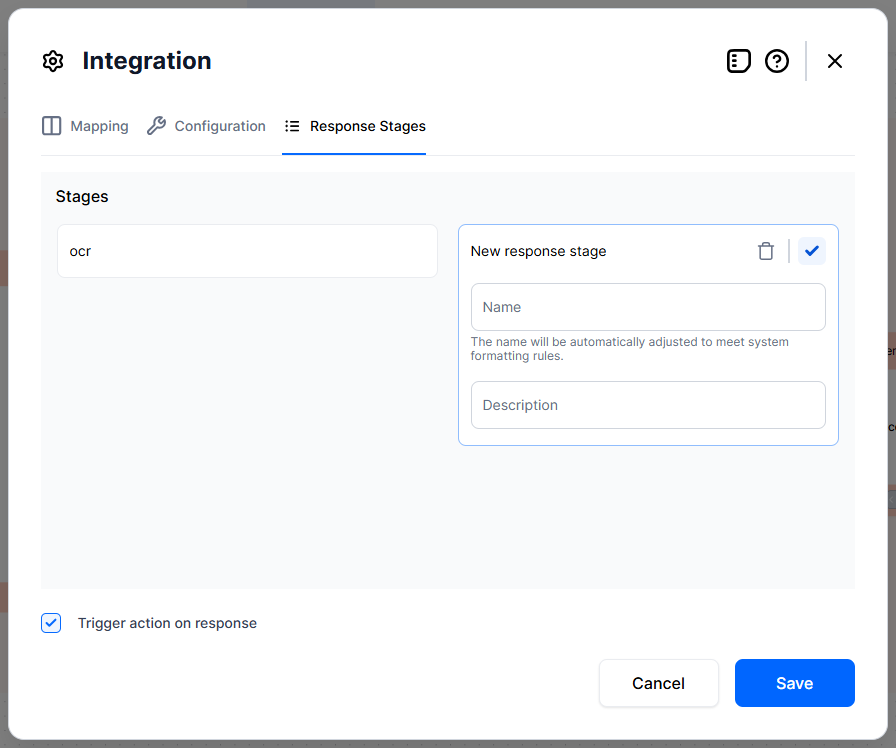
If you know you must receive several stages, you need to define them here. One example is you're expecting to receive the OCR information from an ID (name, address, etc) and the status of the identity verification (passed, failed, etc.). To handle these:
-
Click Add response stage. Add a name and description of the stage.
-
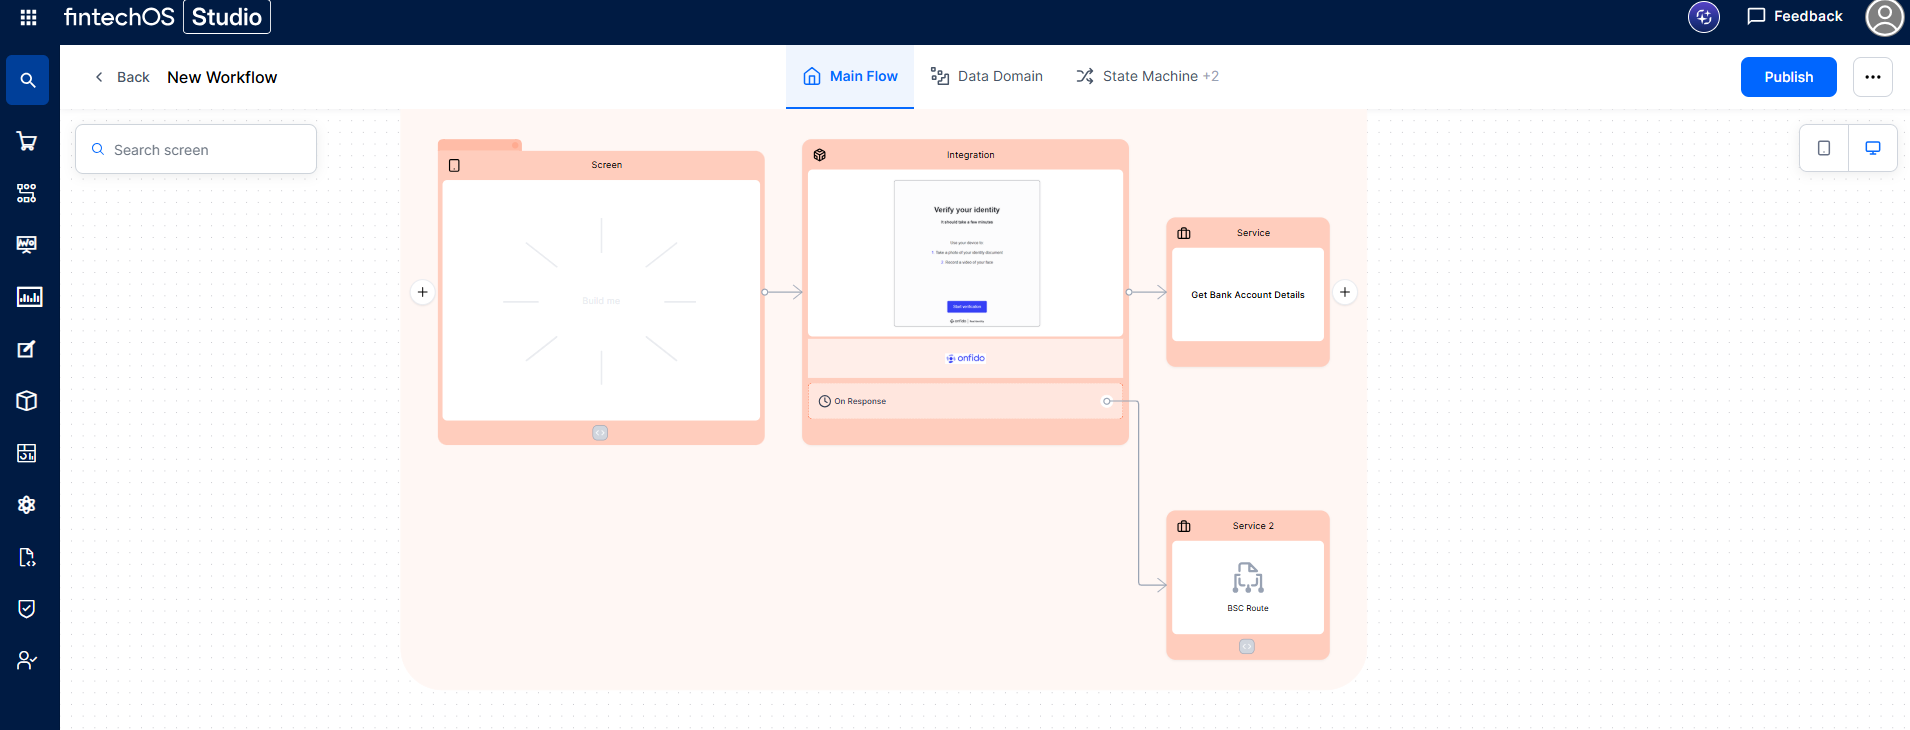
Click Trigger action on response. This automatically generates a BSC service in flow attached to your Integration where you need to specifically code the behavior.
-
Click the BSC Route to open the editor. The payload is in the Output Mapper screen, the
resultin our case.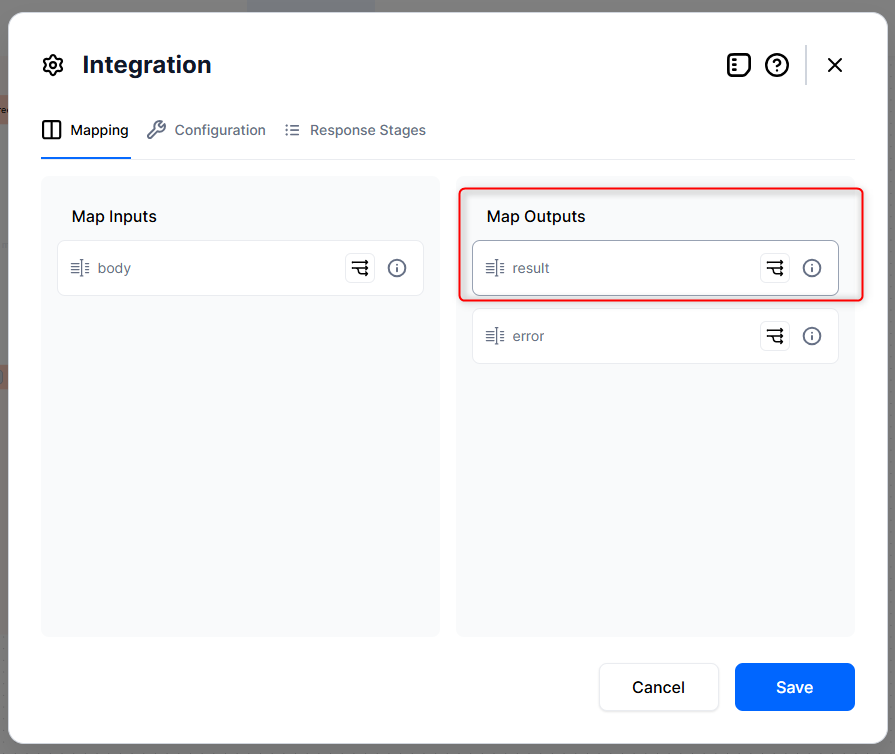
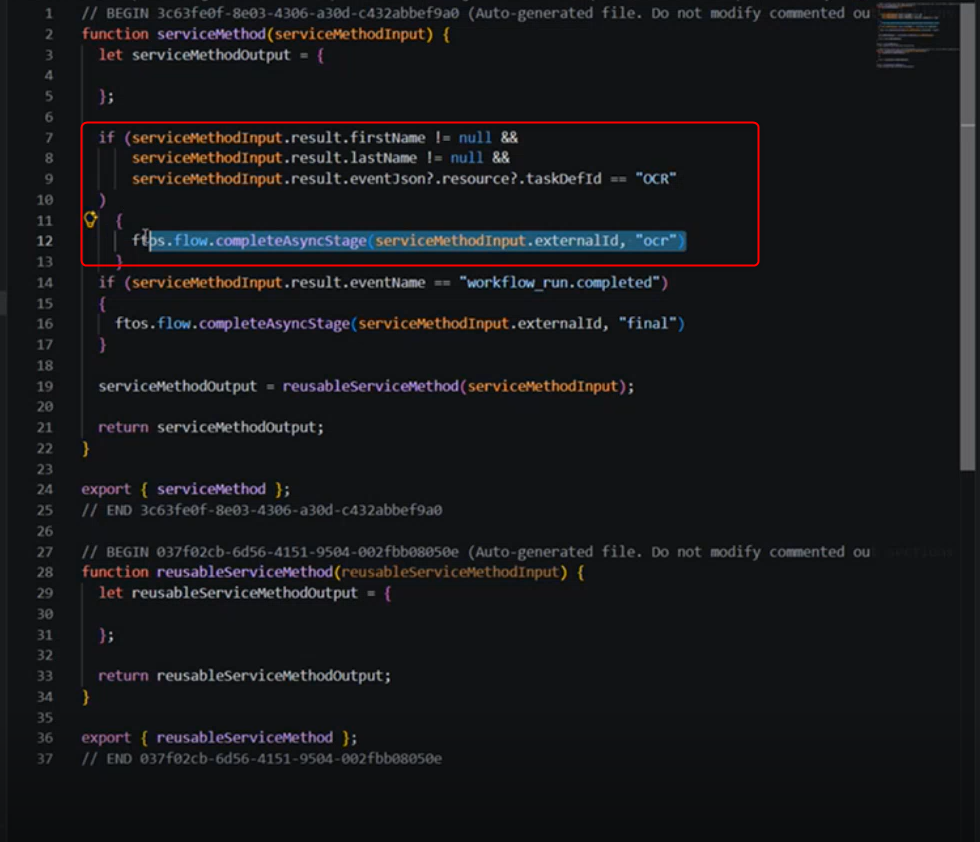
Let's say we receive 12 events back from the service. If inside the OCR event, I get the firstName, lastName, then I want the OCR stage to be marked as completed.
The ftos.flow.completeAsyncStage method marks the specified async stage as completed. You call this method with the appropriate stage name inside the on-response BSC, after inspecting the webhook result data to determine which stage(s) should be progressed.
The flow can contain On Hold screens. This is a process stage in which the workflow is paused and awaiting an action. This handles situations when the data is received async.
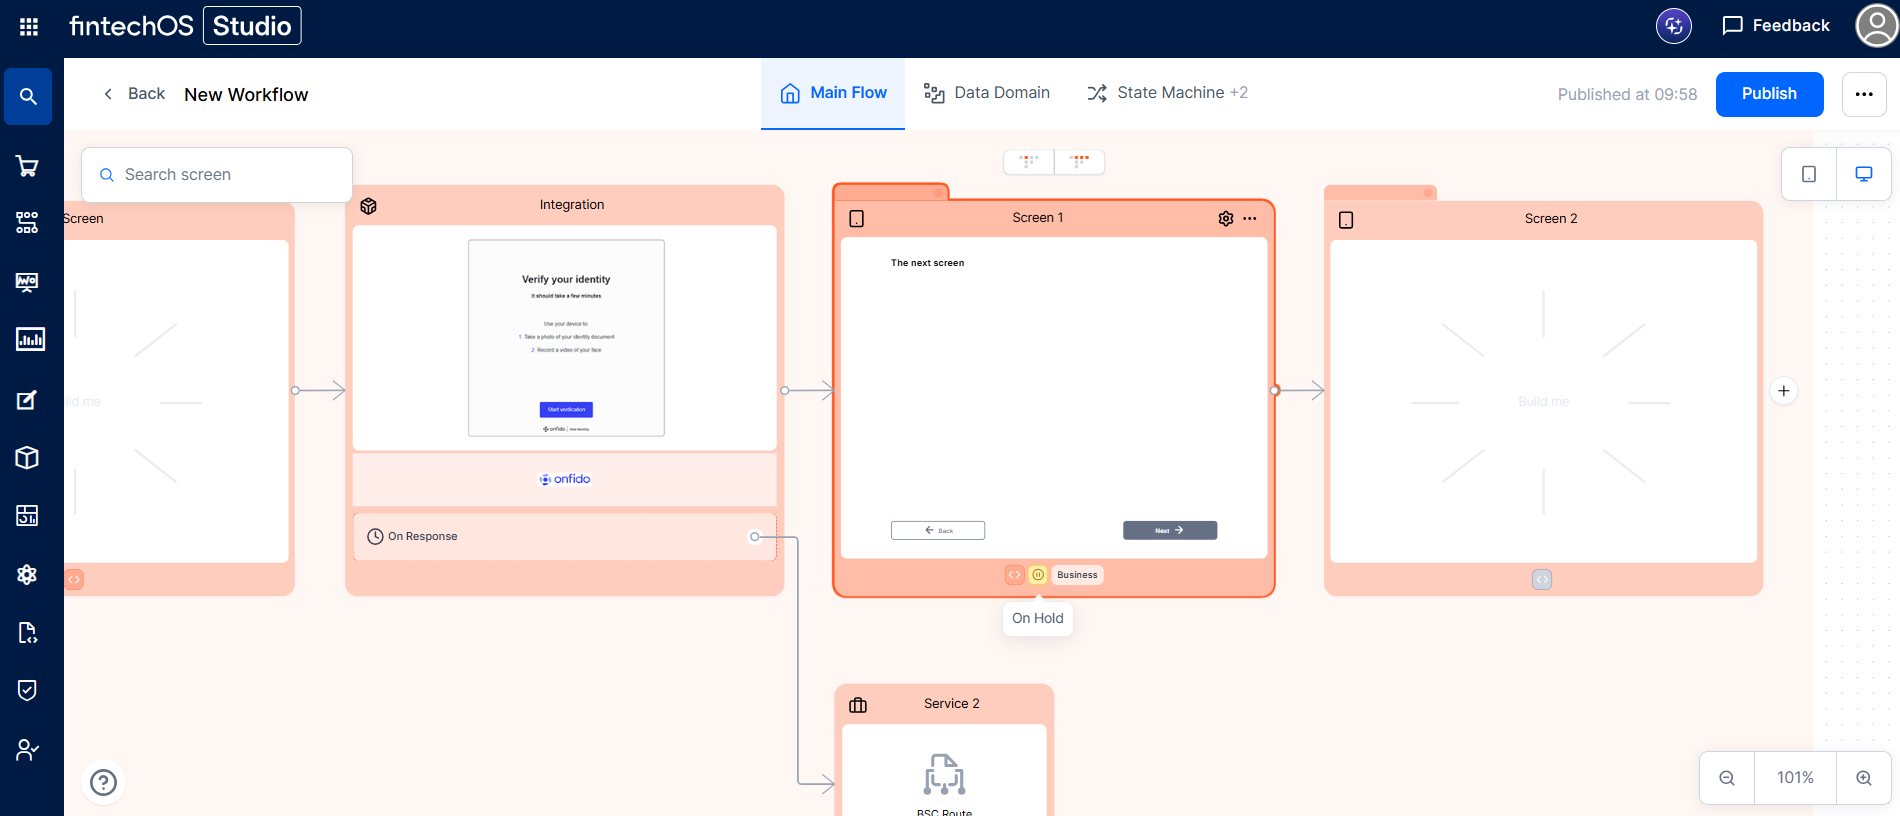
The data flow is like this: the Integration step sends data to the service, which async sends back bits of data through multiple webhooks. The data is processed in the Service: BSC Route, which then send the data to the On Hold screen depending on the response stage, which is set in the Screen's Settings modal > Resume Behavior:
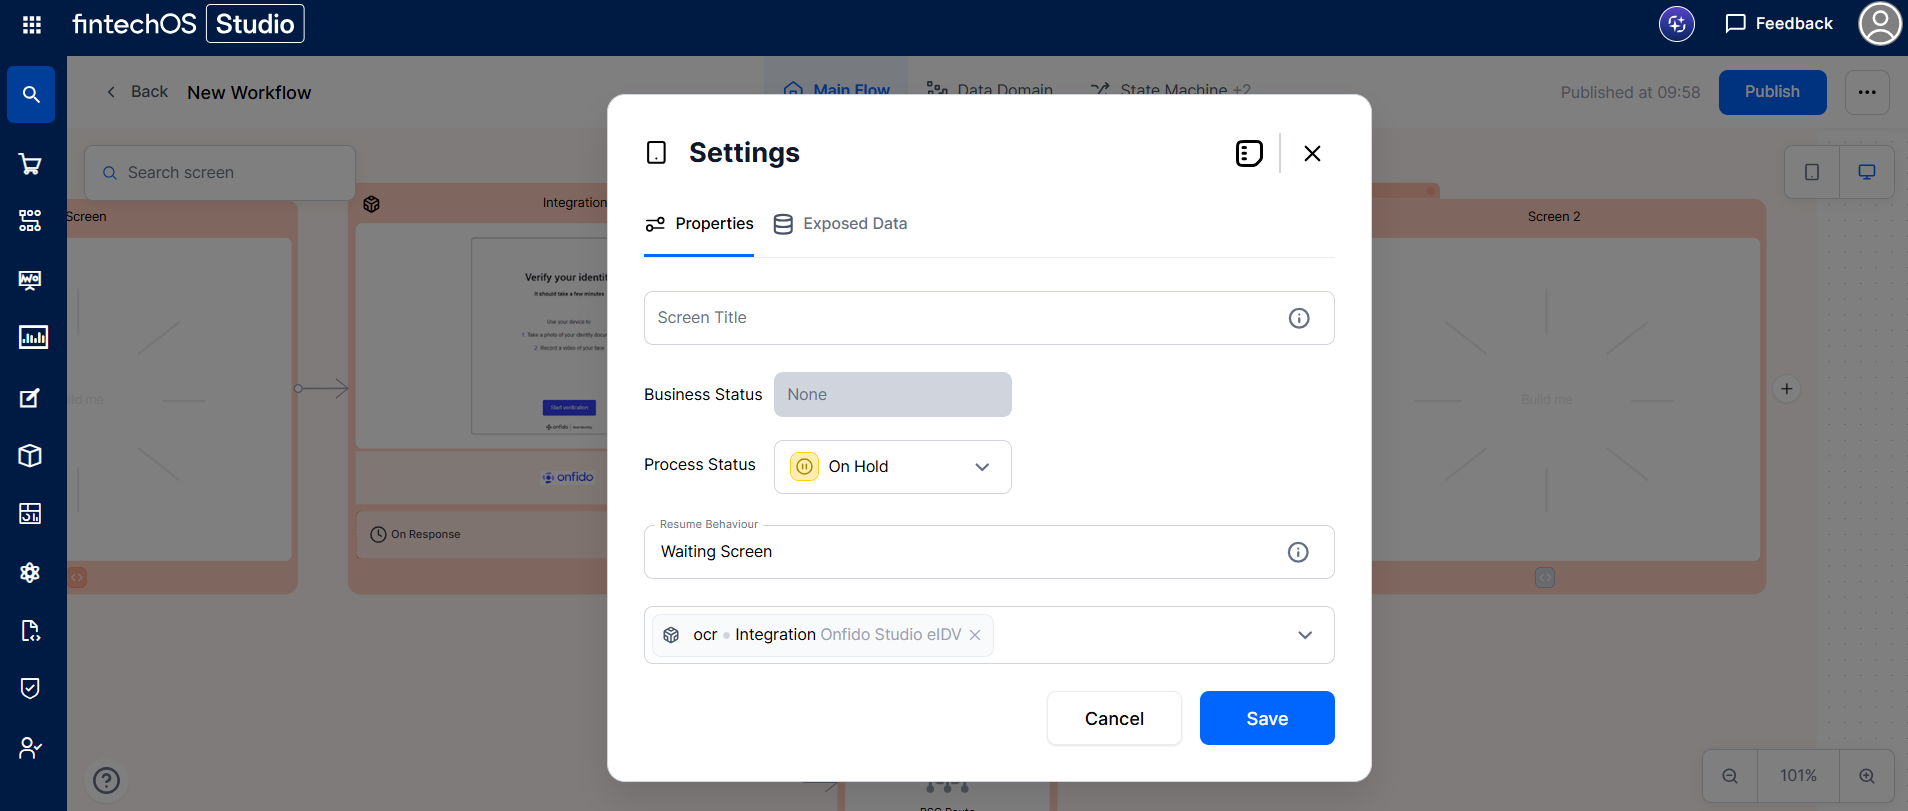
The On Hold screen is unblocked, and the user can progress to the next screen.