Extend platform data entities with transient data entities
To include a transient data entity in a form driven flow, you must extend the flow's source entity data model with the transient data entity. This will allow you to interact with the transient data entity attributes via fields in your form driven flow. For more information about data model extensions, see Extend the Data Model.
Step 1. Create a transient data entity extension
- Open a platform data entity in the editor.
- Expand the Extended Model section and click Insert.
- Enter a Name for your entity extension.
- In the Extension Type field, select Transient Data Entity.
- In the Transient Data Entity field, select a transient data entity you created earlier (see Create transient data entities for details).
- Click Save and reload (
 ).
).

Step 2. Add virtual attributes (only for transient data entities with single instance outputs)
- Open the entity extension for your transient data entity.
- Select the Virtual Attributes tab.
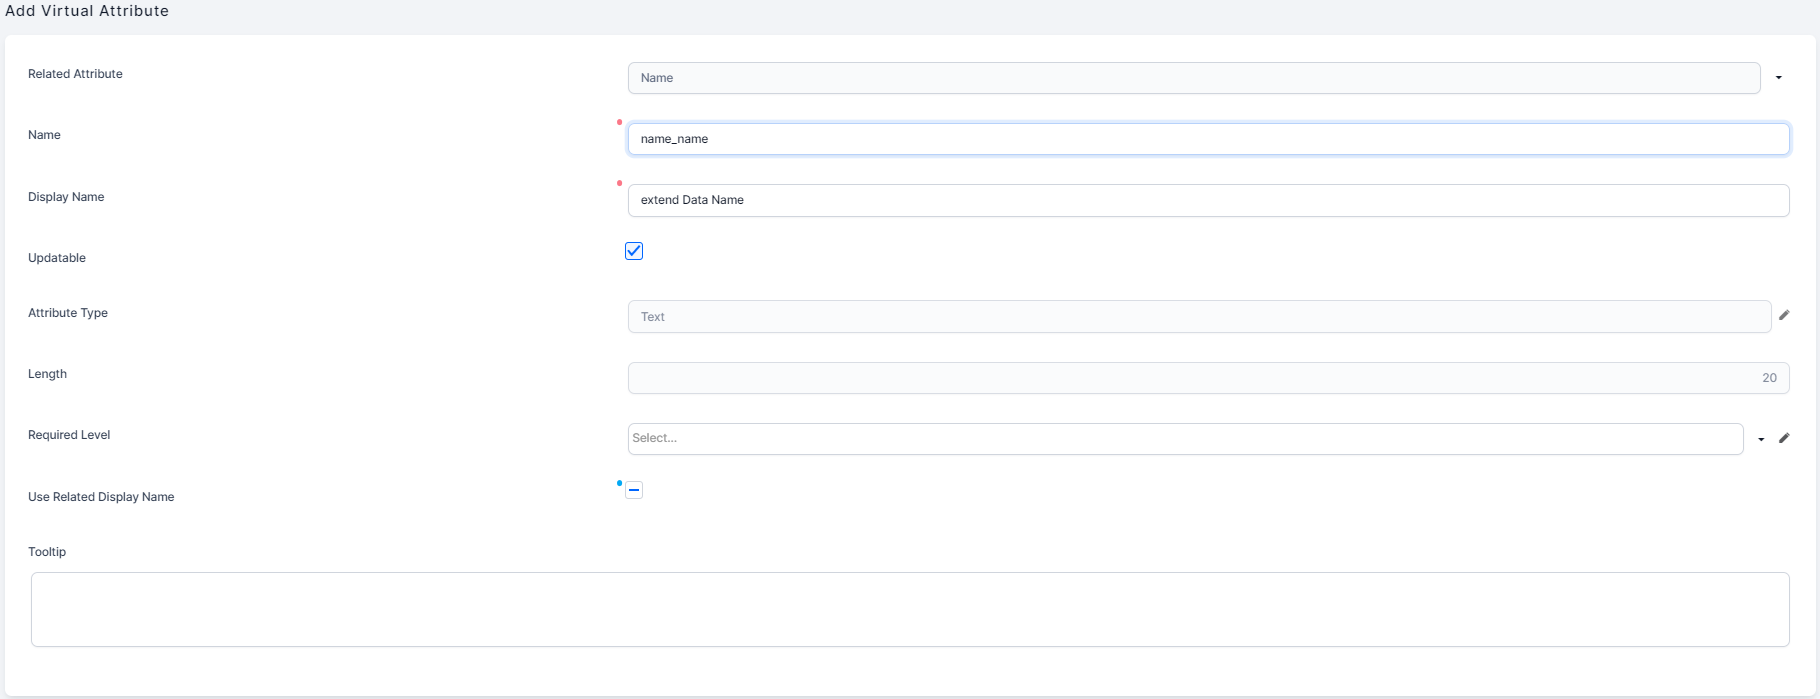
- Click Insert and fill in the virtual attribute's settings.
- Related Attribute - Select the transient entity attribute linked to your virtual attribute.
- Name - Enter a name for your virtual attribute. This is a unique name used to identify the virtual attribute internally by the system.
- Display Name - This is the field name that will be displayed in the end-user interface.
- Updatable - Select to have the data extension value updated automatically.
- Attribute Type - Will be updated automatically to match the Related Attribute.
- Length - Will be updated automatically to match the Related Attribute.
- Required Level - Select if the attribute is optional, required, or recommended to be filled.
- Tooltip - If tooltips are set to be shown on forms and digital journeys and you want to have a tooltip explaining this data extension in the user interface, provide the desired text in the Tooltip text area field.
- Click Save and Reload ().
Step 3. Bind entity attributes to the automation script for load input parameters
If the transient data entity's automation script for load includes input parameters (see Define the automation script for load for details), you must bind those parameters to attributes in your extended entity. When a form driven flow is displayed, the input parameters will be populated based on the matching entity attributes.
To bind input parameters to entity attributes:
- Open the entity extension for your transient data entity.
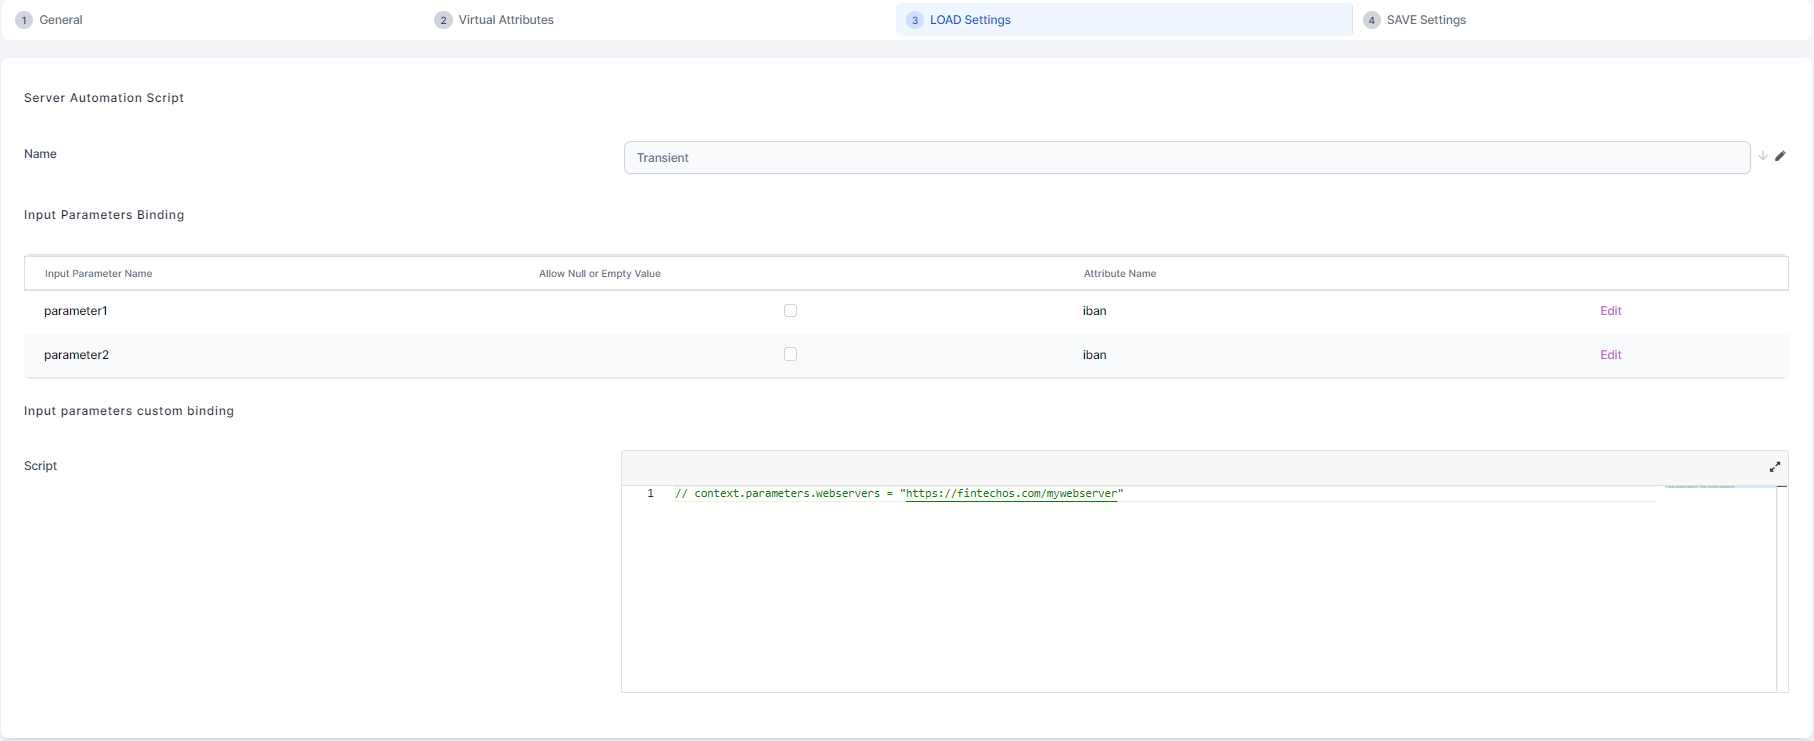
- Select the LOAD Settings tab.
- The server automation script Name will be populated automatically with the transient data entity's automation script for load.
- In the Input Parameters Binding section, match each input parameter to the entity attribute used to populate it. Click the Edit/Save links at the right end of each row to set the attribute names.
- Optionally, you can manually enter a script in the Input Parameters Custom Binding to define custom input values for your input parameters.IMPORTANT!
Input Parameter Custom Binding settings override settings in the Input Parameters Binding section - Click Save and Reload ().
Step 4. Bind entity attributes to the automation script for save input parameters
If the transient data entity's automation script for save includes input parameters (see Define the automation script for save for details), you must bind those parameters to attributes in your extended entity. When a form driven flow is saved, the input parameters will be populated based on the matching entity attributes.
To bind input parameters to entity attributes:
- Open the entity extension for your transient data entity.
- Select the SAVE Settings tab.
- The server automation script Name will be populated automatically with the transient data entity's automation script for save.
- In the Input Parameters Binding section, match each input parameter to the entity attribute used to populate it. Click the Edit/Save links at the right end of each row to set the attribute names.
- Optionally, you can manually enter a script in the Input Parameters Custom Binding to define custom input values for your input parameters.
 IMPORTANT!
Input Parameter Custom Binding settings override settings in the Input Parameters Binding section. - Click Save and Reload ().