Create transient data entities
- Open FintechOS Studio.
- From the Main Menu (
 ), go to Evolutive Data Core > Data Model Explorer and click Insert.
 - In the Entity Type field, select Transient Data.
- Enter a Name for the transient entity. This is a unique name used to identify the entity internally by the system.
- Enter a Display Name for the transient entity. This is the name that will be displayed in the end-user interface.
- Click Save and reload (
 ).
). - In the Data Model section, add the entity's data attributes (for details, see Attributes).
- If you want the transient data entity to appear in form driven flows as a grid of multiple records (not a single record instance), use the Data View section to define a view that includes the attributes you wish to display. For details see Data Views.NOTE
Make sure that the view is configured as the default view of your transient data entity, by checking the IsDefault checkbox.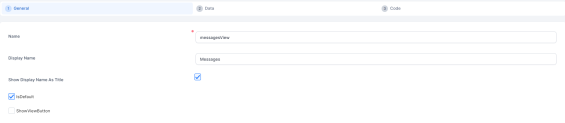
- Click Save and reload ().
Define the automation script for load
The automation script for load is triggered when a form driven flow with a data extension linked to the transient data entity is displayed. This is useful, for instance, if you use the transient data entity to fetch data from an external source and display it in the form driven flow.
To add an automation script for load:
- Open the transient data entity in the editor.
- Use the Automation Script for Load field to create the automation script.
- The automation script must be on-demand (see Create On-demand Server Automation Scripts for details).
- The output structure must be set to your transient data entity (see Customize the Output Structure for details). If you will use the transient data entity to show a grid of records (not a single record instance) when displayed in a form driven flow, make sure that the Output Parameter Type is set as Collection. Otherwise, choose Single Instance.
Examples
In this automation script for load:
- We use the ftosOpenAPI Web API client library that stores the API specifications for another FintechOS Platform instance to make API calls to that instance. For more details about Web API client libraries, see Web API Client Libraries.
- We read the incoming webserver, username, and password input parameters that we have set up in the automation script. For details, see Customize the Input Parameters.
- We authenticate to the above web server with the provided credentials and we run a query on the systemuser entity.
- We extract each userName from the Records object in the result set in the users variable, which we then save to the importedData attribute we have set up for the transient data entity.
Copy
context.result = createResult();

let client = importWebApiClient('ftosOpenApi', context.parameters.webserver);
try {
    let authToken = client.authorize.getToken("client_id", context.parameters.username, context.parameters.password, "", "");
    if (authToken && authToken.access_token) {
        let data = client.openApi.query({
            apiInfo: {
                token :  authToken.access_token
            },
            request: {
                entity: {
                    name: "systemuser",
                    alias: "t"
                },
                distinct: false
            }
        });
        let users = [];
        data.Records.forEach(myFunction);
        function myFunction(value){
            users.push(value.t_userName)
        };
        context.result.importedData = toJson(users)
    }
    else
        throw new Error('Invalid authentication!');
}
catch(err) {
    context.result.importedData = err
}In this automation script for load:
- We use the ftosOpenAPI Web API client library that stores the API specifications for aFintechOS Platform instance to make API calls to that instance. For more details about Web API client libraries, see Web API Client Libraries.
- We authenticate to the above web server with the credentials and we run a query on the guestBook entity.
- We store each visitor and message we find in the guest book in an entry object, and we push each entry object in the result collection.
- We set the result collection as the script's output, (we have configured the script to have a collection output parameter type).
Copy
let result = [];
let entry = {};

let client = importWebApiClient('ftosOpenApi', 'https://anotherFTOS/Pulsarb71i02Portal');
try {
    let authToken = client.authorize.getToken("client_id", 'username', 'password', "", "");
    if (authToken && authToken.access_token) {
        let data = client.openApi.query({
            apiInfo: {
                token :  authToken.access_token
            },
            request: {
                entity: {
                    name: "guestBook",
                    alias: "t"
                },
                distinct: false
            }
        });
        data.Records.forEach(myFunction);
        function myFunction(value){
            entry = {};
            entry.visitor = value.t_visitor;
            entry.message = value.t_message;
            result.push(entry)
        };

        setResult(result)
    }
    else
        throw new Error('Invalid authentication!');
}
catch(err) {
    context.result.importedData = err
}
Define the automation script for save
The automation script for save is triggered when a form driven flow with a data extension linked to the transient data entity is saved. This is useful, for instance, if you use the transient data entity to save data displayed it in the form driven flow to an external destination.
To add an automation script for save:
- Open the transient data entity in the editor.
- Use the Automation Script for Save field to create the automation script.
In this automation script for save:
- We use the petstore Web API client library that stores the API specifications for the https://petstore.swagger.io/v2 web service. For more details about Web API client libraries, see Web API Client Libraries.
- We call the updatePet endpoint to update the id, name, and tags attributes of an entry with the values stored in the respective petID, petName, and petTags input parameters that we have set up in the automation script. For details, see Customize the Input Parameters.
- We leave the photoUrls attribute empty.
Copy
var client = importWebApiClient("petstore", "https://petstore.swagger.io/v2");
client.updatePet({
    id: context.parameters.petId,
    name: context.parameters.petName,
    tags: context.parameters.petTags,
    photoUrls: []
})